Ever dreamt of crafting with balsa wood but unsure how to start cutting? Let’s carve a path together!
I have been dealing with woodworking for 40 years and one day a friend of mine asked me about a proper technique to cut balsa wood.
He was struggling to cut balsa wood cleanly for his desk project due to the softness of the wood.
Drawing on my experience and conducting further research, I found a method to cut balsa wood without causing any damage.
So, let’s discuss, How to cut balsa wood?
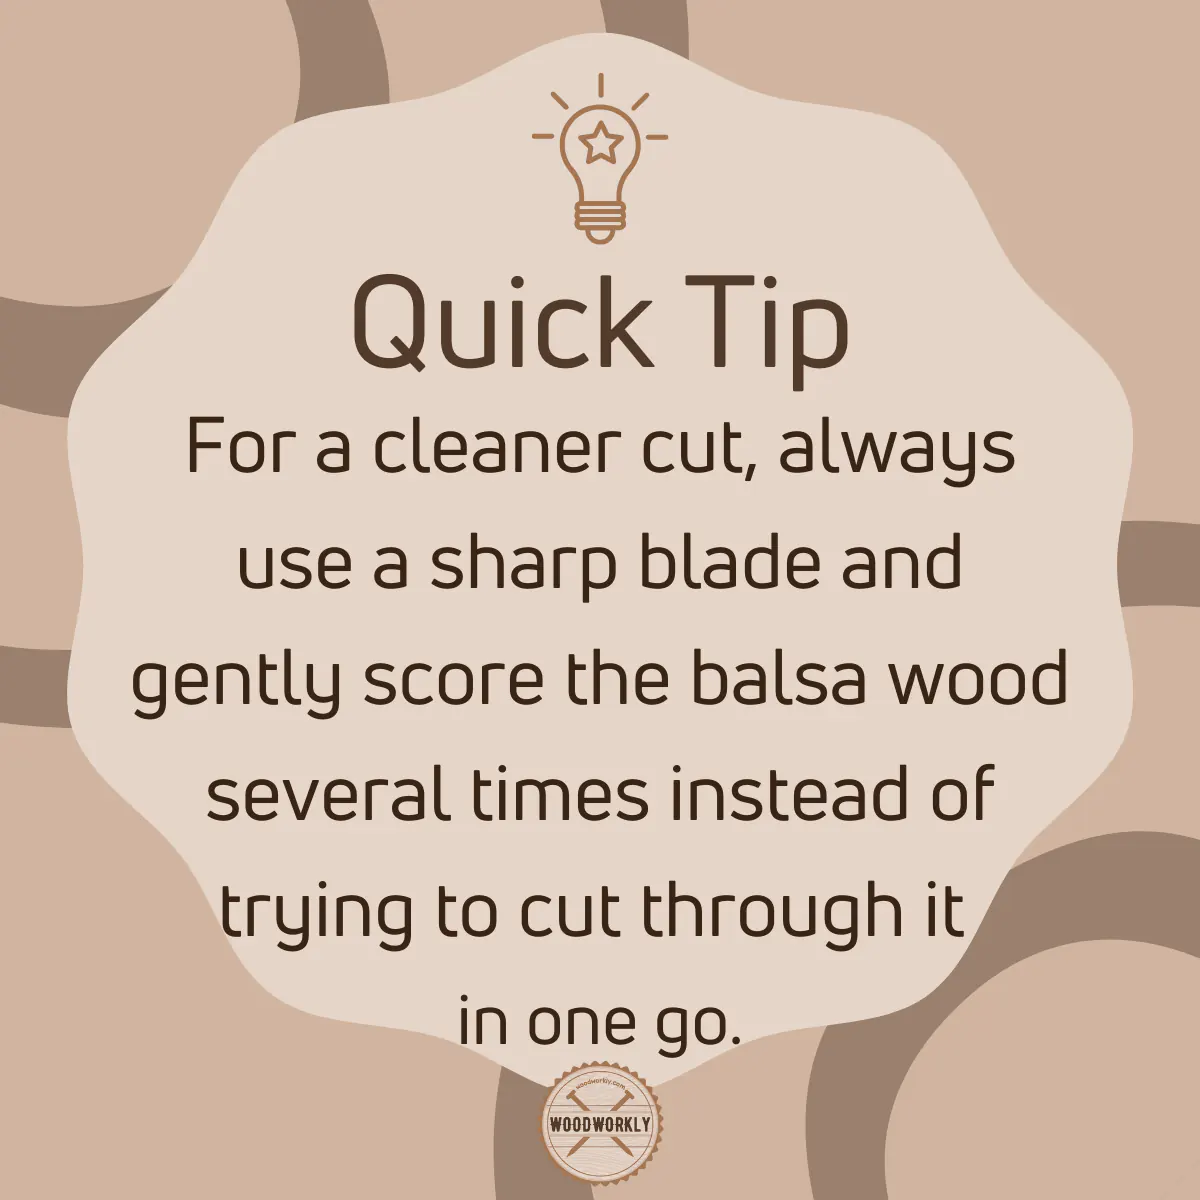
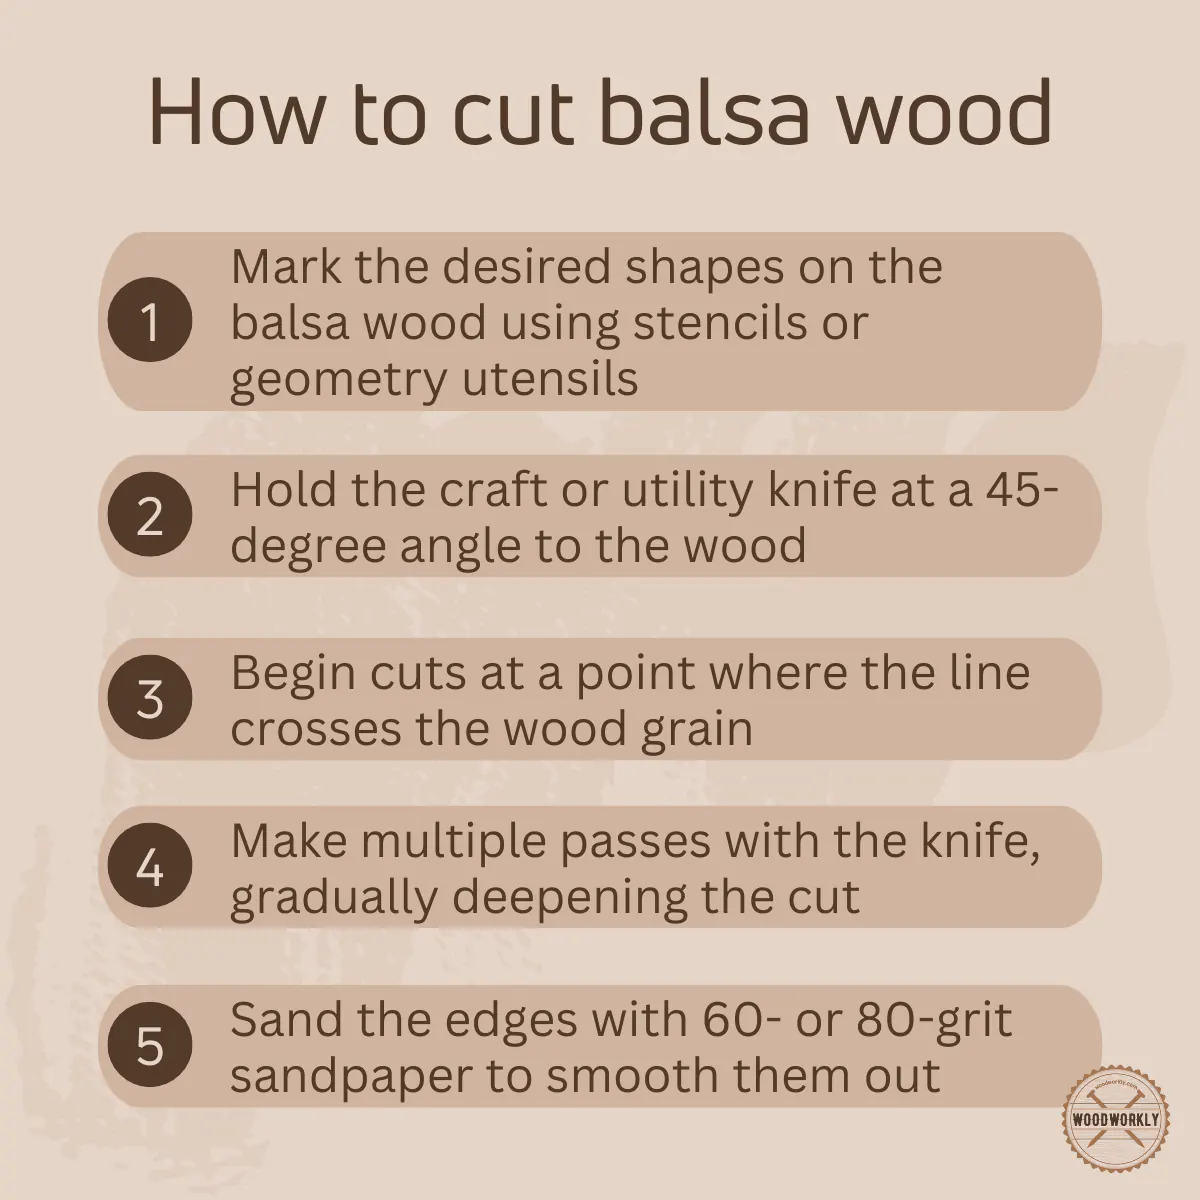
To cut balsa wood; first mark the wood using a pencil or marker. Then gently place the wood on a stable surface using a cutting mat on the work area. You can then start cutting along the marked lines using a sharp utility knife. Do not apply too much pressure here.
But that’s just a quick snapshot of the question! There is much more for you to know.

You can cut balsa wood using a variety of methods and tools. Also, the cutting method should be changed according to the nature of the wood.
Do not be nervous!
I have come to answer all these problems for you. I can confidently say that by the end of this article, you will be a balsa wood cutting expert.
Let’s move on to the best part!
Can You Cut Balsa Wood?
Yes, you can cut balsa wood. But depending on the equipment and method you use for it, it is determined whether balsa wood cutting is easy or difficult.
Balsa wood is generally a soft and light wood.
Therefore, you can use a sharp knife, scissors or woodworking tools to cut the balsa wood.
The softness of balsa wood makes it easy for woodworkers to cut the shapes they need for a variety of projects and crafts.
Supplies You Will Need to Cut Balsa Wood
Did you know that woodworkers use different methods to cut balsa wood?
Whichever method you use, you should find the following list of supplies.
- Pattern – To make your task easier I advise you to first make a design template or pattern for the shape you intend to cut out of the balsa wood.
- Utility Knife – Do you know the benefits of using a utility knife? You can actually make a precise cut using a utility knife. If possible, use a sharp utility knife with replaceable blades.
- Rubber Adhesive – Do you know the advantage of using rubber adhesive while woodworking? This allows you to preserve the pattern in the wood while cutting.
- Balsa Wood Strips – Did you know that depending on the nature of your end result you should choose the size of the balsa wood strips you use? Therefore, I advise you to choose balsa wood sheets or strips of the appropriate thickness for your project.
- Ruler or Protractor – Using a ruler or protractor will help you get the job done easily, such as making accurate cuts.
- Cutting Mat – By using this you can protect the wood from knife marks while also protecting your work surface.
- 60-80 Grit Sandpaper – You can smooth the edges of the cut pieces using grit sandpaper. You can finish your work done more neatly.
I have compiled this list using the knowledge gained from my personal experience and I hope it will help you a lot.

How to Cut Balsa Wood?
Now you might be thinking how qualified am I to give you advice?
Do not be nervous!
Actually, I am a person with 40 years of experience in the woodworking industry.
Based on my experience I would advise you to follow the steps below to cut balsa wood.
After getting the supplies you need to cut the balsa wood I mentioned above, proceed to the steps below to cut balsa wood properly.
- Prepare Your Work Surface
- Use a Firm Grip Mat to Protect Your Work Table
- Create Patterns
- Apply Rubber Adhesive
- Cut Out the Paper Outline
- Position the Pattern on Balsa Wood
- Place the Ruler on the Pattern
- Check the Cutting Edge of the Knife
- Position the Ruler Over the Line You want to Cut
- Start Cutting the Balsa Wood
- Remove the Paper Outline
- Smooth the Edges Using Sandpaper
Let us now see in detail how to follow the above steps.
1. Prepare Your Work Surface
Make sure your workspace is tidy and stable before starting all work.
To do this you need to gently remove all the unnecessary things from the work table.
Also, clean the work surface well. Doing so will allow you to finish the job safely and neatly without messing up your new creation.
2. Use a Firm Grip Mat to Protect Your Work Table
Using a firm grip mat will protect your workbench from knife marks.
Otherwise, you will have to buy another table when one project is finished.
3. Create Patterns
By this, I mean to draw the patterns you want to cut out on a piece of paper or use a stencil.
Then you can easily make designs like bridges, model houses, gliders or airplanes.
Remember; You should use a clean piece of paper for this.
Another important thing is to make sure you have a variety of similar patterns so you don’t have to reuse paper. For this, you can make several copies of your pattern.
You can use a protractor or square to create beautiful straight, curved or straight lines on balsa wood.
But this is only suitable if you prefer freehand design instead of stencils.
4. Apply Rubber Adhesive
In this step, the back of the previously prepared paper pattern should be coated thinly with rubber glue.
This will remove the paper from the wood after you are done cutting.
Remember; When you use rubber adhesives, work from the outside in. This is because it is difficult for you to inhale the scent.
5. Cut Out the Paper Outline
All you need to do in this step is cut around the perimeter and hang some paper over the edge. Then cut around the edges of the pattern.
6. Position the Pattern on Balsa Wood
Here place the pattern on the balsa wood.
Note that the wood grain runs parallel to the front edge of the pattern during placement.
7. Place the Ruler on the Pattern
You should get an excellent straight-edge ruler here and place it on your pattern. Be careful not to take away from the sides and keep it well on the pattern.
Then use your knife to make straight cuts. If you made lines with it, you can use a curved object like a protractor to help guide your cuts.
Remember; Do not use a stencil for this as your cuts will not be strong enough here.
8. Check the Cutting Edge of the Knife
In this step, I will instruct you to remove the dark edges if you want. If not, you can replace the blade.
Balsa wood is so soft that you can cut it easily. But if the knife is not sharp enough, it will break easily. So I advise you to always use a new knife.
9. Position the Ruler over the Line You want to Cut
Here I advise you to place the ruler above the cutting line and press it.
Then using the tip of the knife you can cut the wood. But avoid going straight up and down.
Angle the knife back while doing this. Also, I advise using your index finger and thumb to hold the cutting knife. In other words, hold the blade like a pencil.
10. Start Cutting the Balsa Wood
I advise paying particular attention to the edge of the knife when cutting.
Place the knife 45 degrees on the wood and use your index finger to control the pressure.
You can protect the wood by applying minimal pressure when cutting the material.
Be sure to press down on the controller with your fingers spread out to prevent the knife from sliding around.
11. Remove the Paper Outline
Here you place the paper from the cut fins. Then you apply rubber glue so it comes off easily.
Remember; Don’t reuse the paper for your next cut here. That’s why you made multiple copies when you started.
12. Smooth the Edges Using Sandpaper
Now you understand why I told you to get 60- or 80-grit sandpaper when preparing the equipment.
You can use this 60- or 80-grit sandpaper to smooth the edges of your pieces.
If the pieces are identical, stack them well and smooth the edges only once to save time.
How to Cut Balsa Wood Strips
I mentioned above the word balsa wood strips among the supplies needed to cut balsa wood.
So now you might be wondering how to get these balsa wood strips.
Cutting balsa wood strips is a very simple process for you. But the important part here is to cut them cleanly and correctly.
Here are the steps you need to follow when cutting the balsa wood strips,
- Prepare Your Workspace
- Take the Necessary Measurements and Marks
- Secure the Balsa Wood Sheet
- Cut the Strips Straight
- Cut the Angled Strips and Finish the Edges
I advise you to pay attention to the following points to know the steps for the above and to know how to do them.
1. Prepare Your Workspace
Here I advise you to choose a clean and flat surface as your workspace.
Also, remember to use a cutting mat to protect your work desk.
2. Take the Necessary Measurements and Marks
In this step, you will need to use a suitable ruler or straightedge to measure the desired width of the balsa wood strip.
When marking this, mark the measurement along the edge of the wood with a pencil or fine-point marker.
3. Secure the Balsa Wood Sheet
Use your clamps or your hand to hold the wood steady during this step.
4. Cut the Strips Straight
When cutting straight strips, first move the knife you are using along the marked line.
At the same time make sure that the blade is perpendicular to the wood surface.
I advise you to apply gentle, even pressure when starting the cut. Don’t go cutting the edges all at once here, as you may damage your wood.
5. Cut the Angled Strips and Finish the Edges
Only do this step if your project has angled strips to cut. If you can use a miter box to get the right angles, your process will be easier.
Here you place the balsa wood strip inside the miter box at the desired angle and hold the wood firmly against the side of the box while cutting along the marked line.
After that if you notice a slight roughness along the edges so you can use sandpaper to gently smooth the edges.
From my experience, I believe you can easily cut balsa wood strips with the above steps.

Different Ways to Cut Balsa Wood
Now you know how to cut balsa wood, but don’t think you know all the ways to cut balsa wood.
Because there are different ways to cut balsa wood that you may not know about.
Below I have listed some of the materials that can be used to cut balsa wood based on what I know right now.
- Cricut
- X-ACTO knife
- Dremel machine
- Scissors
Let us now talk about each of these methods separately.
How to Cut Balsa Wood with a Cricut
Using a Cricut machine you can easily create complex designs and projects by cutting balsa wood.
Here’s the procedure for cutting balsa wood using a Cricut machine,
- Select the Suitable Design
- Arrange the Materials and Load the Mats
- Adjust the Blade and Settings
- Start Cutting
- Remove the Mat and Finish
Let me now tell you more about the steps.
1. Select the Suitable Design
Did you know you can choose a design using the Cricut Design Space?
After you have chosen a design, place you balsa wood sheet on a clean working surface and press it down well.
You can use painter’s tape or masking tape to secure the balsa wood sheet to the standard grip mat. Then don’t forget to check that it is tight and well attached to the mat.
2. Arrange the Materials and Load the Mats
In the Cricut Design Space, you can select the ‘Basswood’ material from the list for processing materials.
I advise you to use the ‘Custom’ setting and choose a thickness similar to your balsa wood. Then insert the mat with the protective wooden sheet into the machine.
3. Adjust the Blade and Settings
In you are using a StongGrip or Deep-Point Blade, don’t forget to double-check that it is properly inserted into the machine.
I suggest you use the prompts in Cricut Design Space to easily set cutting settings like pressure and number of passes.
4. Start Cutting
I advise you to press the “Go” or “Start” button in the Cricut Design Space to begin the cutting process.
Then observe and keep an eye on whether the cutting process is done correctly.
5. Remove the Mat and Finish
Finally when the cutting is done, carefully remove the mat from the cricket machine. Then gently peel away the painter’s tape or masking tape from the edges of the balsa wood.
Use sandpaper to smooth rough edges as a final touch.

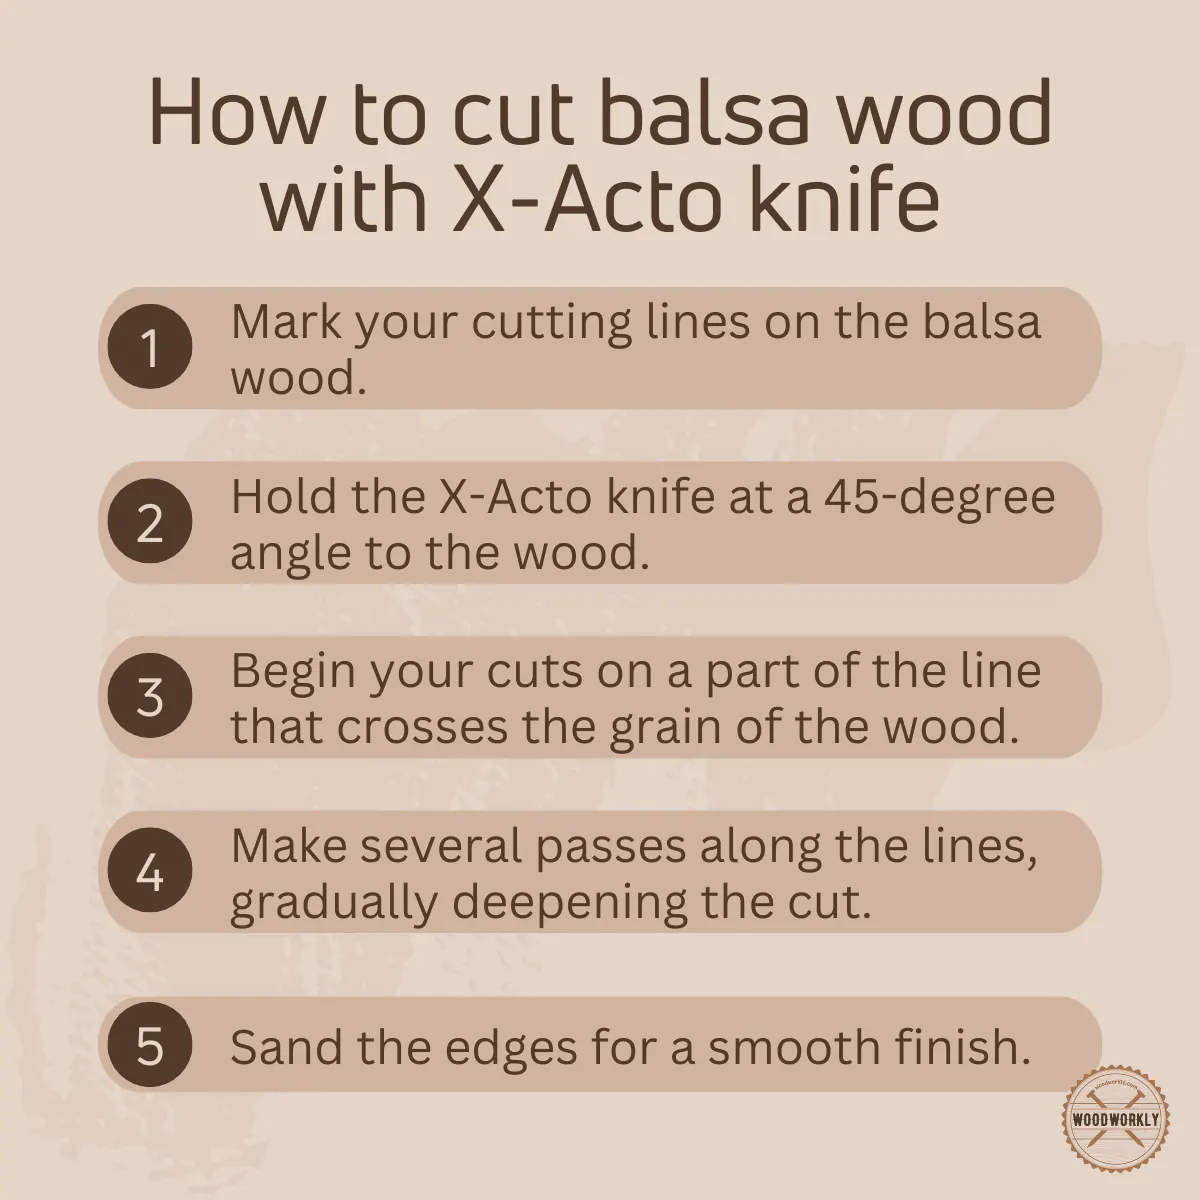
How to Cut Balsa Wood with an X-ACTO Knife
Did you know that using an X-ACTO knife is another very easy and effective way to cut balsa wood?
The X-ACTO Knife makes crafting and modeling projects easy.
I have listed for you below the simple steps to follow to cut balsa wood using the X-ACTO knife.
- Prepare all the Required Materials
- Mark the Cut Line and Protect the Wood
- Choose the Right Blade
- Make Controlled Cuts and Create Straight Edges
- Use Sandpaper to Soften and Replace the Blades
Now let’s look at how to follow the above steps correctly.
1. Prepare all the Required Materials
To start the process you need to prepare all the following materials first.
- Balsa wood sheet
- Cutting mats or surfaces
- Ruler or straight edge
- X-ACTO knife with a sharp blade
- Pencil or marking tool
2. Mark the Cut Line and Protect the Wood
You can use a ruler or straight edge to mark the cut line. Then I advise you to double check that the marked measurements are correct.
Then don’t forget to place the balsa wood sheet on a stable cutting surface or mat and secure it firmly to prevent movement during cutting.
3. Choose the Right Blade
You must select a sharp and appropriate X-ACTO blade for the project at this step.
Did you know that larger blades are better for long, straight cuts and smaller blades are better for complex cuts?
4. Make Controlled Cuts and Create Straight Edges
I would advise holding the X-ACTO knife as firmly as a pencil without much grip during this step. Then you can start cutting along the markings.
Remember; Do not attempt to cut thick balsa wood at once. Use a few shallow passes instead.
I advise you to use a ruler or straight edge to prevent the blade from going off course when you make straight cuts.
5. Use Sandpaper to Soften and Replace the Blades
Did you know that after cutting you should definitely sanding the edges lightly to get a smooth finish?
You should only replace the blades if you notice that the blade has darkened. Generally, using a sharp blade ensures clean cuts and reduces the risk of accidents.
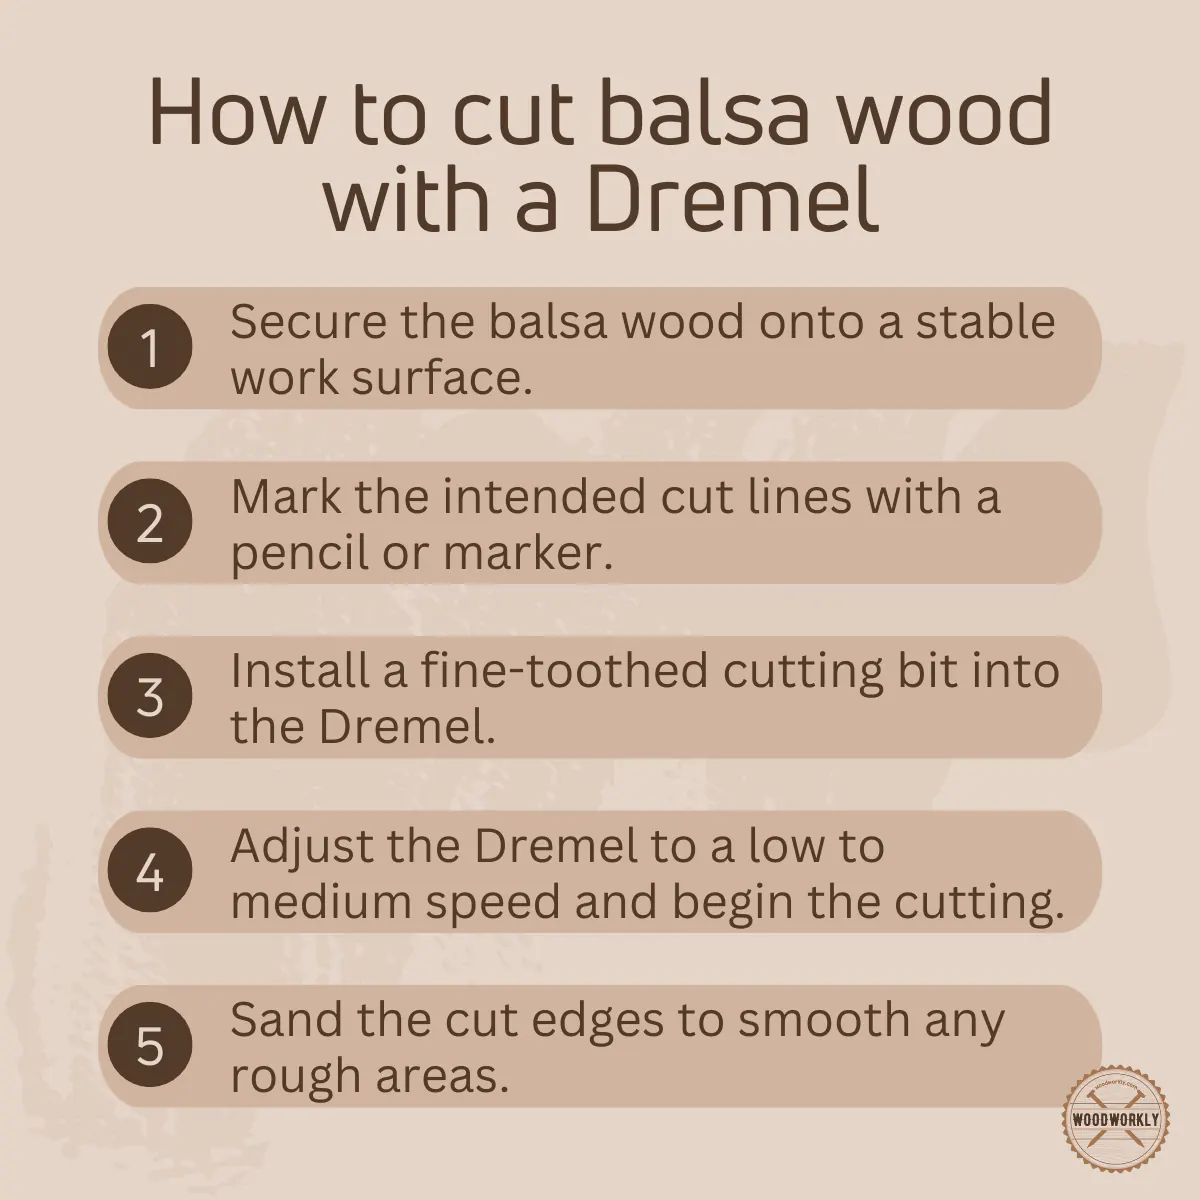
How to Cut Balsa Wood with a Dremel
You can easily get smooth edges and shapes when cutting balsa wood using a Dremel machine.
Here is a great solution if you are also a person who is more worried about the quality of your project.
So, I have listed the simple steps you need to follow when cutting balsa wood with a Dremel,
- Use Your Safety Kit
- Mark the Cut Line and Protect the Wood
- Set the Dremel Speed
- Start Cutting with Controlling Dust
- Finish the Edges
Now let’s talk about the steps I listed above in detail.
1. Use Your Safety Kit
You can protect your eyes and lungs from wood dust by using a safety kit while working.
Remember; Wear protective clothing before starting work.
2. Mark the Cut Line and Protect the Wood
Now I hope you are well aware of this step. Here you should use a pencil or marker to mark the cut lines on the balsa wood.
You can hold your wood to the work table using clamps. This will help you to protect your wood and stop moving wood while working.
3. Set the Dremel Speed
Did you know you can choose a cutting wheel attachment for cutting wood on your Dremel?
When adjusting the Dremel speed, remember to set it to a medium speed.
Otherwise, the wood may burn or crack and you may end up with an uneven cut if you use a low speed.
4. Start Cutting with Controlling Dust
What do you need to do to start cutting? First, hold the Dremel tool like a pen.
Then move the cutting wheel gently along the marked lines.
Remember; Do not try to apply too much pressure here.
Since cutting balsa wood produces fine dust, I advise you to wear dust masks and choose a well-ventilated area as your work area.
5. Finish the Edges
Did you know you can use sandpaper on a Dremel to smooth out any rough edges or surfaces for finishing touches?
After finishing your cuts, be sure to clean your work area and dispose of the wood dust properly.
How to Cut Balsa Wood with Scissors
Are you someone who tends to get specific shapes when working?
Therefore, I would advise using scissors to cut balsa wood in your work.
Cutting balsa wood using scissors is a very simple process and I have outlined the simple steps you need to follow.
- Choose the Suitable Scissors and Mark the Cutting Line
- Use a Correct Cutting Technique
- Smooth the Edges
- Follow Safety Measures
I will now share with you more details on how to cut balsa wood with scissors.
1. Choose the Suitable Scissors and Mark the Cutting Line
Did you know that the first thing you should do is choose a pair of scissors for cutting? When choosing a pair of scissors, I advise you to choose a sharp, strong pair of scissors.
After that you can use a pencil or fine marker to mark the desired shape or cut line on the balsa wood.
2. Use a Correct Cutting Technique
Did you know that using the correct cutting technique is very important step when cutting balsa wood?
First, you need to hold the balsa wood tightly using one hand then start the cutting slowly using scissors.
Keep your fingers clear here and do not apply too much pressure while cutting along the marked lines.
Remember; Applying too much pressure can cause the wood to crack or break.
3. Smooth the Edges
As before, you can sand the edges of the balsa wood to remove any roughness or unevenness. This will give your project a polished look.
4. Follow Safety Measures
The main thing to pay attention to is to always work in a well-ventilated area to avoid inhaling dust or debris generated during cutting.
You can get extra protection by wearing safety glasses.

How To Cut Thick Balsa Wood?
Are you prepared if you have to cut fairly thick balsa wood during your woodworking?
Don’t be afraid!
Here are the steps you need to follow for cutting thick balsa wood,
- Prepare the Required Tools
- Mark the Cut Line and Prepare the Knife
- Score the Wood
- Sharpen the Cut and Finish the Cut
- Sand the Edges
Now let’s see below for more details on cutting thick balsa wood.
1. Prepare the Required Tools
The first thing you need to do is prepare the right tools. Those tools are,
- Straight edge
- Cutting surface
- Sharp utility knife
- Safety gear
2. Mark the Cut Line and Prepare the Knife
Did you know you can use a pencil or masking tape to mark the cut line? Marking the cut line is helpful for making your cuts accurately.
Then check if the plate is well pressed. Otherwise there is a risk of a sharp blade breaking.
3. Score the Wood
In this step, you need to apply firm pressure along the marked cut line.
Shallow scoring can then be done with the utility knife. By doing this process several times you can easily create a groove.
4. Sharpen the Cut and Finish the Cut
One thing to keep in mind when you’re going to sharpen the cut is to avoid applying too much force.
Otherwise, the blade may deviate from the cutting line.
The wood you use in this case is thicker than other cases so you have to score and cut multiple times.
5. Sand the Edges
As before I advise you to use fine sandpaper to smooth out any rough edges or splinters at this point.

How To Cut Thin Balsa Wood?
Are you prepared if you have to cut fairly thin balsa wood during your woodworking?
Here are the steps you need to follow when cutting thin balsa wood,
- Prepare the Materials
- Choose the Right Blade for Cutting
- Use a Cutting Technique
- Give the Final Touch
Now I will give you a description of the steps to follow when cutting thin balsa wood.
1. Prepare the Materials
First, prepare the following list of materials that I used for cutting thin balsa wood.
- Thin balsa wood
- Ruler or straight-edge
- A cutting mat or protective surface
- X-Acto knife or utility knife with a fresh and sharp blade
- Pencil or pen
How do you prepare the workspace after that?
To prepare the work area, you should first put a cutting on your work area.
Why do you put a safety mat on your work area?
Using a safety mat on your work surface can protect the work table form cutting marks. Also, you can prevent the blade from darkening quickly.
2. Choose the Right Blade for Cutting
I advise you to use a sharp X-Acto knife or utility knife.
Remember; Use a fresh blade to make clean cuts and reduce the risk of splitting the wood.
3. Use a Cutting Technique
I will share with you some of the cutting techniques I used when cutting balsa wood.
The first thing you need to do is hold the knife at a slight angle to the surface of the wood. Then you can start cutting along the marked path.
Remember; Do not use high pressure.
You can cut in a few shallow passes with a knife to stop the cracks on your balsa wood.
To protect you wood when the blade leaves the wood, you can hang the wood over the edge of the table.
4. Give the Final Touch
Finally, as before, use fine sandpaper to smooth out any rough spots or cracks on your wood.
If you are using a utility knife or X-ACTO knife I would remind you to use caution.
Also, for your own safety, always keep your fingers and body parts away from the blade.

Tips For Cutting Balsa Wood
If you are interested in woodworking or have been hoping to get into this field, don’t miss this section.
I will now share with you some simple tips that I used when cutting balsa wood.
- I advise you to always use a sharp, fresh blade to maintain the success and quality of your work or project.
- You can hold your wood to the work table using clamps. This will help you to protect your wood and stop moving wood while working.
- If you use a saw in your work, don’t forget to choose a blade with more teeth.
- I recommend using a mat on your work table to protect the table from cut marks. This is an important tip to maintain and use your products and equipment for a long time.
- I always recommend using a miter box if you have to make angled cuts during your work.
If you are new to woodworking, remember that knowing how to cut balsa wood is not enough. You can get successful results by using simple tips.

Congrats folks! Now you know how to cut balsa wood properly using the right techniques without messing things up.
By following the above method you can cut any type of balsa wood, even if it is strong!
So, let’s answer some frequently asked questions.
FAQs
What is the ideal thickness of balsa wood for beginners?
For those new to working with balsa wood, starting with a thickness between ⅛–¼ inches (0.32–0.64 cm) is recommended. This range offers a good balance between manageability and stability for beginners.
How can I create patterns on balsa wood?
To craft patterns on balsa wood, you can use stencils or templates available online or draw your designs manually. Utilizing stiff paper for printed stencils can facilitate easier use, especially for complex 3D models.
What tools are necessary for drawing lines on balsa wood?
Essential tools for drawing lines on balsa wood include geometry utensils such as protractors, squares, and rulers. These tools help in crafting straight, angled, or curved lines, whether you’re freehanding a design or tracing a stencil.
What should I use to mark lines on balsa wood?
Marking lines on balsa wood can be done with a fine-tipped pen or a sharp pencil. If you opt for a pencil, it allows the flexibility of erasing marks and correcting mistakes, making it a forgiving choice for beginners.
How should the knife be held while cutting balsa wood?
While cutting balsa wood, hold the craft or utility knife at a 45-degree angle to ensure the most effective cut. Always make sure to use a sharp, new blade to achieve the best results.
What strategy should be used to initiate cuts on balsa wood?
Begin your cuts at a point where the line crosses the grain of the wood perpendicularly or at a close angle. This technique helps in preventing breaks as balsa wood is quite delicate.
How can I avoid breaking balsa wood while cutting?
To avoid breaking balsa wood, apply very light pressure during the initial pass, creating a shallow groove rather than cutting through immediately. This strategy aids in preventing breaks, especially during the first few passes.
What is the recommended method for sanding cut balsa wood pieces?
After cutting, sand the edges of the pieces smoothly using 60- or 80-grit sandpaper. This process not only enhances the appearance but also facilitates better assembly, especially for pieces that will be joined together.
Did I cover all you wanted to know about: How to Cut Balsa Wood?
In this article, I’ve deeply discussed how to cut balsa wood using different machines. Plus, I’ve shared my personal experiences as well to make your cutting project a lot easier.
To cut balsa wood, place it on a flat surface, mark your design using a stencil or drawing utensils, and outline with a pencil or pen. Hold a craft knife at a 45-degree angle, and gently cut along the lines, starting perpendicular to the grain. Sand edges with 60- or 80-grit sandpaper for smoothness.
Furthermore, I’ve answered some frequently asked questions as well.
Hope you’ve learned everything you wanted to know about how to cut balsa wood properly using the best methods.
So, it’s time to select the method that suits you the most and practice with a scrap balsa wood piece. Once you feel comfortable with the main project! Happy woodworking with balsa wood!