Is your woodworking shop more of a cluttered mess than a creative space, leaving you frustrated and searching for tools you just had in your hand?

Ever spent 15 minutes looking for a tool you just had in your hand? Or tripped over a cord for the third time in a week?
I’ve been there, and I know how frustrating it can be when your shop feels more like a chaotic maze than a creative workspace.
When I first started woodworking, my tools were scattered everywhere, and projects took twice as long because I couldn’t find what I needed.
After reorganizing my shop, I not only saved time but also made my work a lot more enjoyable.
If you’re tired of wasting time hunting for tools or feeling overwhelmed by clutter, this guide is for you. Let me share the simple steps I took to turn my messy shop into a space I actually love working in.
Why Organizing Your Woodworking Shop is Important
Organizing your woodworking shop saves time and reduces stress. I used to spend 20 minutes looking for a chisel I swore was on my workbench, and now, with everything in its place, it takes me less than a minute.
It also improves safety by reducing the risk of accidents. After nearly tripping over stray wood pieces and tangled cords too many times, I finally set up proper storage, and it made a huge difference.
An organized shop boosts creativity and productivity. When my shop is in order, I actually look forward to starting new projects without the dread of cleaning up first.
In short, an organized shop helps you work efficiently, stay safe, and enjoy woodworking more. Once I got organized, I wondered how I ever managed in the chaos before.
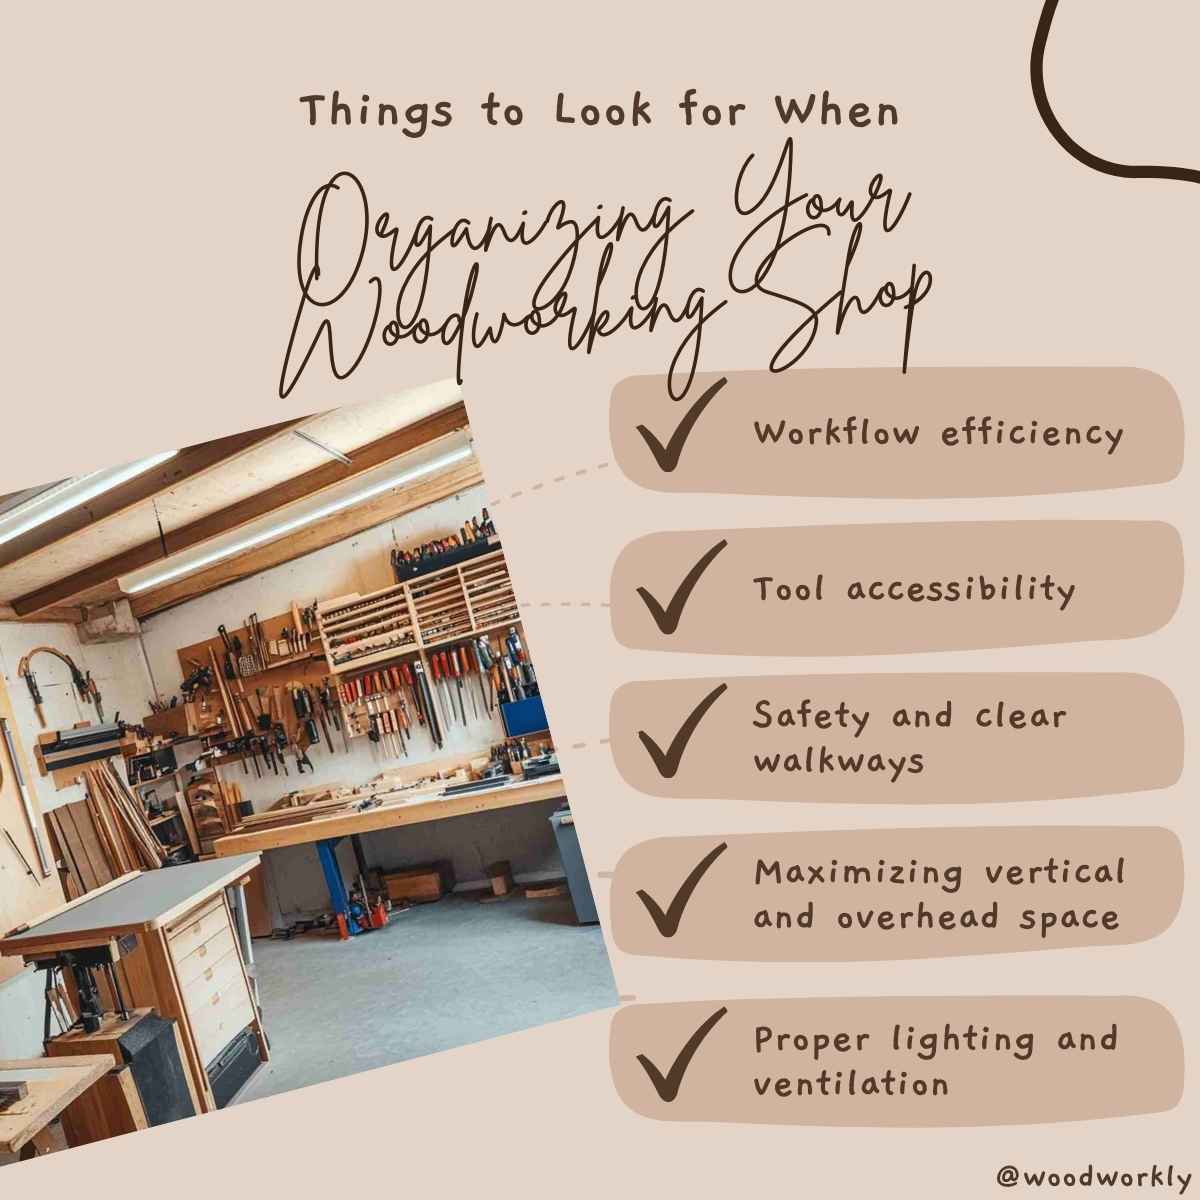
Things You Need to Know Before Organizing Your Woodworking Shop
Before diving into organizing your shop, there are a few key things to consider. Knowing these will save you time and prevent frustration later on.
- Evaluate Your Space: Measure your shop area to understand how much room you have to work with. When I first organized my shop, I realized that rearranging my workbench by just 2 feet made a huge difference in workflow.
- Identify Your Workflow: Think about how you move through projects from start to finish. For me, placing frequently used tools like clamps and sandpaper near my workbench saved me at least 10 minutes per project.
- Declutter First: Get rid of tools and materials you no longer use. I found three broken rulers and five duplicate screwdrivers buried in drawers, tossing them cleared up so much space.
- Plan for Safety: Ensure you have clear walkways and proper storage for hazardous materials. After adding wall-mounted racks for cords and storing sharp tools securely, I felt much safer moving around.
- Invest in Storage Solutions: Consider shelves, pegboards, and tool chests that suit your needs. I installed a pegboard for my hand tools, and now everything is visible and within reach, cutting my setup time in half.
Taking these steps before you start organizing will make the whole process smoother and more effective.
How to Organize Woodworking Shop
So, let’s explore each method you need to follow when organizing your woodworking shop.
1. Declutter and Prioritize
The first step to organizing your woodworking shop is decluttering. Go through every tool, piece of wood, and supply to see what you actually use.
I found five old paint cans that were dried out and a pile of scrap wood I hadn’t touched in over a year, tossing them freed up a ton of space.
Next, prioritize the tools and materials you use most often. Keep these items within easy reach.
For example, I keep my favorite chisels and measuring tape on a magnetic strip right above my workbench, saving me at least 5 minutes on every project.
For the tools you rarely use, find a designated storage spot where they’re out of the way but still accessible.
I store my specialty saws and jigs on a high shelf since I only need them a few times a year.
Decluttering and prioritizing your workspace makes it easier to find what you need, keeps your shop functional, and helps you stay focused on your projects.

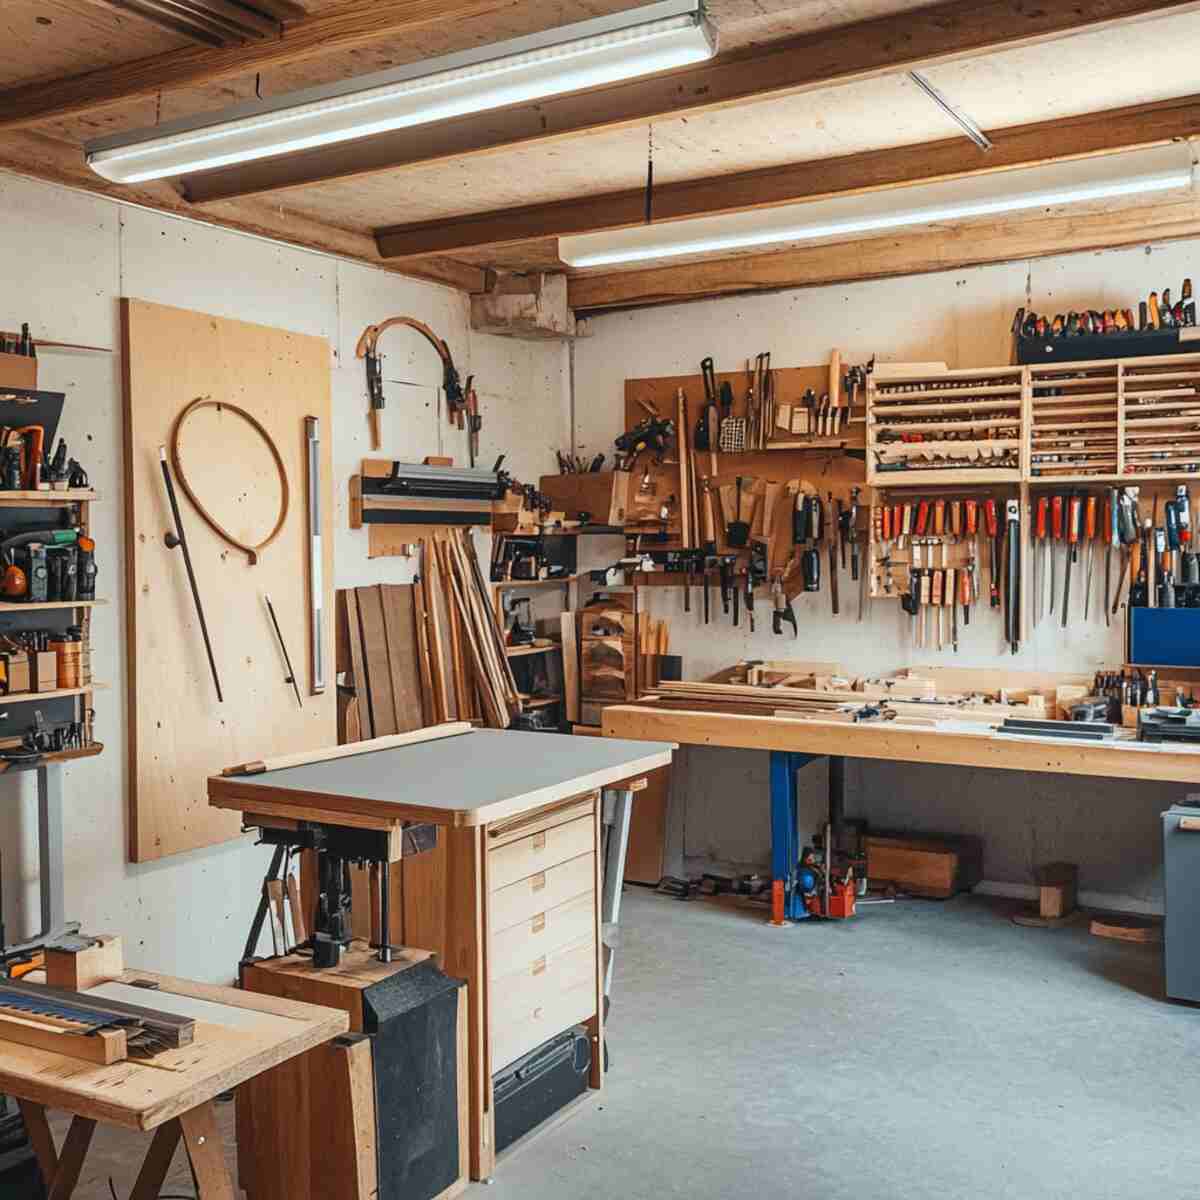
2. Utilize Vertical and Overhead Space
Maximizing vertical and overhead space can transform a cluttered shop into a spacious workspace.
I installed wall-mounted shelves and pegboards, which cleared my workbench and opened up floor space.
Use the walls for tools you frequently grab. Hanging my clamps on a pegboard saved me from digging through drawers, and now I find them in under 10 seconds.
Overhead storage is perfect for rarely used items. I built a simple ceiling rack to store long pieces of lumber, freeing up at least 4 feet of floor space.
By going vertical, you keep your shop organized and make room for larger projects.
It’s a simple change that made my workspace feel twice as big without any major renovations.

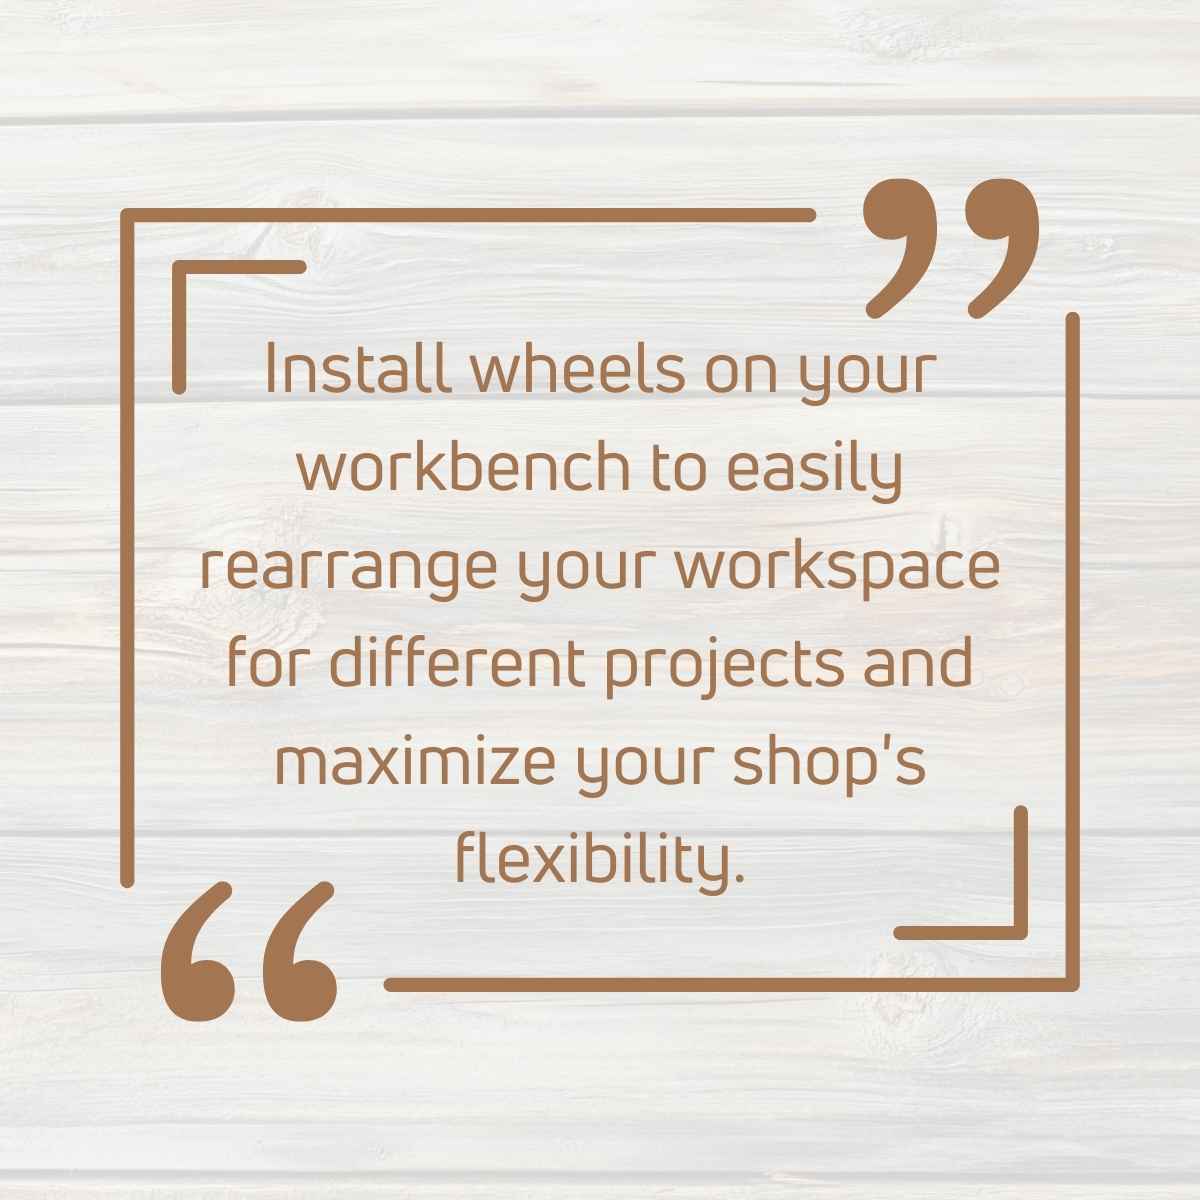
3. Implement Mobile Workstations
Adding mobile workstations can make your shop more flexible and efficient.
I put locking casters on my workbench, and now I can easily move it to create more space when working on larger projects.
Rolling carts are perfect for keeping essential tools and materials within reach.
I use a small cart for my sanding tools, and it saves me from walking back and forth across the shop multiple times per project.
Mobile stations can also double as extra storage. I built a rolling cabinet for my power tools, and it keeps them organized while allowing me to move them wherever I need.
With mobile workstations, you can adapt your shop layout to fit any project. It’s a simple upgrade that made my workflow smoother and my space feel more versatile.

4. Group Similar Tools Together
Keeping similar tools grouped together can save you time and reduce frustration.
I created dedicated sections for my measuring tools, cutting tools, and finishing supplies, which made finding what I need quick and effortless.
For example, all my chisels, screwdrivers, and hammers are stored in one drawer, while my sandpaper, stains, and brushes are in another.
This simple system helps me avoid wasting time searching for tools scattered across the shop.
Labeling toolboxes and drawers makes it even easier to stay organized. I added clear labels to my storage bins, and now I can find the exact drill bit or clamp I need in under 30 seconds.
By grouping similar tools together, your workspace becomes more intuitive and efficient. It keeps your projects running smoothly and helps maintain a clutter-free environment.
5. Create Dedicated Zones
Dividing your shop into dedicated zones can improve your workflow and efficiency. I set up separate areas for cutting, assembling, and finishing, so I’m not constantly shifting tools and materials around.
For example, my cutting zone includes the table saw, miter saw, and a rack for wood storage. This setup keeps all my cutting tools in one spot, saving me at least 15 minutes per project.
The assembly zone has my workbench, clamps, and essential hand tools. Keeping these tools together means I don’t waste time searching when it’s time to put pieces together.
By creating dedicated zones, you streamline your workflow, reduce clutter, and make your shop more enjoyable to work in. It’s a simple strategy that transformed how efficiently I move through projects.

6. Label Storage Areas
Labeling your storage areas makes finding tools and materials quick and effortless. I added clear, bold labels to my drawers, shelves, and bins, which cut down the time I spent searching for items by at least 50%.
For example, I labeled my bins for screws, nails, and bolts, so I no longer have to dig through mixed hardware. This simple change has saved me countless minutes on every project.
Use large, easy-to-read labels for frequently accessed areas and smaller, detailed labels for specialized tools. I even color-coded some labels to quickly identify different tool categories.
By labeling your storage areas, you create a more organized and efficient shop. It’s a small step that makes a big difference in keeping your workspace tidy and productive.

7. Maintain Regular Cleaning Routines
Keeping a regular cleaning routine is key to maintaining an organized shop. I dedicate 10 minutes at the end of each day to sweep up sawdust, put tools back in place, and clear off my workbench.
Doing a deep clean once a month helps keep the space fresh and functional. I use this time to wipe down surfaces, check for tool maintenance, and clear out any clutter that has sneaked back in.
Staying consistent with cleaning prevents small messes from becoming overwhelming. I’ve found that even just a few minutes of tidying up can save me hours of frustration later.
By maintaining a clean shop, you’ll work more efficiently, stay safer, and enjoy your woodworking projects even more. It’s a simple habit that keeps your space ready for any project.

Are you ready to transform your woodworking shop into a space that works for you? Trust me, the time you spend organizing now will save you countless hours down the line.
Once I got my shop in order, I couldn’t believe how much smoother my projects went. What changes are you most excited to make in your workspace?
FAQs
What is the best way to organize woodworking tools?
Group similar tools together, use pegboards, and label storage areas for easy access.
How do I maximize space in a small woodworking shop?
Utilize vertical and overhead storage, and consider mobile workstations for flexibility.
What should every woodworking shop have?
Essential tools like a workbench, saws, clamps, and safety gear, all stored efficiently.
How often should I clean my woodworking shop?
Spend 10 minutes daily for basic cleaning and do a deep clean once a month.
How can I improve workflow in my woodworking shop?
Create dedicated zones for cutting, assembling, and finishing to streamline your projects.