Ever struggled with woodworking because you’re short on clamps? Discover innovative ways to achieve perfect, clamp-free bonds that hold strong! How, you ask? Read on!
Gluing wood without clamps can be a challenge, but it’s certainly possible with some creative techniques and a bit of patience.
I’ll bring you such techniques as I experienced during the past few decades.
In this article, I’ll look at several methods and provide advice on how to successfully glue wood without clamps with expert advice.
Now, let’s discuss, how to glue wood without clamps?
To glue wood without clamps, Add superglue in the gaps and press pieces together. Alternatively, use masking tape, heavy objects, brad nails, bungee cords, ratchet straps, or DIY clamps to hold pieces in place while glue dries. Ensure even pressure and alignment for a secure bond. Avoid using superglue alone for permanent bonding.
But there’s a lot more to know!
In this article, I’ll explore how to glue wood without clamps using different techniques in more detail with important tips.
Plus, I’ll tell you the steps that need to be followed when applying glue on wood without clamping and how to choose the best wood glue products as well.
So, let’s dig in!

Can you Glue Wood Without Clamps?
Yes, it is possible to bond wood without using clamps if you employ different strategies.
Although woodworkers frequently use clamps, they aren’t always appropriate for smaller or delicate jobs.
In these circumstances, knowing how to glue wood together without clamps will come in handy without a doubt.

Supplies You Will Need to Glue Wood Without Clamps
Here are the tools and materials you need to collect to glue wood without clamps,
- Masking Tapes
- Rubber Bands
- Superglue
- Cord or Rope
- Nails or Screws
- Ratchet Straps
- Windlass
- Kreg Pocket-hole Screws
- Heavy Objects
- Carjack
- Pipe clamps
- PVC pipes
- Brad Nails
- Caulking Gun
- Bungee Cords
- Vise
- DIY Clamps
Apart from the above-mentioned materials and tools, you will need,
- Safety gear (protective gloves, masks, and goggles)
- A glue
- Hammer
- A drill
- Disposable cloth or rags
Make sure to collect supplies from quality manufacturers to avoid occurring any issues when gluing.

How to Glue Wood Without Clamps?
It can be difficult to glue wood without clamps, but it is doable with the right procedures.
Here are some techniques for gluing wood without using conventional clamps.
Choose your method according to the availability of tools and materials, your needs, and your preference from the list.
Let’s discuss each technique in detail.
First of all, make sure to wear safety gear before starting any protocols, and keep in mind to remove extra wood glue as well.
1. Use of Masking Tapes
For small-scale, lightweight projects, masking tape can be used in place of conventional clamps to bond wood.

Here is a detailed explanation of how to accomplish it.
1. Apply Wood Glue
After cleaning the surface, on one of the wooden surfaces, apply a thin, even layer of wood glue. Ensure that the adhesive completely encloses the bonding area.
2. Join the Wood Pieces
Align the two pieces of wood carefully, then press them together.
3. Apply Masking Tape
Strips of masking tape should first be placed over the bonded connection.
To achieve good contact, make sure to apply pressure when applying the tape.
Make sure to apply masking tape at regular intervals along the length of the joint. Here, the tape acts as a temporary clamp.
4. Remove the Tape
After the recommended drying time of glue, the masking tape on the wood should be removed carefully.
If you have complex or unusually shaped things that are difficult to clamp, use electrical tape. It works well for this because it is elastic and simple to remove.
It actively assembles the parts as a result.
2. Use of Rubber Bands
An efficient and adaptable way of gluing wood without using conventional clamps.

Rubber bands are particularly used for smaller woodworking projects.
1. Clean the Wood Surfaces
For a solid bond, make sure the wood surfaces are clean and exactly fit together.
2. Apply Wood Glue
On one of the wooden surfaces, apply a thin, even layer of wood glue.
3. Join the Wood Pieces
Align the two pieces of wood carefully, then press them together.
4. Use Rubber Bands
Wrap rubber bands around the glued joint.
5. Remove the Rubber Bands
After the glue has dried, remove the rubber bands.
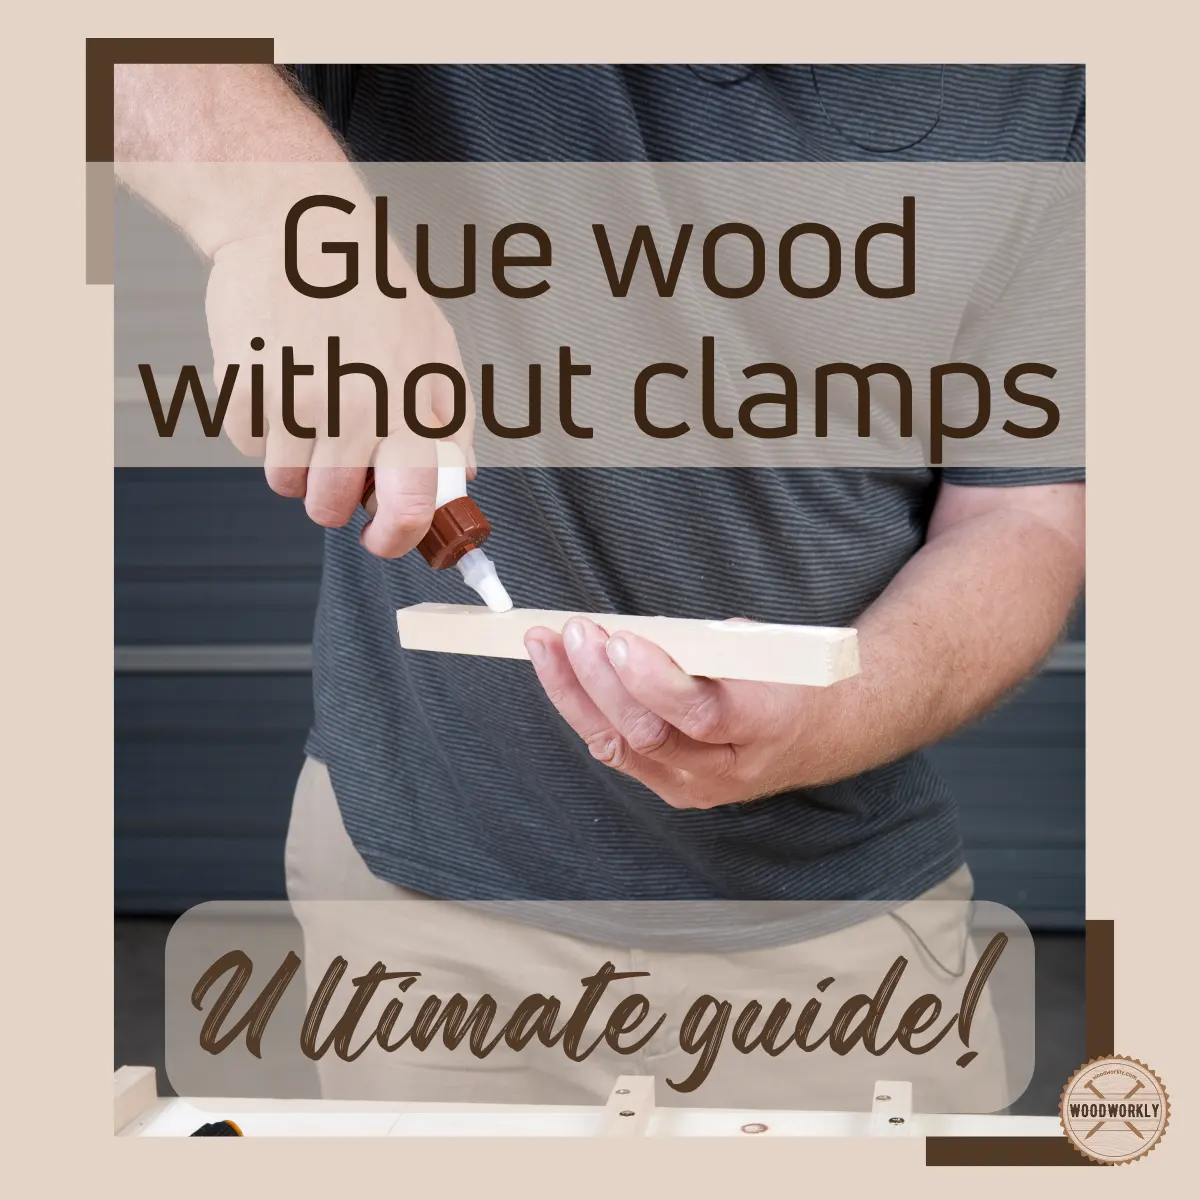
3. Use of Superglue
For small woodworking projects or repairs and attaching lightweight wood pieces, using superglue (cyanoacrylate adhesive) to glue wood is a rapid and efficient technique.

However, because it can be brittle and may not offer as much strength as other kinds of wood glue, it might not be the greatest option for load-bearing or structural applications.
Here’s how to glue wood using superglue.
1. Prepare the Wood Surfaces
Make sure the surfaces are dust-free, dry, and devoid of any other things.
Lightly sanding the surfaces will give them a rough texture, which will strengthen the adhesive bond.
2. Apply the Superglue
Apply a tiny amount of superglue with caution to one of the wood surfaces.
Superglue can bond quickly, so use only a small amount to avoid leaving behind ugly residues.
3. Join the Wood Pieces
Align two pieces of wood properly and press them together. To ensure a tight binding, apply even pressure.
4. Hold the Bond in Place
You need to maintain the above pressure for 10-30 seconds.
Although superglue dries quickly, you should some time to dry for optimal strength. For a full cure, certain formulations could need 24 hours.
5. Clean Up
Once the glue has fully dried and hardened if there is excess. Carefully remove it with a sharp blade or sand it away.
4. Use of Cord or Rope
In certain situations, a cord or rope might serve as a handy substitute for clamping when bonding wood.

After applying the glue between two wood surfaces, the string or rope should be wrapped around the bonded junction with uniform pressure.
This method is appropriate for quick and simple woodworking projects.
You can apply additional cord or rope loops if necessary along the joint’s length to distribute pressure uniformly.
5. Use of Nails or Screws
It is simple and practical to use nails or screws instead of traditional clamps when bonding wood, especially for small woodworking projects.

Here are the steps you need to follow when gluing wood using nails or screws,
- For a solid bond, make sure the wood surfaces are clean, dry, and precisely fitted, and ensure to lay them on a flat surface.
- Apply a thin, even layer of wood glue to cover the entire bonding region. The two wood pieces should be carefully positioned and pressed together.
- Remove the nails or screws after the adhesive has finished drying completely.
- Put screws or nails through one piece of wood and into another. Make sure they are situated so that they will firmly keep the parts together.
The size and shape of the junction determines how many nails or screws to use and where to place them.
6. Use of Ratchet Straps
Ratchet straps can be an excellent substitute for conventional woodworking clamps because they are a versatile and effective instrument for clamping wood during glue-ups.

Here are the steps for using ratchet straps without clamps for gluing wood,
- On one of the cleaned wood surfaces, apply a thin, even layer of wood glue to cover the entire bonding region.
- Make sure the ratchet straps are uniformly spaced and parallel to the wood joint as you lay them down.
- Start tightening the straps by turning the ratchet, and applying even pressure to the bonded connection. Be careful not to over-tighten the straps as this could squeeze out extra glue. Instead, tighten the straps until the components are securely fastened together.
- Reverse the ratcheting function to remove the ratchet straps once the glue has completely dried.
Ratchet straps are an excellent choice for bigger and more complex woodworking jobs because they can apply significant and even clamping pressure.
And also they can accept a range of joint sizes and shapes that are adjustable and simple to use.

7. Use of Windlass
Here, using a windlass involves using a rope and two or more sticks to join two opposing wooden structures. This is a different way to bond wood without using clamps.
You must wind the rope around two sticks on either side of your bonded joints in order to use it.
Next, thread the third stick through the rope’s length and twist it.
As the glue dries, this will provide enough pressure to hold the pieces together.
8. Use of Kreg Pocket-hole Screws
Kreg pocket-hole screws are typically used in conjunction with pocket-hole joinery to make secure and covert connections in woodworking projects.

However, you can use them in a specific way to join wood without depending on conventional clamps.
- Make sure the pocket holes made by a Kreg Jig are precisely aligned and matched on the wood pieces.
- Position the pieces whose pocket holes are correctly matched.
- Drill the Kreg pocket-hole screws into the adjacent piece of wood and into the pocket holes.
Without using clamps or adhesive, the screws will draw the components together securely to provide a solid connection.
9. Use of Heavy Objects
Using heavy objects instead of conventional clamps to glue wood can work well, for smaller tasks or when clamps are unavailable.

Heavy objects such as books, bricks, bottles filled with either sand or water or any other heavy items can provide pressure and hold the wood pieces together while the adhesive cures.
Here’s a method for using heavy objects without clamps for gluing wood,
- For a strong connection, make sure the wood surfaces are clean, dry, and well-assembled.
- On one of the wood surfaces, apply a thin, even layer of wood glue to cover the entire bonding region.
- Make a thin adhesive coating between the two pieces of wood by carefully aligning them and pressing them together.
- Put pressure on the glued connection by placing heavy objects on top of it to keep the wood pieces together. To keep pressure on the whole joint, these objects should be placed evenly throughout.
- Wait for the recommended drying time specified by the wood glue manufacturer.
- After the glue has fully dried, carefully lift and remove the heavy items.
However, this method might not be appropriate for your large or more substantial woodworking tasks, though, as heavy things might not generate as much pressure and control as clamps do.
10. Use of Carjack
Car jacks are not intended for use in woodworking or clamping; rather, they are made for lifting and supporting large, heavy automobiles.

However, you might be able to utilize a vehicle jack as a temporary clamp if you need to apply a lot of downward pressure to a wood glue-up but don’t have access to conventional woodworking clamps.
Before you clamp the two pieces of glued wood together, ensure they are first aligned.
In order to avoid damaging the clamping location, disperse the car jack’s gripping pressure over a block of wood.
11. Use of PVC Pipes
Wooden components can be temporarily clamped together with PVC pipes while the adhesive dries.
- First, make a quarter- or half-inch thick incision in the PVC pipes.
- After that, cut around the pipe until you have c-shaped pieces.
- Attach your wood pieces together with glue and secure them using your C-clamp.

This technique offers consistent pressure across the joint and is suitable for smaller woodworking jobs such as small furniture items, picture frames, craft projects, etc.
12. Use of Pipe Clamps
Pipe clamps are a versatile tool that can be quite efficient in woodworking tasks for holding wood together during glue-ups.

Here are the steps you need to follow.
- Put two pipe clamps on the wood pieces as you would for a standard glue-up: one on top and one on the bottom.
- Fill the clamps with pipe segments (made of steel or galvanized pipes) to expand their reach throughout the entire glued joint.
- Gradually tighten the pipe clamps to evenly press against the wood joint. Make sure the clamps are tight enough to securely hold the wood pieces together.
- After the glue has dried, carefully release the pressure on the wood by loosening the pipe clamps.
13. Use of Brad Nails
When joining wood pieces without the use of typical clamps, brad nails can be another useful addition to your woodworking projects.

In the meanwhile, as the glue dries, they serve as temporary fasteners, holding the wood pieces together.
Here I’ll discuss how to bond wood without clamps with brad nails,
- Put the right length of brad nails in the brad nailer. Pick a nail length that will allow it to go through both pieces of wood without sticking out the other side.
- Drive brad nails through one piece of wood and into the other using the brad nailer.
Make sure the joints are evenly spaced apart by the nails. As the glue dries, this will hold the pieces together.
14. Use of Caulking Gun
For small woodworking tasks and circumstances where clamps are either unavailable or impractical, a caulking gun can be used to bond wood without clamps as a successful technique.

If you find yourself in a situation where you only have one free hand also, you can try this.
Make sure the gun’s cartridge is unloaded first. The edges of the glued wood should then be clamped using the two faces of a caulking gun.
In order to avoid injuring your item, lay a thin scrap of wood between the jaws for the softwood you are using, if necessary. Joining plywood will give the greatest results.
15. Use of Bungee Cords
If your pieces of wood that need to join are large, heavy, or irregularly shaped wood and clamps can’t support it, try this method.

Here are the steps you need to follow,
- Apply and spread wood glue over the wood pieces you want to join.
- Firmly press the wood pieces together while holding them in place.
- Align the edges together and wrap your wooden structure with a bungee cord.
- Tighten the elastic rope around the wood structure by stretching it. If you are using a rope, repeat the process.
As the wood glue dries, be careful to tie a tight knot to retain your structure in place.
16. Use of Vise
The multipurpose tool known as a “vise” is frequently used in woodworking to hold and secure wood pieces while performing various processes like gluing, cutting, planning, and shaping.
- Open the bench vise enough to accommodate the breadth of your wood pieces.
- Place the glued wood pieces in the vise using the clamping blocks or cauls.
- To evenly press on the bonded joint, gradually tighten the vice jaws. Avoid over-tightening to avoid damaging the wood.
- After the glue has completely dried, slowly release the vice by opening the jaws.

17. Use of DIY Clamps
It’s time to make your wood clamps!
For this, you’ll just need some pieces of scrap of wood, a Screw or nail, and a hammer.
How to make a DIY clamp?
- Cut a wedge-shaped piece of waste wood and another piece for the “main clamp”.
- Make them bigger than the joints and wood you intend to glue together. The wood pieces are then joined with screws or nails.

Here are the steps you need to follow when gluing wood with DIY clamps,
- Apply adhesive to one of the wood’s joints.
- Place the second piece of wood on the bonded joint.
- Insert the glued joints into the homemade clamping board.
- Gently tap the wedges against the scrap wood and glued joints with a hammer until they fit firmly.
These DIY clamps can be customized to meet the particular needs of your project and are comparatively simple to build.
The most important thing is to make sure that the clamping pressure is uniform and that it firmly keeps the wood pieces in place while drying.

Best Wood Glue Products
There are a number of wood glue products out there, each with special qualities and benefits.
The type of wood, the intended application, and your personal preferences may all influence the best wood glue for your project.
There are five glue categories available. These are Cyanoacrylate (CA), Hide glue, Polyvinyl acetate (PVA), Polyurethane glue, and epoxy-based glue.
For applications indoors and outside, waterproof glue options include polyvinyl acetate and polyurethane.
For modest projects, epoxy and CA glue are ideal choices. Finally, the best adhesive for repairing antiques is hide glue.
When purchasing a glue type for your project, you need to consider the wood glue type, strength, Shelf life, viscosity as well and the color of the glue.
The following are some of the best wood glue items on the market.
- Gorilla Wood Glue– A trustworthy option for woodworking jobs. It has exceptional strength, has a quick clamp time, and dries with a natural color.
- Elmer’s Carpenter’s Wood Glue– A cost-effective and reliable option for general woodworking projects.
- Titebond Ultimate Wood Glue– Suitable for outdoor projects and applications exposed to extreme conditions.
- Titebond Premium Wood Glue– It is waterproof, making it perfect for outdoor or high-humidity tasks.
- Krazy Glue Wood Glue is an ideal option for modest woodworking tasks, repairs, and situations requiring a quick and strong bond.
- STARBOND Super Glue– A high-quality cyanoacrylate adhesive and an excellent choice for various projects and quick repairs.

Tips for Gluing Wood Without Clamps
The following tips will help you to successfully bond wood without using conventional clamps.
- For a strong and durable bond, make sure your wooden surfaces that are going to join are free of dust and debris.
- Choose the right type of wood glue for your project. Choose a glue that meets your demands since different glues have different drying times and strengths.
- Before the glue sets, double-check the alignment and make any required adjustments. Making sure the parts are in the right places is essential.
- In most of the techniques, be careful when tightening the softwood. Too much pressure may damage your softwood.
- While the glue dries, you can hold the wood pieces together using temporary fasteners like nails, screws, or dowels. After the glue has dried, remember to remove them.
- Be aware of the method and tool you are using and put pressure appropriately on the wood joint to prevent damage especially if you are working with carjack etc.
- If you are using ropes or bungee cords, they can adhere to the wood while drying glue. Therefore be careful when using them.
Congrats folks! Now you know how to glue wood without clamps using different effective methods.
So, let’s answer some frequently asked questions.
FAQs
Can I use superglue alone to bond wood pieces?
No, superglue alone isn’t advisable for bonding wood pieces as it isn’t as strong as wood glue. It’s primarily used in conjunction with wood glue, where it holds the pieces temporarily in place until the wood glue dries.
How effective is masking tape in gluing wood without clamps?
Masking tape can be effective for small woodworking projects. It holds the glued pieces together, although it doesn’t apply as much pressure as clamps.
Can heavy objects be used as a substitute for clamps?
Yes, heavy objects like books or paint cans can be used to apply pressure to the glued wood pieces. They’re especially useful where gravity can assist in the bonding process.
Is it necessary to have a brad nailer for using brad nails to hold glued wood?
Having a brad nailer is highly beneficial as manually hammering in the nails can cause the wood pieces to shift, resulting in a weaker joint. A brad nailer inserts nails quickly and efficiently, ensuring the wood stays in place as the glue dries.
Can bungee cords or ropes effectively replace clamps in larger woodworking projects?
Bungee cords or ropes can be a viable option for holding larger wood structures together. The elasticity of bungee cords and the tension of tied ropes can apply sufficient pressure to secure the joint as the glue dries.
Are DIY clamps a practical solution for gluing wood without commercial clamps?
DIY clamps can be a quick and easy solution, especially when made from scrap wood and a wedge to apply pressure. They’re customizable and can be made to fit various sizes of wood pieces and joints.
Can I use rubber bands for small woodworking projects?
Yes, rubber bands can be used for small projects, as they provide enough tension to hold the wood pieces together firmly. The number of rubber bands can be adjusted to apply the desired pressure until the wood glue dries.
What types of wood glue are recommended for various woodworking projects?
Choosing the right wood glue depends on factors like curing time, the type of project, and intended use. Polyvinyl acetate and polyurethane glues are popular choices for their waterproof qualities and strength.
How can ratchet straps be used without damaging the wood?
Ratchet straps should be used with caution, especially on softwood, to avoid denting or damaging the wood. It’s essential to apply pressure slowly and not overtighten the straps.
What precautions should be taken when using heavy objects to hold wood pieces together?
When using heavy objects, it’s crucial to distribute the weight evenly across the wood surface to avoid uneven pressure and ensure a strong, uniform bond as the glue dries.
Did I cover all you wanted to know about: How To Glue Wood Without Clamps
In this article, I’ve deeply discussed how to glue wood without clamps using different quick and easy methods. Now you can select the one that suits you the most.
You can glue wood without clamps by using masking tape to hold two glued wood pieces together. Apply a thin layer of glue to join the two pieces, put masking tape at regular intervals, and remove the tape after the glue has dried. For heavy projects, use bungee cords to warp both glued pieces tightly until glue dried.
Furthermore, I’ve answered some frequently asked questions as well.
I hope this article has given you some inventive ideas on gluing wood together without clamps with expert tips!
Now it’s time for you to practice the method that matches you the most for several times with scarp woods and head into the main project like a pro! Happy woodworking!