Ever struggled with a headless screw in your DIY project? Discover the ultimate guide to tackle this pesky challenge head-on! Ready?
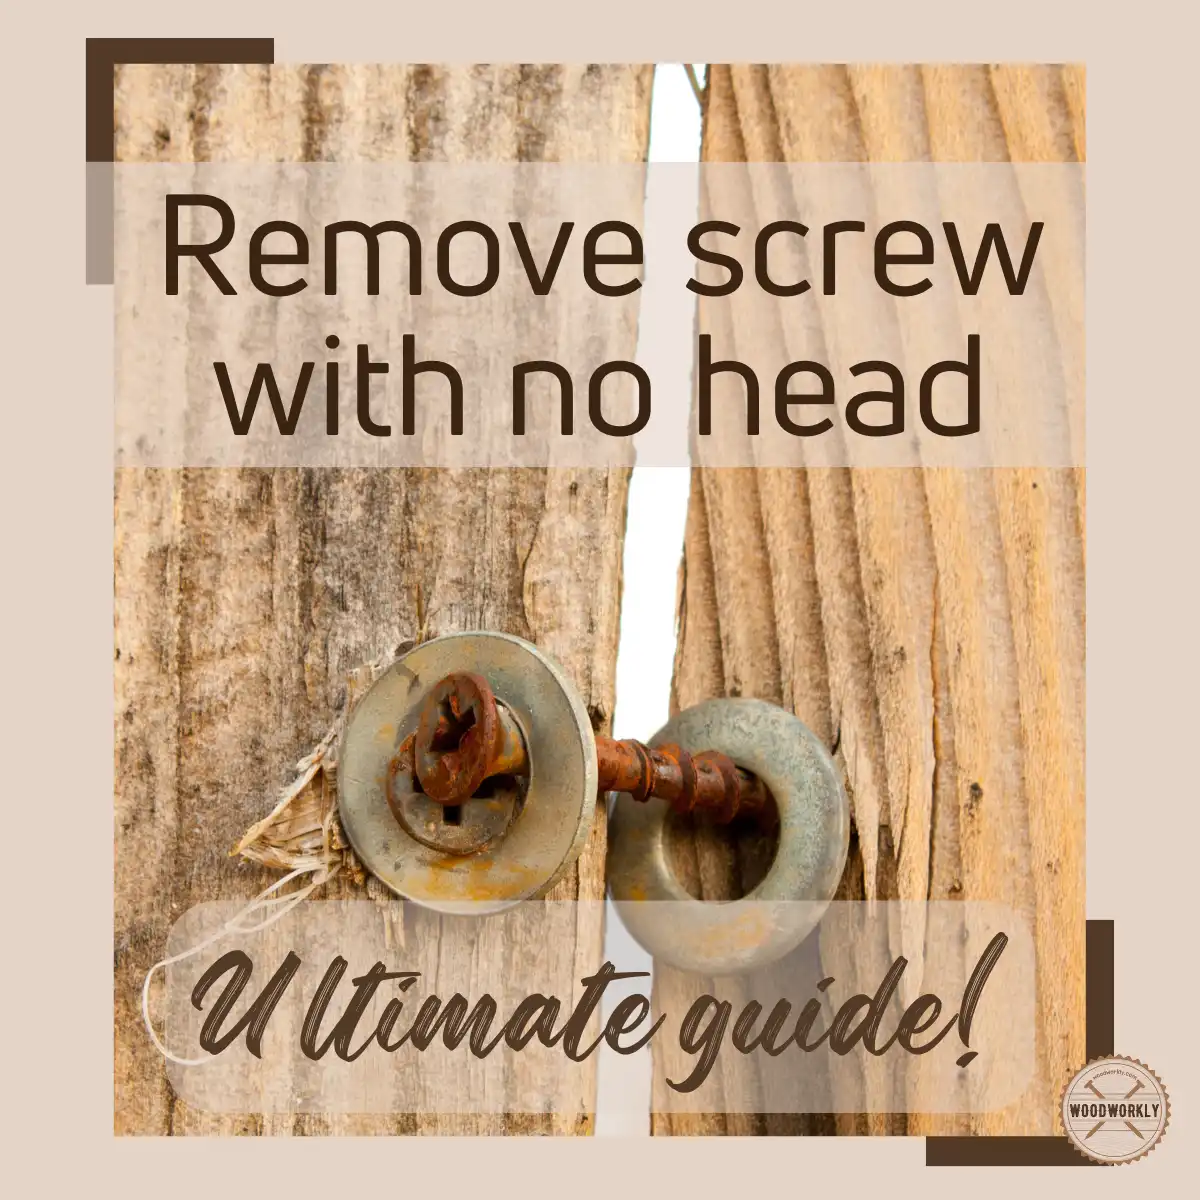
Have you ever been struggling to remove a weak or rusted screw? Did it get worse with a broken head?
Don’t worry I’m here to assist you to solve your problem as always because I have also faced the same situation and I was able to find a solution thanks to the experts.
Now with years of experience, let me share with you the right technique to remove stripped or broken screws without any issues.
Here’s How to remove a screw with no head?
To remove a screw with no head, use a screw extractor by drilling a hole in the center of the screw head. Insert the extractor, then turn counterclockwise. If unsuccessful, try using pliers to grip the screw’s shank and twist it out. Other methods include rubber bands, superglue, or specialized tools.
But there’s a lot to know!

I’ll start with the reasons for breaking your screw inside the wood.
In this article, I will explain how to remove a screw with no head with different methods I followed for many years and tips to follow for promising results.
Let’s dive in!

The Primary Reasons for Broken Screws Inside the Wood.
Pressure
If you use an electrical or manual screwdriver, it is important to keep the pressure under control.
Otherwise, putting too much pressure may result in its breakage.
Rust and Corrosion
If your screws are exposed to moisture, oxygen, oil, etc which are incompatible substances to metal, they may rust over time leading to loss of structural integrity and making them more prone to breaking.
Over-tightening
Excessive force while pushing a screw into wood can cause it to break.
The pressure that wood can bear has a natural limit, and exceeding this limit might cause the screw to snap.

Screw Fatigues
Screws can be weakened over time by repeated usage or over-tightening, making them more prone to breaking.
Temperature and Humidity Changes
Temperature and humidity fluctuations can cause wood to expand and shrink by potentially putting additional stress on screws which will lead to fracture.
Age
Moisture content, temperature changes, and exposure to the environment can cause the wood to change over time.
Older wood may become harder, denser, or more brittle as it ages, making it more difficult to deal with.
Removing a broken screw from an old wood should be a more careful process.
Poor-quality Screws
Don’t use poor-quality screws as they are more prone to breaking.
Now the question is, How to remove a screw with no head?
Let’s talk about that in detail.

How to Remove a Screw With No Head?
There are several methods that you can try to remove the screw without a head. I’ll explain each method in detail.
Just you need to keep reading.
1. Screw Extractor Method
Tools You’ll Need to Remove a Screw with No Head
Collect the following materials and tools before starting the process.
- Fine sandpaper
- Steel wool
- Screw extractor
- A power drill or T-handle
- Pliers
- Drill Bit
- Screwdriver kit
- Lubricant
Let’s see how to remove a stripped or broken screw with no Head from a wood surface.
Here are the steps to remove a screw without a head by using a screw extractor,
- Prepare work area
- Choose a screw extractor
- Drill a screw hole
- Hammer the screw extractor
- Remove the screw
- Sanding
I’ll explain each step in detail. Stay tuned with me.
1. Prepare Work Area
Make a clear and safe workplace before starting work.
Use safety goggles before starting drilling.
2. Choose a Screw Extractor
You need to Purchase a screw extractor tool from a hardware store.
Screw extractors are developed primarily for removing stripped, damaged, or headless screws with your secure.
Since extractors are in different sizes, choosing the correct screw extractor that fits the screw you wish to remove is essential.
What is the Extractor and How Does it Work?
Screw extractors are useful tools for working with stubborn or damaged screws and they can save you time when attempting to remove a screw with no head.
The extractor is a tool that is normally composed of strong steel and resembles a standard drill bit. The extractor’s top end is square-headed, allowing you to use it in a variety of operations.
The extractor’s body is threaded, and the opposite end has tappers. There are several extractors, such as spiral flutes and straight flutes.
Now you can buy multipurpose extractors that can remove buckles as well.

3. Drill a Screw Hole
After selecting the correct screw extractor, use a drill bit to drill a small hole in the center of the screw shank. The hole should be somewhat smaller than the size of the screw extractor.
You need to do it in gentle motion in order to prevent overheating and eventually, it may break. To prevent overheating you can apply a few drops of cutting fluid before drilling.
Allow the oil to sit for at least 30 minutes before attempting to remove the screw.
Read to know, how to drill a hole without splintering.
4. Hammer the Screw Extractor
Attach a suitable grip to your extractor, for convenience you can use a T-handle or locking plier.
Then, with enough pressure insert the extractor into the pilot hole and tap it into place with a hammer.
The extractor’s threads should catch in the screw, allowing you to spin it out.
5. Remove the Screw
Insert the screw extractor into the hole and turn it counterclockwise until you can eventually remove it from the hole by hand.
The reverse-threaded construction of the extractor should grasp the screw and allow you to unscrew it.
There are some screw extractors like a standard drill, you’ll need to center this hollow extractor around the headless screw before burrowing it down.
If you use such an extractor, you’ll have to remove surrounding materials when it penetrates with wood particles.
You will have a large hole. For this, use a piece of doweling that is the same size as the hole. Fill and sand the hole flat.
6. Sanding
Once you are done with filling the hole, use high-grit sandpaper to sand the rough surface and wipe all the sanding particles using a damp cloth.
Now, apply paint or a sealer for the protection of your wood.
How to Remove a Screw with No Head without An Extractor
Don’t worry if you don’t have an extractor. I got you!
If you don’t have an extractor, there are several extraction methods and tips to remove a screw with no head, I’ll explain them below.
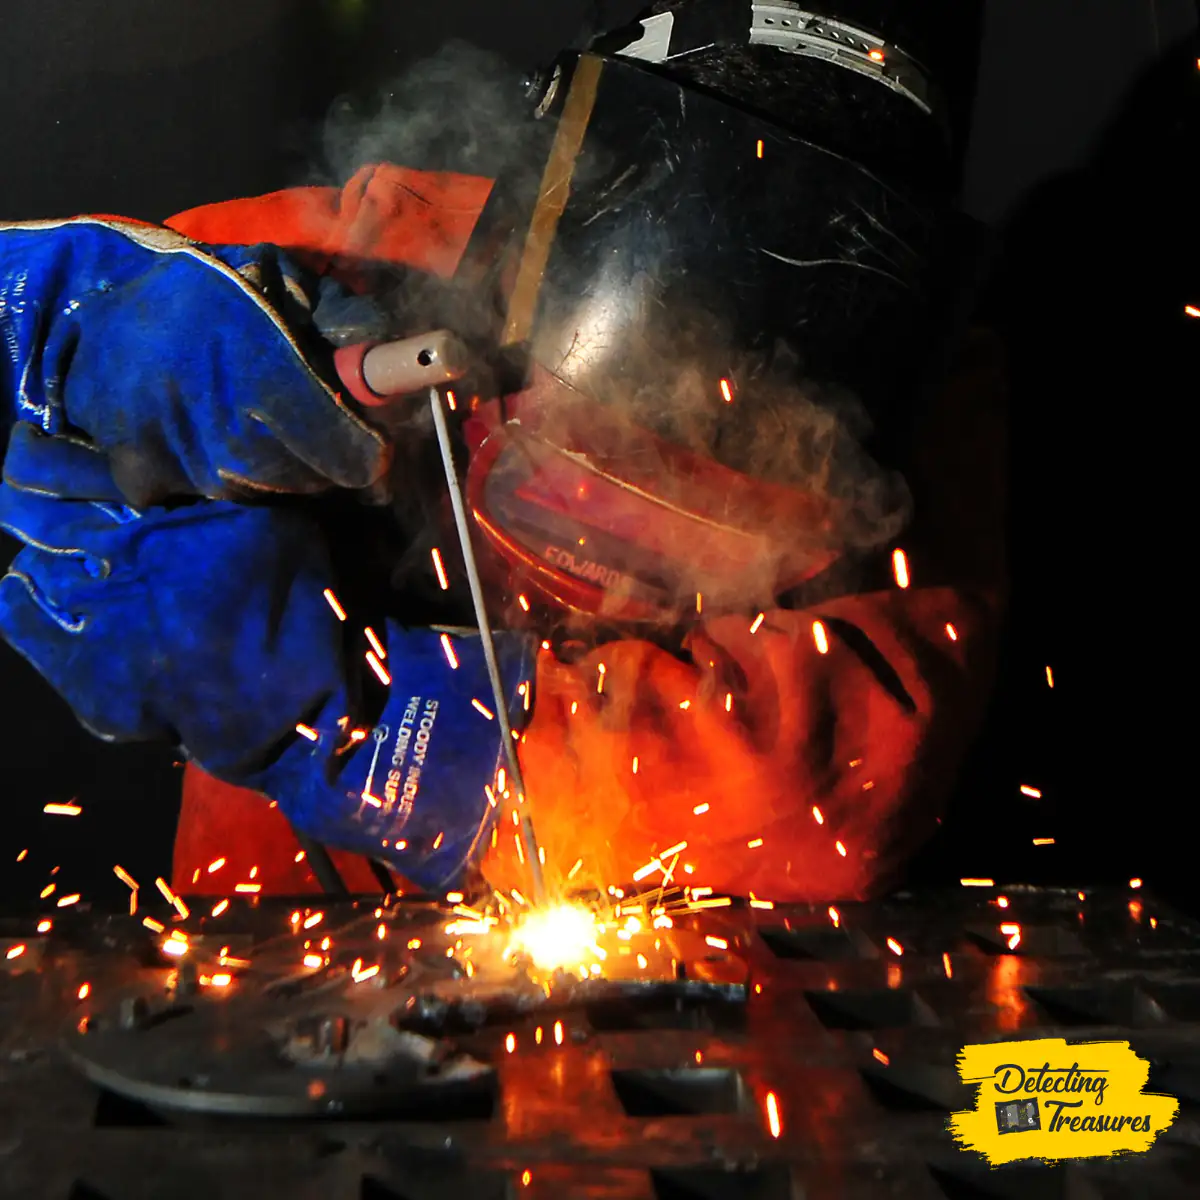
2. The Welded Nut Method
If your screw isn’t protruding enough to catch by the pliers, you can try the welded nut method.
For this method, you’ll need.
- An appropriately sized nut
- A welding device
Before getting started, you need to know how to use the welding device. But this is a simple and easy method.
In here, you are going to make a head for your broken screw. You need to take the nut which is the same in size as the broken screw and twist it onto the exposed threads.
Then, Weld the nut and the screw part well until it doesn’t come off.
Finally, you can easily remove the screw part with a pair of pliers or a wrench. Now, grab the nut and twist. The broken screw will come out.
Before starting the welding process, make sure to wear protective clothes and items.
3. The Hollow Screw Extractor Method
You can try this method, if you have a hardened steel screw or if the screw is too small to drill through.
For this, you will need
- A hollow screw extractor
- T-handle or a power drill
Insert the hollow screw extractor into the power drill or T-handle and place the extractor around the broken screw and rotate to cut the wood straightly.
If you use a power drill, Change the setting on your power drill to reverse.
Simply remove the broken screw with the extractor.
Apart from the above three main methods, you can try out some other methods using the following tools and materials as well.

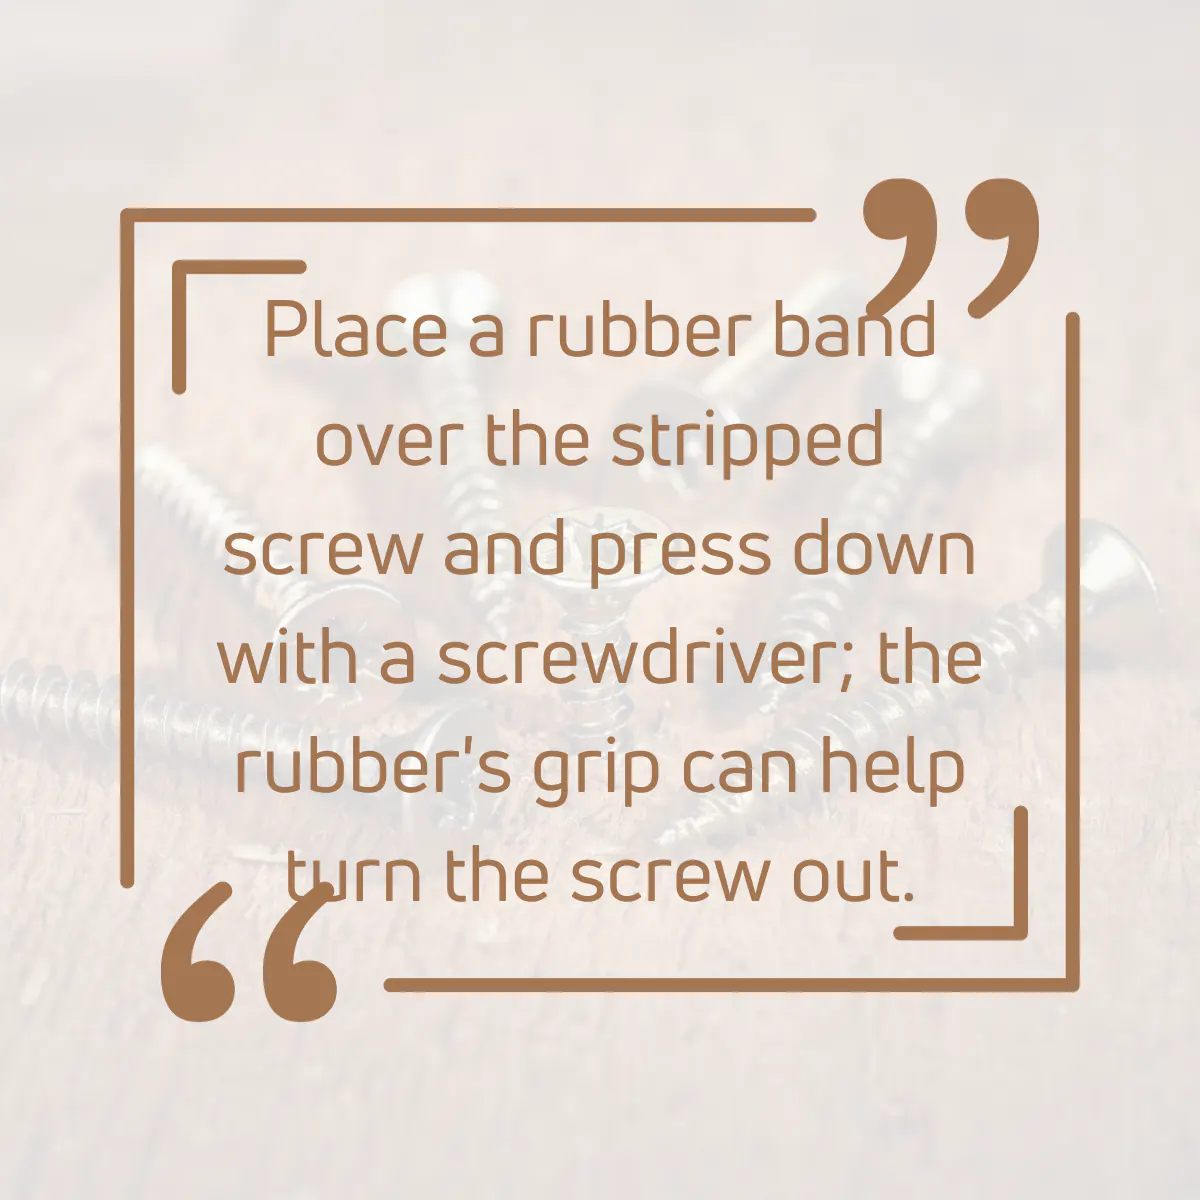
4. Rubber Band or Steel Wool
Cover the screw hole with a rubber band or a thin piece of steel wool.
Create some grip with a screwdriver or drill bit, then turn counterclockwise to remove the screw.
Then, Fill the gap with a rubber band or steel wool which can provide enough friction to move the screw.

5. Pliers or Vice Grips
Grip the exposed shank of the screw with pliers or vice grips with serrated jaws.
To unscrew the screw, apply firm and steady pressure while turning counterclockwise.
You need to be patient, as this procedure may need some work.

6. Tap with a Hammer
If your screw is slightly protruding, use a flat-head screwdriver and tap it with a hammer counterclockwise to produce a small indentation.
Once you have an indentation, spin the screw counterclockwise with the screwdriver until the screw gets out.

7. Wood Plug Cutters
Did your screw get stuck deep inside the wood piece? Use a wood plug cutter to remove your screw part. But you should be okay with little destruction.
Wood plug cutters drive deep around the screw and extract it but also scrape the surrounding area.
Insert the plug cutter into the drilling machine and adjust it to fit the screw surface. As the drill moves downward, begin scraping the area.
Continue this until the cutter reaches the screw’s depth. Once it reaches the depth, remove and clean the plug cutter and clean the area of the screw.
Now, your screw can be easily removed using a plier or a vice grip.
8. Use a Chisel
Chisel the screw’s surface and softly hit it with a hammer to make a small slot.
Then, to remove the screw, use downward pressure while spinning counterclockwise. Use the slot you made as leverage.

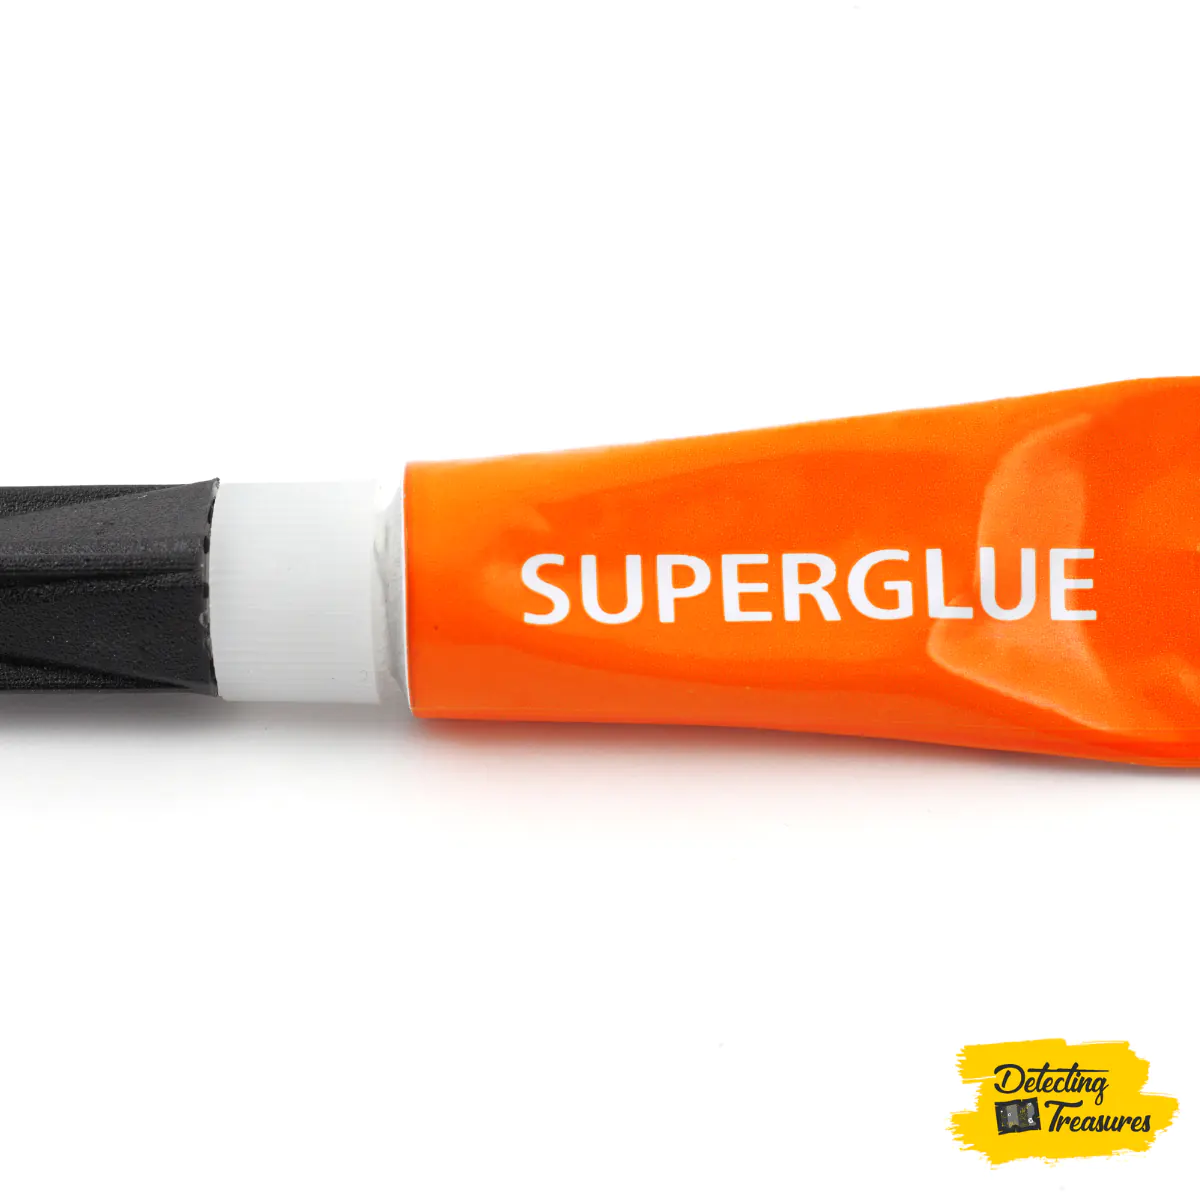
9. Use a Superglue
If the screw is still stubbornly lodged inside, you can try again with the superglue without damaging the region.
Drop two to three drops of super glue into the screw head before inserting the driver. Allow to stick and to cure. After that, push the driver downward to check there are no slack grips.
Gently turn the screw with the driver. Drive the screw outside if the attachment is still attached
Alternatively, repeat the above step until the grip becomes tight enough.
10. Heat
Heat expansion can sometimes loosen the screw. As a screw made up of metal, it can expand in extreme temperatures and contract when it gets cool.
This can be used to lose the connection of the screw from the wood hole.
Therefore, use a heat gun or a propane/butane torch, to heat the region around the screw.
After heating, grip the screw’s shank with pliers or vice grips and turn it counterclockwise.

11. Drill and Remove
Finally, if the above procedures fail, you may need to drill the screw out completely.
Using a drill bit which is slightly larger than the screw shank, drill through the screw’s center.
The screw should gradually loosen and come out as you drill.

That’s it, folks! Now you know exactly how to remove a screw with no head using the right techniques.
I’ve personally used each and every method described above in different stages of my woodworking career and able to achieve promising results with no frustrations.
What If non of the above methods worked and you still need to make the scrapped screw not visible. No worries! Just cover it.
Now I’ll show you how to cover the screw with no head without removing it.
How to Cover the Screw
Covering a screw that has become damaged or stripped can be a practical alternative to trying to remove it.
Especially in situations where removal might damage the material or is not essential for the functionality of the project, covering it up might just be the way to go.
Let’s dive into how this can be achieved and the different methods available.
1. Using Fillers or Wood Putty
One of the most common methods to cover a screw is to use a wood filler or putty.
This method is ideal for screws that are slightly protruding from wooden surfaces.
Example: If you have a piece of wooden furniture with screws that aren’t flush with the surface, you can apply wood putty over the screw.
After it dries, simply sand it down to make it level with the surface. Then, paint or stain as desired to match the surrounding wood.
2. Decorative Caps or Covers
Another method is to use screw caps or covers, which are specifically designed for this purpose.
These caps come in various materials and finishes and can add a decorative touch while concealing the screw.
Example: Kitchen cabinets often utilize these caps. If you’ve ever noticed small plastic or metal covers on the screws of a cabinet, that’s a decorative screw cover in action.
3. Using Paint or Stain
In cases where screws are embedded in walls or wooden surfaces, simply painting or staining over them can effectively hide their presence.
Example: If you have a wooden deck with screws that are starting to rust, you can prevent further rusting and hide the existing discoloration by painting over the screws with a matching stain or paint.
4. Using Plaster or Wall Patching Compound
For screws in walls, particularly in drywall, a simple wall patching compound or plaster can be used to cover them up.
Example: If you’ve mounted a television to your wall and later decide to move it, you might be left with exposed screws or holes.
By applying a bit of wall patching compound, and then sanding and painting over it, you can make the wall look as good as new.
5. Incorporating into Designs
Instead of seeing the exposed screw as a flaw, why not turn it into a feature? Depending on the setting, you can incorporate the screw into a design or decorative element.
Example: An exposed screw on a wooden piece could be the center of a painted flower, a star, or any other decorative element that fits the aesthetic of the room.
6. Using Adhesive Covers
There are adhesive covers available in various shapes, sizes, and colors that can be stuck directly onto the screw head, effectively covering it.
Example: For children’s furniture or toys, colorful adhesive covers can not only hide the screw but also add a playful touch.

Now I’m going to share with you some tips that I’ve learned when removing stripped or broken screws using the above methods.
The below tips will make your project look super easy since they come from my practical experiences.
Tips to Remove a Screw with No Head
You can follow the below tips when removing a screw without a head for the success of your process.
- Make sure you use the correct size screw extractor for the starter hole you drilled.
- When spinning the extractor, be patient and apply constant pressure because excessive force can cause the extractor to break or damage the material.
- If the screw is stuck due to corrosion, apply penetrating or cutting oil.
- It might be difficult to remove a screw extractor if it becomes trapped or breaks inside the screw. Therefore, it is critical to follow the manufacturer’s instructions.
- When trying all of the above methods, to avoid damaging the surrounding material, be patient and apply gentle pressure.
- In summary, all of these methods and tricks may not be effective at various stages of threaded screw heads.
- If you screw,
- At the top of the surface use pliers, screwdrivers, or the hammer method.
- Within the surface use a cutting wheel or a super glue.
- Within the medium height use an elastic rubber band and screw extractor.
- Deep inside, use a wood plug cutter to get off your headless screw.
So, let’s answer some frequently asked questions.
FAQs
What is a screw extractor and how is it used?
A screw extractor is a tool designed specifically to remove stripped or broken screws. To use it, first drill a hole in the center of the screw head, then insert the extractor and turn it counterclockwise using a screwdriver or drill.
How can a hammer help in removing a screw with no head?
A hammer can be used to tap a screwdriver into the screw, creating a grip. This allows you to twist and pull the screw out.
Can a Dremel’s cutting wheel aid in screw removal?
Yes, if you have a Dremel, you can use its cutting wheel to create a slit on the screw head without damaging its surroundings, making it easier to grip and turn.
What is the benefit of welding a nut to a screw?
Welding a nut onto a damaged screw head provides a new grip point. Once welded, you can use a wrench or pliers to turn and remove the screw.
How can superglue assist in this process?
By dropping 2-3 drops of superglue onto the screw head and sticking a screwdriver on top, you create a bond. Once dried, you can twist and rotate the screwdriver to remove the screw.
Are there specialty products designed for stripped screw removal?
Yes, products like DriveGrip or Screw Grip can increase the friction between the driver and the fastener, aiding in removal.
When might an impact driver be useful?
An impact driver is effective for dealing with particularly stubborn screws. After selecting the correct bit and ensuring its proper orientation, the driver can be used to loosen and remove the screw.
Is it always necessary to remove a stripped screw?
No, if removing a screw is too challenging, it’s sometimes better to cover it up, which can be a quicker and simpler solution.
Which methods are suitable for screws lodged at different depths?
For screws just above the base level, use screwdrivers, pliers, or hammers. For those at the base level, superglue and cutting wheels are ideal. For medium height screws, rubber bands or extractors work well. For deeply lodged screws, wood plug cutters are a top choice.
Can regular screwdrivers help in removing screws with no head?
Yes, hammering a screwdriver into a damaged fastener can create additional grip. If using Phillips head screwdrivers, a flathead can sometimes fit inside the Phillips head hole for removal.
Did I cover all you wanted to know about: How to Remove a Screw With No Head
In this article, I’ve deeply explored how to remove a screw with no head which means the removal of stripped or broken screws using different techniques.
You can read each method carefully and select the one that suits you the most based on the equipment you have.
You can remove a screw with no head using an extractor or without using an extractor. If you use the screw extractor method, you need to find a suitable extractor first, then drill a screw hole gently, hammer the extractor, and turn counterclockwise to remove the screw.
Plus, I’ve answered some frequently asked questions with tips as well.
Hope you learned almost all the things you wanted to know about, how to remove a screw with no head.
Now it’s time to give them a try! There’s no time to waste thinking about the stripped or broken screw anymore!