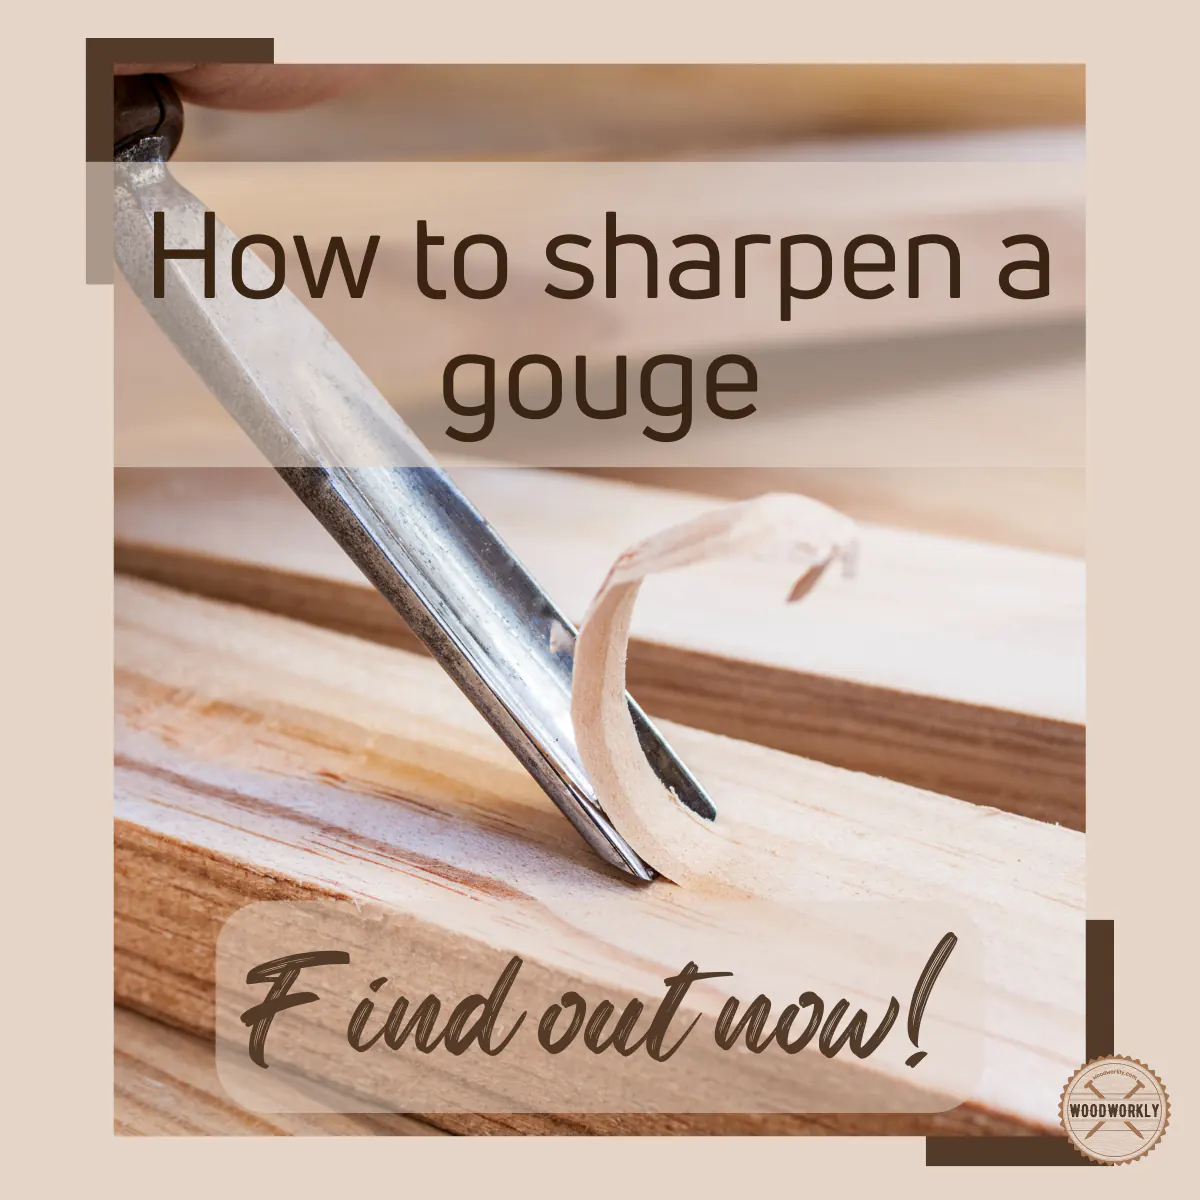
Ever struggled with a dull gouge? Wonder how to restore its sharp edge? You’re not alone. Let’s uncover the art of sharpening gouges together!
Hand tools can either make you a die-hard fan of woodworking or cause you to despise it.
As a beginner in woodworking, I often wondered why my leather gouge, cannel gouge, carving gouge, and many other types of gouges weren’t working as I had hoped.
At first, I attributed the problem to my inexperience in handling these tools.
However, I soon realized that it wasn’t just me. Many people, in fact, give up on woodworking due to struggles with hand tools.
The reason was quite simple: none of the woodworking gouges function properly unless they are as sharp as a new blade.
This led me to research and here’s what I found about, how to sharpen a gouge.
To sharpen a gouge, start by wetting a coarse diamond stone. Hold the gouge at a consistent angle and rub it back and forth on the stone, working both outer and inner edges. Polish the edges using a fine stone, then finish with a leather strop for a sharp, clean edge.
Sharpening a gouge is a quite difficult task if you’re a beginner as it’s a curved woodworking tool.

You can do the sharpening process using a high-speed grinder or by an entirely manual method.
Also, there’s a lot more to know about the,
How to sharpen a straight gouge, bowl gouge, spindle gouge, roughing gouge, and many more other types of gauges with sharpening tips and tricks you can use for a better sharpening process.
So, let’s keep going!
How to Sharpen a Gouge By Hand Using Standard Method?
Sharpening a gouge is easy by hand. The standard method of sharpening a gouge is applicable for any type of gouge.
But there are some special circumstances you need to add some modifications to the standard method according to the gouge you’re going to sharpen.
So, let’s talk about the standard method of sharpening a gouge.
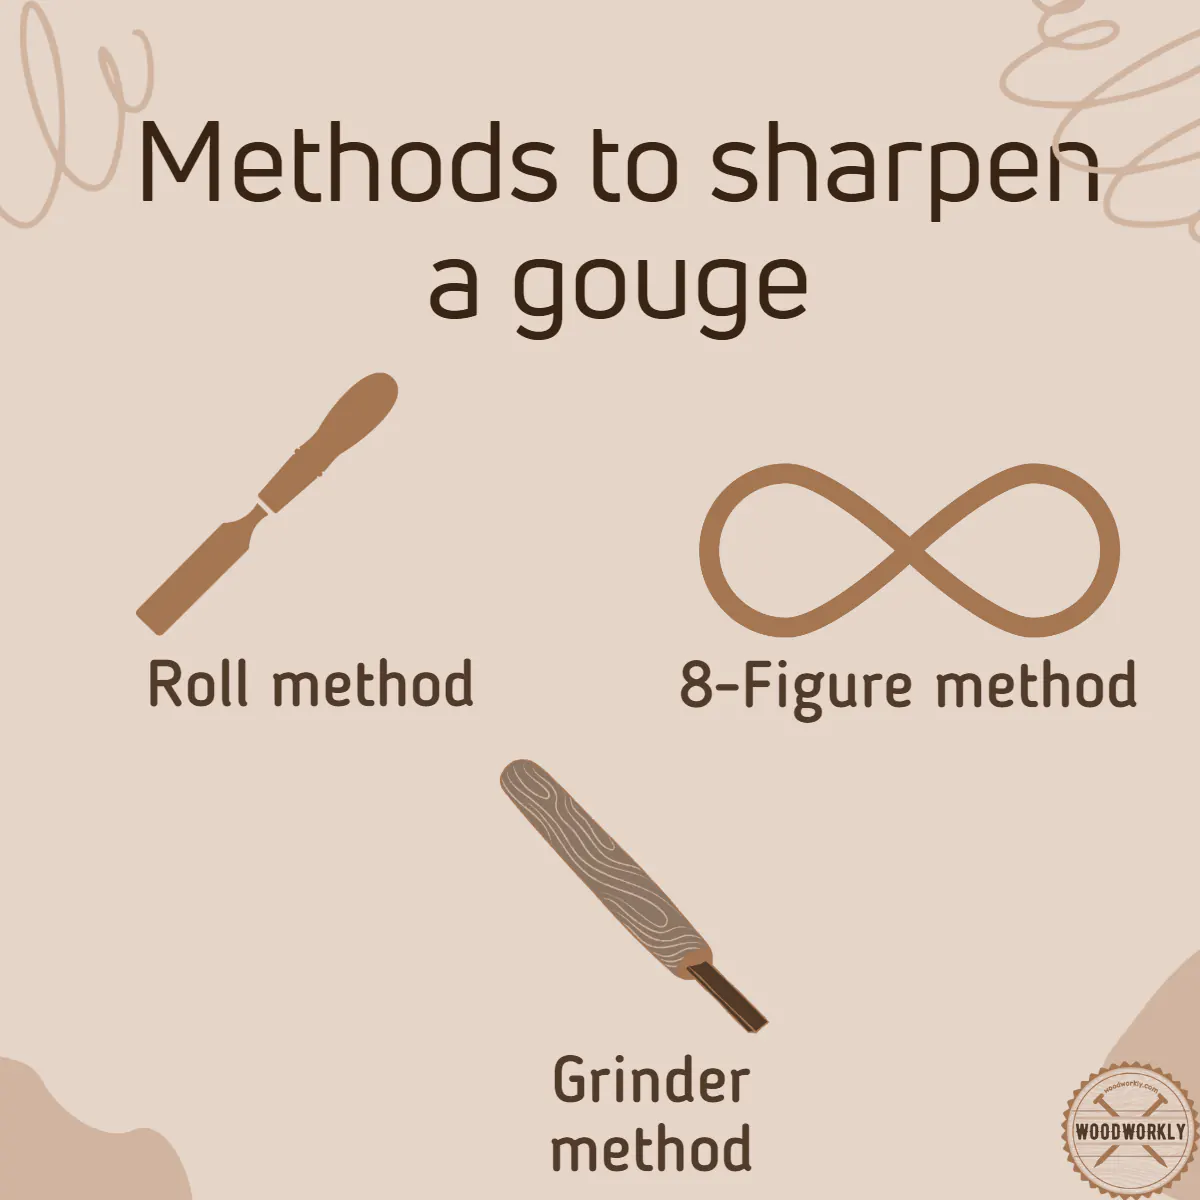
There are two types of methods under the standard method of sharpening a gouge by hand. They are,
- Roll method
- The 8-figure method
First, let’s talk about the roll method.
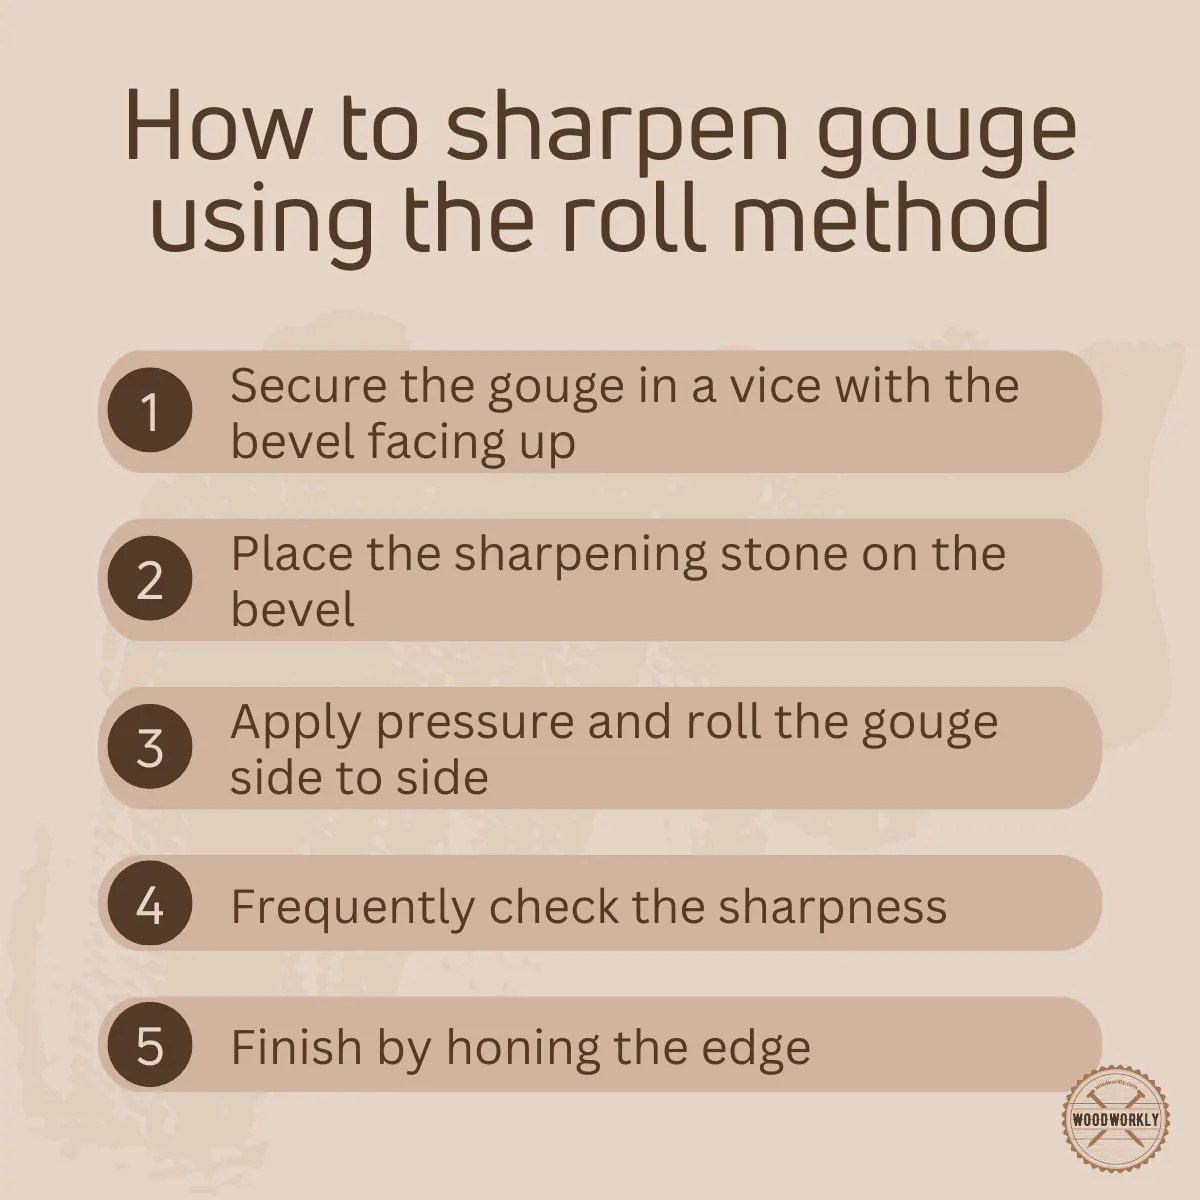
Sharpen a Gouge Using the Roll Method
Tools you need,
- Gouge you want to sharpen.
- Flat diamond stone in coarse 250 grit
- Flat diamond stone in fine 600 grit
- Flat diamond stone in superfine 1200 grit
- Flat poplar strop
- Honing compound – Abrasive suspended in wax or Chromium oxide
- Broom handle or hollow or piece of wood with a rounded shape
- Piece of leather
Steps to Sharpen a Gouge Using the Roll Method
- Take the gouge you want to sharpen, doesn’t matter whether it’s big or small.
- Take the flat stones (250 grit, 600 grit, and 1200 grit) and apply glass cleaner fluid on top of them to lubricate the surface to make sure that particles have grit.
- Take the gouge and place it on a coarse flat stone (250 grit) at a 30-degree angle with the surface.
- Roll the gouge along its bevel and cutting edge while moving back and forth. Roll in both directions slowly while keeping a steady angle.
- Start by slow and eventually speed up the rolling speed, because you can go quite fast easily while rolling the gouge on the coarse surface.
- Flip the gouge and go for the sharpening process with the next stone which is a fine 600 grit one.
- Repeat the rolling process in steps 4 and 5 with this stone as well.
- Then go for the next flat stone which is super fine 1200 grit and place the gouge with a 30degree angle.
- Repeat the same rolling process back and forth along with both directions.
- Eventually check the bevel edges and you can notice they have sharpened well.
- Take the flat strop and charge it with buffing compound by rubbing through it.
- Place the cutting edge on a strop with a 30-degree angle.
- Pull and roll the gouge to catch the whole bevel back and forth repeatedly 30-40 times with speed to get the whole of the bevel polished out, work from one side to the other. While doing this you’ll notice that inside of the gouge is highly polished out.
- Repeat the same process as above until you feel like you’ve got an equal shine across the whole of the bevel. This means you’ve got an equal surface cutting along the bevel too.
- Then go to sharpening the inside of the gouge, by taking a broom handle or hollow.
- Drop a piece of leather on top of the rounded shape of broom handle or hollow.
- Coat and polish the leather with the abrasive honing compound that we use earlier well.
- Grip the hollow with leather. Make sure to stretch the leather onto the surface. Cinch it tight. Also, make sure you’ve got abrasive over the whole surface.
- Place the inner part of the gouge on the rounded surface and press it with the same 30-degree angle.
- Then polish the inside edge by removing the burr, until the gouge is fully sharpened.
The bevel of most gouges is going to be slightly convex or sometimes it’s dead flat.
This depends on the curve. So, you always need to focus on the cutting edge.
So, that’s it. This is the rolling method you can use to sharpen any kind of gouge easily.
That’s all about the roll method and let’s discuss the other method which is known as the 8-figure method.
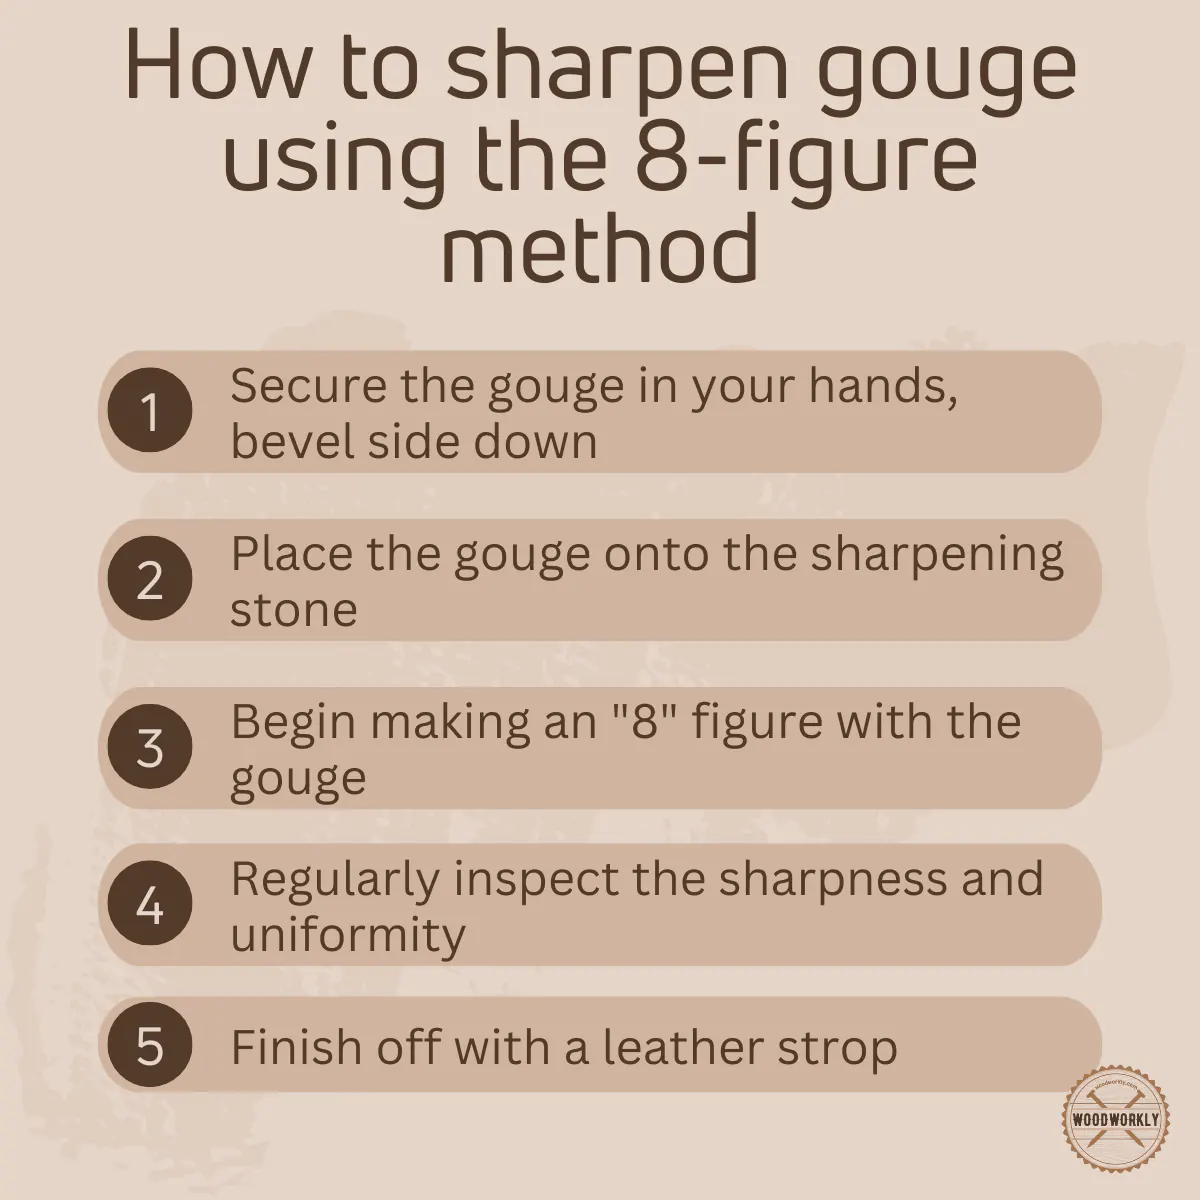
Sharpen a Gouge using the 8-Figure Method
This method is easier than the rolling method and you can be a pro at this method with experience.
Tools you need,
- Gouge you want to sharpen.
- Flat diamond stone in coarse 250 grit
- Flat diamond stone in fine 600 grit
- Flat diamond stone in superfine 1200 grit
- Flat poplar strop
- Honing compound – Abrasive suspended in wax or Chromium oxide
- Broom handle or hollow or piece of wood with a rounded shape
- Piece of leather
Steps to Sharpen a Gouge Using 8-FigureMethod
- Take the gouge you want to sharpen, doesn’t matter whether it’s big or small.
- Take the flat stones (250 grit, 600 grit, and 1200 grit) and apply glass cleaner fluid on top of them to lubricate the surface to make sure that particles have grit.
- Take the gouge and place it on a coarse flat stone (250 grit) at a 30-degree angle with the surface.
- Start with the corner of the gouge on the stone and move across forward and rolling like making the figure of eight by taking round corners and not like straight lines as the rolling method. This is why it is known as the figure of eight sharpening.
- After you’re done with coarse flat stone repeats the figure of eight method with fine 600 grit stone and then with super fine 1200 gritstone.
- Then you can change the angle and repeat the same above process to cover up the whole outer bevel edge.
- Then go to sharpening the inside of the gouge, by taking a broom handle or hollow.
- Drop a piece of leather on top of the rounded shape of broom handle or hollow.
- Coat and polish the leather with the abrasive honing compound that we use earlier well.
- Grip the hollow with leather. Make sure to stretch the leather onto the surface. Cinch it tight. Also, make sure you’ve got abrasive over the whole surface.
- Place the inner part of the gouge on the rounded surface and press it with the same 30-degree angle.
- Then polish the inside edge by removing the burr, until the gouge is fully sharpened.
Once you get the rhythm going it works so well. With practice, you can gain speed more.
The advantage of sharpening a gouge by hand is you’ll have plenty amount of time to grinding the edge of the gouge until it comes back to its original shape.
The controllability is high in the manual method even though the process is really slow.
According to my opinion, sharpening by hand is user friendly than the machinery method.
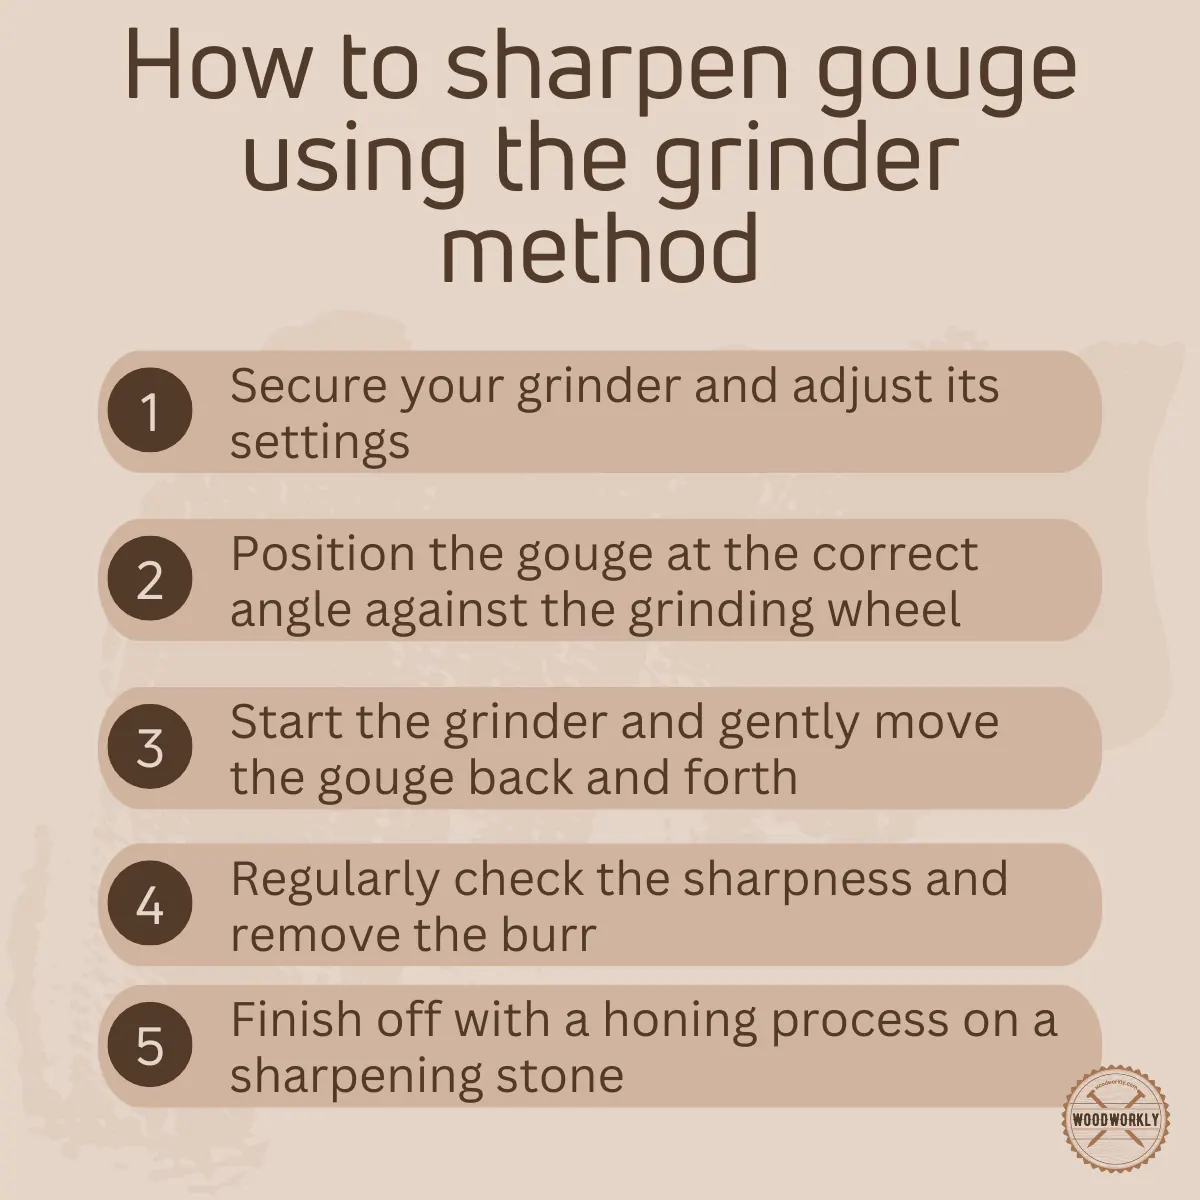
Sharpen a Gouge using a Grinder
Tools you need,
- Jigs
- Grinding wheel
- Sharpening stone
- Dust mask
- Leather gloves
- Safety glasses
- Wet/dry sandpapers 80, 150, 220 grit
- Thick flat glass
- Low tack adhesive spray or standard spray
Steps to Sharpen a Gouge Using a Grinder
- Take the thick flat glass and spray adhesive on top of that and place 80 grit sandpaper and stick them both.
- Prepare a sharpening surface by cutting through the edges of your 80-grit sandpaper and press it to the glass well. By applying sandpaper to both sides of the glass you can stop its sliding movements.
- Repeat the step 1 and 2 with 150 grit and 220 grit sandpapers.
- Dip the blade in water for 3-4 seconds while passing on to prevent the blade from burning. If you see a bluish or straw color, that means the gouge blade is overheated. So, always make sure to keep your gouge cool.
- Take the gouge and press it hard against 220 grit and rub well through the diagonal direction. If the scratches are low keep this doing with 220 grit sandpaper. If there are a smaller number of scratches, shift towards coarse medium 150 grit secondly and then slowly move to 80 grit sandpaper. Our final goal is to get a scratch-free surface around the cutting edges of the gouge. Do this for both inside and outside surfaces both.
- Set the honing angle to 30 degrees and roll honing on 80 grit sandpaper to sharpen the gouge.
- Repeat the above step until you get sharp cutting edges without burr. Once you get a wire edge, this means the gouge is well sharpened.
- then rub the cutting edge on 220 grit sandpaper to remove the wire edge. With few passes, the wire edge will be gone.
- Then set the honing angle to 30 degrees and roll honing on 150 grit sandpaper to sharpen the gouge until you get a new wire edge.
- Once this produces a new even sharper wire edge, remove it using 220 grit sandpaper again by following step number 8.
- Finally, go with 220 grit sandpaper and sub the gouge 6-7 times until you get the sharpest cutting edge.
- To get a super-sharp edge hon the buffer compound or sandpaper. With the buffer compound, you can easily get a super sharp edge.
- Before going for the grinding wheels, to stop the overheating problem, first, go with the coarsest wheel on the grinder because fine wheels create more heat than the coarse wheel. Set the grinder for a 90-degree angle.
- Next, draw a stop line on the surface of your gouge to get an idea about how much metal part you should remove after the grinding process.
- Then set the grinding bevel to 25degrees and honing the bevel to 30degrees and continue the grinding until you get the superfine sharp bevel edge.
Sharpening a gouge using a grinder should do very careful because, no matter how well the wheel is fitted to the machine, the curved shape can change very easily even for a very little mistake.
This is why the manual method is recommended when it comes to sharpening a gouge for a beginner.
Even though we’re able to apply the standard method to sharpen many types of gouges, the cutting angles, curves can differ according to the type of gouge.
So, if apply a unique sharpening method for each of them separately, we can achieve razor blade sharpening as we wish. Because those sharpening methods are specialized for those gouges to get the best results.
So, let’s talk about how to sharpen a gouge according to the types.
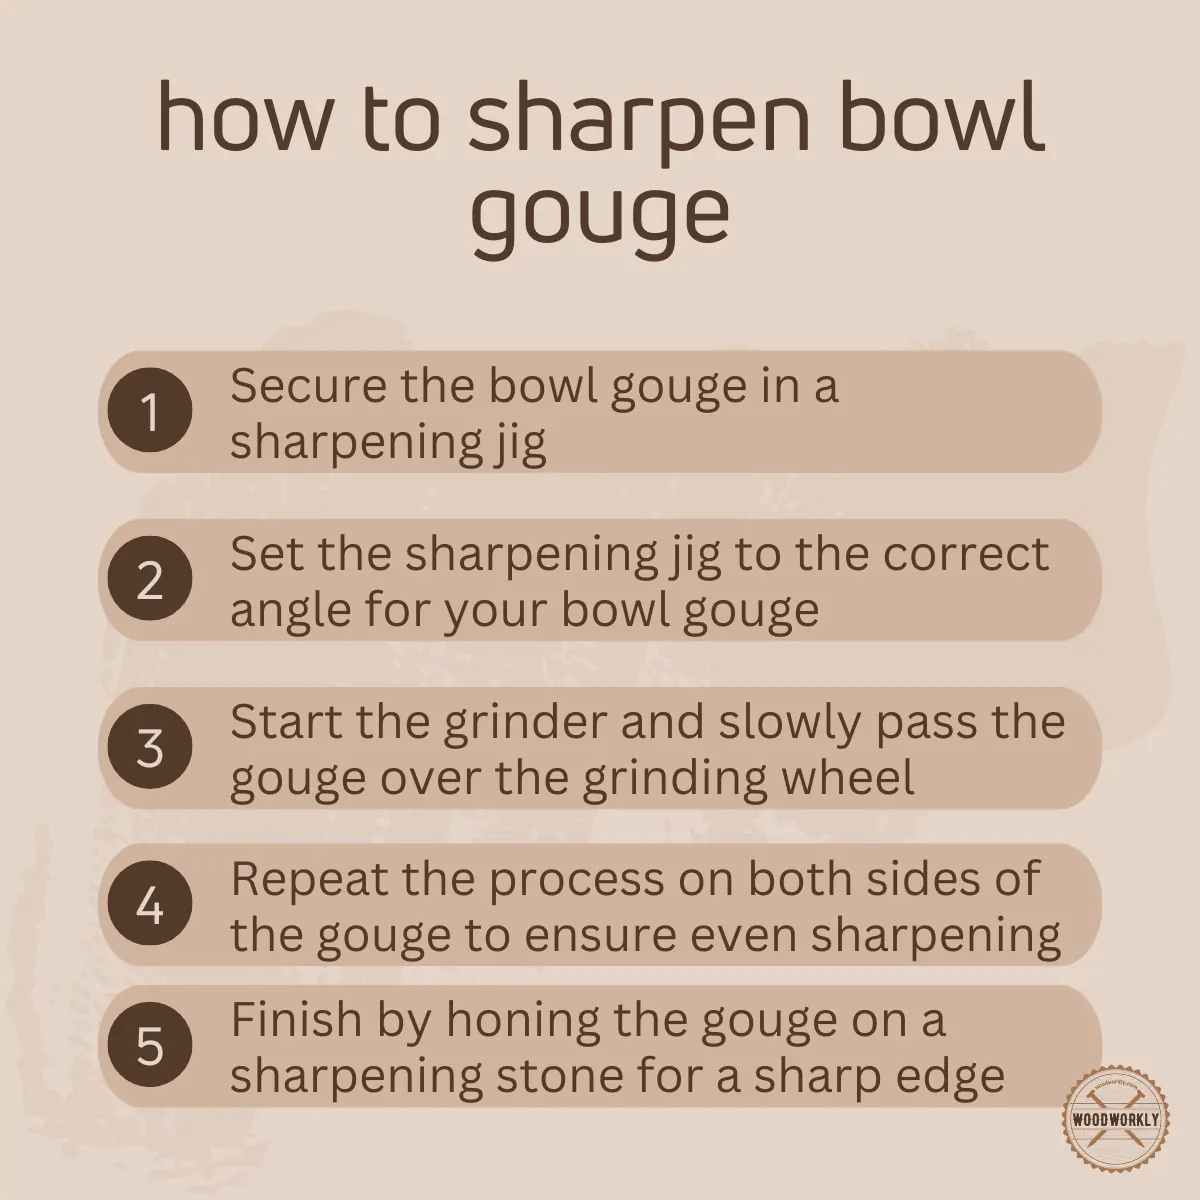
How to Sharpen a Bowl Gouge?
At first, I found the bowl gouge would be the toughest lathe tool to sharpen.
But once you have proper tools and accessories and learning proper techniques it will become pretty easy.
The profile that we use on bowl gouge is Ellsworth grind. It’s a swept-back grind.
According to the basic concepts of sharpening tools like bowl gouge, which has very little roll to it, but a very large percentage of sweep to the back we need to follow a specialized method for the sharpening process.
Keeping this roll and sweep by hand when sharpening is really difficult. This is why we go for a one-way jig system.
The basic pocket and the very grind attachment. In very grind attachment, that’ll let you control the amount of roll or sweep.
When we sharpen a bowl gouge, remove the leg down which is available in grind attachment, towards the bottom.
That’ll introduce more sweep side to side with just a slight amount of roll.
Tools you need,
- Ellsworth Grind
- Bowl gouge
- Jig system
- Grind attachment
Steps to Sharpen a Bowl Gouge
- Place the bowl gouge into the very grind jig and tighten it down slightly.
- Get a certain distance between the tip of the bowl gouge and the base of the jig. In order to achieve this, you can use a wooden block that is drilled out with a foster bit. So, it gives us a flat bottom. It’s one and three-quarters inches deep, which is the projection that we need for the tool.
- Next, take and place the block of wood against the tip of the bowl gouge. We bottom the bowl gouge out against the block of wood and push it against the base of the jig and tighten the screw. This will give us our desired one and three-quarters inches projection. (It can be 2 inches as well because it’s just got to be repeatable each time you go to sharpen the tool.)
- Then place the very grind jig into the pocket and place the bowl gouge against the wheel. Always make sure to place the tool, to get the bevel flush against the wheel. We can do this by marking the front of the bevel using a marker.
- Once we place bowl gouge against the wheel and we turn the wheel with our hand. Then here you’ll notice the markers remove cleanly from the top of the bevel to the bottom. This assures us that the bevel of the tool resting flush against the wheel.
- Take the jig out and turn on the grinding wheel.
- Wait till it comes up to speed and then place the jig into the rest and lightly touch the tool against the wheel.
- Do the grinding by starting from one side, lift the tool from the sharpening wheel, go to the other side, and then once we have both sides sharpened, then we will touch the nose and work it back and forth. That way we have control of the profile we want to achieve.
- Continue the process until you get a really nice sharp bowl gouge with the swept-back that we want.
From this process, we’ll be able to maintain the nice fingernail grind at the front of the bowl gouge that we’ve worked so hard to achieve.
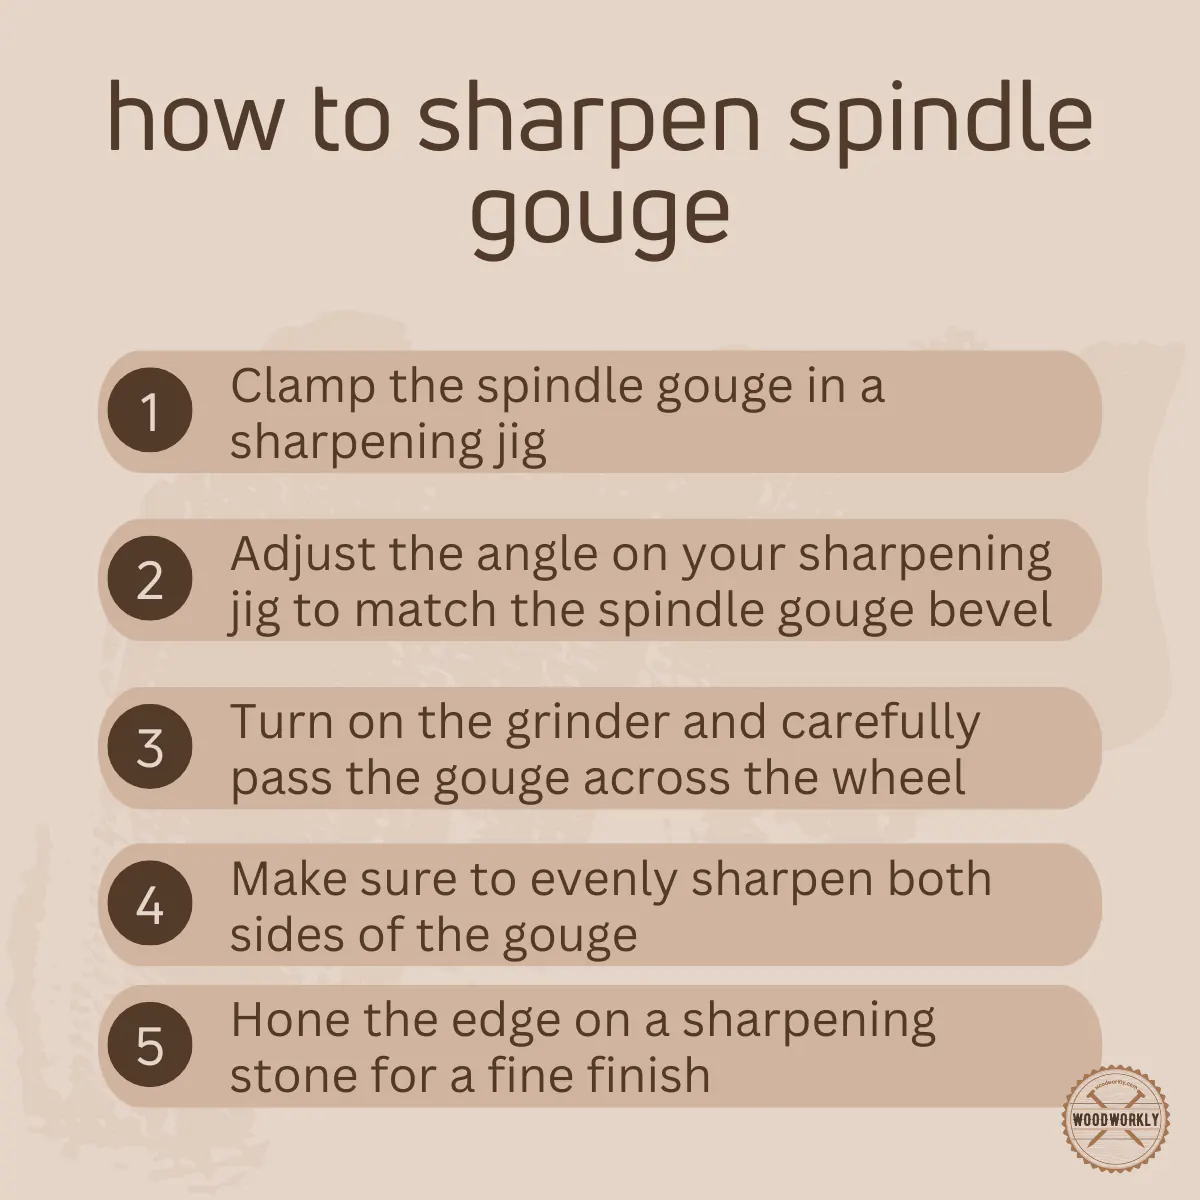
How to Sharpen a Spindle Gouge?
Spindle gouge is known as one of the most difficult tools to sharpen, because of having a compound bevel.
There is more involved than just roll. There is a minor rounding in the front and there is a large area of sweeping towards the back.
So, we not only need a method to be able to sharpen this compound shape, but we have to replicate the process each time.
The best method to do this is by the Jake system with a very grind attachment.
Depending on how you set up the very grind jig, it can give us a rolling motion with a slight swept back as with spindle gouge.
By setting up the leg in the top position of the jig give us the best result for the spindle gouge. It gives us more roll, but a slight sweep side to side.
Tools you need,
- Ellsworth Grind
- Spindle gouge
- Jig system
- Grind attachment
Steps to Sharpen a Spindle Gouge
- Place the bowl gouge into the very grind jig and tighten it down slightly.
- Get a certain distance between the tip of the spindle gouge and the base of the jig. In order to achieve this, you can use a wooden block that is drilled out with a foster bit. So, it gives us a flat bottom. It’s one and three-quarters inches deep, which is the projection that we need for the tool.
- Next, take and place the block of wood against the tip of the spindle gouge. We bottom the bowl gouge out against the block of wood and push it against the base of the jig and tighten the screw. This will give us our desired one and three-quarters inches projection. (It can be 2 inches as well because it’s just got to be repeatable each time you go to sharpen the tool.)
- Take a marker and draw a solid line on the bevel.
- Then place the very grind jig into its base and try to line up the bevel of the spindle gouge by moving the base of the jig in or out.
- Once we place bowl gouge against the wheel and we turn the wheel with our hand. Here you’ll notice that the marker is completely removed from the bevel. This indicates we have our toolset at the proper angle.
- Turn on the grinding wheel and wait till it comes up to speed.
- Then start the sharpening spindle gouge, by touch one side of the spindle gouge o the wheel, rotate the tool, and right before we reach the tip lift the tool off of the wheel, then rotate the tool over, touch the other side of the tool to the wheel and once again when we rotate towards the tip before we reach the tip, again lift the tool off of the wheel.
- Now position the tool so that the flute is facing up.
- Touch the tip gently to the wheel and roll back and forth and then control the shape of the tip of the tool.
At the end of the process, you’ll be able to get a nice and sharp spindle gouge.
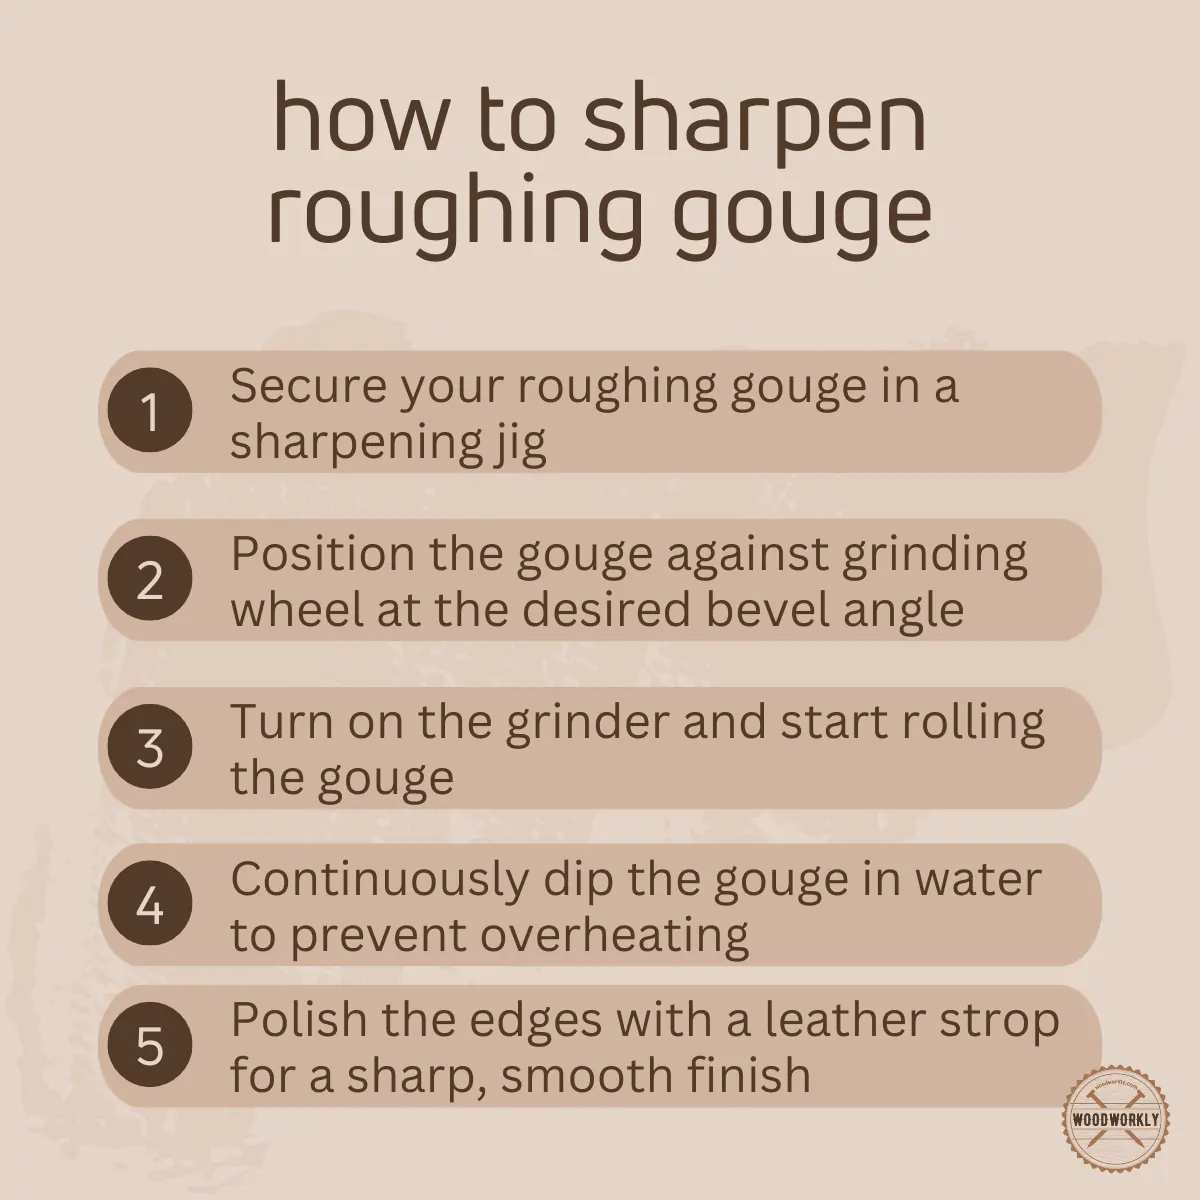
How to Sharpen a Roughing Gouge?
Roughing gouge is known as one of the easiest tools to sharpen.
Tools you need,
- Ellsworth Grind
- Spindle gouge
- Jig system
- Grind attachment
Steps to Sharpen a Roughing Gouge
- Insert the sharpening jig.
- Rest the roughing gouge with the bevel of the tool resting on the grinding wheel.
- Now make sure that you get the bevel of the tool aligned right with the grinding wheel. You can do this by marking a solid line on the bevel of the roughing gouge and place the tool back into the jig with the bevel resting on the grinding wheel.
- Now turn the wheel using your hand and take the tool out and examine the roughing gouge. Here you’ll be able to see how the mark was removed completely from the bevel. This means our tool is set at the proper angle.
- Now start the grinding after placing the tool as before onto the grinding wheel.
- When we are sharping roughing gouge, we do roll action from side to side. Simply roll over, roll it back and forth.
- Then turn on the grinding wheel and wait till it comes up to speed. Gently touch the tool to the wheel and spin it back and forth.
- After a few light passes, you’ll be able to get a great edge.
This is the way of sharpening a roughing gouge which is relatively easier than bowl and spindle gouge methods.
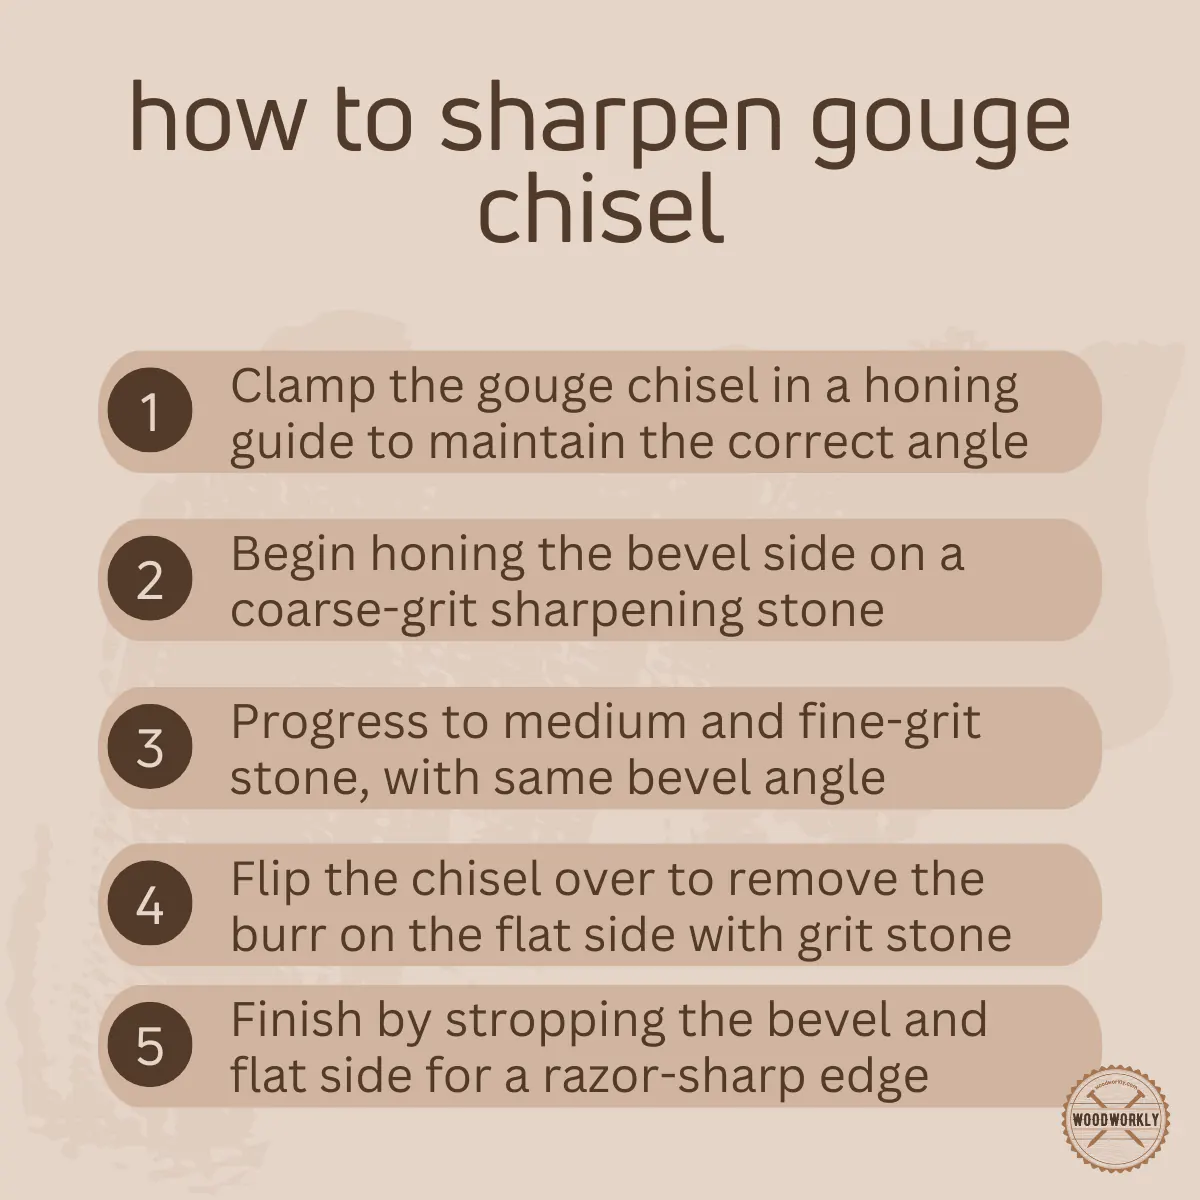
How to Sharpen a Gouge Chisel
First, it’s crucial to understand what makes a gouge chisel special. This chisel comes with a curved cutting edge, making it perfect for carving round hollows and grooves in wood.
Just imagine the magnificent sculptures you can create once you master this tool!
Essential Tools for Sharpening
When it comes to sharpening a gouge chisel, you need a few essential items:
- Sharpening Stone: A wet stone or diamond stone will be your go-to for this task.
- Slipstone or Honing Cone: These are smaller, rounded stones designed for the inner curve of the gouge chisel.
- Leather Strop: To put that final polish on your tool.
- Honing Oil or Water: This is to lubricate the sharpening stones.
The Sharpening Process of Gouge Chisel
Here’re the steps you need to follow when sharpening the gouge chisel,
- prepping the stone
- Working on the outer curve
- Tackling the inner curve
- Polishing it up
So, let’s talk about each of the above steps in detail to ease your gouge chisel sharpening process.
Prepping the Stone
If you’re using a wet stone, let it soak in water for around 10 minutes. Diamond stones only require a small amount of water or honing oil.
Working on the Outer Curve
Hold your gouge chisel at an angle against the stone, ensuring the cutting edge is flat.
Use a smooth, sweeping motion to move the chisel back and forth, making sure the full curved edge interacts with the stone.
Tackling the Inner Curve
Here’s where you need a bit of skill – sharpening the inner curve.
Wet your slipstone or honing cone with honing oil or water and rub it carefully along the inside of the gouge. Remember, practice makes perfect.
Polishing It Up
Finally, it’s time to polish your chisel with the leather strop.
This step is to remove any remaining burrs and give your tool a clean, sharp edge.
Pros and Cons
There’s no denying that sharpening a gouge chisel comes with its advantages and disadvantages.
Pros:
- Precision: A sharper tool means more accurate cuts and grooves.
- Effort: With a sharper edge, you won’t need to exert as much force, making your work easier.
- Safety: Believe it or not, sharp tools are safer because they’re less likely to slip.
Cons:
- Time Investment: Sharpening takes time, particularly if you’re a newbie.
- Skill Needed: Sharpening, especially the inner curve, requires a certain level of skill and practice.
So, that’s all about sharpening a gouge.
We have discussed the best sharpening methods of bowl gouge, spindle gouge, roughing gouge, and gouge chisel using unique methods and techniques.
So, let’s answer some frequently asked questions.
FAQs
What type of sharpening stone is best for my gouge chisel?
Either a wet stone or diamond stone works well, but diamond stones require less maintenance and provide a fast, effective sharpening experience.
How do I know if my gouge chisel is sharp enough?
If your gouge chisel cuts cleanly and easily through wood without requiring too much force, it’s sharp enough. Struggling and straining suggest it might be time for a sharpen.
Can I use a standard flat stone to sharpen the inside of my gouge?
It’s recommended to use a rounded slipstone or honing cone, as these are designed specifically for the inner curve of a gouge chisel.
Why is the leather strop necessary in the sharpening process?
A leather strop helps to remove any remaining burrs and gives your chisel a clean, sharp edge, which leads to precision in your work.
How often should I sharpen my gouge chisel?
Frequency of sharpening depends on use, but a good rule of thumb is to sharpen your chisel when you start to notice it’s requiring more force to cut.
Is sharpening a gouge chisel hard to learn?
Sharpening any tool can take practice, but with patience and consistency, you’ll find the process becoming easier over time.
Did I cover all you wanted to know about: How to Sharpen a Gouge?
From this article, I have widely discussed, How to sharpen a gouge by hand, how to sharpen a gouge with a grinder using standard methods.
Apart from that, I’ve discussed the specialized methods of sharpening gouges such as bowl gouge, spindle gouge, roughing gouge, and gouge chisel.
You can sharpen a gouge using abrasive paper, stones, or diamond plates. Steps to sharpen a gouge are sharpening, honing, and stropping. The target of sharpening a gouge is to produce sharp edges inside of the bevel of the gouge which uses for cutting. By maintaining bevel angles, shape cutting edges you can get good sharpening.
The tricks and techniques that I’ve discussed in the article will be very useful for you especially when you’re a beginner.
So read and practice them out.
Hope you have learned great information from this article about the accurate process of sharpening a gouge.
So, let’s give it a try. Hope you’ll get the best results which use for your woodworking and woodcarving projects.