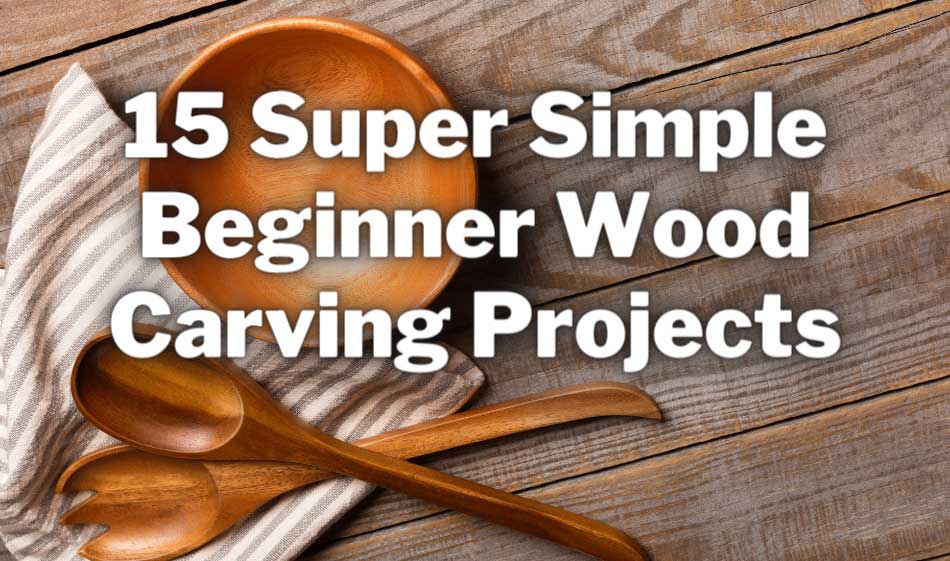
New to wood carving and looking for simple projects to start with? Uncover beginner-friendly projects in our latest guide, designed to spark your creativity and skill. Are you ready to carve your path in woodworking?
There’s something always so pleasant about building something out of nothing. This is why I think woodcarving is one of the greatest hobbies for any person.
You can create whatever you wish which feel proud and accomplished every time you see your project. Plus, it’s a great way to decorate your home while staying under the budget.
Many people who are new to wood carving get too cocky because they tend to start with big projects and unfortunately finally end up with nothing only frustration.
The main reason for this issue is following non-reliable unbalanced tutorials and guides which are not actually for beginners. Most of them don’t even cover the basic steps of wood carving.
As a full-time, woodworker, before I started my wood carving carrier, I did some research to find out What Beginner Wood Carving Projects everyone can follow easily with a lot of new techniques.
From this article, we’re going to talk deeply about 15 Beginner Wood Carving Projects.
- Wood carving spoon
- Whittling a simple bunny
- 5-minute wizard
- Whiskey barrel
- A flower
- An owl
- Carve a heart
- A cat
- Carve a simple bowl
- Carve Chopsticks
- Whittling a mushroom
- Gnome
- Whittling a fox
- Whistle
- A Walking stick

I’m going to cover up all the above wood carving projects with,
- Estimated time needed for the project
- What wood is best for the project
- What tools you need
At the end of this article, you’ll be able to figure out what woodcarving project you should start with which can lead to your wood carving carrier goals.
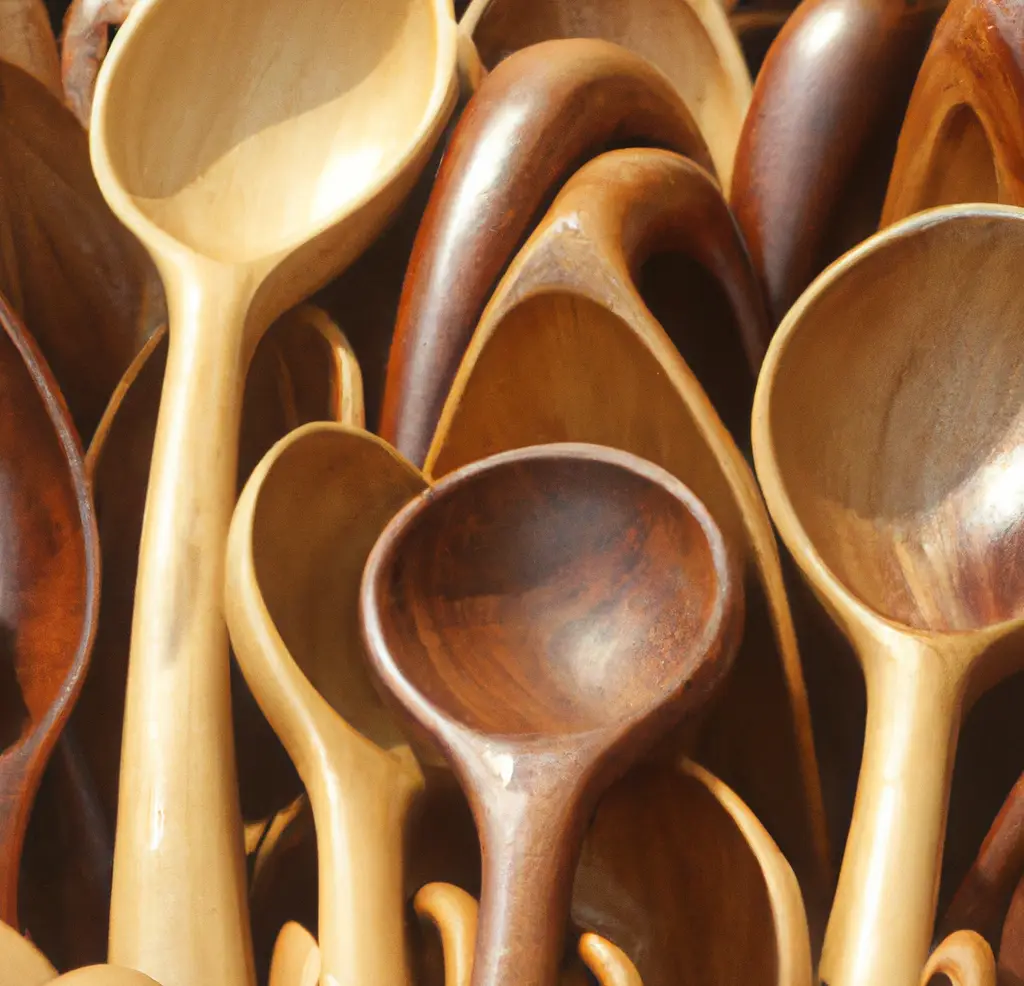
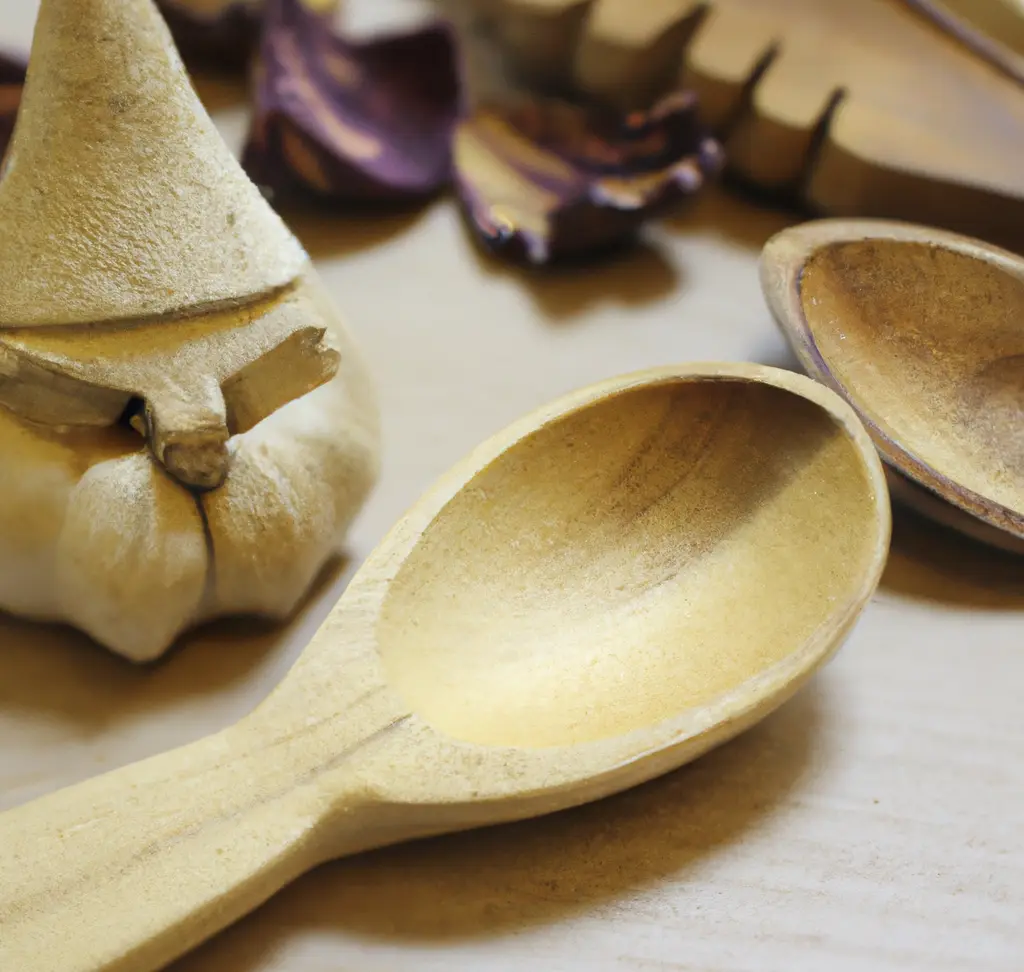
1. Wood Carving Spoon
Estimated Time Needed: 2 Hours
Carving a spoon is one of the simplest wood carving projects you can start with. You can use the spoon for selling, for yourself, or give it as a gift. To make spoon whittling or knife carving is the method that you should go with.
There are a lot of modifying features and techniques are available for wooden spoons. You can do different decorative methods to make it more attractive.
This is why most people tend to start their first wood carving project by making spoons. Because you can easily get nice appealing and can learn a lot of beginner stuff as well.
When you feel comfortable with wood carving after several projects, mostly you’ll feel to carve the spoon soon again.
At that time, you can apply different shapes which are far more complicated and advanced than your previous project.
Also, you can minimize the mistakes you have done with earlier wooden spoon carving projects.
In my point of view, carving a spoon is like an experiment you can learn a lot of new things about knife carving and can get a great experience with lots of fun.
Best Wood for Carving Spoon:
Hardwoods, such as
- Poplar
- Paper Birch
- Maple
- Cherry
- Black Walnut
- Apple
Tools needed for Carving Spoon:
- An axe
- A chunk of wood with a little larger than the spoon size you going to make.
- Sharp carving knives with straight knife and sweep or rounded gouge.
- Pen, pencil, or maker.
- Food-safe wood finisher.
- 120,220, 400 grit sandpapers
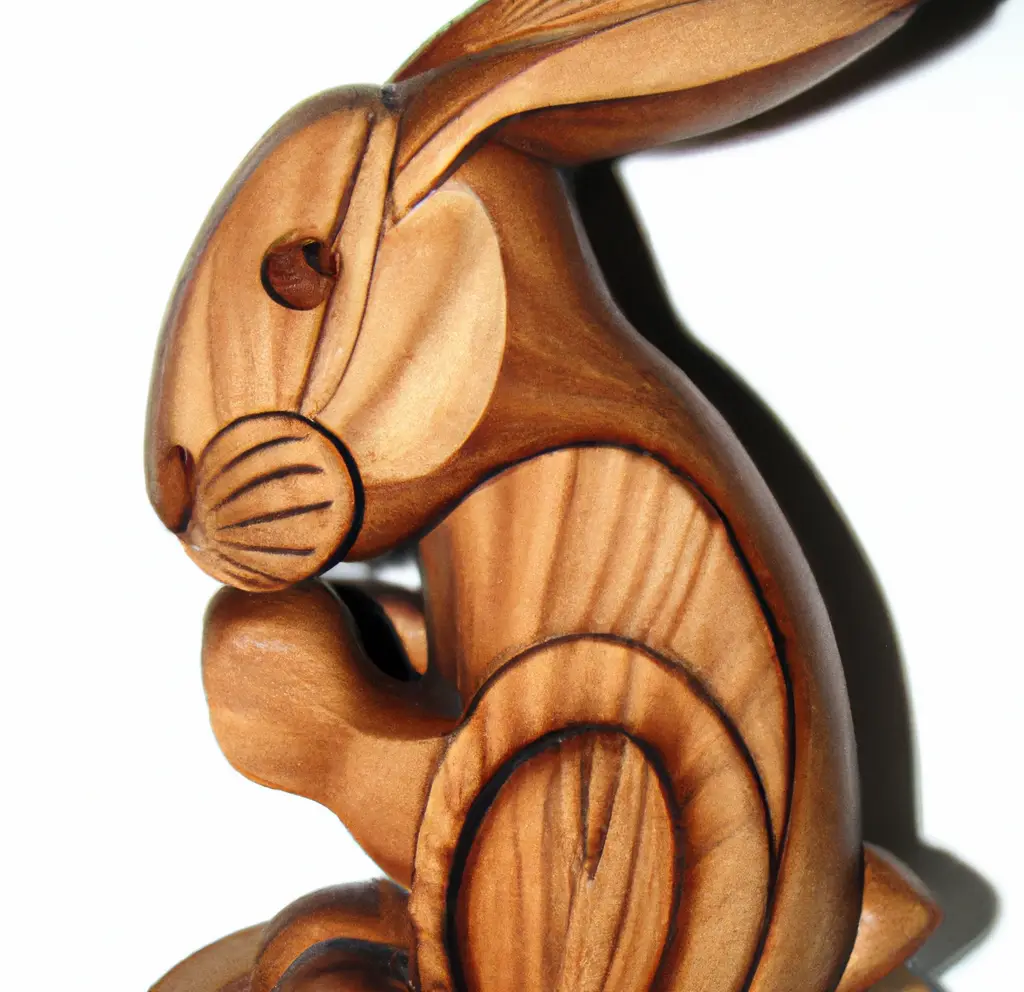
2. Whittling a Bunny
Estimated Time Needed: 30 minutes
This is a simple and interesting wood carving project, a simple bunny that can finish within 30 minutes even for beginners.
A Carved rabbit can be a lovely heartwarming gift for your loved ones which is perfect as a desk statue.
Whittling or knife carving is the method that we use for this project. Carving rabbits is known as one of the easiest carvings.
Also, you don’t need to have many materials or tools for this project. This is why I highly recommend whittling a simple bunny to anyone just getting into wood carving.
There are lots of small cuts you will have to make in this project. They are simple. But you need to have a sharp knife to get a satisfying result.
In delicate things, mostly good to do a higher number of small cuts leading up your line, rather than 2-3 large cuts.
This first step is to scratch your bunny with simple outlines and follow the process. For the smoothing and finishing, part linseed oil or olive oil is perfect. It’s non-toxic and no harmful fumes.
Best Wood for Whittling Bunny:
Softwoods such as,
- Basswood
- Pine
- Cedar
- Aspen
- Butternut
- Balsa wood
Tools needed for Carving Rabbit:
- A chunk of wood with a little larger than the rabbit size you going to make.
- Sharp whittling knives with a straight knife.
- Pen, pencil, or maker.
- Olive oil or Linseed oil as Finisher
- Protective gloves
- 220 grit sandpaper
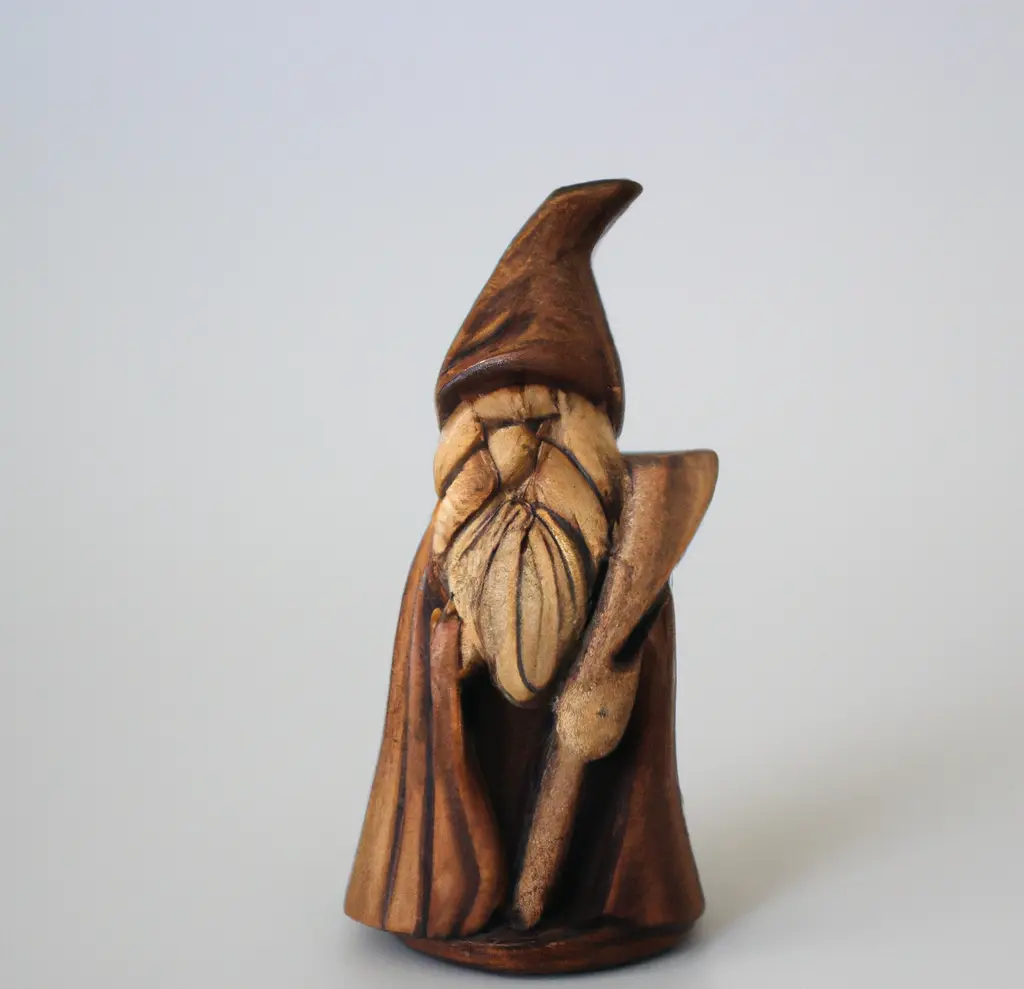
3. 5-Minute Wizard
Estimated Time Needed: 5 to 30 minutes
Yes, you read it correctly. To make all the basic cuts only takes 5 minutes only.
That’s why this wonderful wood carving project is called the 5-minute wizard. But to finish the whole process you’ll definitely need much more time.
Actually, that’s not the case, you need to start carving the 5-minute wizard by taking as much time you want.
With practice, one day you’ll be able to do this even less than 5 minutes. So, give it a try!
After learning to make a 5-minute wizard and practicing it few more times, you’ll be able to explore a new area in wood carving with sculptures. You can then go ahead and do Santa Claus, hillbilly, gnome, or whatever.
Most importantly you can carve a nice project with only using only a few tools as a beginner.
All you have to make sure is the knife is sharp enough. Because you need to put thick deeper cuts to do the wizard’s beard.
The nose and eyes are the parts that you should concern more. Because sometimes you can end up taking out the nose or no lining right. To correct that, practice the nose and eyes parts over and over a few more times on all 4 corners until making it right. Practice makes you perfect.
For better blade control: place your thumb on the knife blade back and push it forward to any direction you want by applying force to the thumb.
Best Wood for 5-Minute Wizard:
Softwoods such as,
- Basswood
- Pine
- Cedar
- Aspen
- Butternut
- Balsa wood
Tools needed for 5-Minute Wizard:
- Wood stick with little larger than the wizard size you going to make.
- Sharp whittling knives with a straight knife.
- Pen, pencil, or maker.
- Olive oil or Linseed oil as Finisher
- Protective gloves and thumb guard
- Small V shape tool for better shaping of beard. (optional)
- 220 grit sandpaper
- Paintbrushes
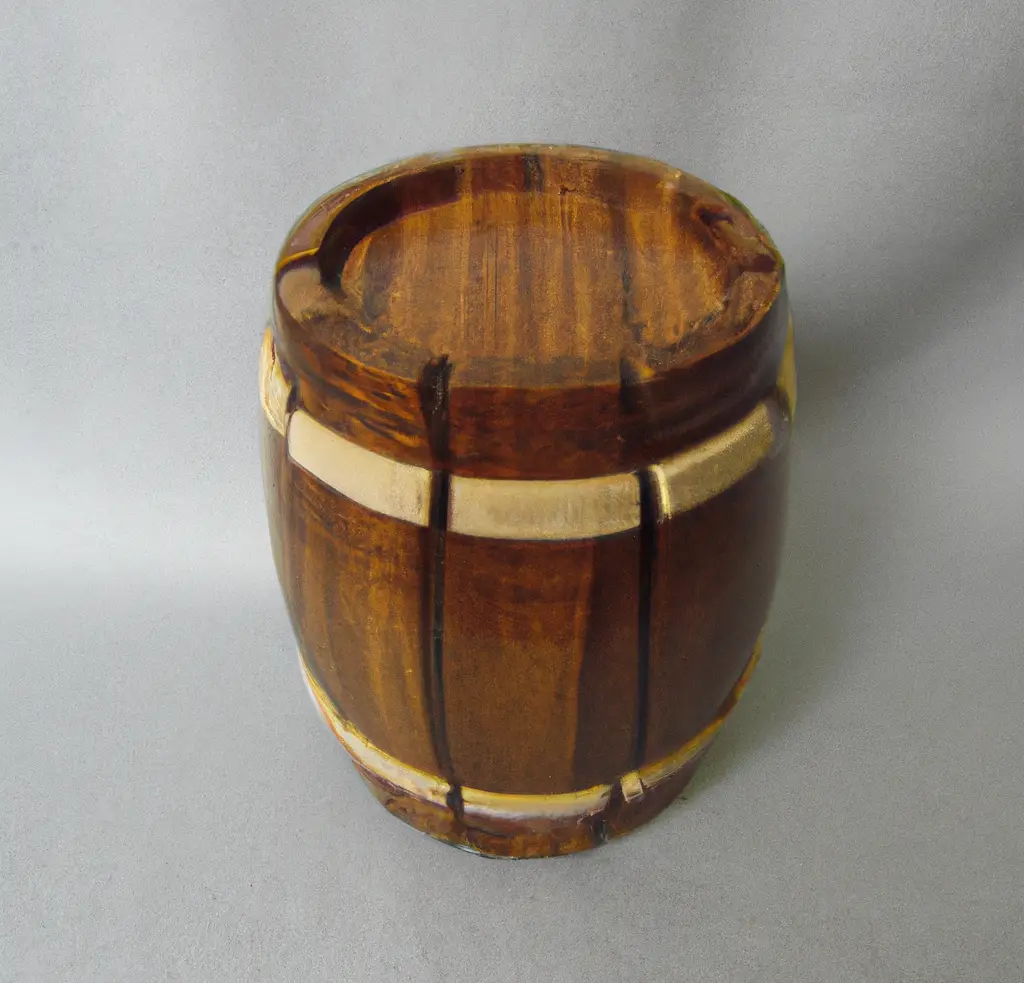
4. Whiskey Barrel
Estimated Time Needed: 45 minutes
The whiskey barrel is also an excellent selection for your first wood carving project. The interesting part is you can use it to take a shot after it’s finished and it’s fun.
The barrel carves using a more hook knife which holds the liquid. After the barrel part, it was shaped and decorate the barrel with a small rough pocket knife.
The final result can be finished with tung oil or linseed oil and let dry for few days.
A carved whiskey barrel is a perfect desk statue for your liquor label or as a hobby. They are an incredible gift for any spirits or whiskey lover.
Best Wood for carving Whiskey Barrel:
- Birch
- Basswood
- Pine
Tools needed for carving Whiskey Barrel:
- A wood chunk with a little larger than the wizard size you going to make.
- Sharp whittling knives with a straight knife and pocket knife
- Pen, pencil, or maker.
- Tung oil or walnut oil as Finisher
- Protective gloves and thumb guard
- 400 grit sandpaper
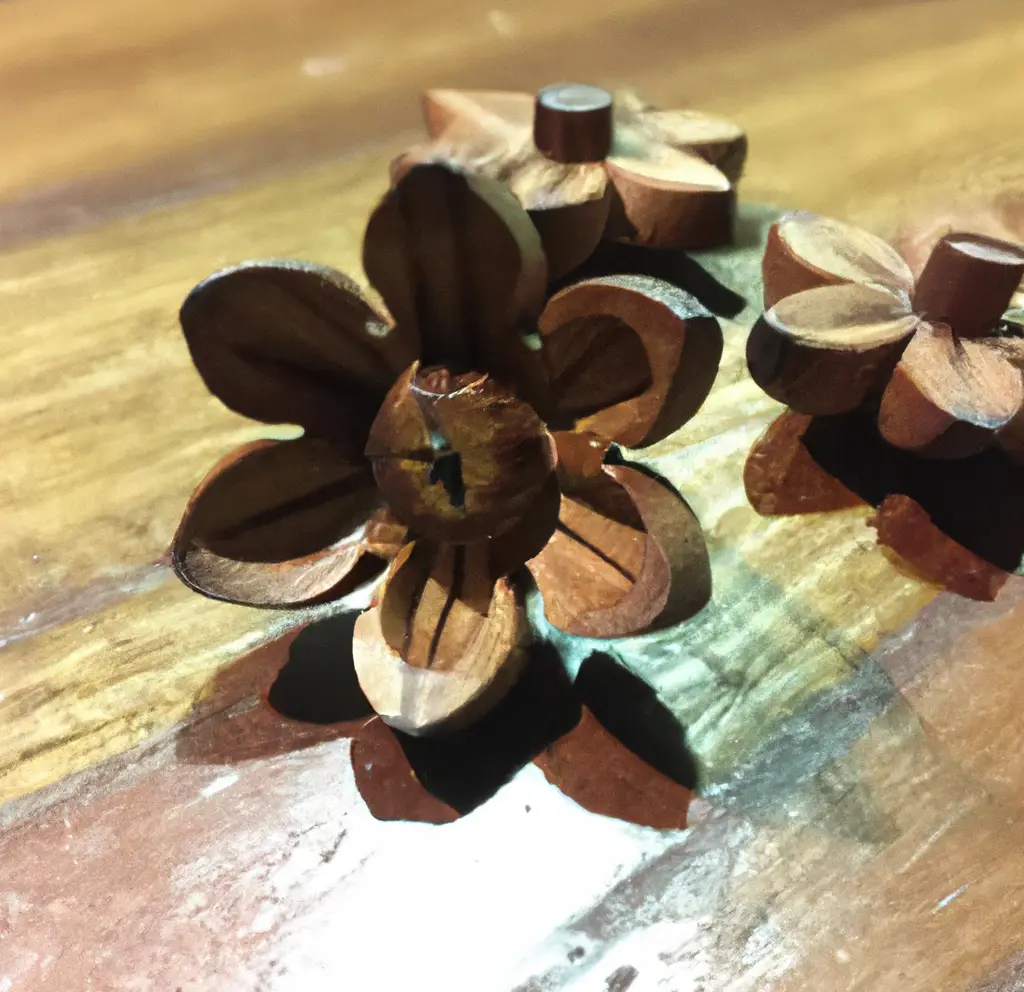
5. Whittling a Flower
Estimated Time Needed: 30 minutes
The whittling flower is a great piece of beginner wood carving projects that every beginner should try. There are different methods you can try to carve a flower.
So, I recommend you follow all the different methods to carve beautiful wooden flowers.
First of all, you need to draw the flower with petals to get an idea of its basic shape. Then transfer what you have drawn in the sheet to the wood chunk.
By doing this you’ll be able to get a clear idea about its dimensions and also you can remove the excess parts from the wood chunk as well.
This makes the wood easy to handle.
Then you can start the carving which is the most interesting thing.
Tip: Try to maintain the cutting angle to 85 degrees and not 90 degrees.
Because, when you’re going down if any mistakes happen, it is so much hard to fix if you got the cutting angle of 90 degrees at the beginning. After removing the piece by cutting 85 degrees, make the final cut with 90 degrees.
You can get the flower that you have drawn in sheet as a 3d model with carving with zero differences by regularly looking at the sheet you drew and comparing it while you working on it.
Best Wood for Whittling a Flower:
Softwoods such as,
- Basswood
- Pine
- Cedar
- Beech
- Butternut
- Balsa wood
Tools needed for carving a Flower:
- A chunk of wood with a little larger than the flower size you going to make.
- Sharp whittling knives with a straight knife.
- Paper to draw.
- Ruler
- Pen, pencil, or maker.
- Olive oil or Linseed oil as Finisher
- Protective gloves
- 220 grit sandpaper
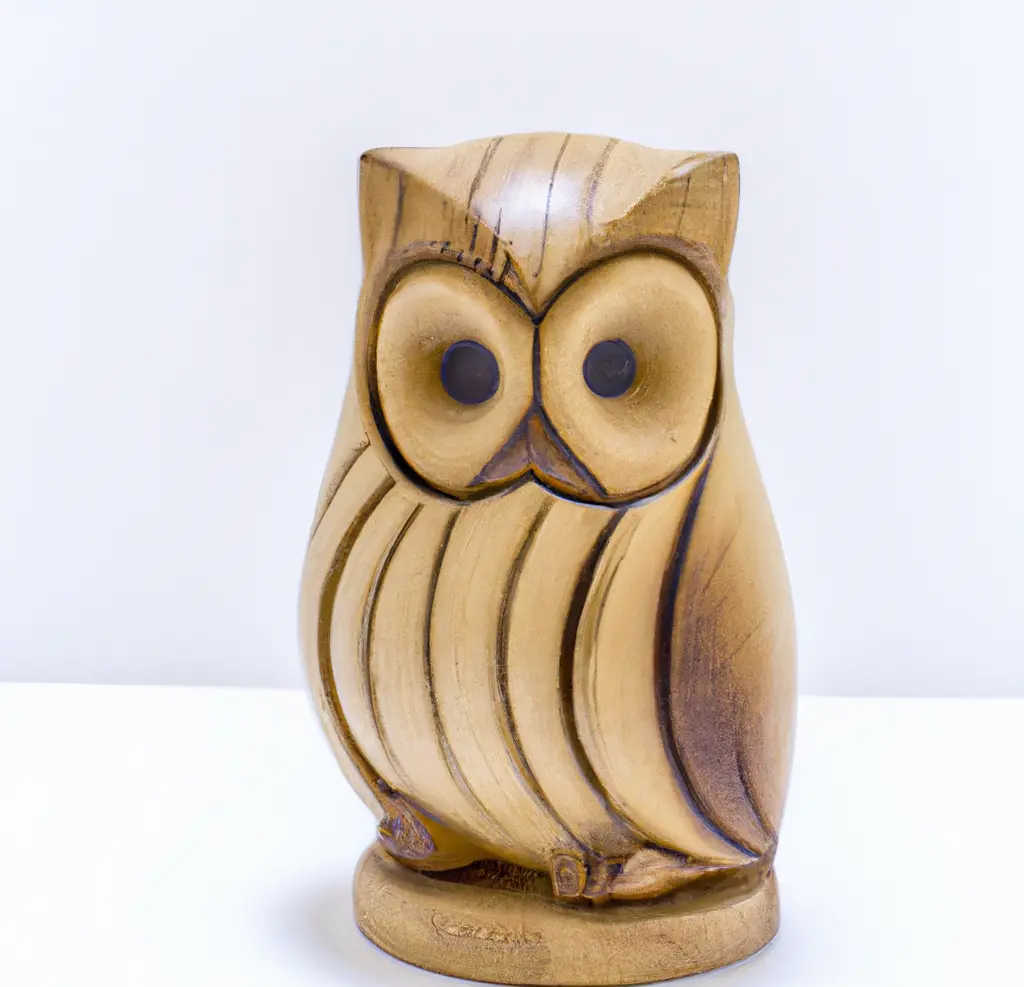
6. Carve an Owl
Estimated Time Needed: 50-60 minutes
Yes, I know what you’re thinking. Carving an owl is an advanced project with lots of stuff to do. It needs a lot of practice and patent with techniques and not recommend for a beginner.
Actually, that’s partially true, if you think to carve an owl with complex shapes and modifications in the first place, that is pretty much hard. Because you don’t have much experience yet.
But how about carving an owl that has basic shapes with simple techniques? That’d be interesting right.
Making a simple owl today with easy shapes as a beginner will be an added advantage to carve an owl with more advanced techniques and shapes in the future.
The interesting part is you can do the whole carving project with a knife only and a little bit better than some of those you have seen on the internet.
After the carving is done you can add feathers and other textures using the paint to make it look more attractive. Apply boiled linseed oil to seal it.
Best Wood for Carving an Owl:
Softwoods such as,
- Basswood
- Pine
- Cedar
- Beech
- Butternut
- Balsa wood
Tools needed for Carving an Owl:
- A chunk of wood with a little larger than the owl size you going to make.
- Sharp whittling knife.
- Pen, pencil, or maker.
- Linseed oil as Finisher
- Protective gloves
- 220 grit sandpaper
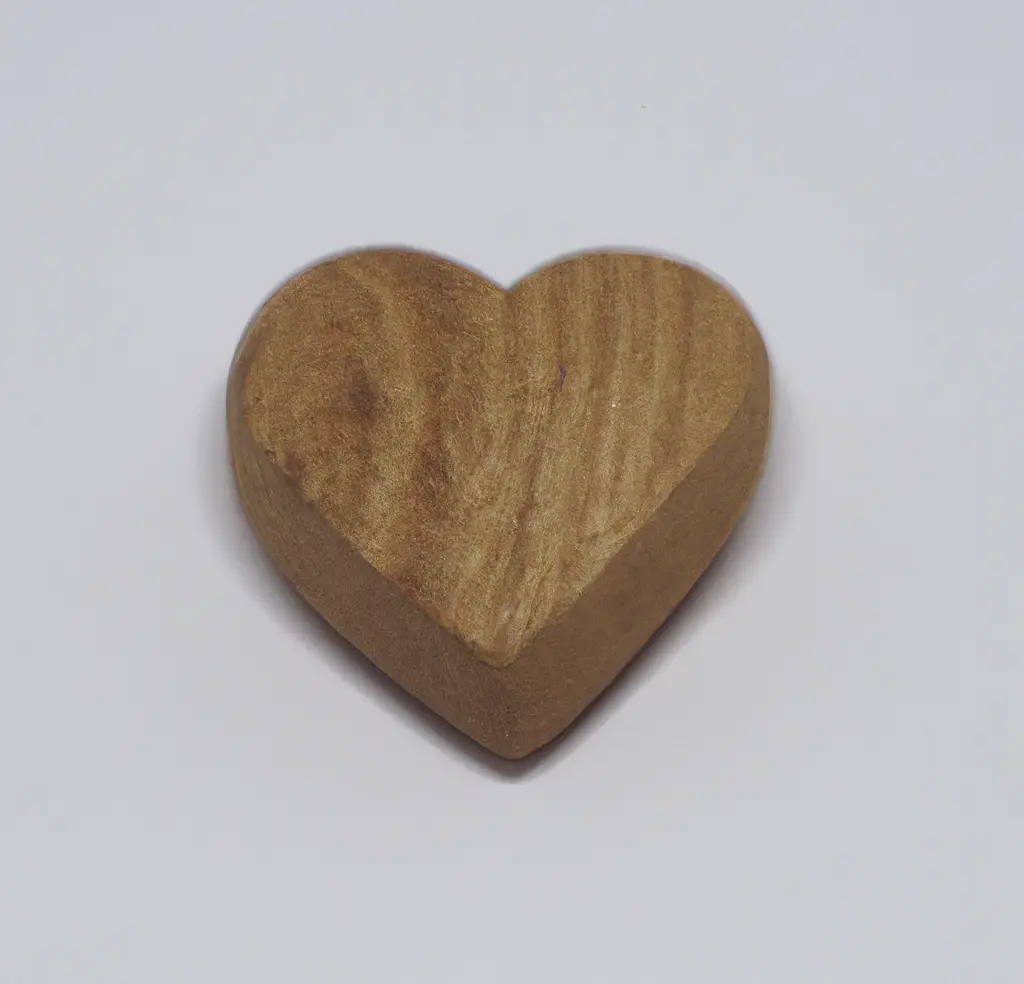
7. Carve a Heart
Estimated Time Needed: 20 minutes
Are you a beginner in woodcarving who wishes for the perfect Valentine’s gift or birthday gift for your soulmate or someone you love? Why don’t try giving a handmade wooden heart as a pendant?
The value so high because this is 100% made by yourself. This is a fun little project for you to kind of play around and practice some of these techniques and end up with a nice little gift.
You can simply turn a little basswood block into a nice heart with a few cuts and curls.
If you wish to use the carved heart as a pendant better to go for a good finisher. No linseed oil. Because it can tacky in a humid environment.
I recommend going with danish oil. It penetrates into the wood and makes it hard. After applying several coats you’ll be able to get the sheen you want.
Best Wood for Carving a Heart:
Softwoods such as,
- Basswood
- Pine
- Cedar
- Beech
- Butternut
- Balsa wood
Tools needed for Carving a Heart:
- A chunk of wood with a little larger than the owl size you going to make.
- Sharp whittling knife and Roughing knife
- Pen, pencil, or maker.
- Danish oil as Finisher
- Protective gloves
- 220 grit sandpaper
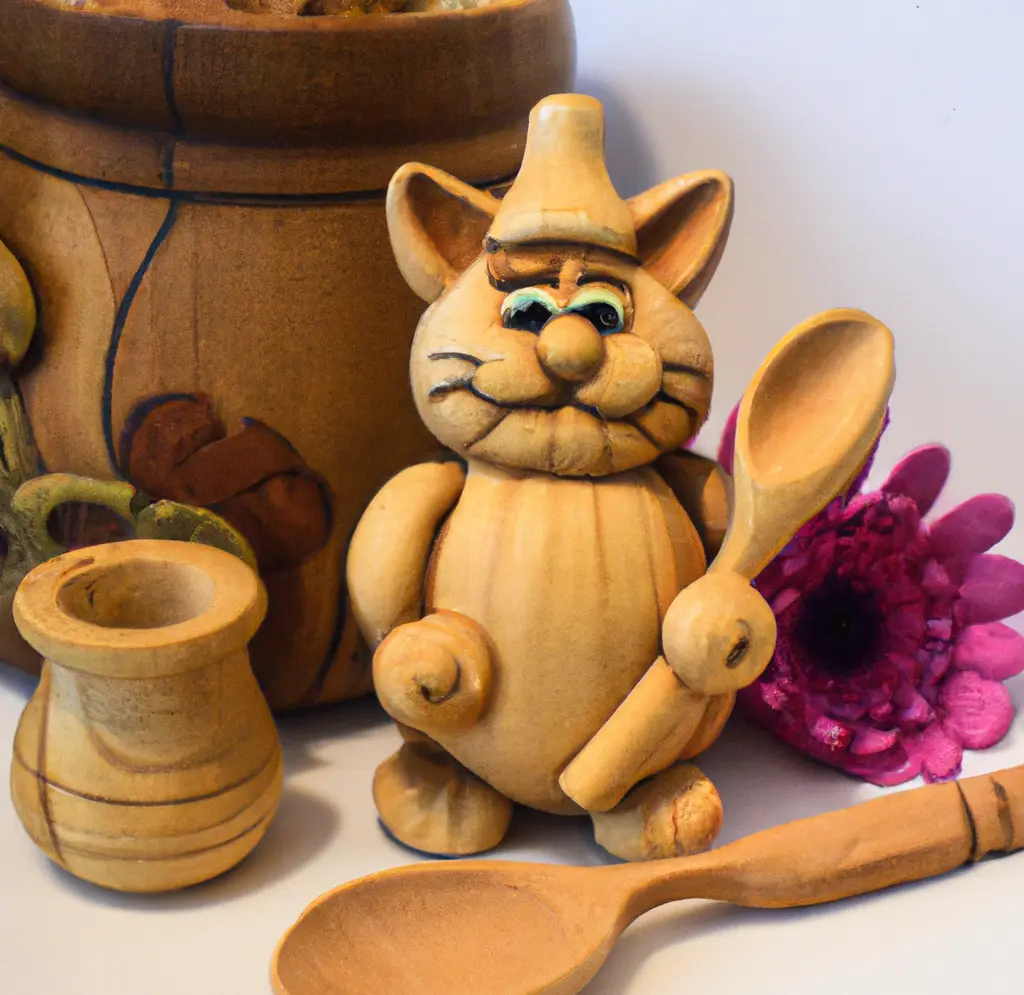
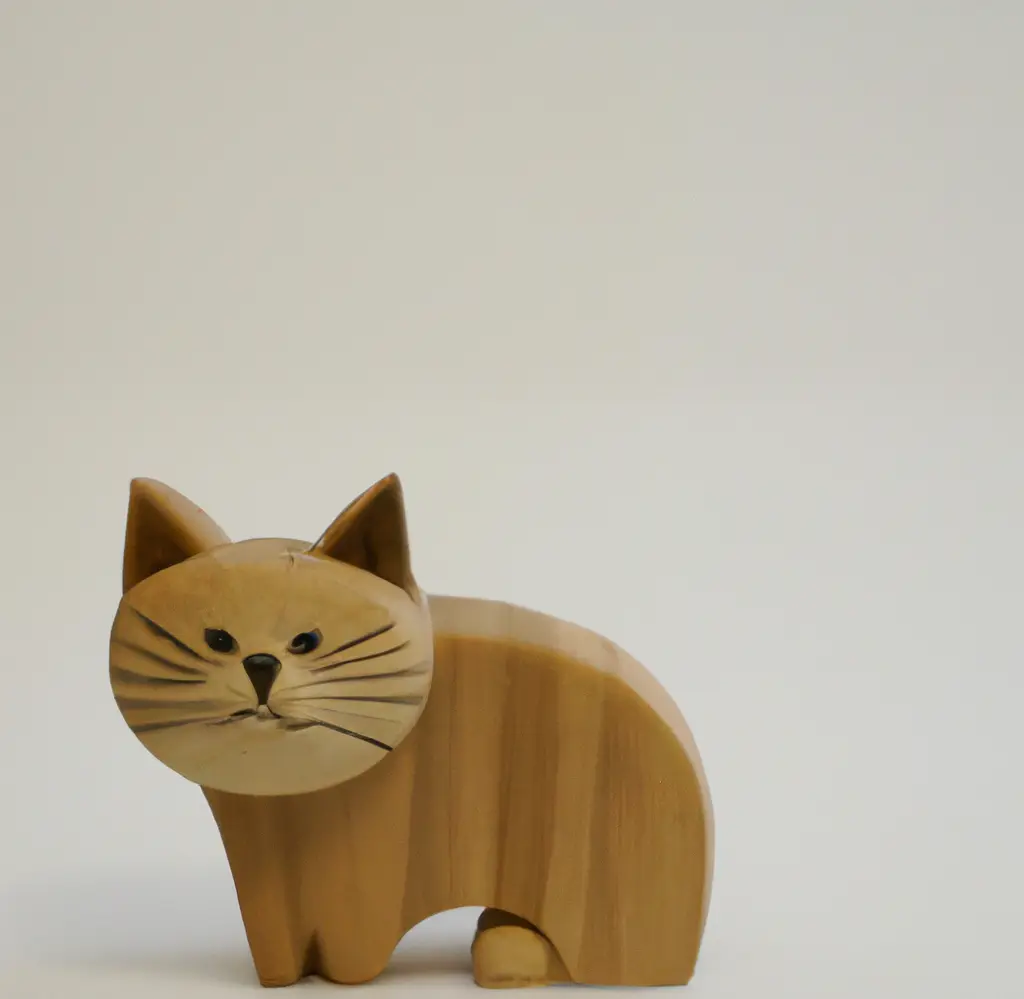
8. Carve a Cat
Estimated Time Needed: 40 minutes
Carving a cat by using a simple block of wood is a project that every beginner should try. There are lots of important techniques you can cover by carving a cat. This is perfect for someone new to whittling.
This is an easy sculpture to inspire and motivate to keep going their carving life.
The main steps you must follow for the process are listed below.
- Draw the simple sketch
- Outline the cuts
- Rough the body
- Shape the back of the head
- Add ears and details
- Add the cattail
- Finish the touches
- Apply the finisher or painting
To complete the whole process, you don’t need any advanced tools or materials, just the whittling knife and a pencil with the wood chunk.
This is an awesome project you can get lots of experience. It’s not about how long it takes to finish, but how much you enjoy the process. So give it a try!
Best Wood for Carve a Cat:
Softwoods such as,
- Basswood
- White Pine
- Cedar
- Beech
- Butternut
- Balsa wood
Tools needed for Carve a Cat:
- A chunk of wood with a little larger than the owl size you going to make.
- Sharp whittling knife and Roughing knife
- Pen, pencil, or maker.
- Danish oil as Finisher
- Protective gloves
- 220 grit sandpaper
9. Carve a simple Bowl
Estimated Time Needed: 2 hours.
Under carving kitchen utensils, carving bowls are a must for beginners. Bowl uses the same principles that we discussed under carving spoon except using large size of wood.
You can use the bowl for selling, for yourself, or give it as a gift. To make spoon whittling or knife carving is the method that you should go with.
There are a lot of modifying features and techniques are available for wooden bowls. You can do different decorative methods to make it more attractive.
This is why most people tend to start their first wood carving project by making bowls. Because you can easily get nice appealing and can learn a lot of beginner stuff as well.
When you feel comfortable with wood carving after several projects, mostly you’ll feel to carve the spoon soon again.
At that time, you can apply different shapes which are far more complicated and advanced than your previous project.
Also, you can minimize the mistakes you have done with earlier wooden bowl carving projects.
In my point of view carving bowl is like an experiment you can learn a lot of new things about knife carving and can get a great experience with lots of fun. Similar goes with carving a spoon.

Best Wood for Carve a Bowl:
Softwoods such as,
- Basswood
- White Pine
- Cedar
- Beech
- Butternut
- Balsa wood
Tools needed for Carve a Bowl:
- A chunk of wood with a little larger than the owl size you going to make.
- Sharp whittling knife and Roughing knife
- Pen, pencil, or maker.
- Danish oil as Finisher
- Protective gloves
- 220 grit sandpaper
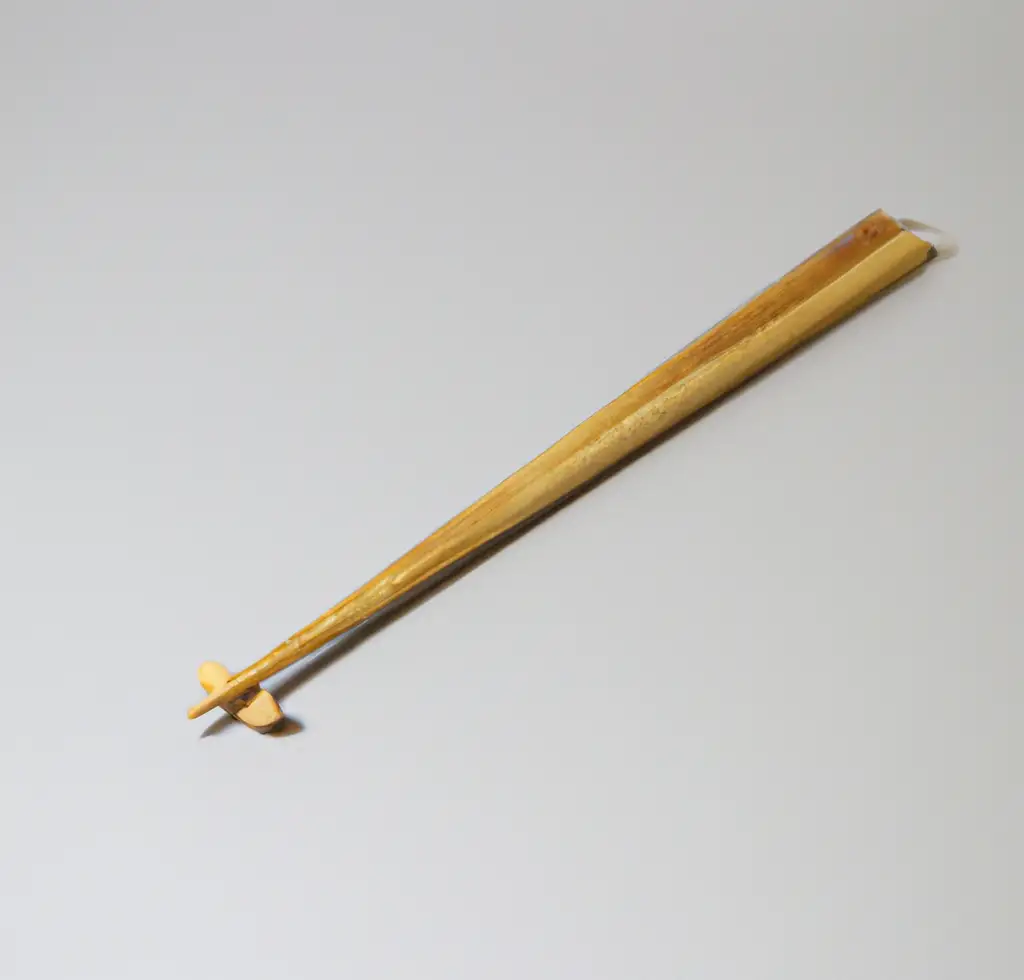
10. Carve a Chopstick
Estimated Time Needed: 30 minutes
Carving a chopstick is a super simple and great project for a beginner to learn lots of new wood carving and whittling skills such as chipping, shaping, and sharpening wood.
Usually, chopsticks are plain, minimal looking, and have no beautiful curves and shapes. But as a wood carver, you can give an artistic look to chopsticks using basic wood carving tools.
Even though chopsticks don’t have sharp edges and hard curly shapes, making them rounded is somewhat challenging.
But with regular practice, you will be able to get a perfectly rounded shaped chopstick with ease.
Plus, making both chopsticks exactly the same is important. This will teach you how to carve an object the same only by watching a previously carved object.
This is an important wood carving skill that is great for a beginner.
If getting a perfectly rounded shape is difficult, you can make both chopsticks flat on each easier side. You’ll become a pro over time with practice.
When carving chopsticks, you’ll have to use sandpapers with different grit values to achieve a super smooth finish with ease.
First, start with relatively coarse grit sandpaper and sand along the wood grain to level the surface.
Then, eventually, go for fine-grit sandpapers and sand with even pressure along the wood grain to get a smooth surface with no scratches. Patience is a must to sand and carves without chipping the wood.
Not like other wood carving projects, smoothness is a significant factor when carving chopsticks since they need to handle and contact our skin for so long. So, comfortless is the key factor when carving chopsticks.
Make sure to carve the wood with even and low pressure to stop the wood from chipping away due to sharp knife edges.
Once you’re done with carving chopsticks, clean and finish the entire surface with a non-toxic, food-safe finisher to enhance the appearance and protect from water damage.
Tung oil, Danish oil, and Teak oil are the best oil-finish options for finishing chopsticks, but you’ll have to wait for around 30 days until they are fully cured.
Polyurethane is also great to use as a wood finish which should apply properly with no mistakes.
Water-based finishes are also fine and curing time can take up to 20 days.
Best Wood For Carving Chopsticks
- Basswood
- Cherry
- Birch
- Walnut
- Maple
- Pine
- Aspen
Tools Needed For Carving a Chopstick
- Wood chunk larger than the size of the chopstick you going to make
- Sharp whittling knife
- Pen, pencil, marker
- Oil-based or water-based finisher
- 120 grit, 220 grit, and 320 grit sandpapers
- Ruler
11. Whittling a Mushroom
Estimated Time Needed: 50 minutes
Whittling a mushroom is one of the simplest wood carving projects. But you’ll learn how to get smooth curve shapes and how to carve wood to get the shape of an umbrella.
First, take a piece of a wood little bit bigger because you’ll have something to hold on to. Then turn it up, down and find the center and mark it using a pencil.
We’re going to carve the mushroom around the center point of the wood.
Then mark a line around the wood chunk below one and a half from the top side. Then take the wood bark off using the whittling knife.
Make sure to chip the wood keeping a steady angle to prevent it from breaking.
If the wood you selected is old and dirty, use a bush crafty knife. But I recommend you find fresh wood because working with a block of old wood is a little bit challenging.
Make some scallops around the edge of the mushroom using the knife by whittling around the wood chunk.
When you’re working on whittling the mushroom, better to wear a carving glove because if you cut yourself out the whole project can be ruined.
After making scallops, go around and make the mushroom head. Cut a little bit extra and angle it down later.
From here onwards you can whittle the mushroom and give it your preferred shape.
However, as you can see you’ll learn lots of wood carving skills like making angles, and deep cuts by whittling a mushroom.
Once you’re done with whittling the mushroom, finish it with an oil-based or water-based finish or you can paint it down to give attractive color to your little mushroom project.

Best Wood For Carving a Mushroom
- Basswood
- Limewood
- Cherry
- Birch
- Walnut
- Maple
Tools Needed For Carving a Mushroom
- Wood chunk larger than the size of the mushroom you going to make
- Sharp whittling knife
- Pen, pencil, marker
- Oil-based or water-based finisher
- Protective gloves
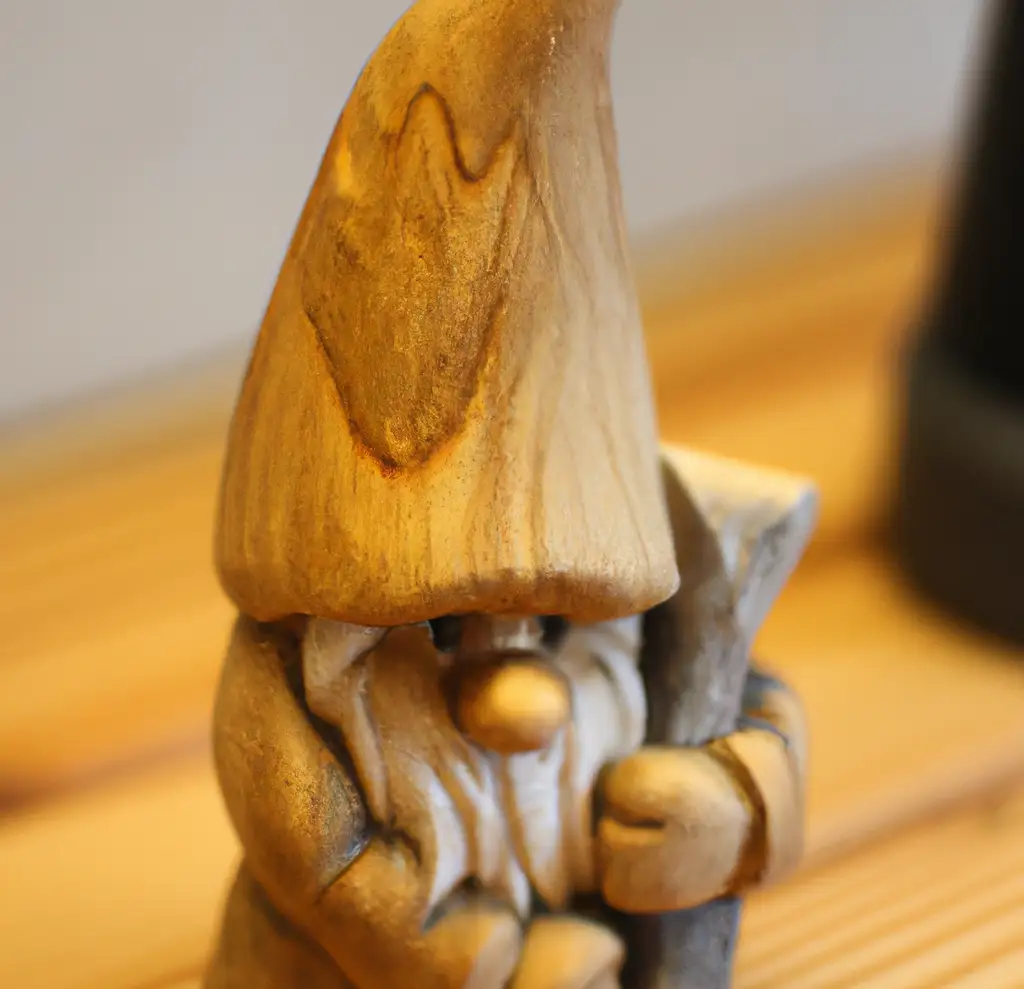
12. Carve A Gnome
Estimated Time Needed: 60 – 80 minutes
Carving a gnome is challenging since it has lots of shapes, curves, and sharp edges. Carving gnome is a top-tier beginner wood carving project in which you’ll learn so many new things.
Wooden gnome is a popular wood carving project since it adds a unique nice look to your indoors and also for gardens.
Overall, carving a gnome is not suitable if you’re so new to wood carving. Yes, it helps to sharpen up your skills but, better to start with something simple like carving a spoon.
Once you’re good at carving basic things, go for carving a gnome. It is nothing to compare with the first project.
Follow YouTube tutorials, e-books, and magazines to get a good knowledge of how to carve a gnome and finally try to carve in your own method.
That’s how you should become successful in woodcarving. Share the first gnome you made with others through social media to show how talented you are.
Once you’re done with whittling the mushroom, finish it with an oil-based or water-based finish or paint it with various colors to make it so awesome.
Best Wood For Carving A Gnome
- Maple
- Basswood
- Limewood
- Cherry
- Birch
Tools Needed For Carving a Gnome
- Wood chunk larger than the size of the gnome you going to make
- Sharp carving knife
- Safety tape
- Pen, pencil, marker
- chisel
- Oil-based or water-based finisher or paint
- Protective gloves
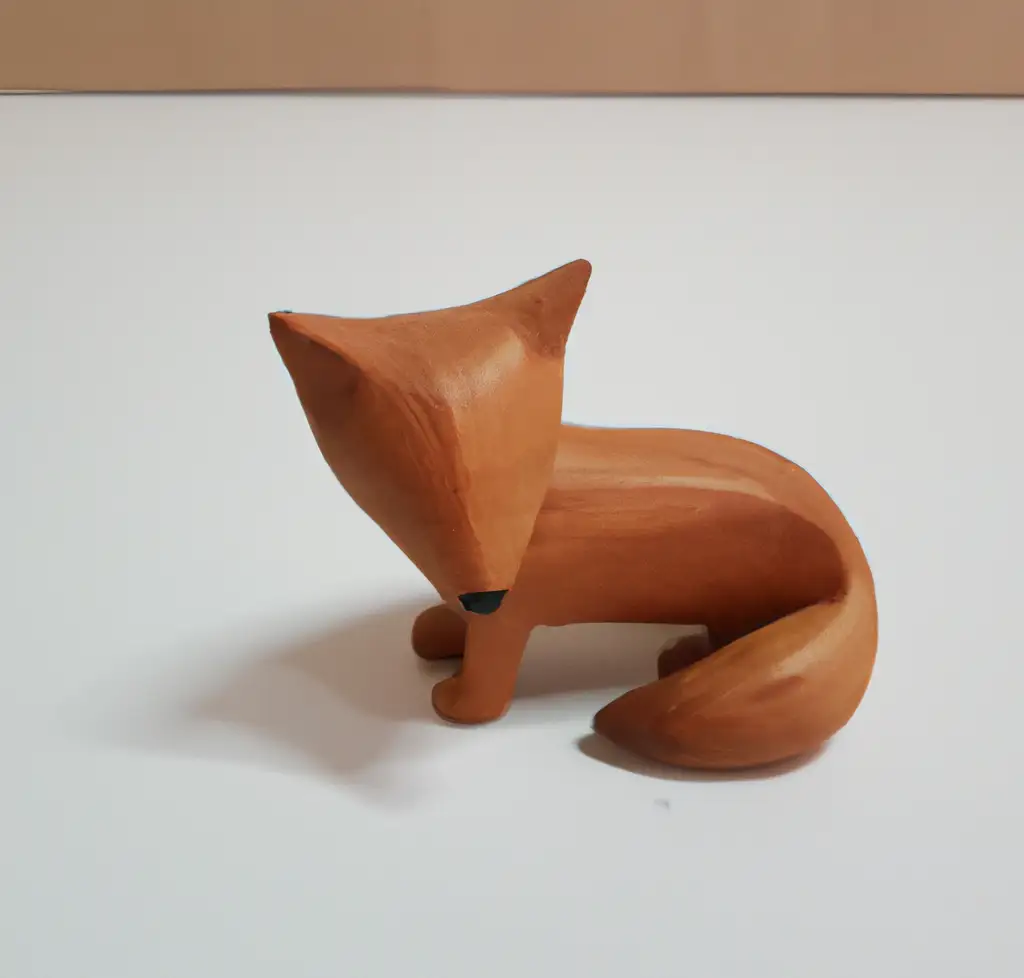
13. Whittling A Fox
Estimated Time Needed: 80 minutes
Whittling a fox is a little bit more difficult than whittling a spoon because of its complex shapes and curves. But it will teach you so many important wood carving skills.
Take a 1*1*4-inch wood chunk, make an outline on it using a pencil and start whittling.
Marking with a pencil on a wood chunk is helping you to think about what cuts you should make.
After whittling the fox, make it rounded using a knife. Finally, sand it down and make the fox so smooth.
Make triangular cuts to make the face of the fox and that can be tricky since you’ll have to make many cuts in a small area to shape it.
Practice, again and again, to whittle fox with a minimum of mistakes. Nothing has to be perfect because foxes typically have narrow muzzles.
Take as much as time you need because when you whittle the fox hurry, there’s a high possibility of spilling the wood which will give a bad appearance.
Once you’re done with whittling the mushroom, finish it with an oil-based or water-based finish to give an enhanced look.
Best Wood For Carving A Fox
- Maple
- Basswood
- Limewood
- Cherry
- Birch
Tools Needed For Carving a Fox
- Wood chunk larger than the size of the fox you going to make
- Sharp carving knife
- Pen, pencil, marker
- Chisel
- Oil-based or water-based finisher
- Protective gloves
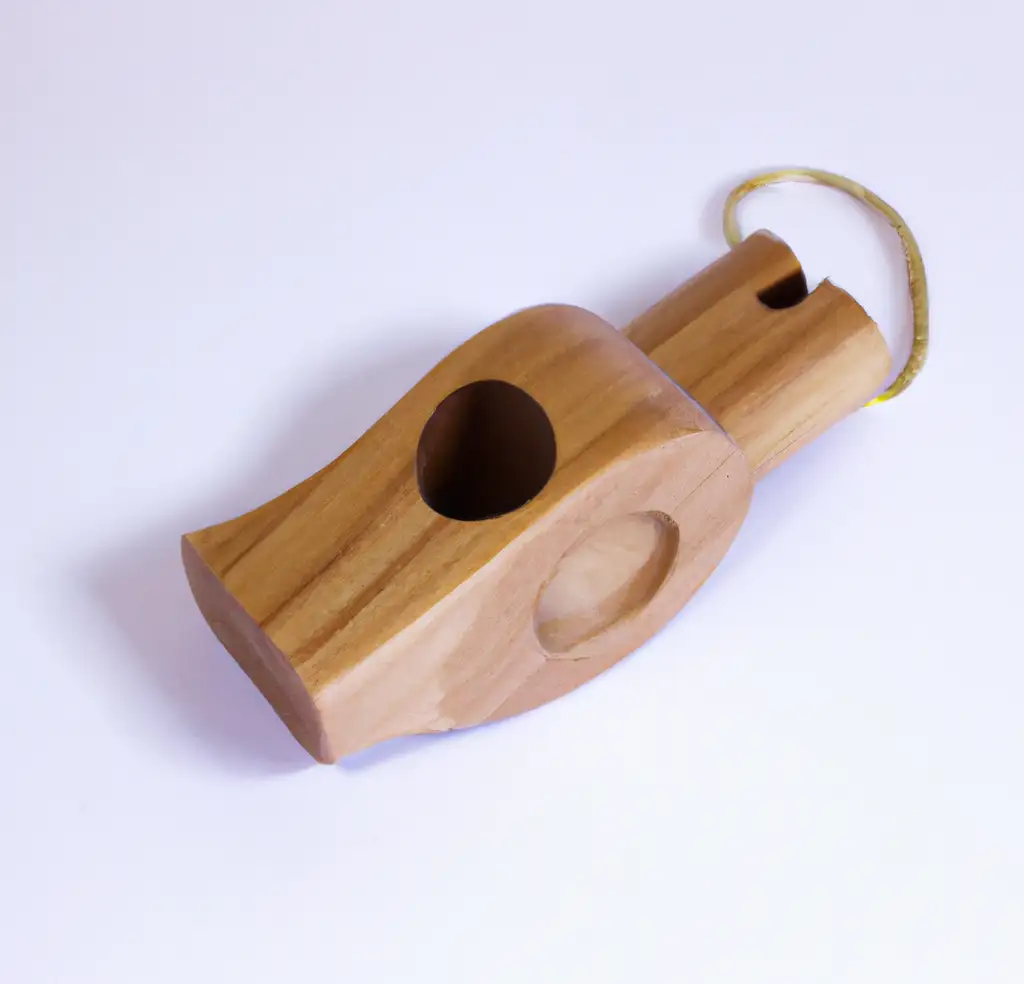
14. Carve A Whistle
Estimated Time Needed – 60 minutes
Let’s make something artistic as a beginner wood carving project. There’re so many different ways to carve a whistle. But willow whistle one is the easiest.
Since you’re a beginner we cannot guarantee that whistle you’re going to carve, make a sound. Because Willow tree branches are not much friendly to make musical instruments.
But, carving a whistle using willow is an excellent project to learn how to shape and round the wood and make a hollow-type tube using wood.
The disadvantage of using willow is you’ll have to wait until early summer or late spring to remove the Willow bark quite easily.
Sycamore is also great for making whistles.
When you’re carving a whistle, make a nice little cut in the bark. Then come back about 3cm and score around the branch making sure you cut the bark.
Then give the wood a little turn and crack the bark off.
Make sure not to break the wood.
Once you remove the bark, you just have to keep whittling the wood until you get nice looking whistle with small cuts and shapes.
Best Wood For Carving Whistle
- Willow
- Sycamore
- Basswood
- Cherry
- Birch
Tools Needed For Carving a Whistle
- Wood chunk larger than the size of the whistle you going to make
- Sharp carving knife
- Pen, pencil, marker
- Protective gloves
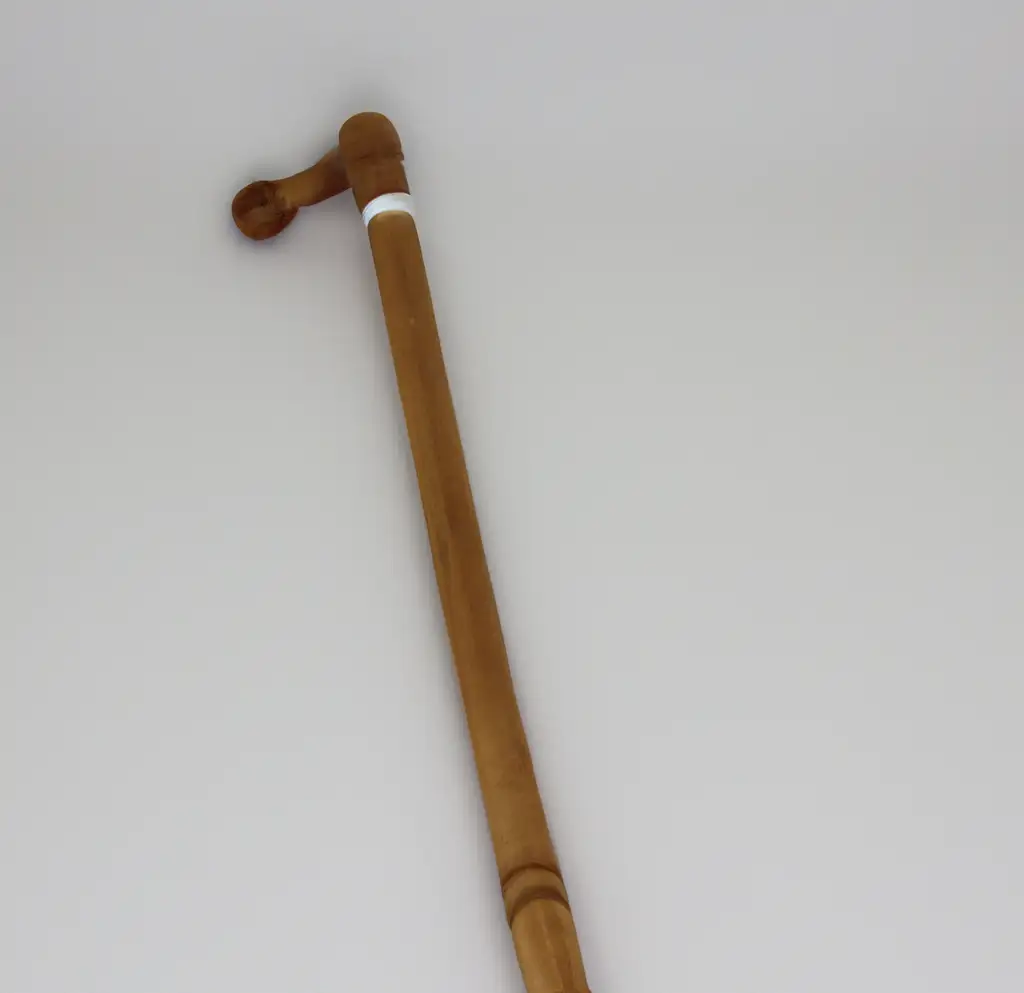
15. Carve A Walking Stick
Estimated Time Needed: 100 minutes
Carving a walking stick may be the largest project you’ll make as a beginner wood carver. Most of the time, walking sticks are plain and don’t have lots of shapes.
But try to make an artistic walking stick with all the wood carving skills you learned throughout by making many simple projects.
You can make faces of wizards on a walking stick to give it a promising look.
First, cut the tree branch that’s long enough to use as a walking stick.
Then peel the walking stick to remove bark and make the surface super smooth and easy to handle. Then make the wrist strap by marking and making small cuts and curves around the edges.
Shape the body by making some artistic curls. Then gloss the whole wood using an oil finish.
Once the finish is fully dried and cured within 30 days, stain the walking stick to give an enhanced look with excellent protection from rotting.
As you can see, a carving walking stick not only teach you carving skills but also some wood-finishing tips as well.
Best Wood For Carving Walking Stick
- Oakwood
- Limewood
- Sycamore
- Basswood
- Cherry
- Birch
Read to know the 10 Best Wood for Carving (Expert Picks!)
Tools Needed For Carving Walking Stick
- Wood branches larger than the size of a walking stick you going to make
- Sharp carving knife
- Pen, pencil, marker
- Protective gloves
That’s it, folks! Now you know how to carve the top 15 beginner wood carving projects in-depth.
Watch, 10 Inspiring Woodturning Projects for Every Skill Level
So, let’s answer some frequently asked questions about beginner wood carving projects.
What Is The Easiest Wood To Carve?
Basswood is the easiest wood to carve because of being a softwood that cuts and shapes easily without chipping or breaking the wood.
Basswood has good flexibility against the sharp edges of knives.
Apart from basswood here’re some other easy woods to carve,
- Limewood
- Maple
- Cherry
- Birch
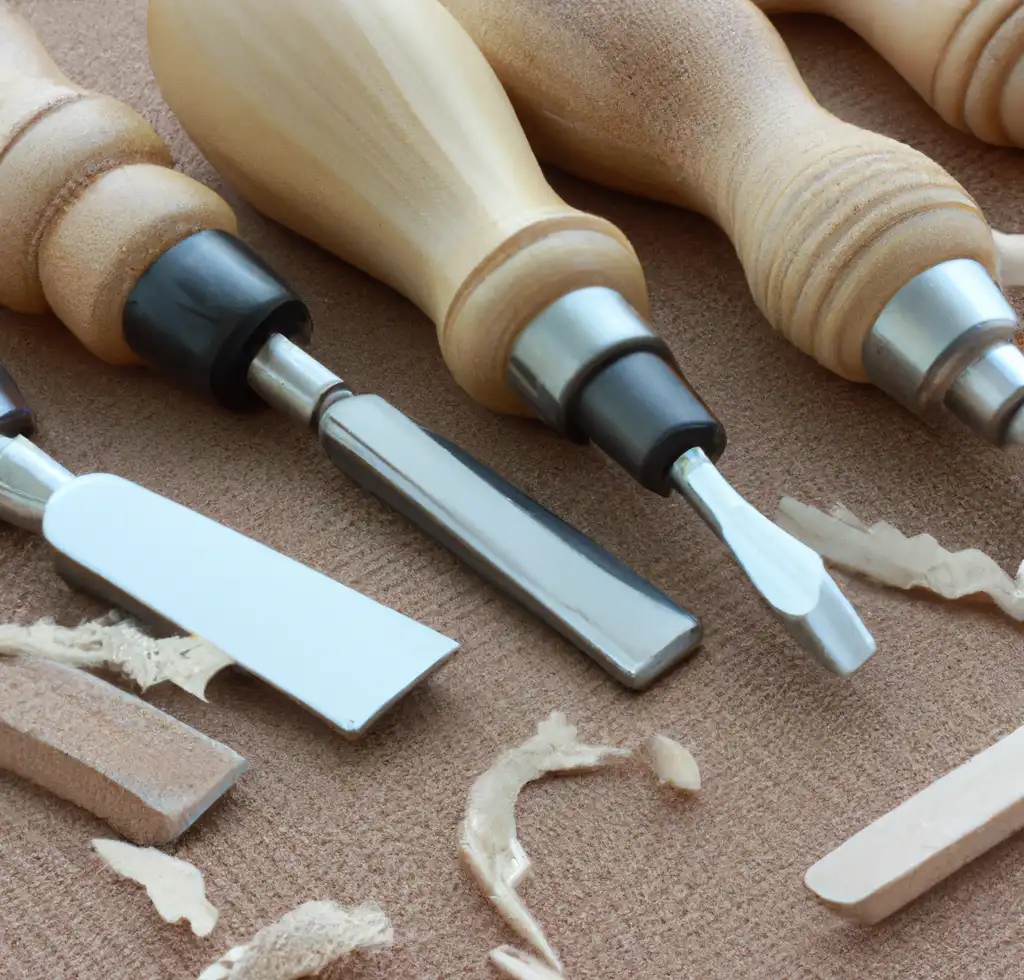
What Tools Are Needed For Beginner Wood Whittling?
- Whittling knife
- Chisel
- Pen, pencil, markers
- Protective gloves
- Ruler
- Roughing Knife
- Chip knife
So, after discussing Beginner Wood Carving Projects, let’s have a look at tools every beginner should have for wood carving.
What Tools are Needed for Beginner Wood Carving?
When we look at tools that every beginner should have before starting wood carving, it’s not all about advanced tools that cost a lot of money. Skill and practice are what make you a pro. Tools are just added advantage.
- A knife
- A strop
- A piece of wood is well enough for a beginner.
But when you keep going there’s a certain moment you feel you can get better smoother results with the help of more tools, that’s the point you should consider of buying tools that are specially designed for wood carving.
Tools are specially designed for wood carving and great for beginners are,
- General carving knife
- Detail knife
- Gouges
- Gouge handles and Shafts
- V- tools
Did I cover all you wanted to know about: Beginner Wood Carving Projects
In this article, I have widely discussed the Beginner Wood Carving Projects that I have started at practiced frequently during the early days of my wood carving journey.
Practice is the key to become a pro at wood carving. Always focus on basics and don’t be overwhelmed with the whole tool rack.
Beginner wood carving projects are Whittling a spoon, Whittling a simple bunny, 5-minute wizard, Whiskey barrel, A flower, An owl, Carve a heart, A cat, Carve a simple bowl, Carve Chopsticks, Whittling a mushroom, Gnome, Whittling a fox, Whistle, A Walking stick
Start with easy projects are going through them until become an experienced player.
I have discussed all the possible questions that can occur when you are a beginner at wood carving.
I hope after reviewing Beginner Wood Carving Projects, now you can have a clear idea to select the first attempt and start the journey.
So, let’s get started with the ultimate journey from now awards.
Hi, My name is Penny Areieta, and i am from the Marshall Islands. I am very very interest in wood carving an i just watched you videos and i amazes me. I am really looking forward in wood carving and i hope you can help me out on as i am just a beginner on woods. Thanks so much an i look forward from any reply in your free time. Peni
Hi! Penny,
Great to have you on the woodcarving team. Of course, I will help you. My email is always open for beginners to improve their knowledge of woodworking and woodcarving. I’m excited to help you.