Ever had your lacquer turn milky white, ruining your project? Why does this happen, and how can you fix it? Dive in as we unravel this common but perplexing issue.
Lacquer is one of the most popular wood finishes that is used to give a unique modern look to your high-end furniture and woodwork.
It gives a glossy look with, waterproofing ability to the wood.
When I was using lacquer to finish my woodwork, I had to deal with lacquer blushing.
So, I did research to fix that with the help of wood-finishing experts and was able to fix lacquer blushing.
So, let’s find out, How to fix lacquer turned white,
Lacquer turns white when moisture gets trapped under the lacquer surface and diffuses the light that hits the surface. To fix the lacquer turned white, let the moisture evaporate into the air using heat. Or use lacquer thinner to rub out white spots. Or use a lacquer retarder to slow down drying time.
But there’s more to know about fixing lacquer turned white.

So, in this article, I’ll explore why lacquer turn white, how to fix blushing in lacquer, how to apply lacquer to avoid getting white spots, and many other tips and tricks.
Furthermore, I’ll answer some frequently asked questions as well.
Let’s dig in!

Why Does Lacquer Turn White?
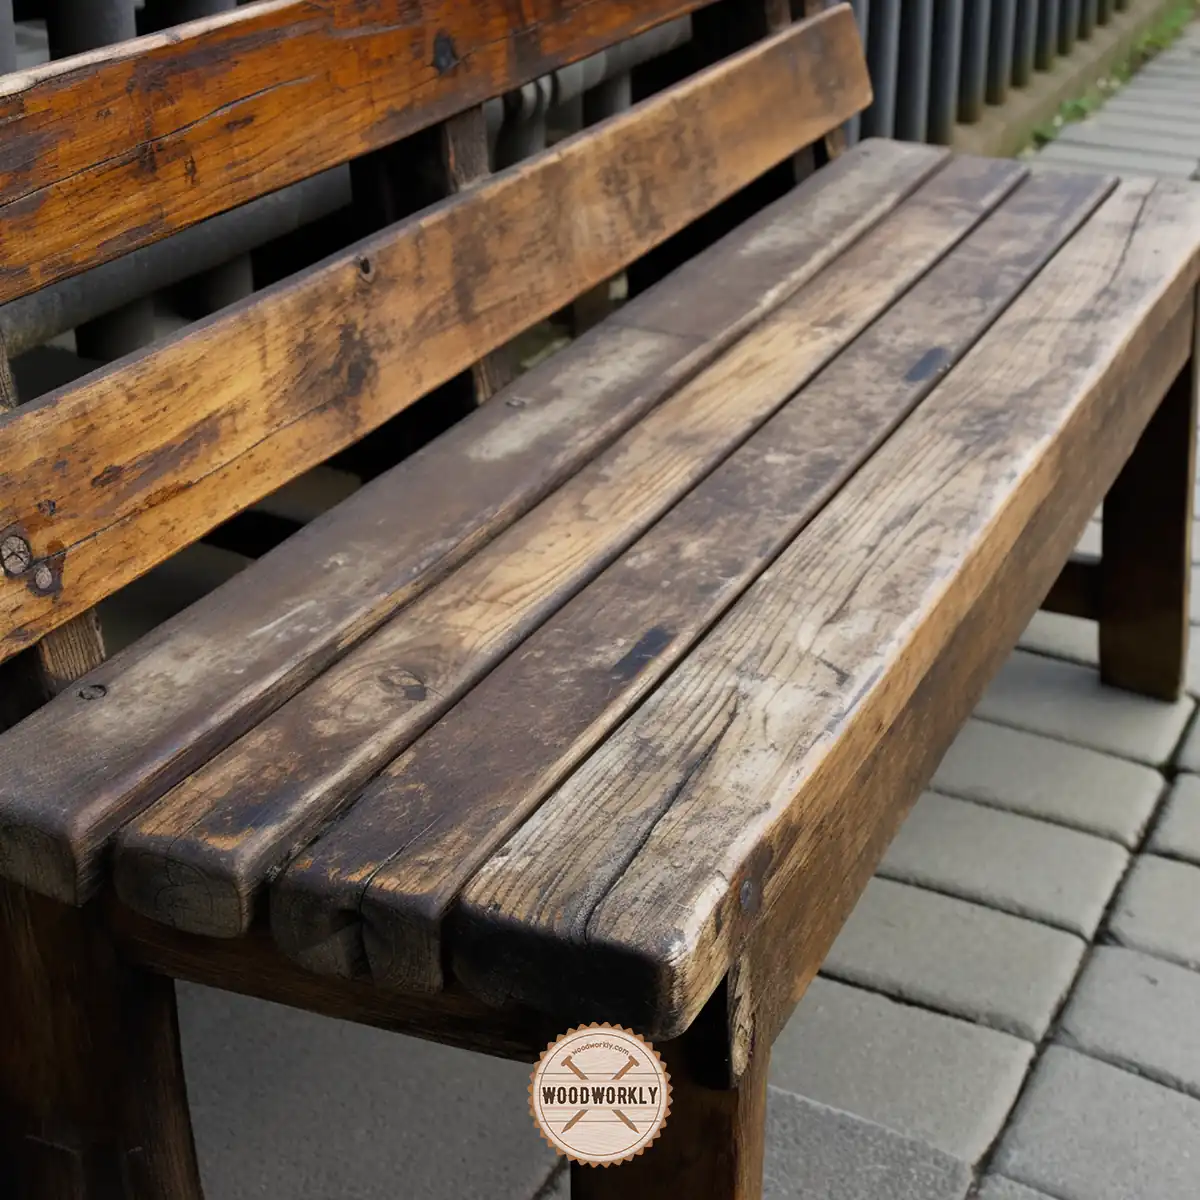
Lacquer finish turns white when moisture gets trapped inside or under the lacquer finish.
Water particles diffuse the light that hits on the lacquer surface and results in white spots in the finish.
Lacquer finishing turning white is also known as lacquer blushing.
Lacquer is considered one of the fastest drying finishes. It usually dries within 12 hours and cures within 24 – 48 hours.
Therefore, most people tend to spray lacquer as a finish to get their desired look and protection.
But when the lacquer finish is drying, it uses a fast cooling effect with the help of environmental moisture to dry quickly.
Therefore sometimes, when lacquer dries up, the moisture will stay underneath the lacquer layer.
Once the lacquer layer gets completely hardened the moisture will result in white spots and cause lacquer blushing which is difficult to remove.
This is a common thing if you’re living in a humid environment.
When you apply a lacquer finish on wood following the wrong method, the moisture will get mixed with the lacquer during the process.
White spots are microscopic water bubbles that appear when light hits on the surface due to the diffusion of light.
Microscopic water bubbles group together and create a cloudy white stain under your clear lacquer stain and ruin the beauty of the wood.
When the lacquer layer gets hardens over time, water particles will be trapped inside, and they will have nowhere to go.
Moisture is covered by a wood wall from one side and a lacquer layer from the other side.
To fix that water particles need to be removed by evaporation, absorption, or by thinning of the lacquer layer.
Otherwise, moisture will turn clear lacquer into milky white blush with random white spots. This will destroy the beautiful appearance of your high-end furniture.
Plus, it not only destroys the appetence of the wood buts also moisture can cause wood rot if it stayed there for so long.
Therefore, I highly recommend you fix the lacquer finish that turned white as soon as you noticed the issue.
So, let’s find out how to fix lacquer turned white.
How to Fix Lacquer Blushing?
Fixing lacquer blushing is easy when you follow the correct procedure.
Otherwise, you’ll end up with the worst wood appearance and damage the wood surface. And you’ll be frustrated using lacquer as a finish after that.
Here’re the 4 main methods you can try to fix lacquer blushing,
- Let the moisture evaporate out into the air
- Thinning the lacquer finish
- Apply Lacquer retarder
- Use dehumidifier
So, let’s discuss each of the above methods to fix lacquer turned white using simple techniques.
1. Fix lacquer Blushing by Evaporating Moisture Using Heat
You can evaporate the trapped moisture inside of the lacquer layer using heat.
Once the moisture gets evaporated into the air, you’ll no longer see white spots on the lacquer finish.
Supplies you will need to fix lacquer blushing by evaporating moisture,
- Hair dryer
- Iron
- Soft cloth
- Lacquer-finished surface with white spots
Here’s the procedure for eliminating white spots on lacquer using heat,
- Place a soft cloth on top of the white spots of the lacquer finish of the wood.
- Set the iron to a medium setting and switch it on.
- Place the iron on top of the cloth and move it in a sweeping motion without staying in one place.
- Move the iron frequently until the white spots eventually fade away.
- Once you see the white spots vanishing, continue the process for a long.
- Once you see vanishing a significant number of white spots, you’re done with ironing.
- Remove the cloth
- Take the hair dryer and set it to the lowest settings.
- Use it on naked remaining slightly visible white spots in sweeping motion by keeping a distance of 3 -4 inches.
Tips:
- Set the iron to plain settings. Not a steam mode. Because steam mode releases water into the cloth and causes more trouble.
- Never use iron to its maximum high heat settings because that can harm the wood and may cause discoloration. We only need to focus on the lacquer finish. Not the wood underneath.
- Plus, always make sure to move the iron on top of the cloth without staying in one place. Because the cloth might stick to the iron.
- You can check for remaining white spots under a decent amount of light at an angle.
Make sure not to miss any spots when ironing and hair drying because it’s a little bit difficult to identify missing spots once the job is done.
You can repeat the above process until you feel they’re no more white stains on the lacquer finish.
Ironing and hair drying is the best and simplest method to keep the lacquer finish from blushing.
2. Thinning the Lacquer Finish
You can apply lacquer thinner to the areas with white spots to make them fade away and get the original clear coat of lacquer finish.
This works only if the trapped moisture isn’t too deep.
Lacquer thinner cut off the extra layers of lacquer and makes a pathway for trapped moisture to come out.
Once they’re released into the atmosphere, the lacquer will no longer turn white.
Spray lacquer thinner a couple of times by setting your gun light. Flow the surface to let the water comes out, but not too much because it runs.
Spray lacquer thinner horizontally to get the help of gravity to pull the softened finish into a run.
3. Apply Lacquer Retarder
Applying a lacquer retarder is the most effective way of removing lacquer blushing. Lacquer retarder is also known as the blush remover.
A lacquer retarder is the best option you can go with to fix lacquer blushing, especially in highly humid conditions.
Lacquer retarders will slow down the drying process of lacquer finish. This will make the lacquer slow drying, and it will give enough time for the moisture to evaporate into the air.
Mostly lacquer blushing happens because lacquer dries quickly, and moisture usually doesn’t get enough time to escape.
So, mixing lacquer retarder with lacquer before applying will slow down the drying time of lacquer and moisture will get enough time to escape to the atmosphere.
This will prevent the lacquer from turning white and getting white spots.
4. Use Dehumidifier
Dehumidifiers are useful to dry up the air around the wood. When the outside area is dry and less humidity, moisture trapped inside of the lacquer finish tends to evaporate to the outside to balance the humidity outside and inside.
This is a good method to remove moisture from the lacquer finish and remove white spots.
No water will condense under the lacquer finish during this period.
If you don’t have a dehumidifier, better to keep wood in a well-ventilated area by opening windows in a dry climate.
Try to regulate internal room humidity to less than 50%.
Once the white spots are wiped away completely, you can reapply lacquer to seal the wood with lacquer correctly without getting in contact with moisture.
Now you know how to fix blushing in lacquer with the simplest methods.
So, let’s find out how to apply lacquer to avoid getting white spots.
First gather the supplies you’ll need.
Supplies You Will Need to Apply Lacquer without Blushing
- Lacquer
- Lacquer retarder
- 180 grit sandpaper
- Mineral spirit or denatured alcohol
- Gloves
- Rags
- Spray gun
- Facemask
Gather the above supplies from quality manufacturers and get ready to apply lacquer to avoid a cloudy finish.
How To Apply Lacquer to Avoid Getting White Spots?
By applying lacquer correctly, you can avoid getting white spots.
When lacquer turned white it takes so much time to fix that and sometimes nothing will work.
So, better to apply lacquer wood correctly from the beginning to avoid making any mistakes to avoid lacquer blushing.
Here’s the procedure you need to follow to apply the lacquer without turning white,
- Prepare the working area
- Prepare the surface
- Prepare the lacquer finish
- Spray the finish
- Let it dry completely
- Apply another coat of lacquer
So, let’s discuss each of the above steps one by one to get an idea about how to apply lacquer correctly.
1. Prepare The Working Area
Reduce the humidity of the area to 50% or less using a dehumidifier. Otherwise, take the project to a well-ventilated area like a garage. Open all the windows.
Better if you can select a dry weather climate to do the job.
When the humidity of the outside is less than the humidity of the inside of the wood, the moisture won’t trap underneath the lacquer layer.
They always try to evaporate and balance the humidity outside and inside.
This is a good technique to prevent lacquer blushing and avoid getting white spots in the lacquer finish.
2. Prepare The Wood Surface
Wipe the entire wood surface with the mineral spirit or denatured alcohol.
Apply mineral spirits all over the wood using the correct methods and wipe gently with light strokes.
Mineral spirits or denatured alcohol are useful to eliminate white spots in previously applied lacquer finish.
After that let the wood surface dry completely before sanding.
Then, sand the entire wood surface with 180 grit sandpaper to remove the previous lacquer finish, other finishes, dirt, and grease.
Sanding is important to open the pore structure of wood and make them ready to accept the lacquer finish.
Sanding eliminates saw marks from manufacturing that cannot be seen by the naked eye.
Make sure to sand the entire area with even pressure to apply lacquer evenly.
Sand along the direction of the wood grain to avoid wood scratches. Because scratched surface results in a blotchy surface.
Once you’re done with sanding, wipe the surface using rags to remove sawdust and make it smooth and nice.
3. Prepare The Lacquer Finish
Mix 1 part of lacquer with 1 part of lacquer retarder in a container to prepare the lacquer finish.
This means mixing lacquer and lacquer retarders in a ratio of 1:1.
Then load your spray gun with prepared lacquer solution. Better to wear a facemask to get rid of the harsh smell of chemicals.
A lacquer retarder is useful to slow down the drying time of lacquer and provide enough time for the moisture to evaporate into the air.
This will prevent the lacquer finish from getting white spots.
Lacquer retarder is so useful especially if you live in a high-humidity environment. If you live in a less humid area, lacquer thinner is also good to use instead of lacquer retarder.
Mix lacquer with lacquer thinner 1:1 and load the spray gun
4. Spray The Finish
After loading the spray gun with a prepared lacquer finish, adjust the air regulator to 30 PSI and practice with scrap wood before heading into the main project.
Once you feel safe, apply a wet coat of lacquer finish to the entire wood surface.
Apply a thin coat of lacquer coat for better efficiency.
Don’t spray too fast and make sure not to miss any spots during spraying because identifying missing spots is quite difficult once it is fully applied.
5. Let It Dry Completely
After spraying the first coat of lacquer finish, let it dry for about 30 minutes. when the first coat of lacquer is drying, never try to fill the missing spots by spraying again.
Leave those areas alone. You can cover up that area during your next spraying round.
Sand the entire surface with 320 grit sandpaper lightly between each coat and use a clean rag cloth to remove residue before applying the next coat of lacquer.
Once the first coat of lacquer is dried enough, you’re good to move on to the second coat.
6. Apply Another Coat of Lacquer
Now apply another coat of lacquer and make sure to cover up all the missing spots during this round. Apply 4 – 5 coats of lacquer until you get the desired look you wish.
Makes sure to let the wood dry completely between each coat of lacquer because proper drying is important to avoid the lacquer turning white and to avoid getting white spots in the lacquer finish.
The curing time of lacquer is around 24 hours.
After the application of the final coat of lacquer let it cure overnight for better absorption and to get better sealing protection with proper curing.
Lacquer retarders will slow down the drying and curing time and give enough time for the moisture to get escape to the outside air.
This is super importnat to get rid of white spots in lacquer once it is fully cured.
Tips To Apply Lacquer
- If you live in a high-humidity area, using a lacquer retarder is a must to avoid lacquer blushing.
- Make sure not to use too much lacquer retarder to mix with lacquer because the drying process can be unnecessarily slow and that can lead to many problems like contaminating lacquer finish due to dust and debris before it gets hardened.
- Lacquer retarder reduces the glossy appearance of the lacquer finish. So, make sure not to use lacquer retarder of more than 50%.
- Use lacquer thinner and lacquer products from the same quality manufacturer to avoid getting any incompatibility issues.
- Make sure to keep the temperature regulated during the application period because temperature fluctuations can affect the drying process of the lacquer finish.
Congtrats! Now you know how to apply lacquer finish correctly without getting any white spots once it’s cured.
Why is My Varnish Turning White?
You’ve just finished applying that final layer of varnish, stepping back to admire your work, when you notice it: a white, milky or cloudy appearance.
This is not what you had in mind, and it’s understandable if you’re feeling disappointed, confused, or even frustrated.
But don’t worry – you’re not alone.
This is actually a common issue experienced by many DIY enthusiasts and professionals alike, and it’s typically caused by a phenomenon known as “blushing.”
The Curse of Blushing: A Common Cause of Whitening
Blushing happens when moisture (often from humid air) gets trapped in the varnish as it dries.
Instead of a clear, glossy finish, you end up with an annoying white or cloudy appearance.
This can happen more often when you’re working in a humid environment or if the varnish is applied too thickly, preventing it from drying properly before the moisture in the atmosphere interferes.
Now, let’s imagine you were refurbishing an antique table in your garage on a hot, muggy summer day.
The conditions would have been just right for blushing to occur.
Going Under the Surface: Other Possible Causes
However, blushing isn’t the only reason varnish may turn white.
It could also be due to water exposure, improper preparation of the surface, or using an incompatible type of varnish.
Water Exposure
If the varnished item gets wet before it’s fully cured, the water can seep into the varnish and cause a white discoloration.
For instance, if you were varnishing a wooden deck and it rained unexpectedly, the water could have soaked into the semi-dry varnish, causing it to turn white.
Improper Surface Preparation
Another possible reason for varnish turning white is improper surface preparation.
Perhaps there was a layer of dust or oil on the surface that wasn’t properly cleaned off before the varnish was applied.
This could create a barrier between the varnish and the wood, preventing the varnish from adhering correctly and potentially leading to a white or cloudy appearance.
Incompatible Varnish
Using different types of varnish, or a varnish that isn’t compatible with the underlying paint or stain, can also cause a white discoloration.
If you’ve ever tried to mix oil and water, you’ve seen firsthand how some substances simply don’t combine well.
The same principle applies to varnishes and paints.
Resolving the Issue: Steps to Fix Whitening Varnish
Now that we’ve explored why your varnish might be turning white, let’s take a look at how to fix it.
The good news is, in most cases, you won’t need to completely strip off the varnished layer. Instead, applying a fresh coat of varnish (ideally under more favorable conditions) can often resolve the issue.
In some cases, you might need to lightly sand the surface before applying the fresh varnish, especially if the surface is uneven or rough.
Also, remember to always clean the surface thoroughly before applying varnish to ensure the best possible adhesion.
Preventing Whitening in Future Projects
To avoid varnish turning white in the future, try to work in a cool, dry environment and apply thin, even coats of varnish, allowing ample drying time between each coat.
Always ensure the surface is clean and properly prepared, and use compatible materials for the best results.
And remember, while a whitened varnish might be a headache at the moment, it’s a learning experience, too.
You’ll be better equipped for your next project, and who knows? Maybe you’ll be the one offering advice on how to prevent blushing and whitening varnish in the future!
How Many Coats of Lacquer Should You Apply To Wood?
Apply a minimum of 3 coats of lacquer finish on the wood to get the desired finish. You are free to apply more coats of lacquer finish until you get the required outcome.
But make sure to let it dry between each coat for better application and to avoid lacquer finish getting white spots.
Can You Thin Lacquer with Acetone?
Yes, you can use acetone to thin lacquer finish. But not unlike regular lacquer thinner, acetone is a pure chemical that evaporates so quickly.
Therefore, you won’t get enough time for the drying process of lacquer.
The lacquer finish will get dried quickly which can lead to trapped moisture underneath the lacquer finish. So, eventually, this will result in lacquer blushing.
Therefore, using acetone instead of lacquer thinner is not a wise idea to apply.
How Long Does Lacquer Last on Wood?
Lacquer lasts on wood even decades if you apply lacquer using the correct procedure.
Until the lacquer coat is protected from environmental elements such as temperature variations, dust, and debris, lacquer remains clear without yellowing or fading way.
Mostly indoor lacquer finishes live longer than outside finishes due to getting less contact with outside elements.
Hope you’ve learned eveything you wanted to know about, how to fix lacquer turned white.

So, let’s answer some frequently asked questions as well.
FAQs
Why has my lacquer finish turned white after drying?
Your lacquer may have turned white due to blushing, a common problem caused by humidity where moisture gets trapped within the finish as it dries, leading to a white or milky appearance.
Can water exposure turn lacquer white?
Yes, if lacquer gets wet before it’s fully cured, water can seep in and cause a whitening effect, highlighting the importance of protecting your work during the curing process.
Is improper surface preparation a cause of white discoloration in lacquer?
Yes, if the surface was not properly cleaned or prepped before applying the lacquer, residual oil, dust, or previous finish can interfere with adhesion, potentially causing a white or cloudy finish.
Does the type of lacquer I use matter for cludy finish?
Yes, it does. Using incompatible types of lacquer or applying lacquer over an incompatible paint or stain can result in a reaction that leads to a white or milky appearance.
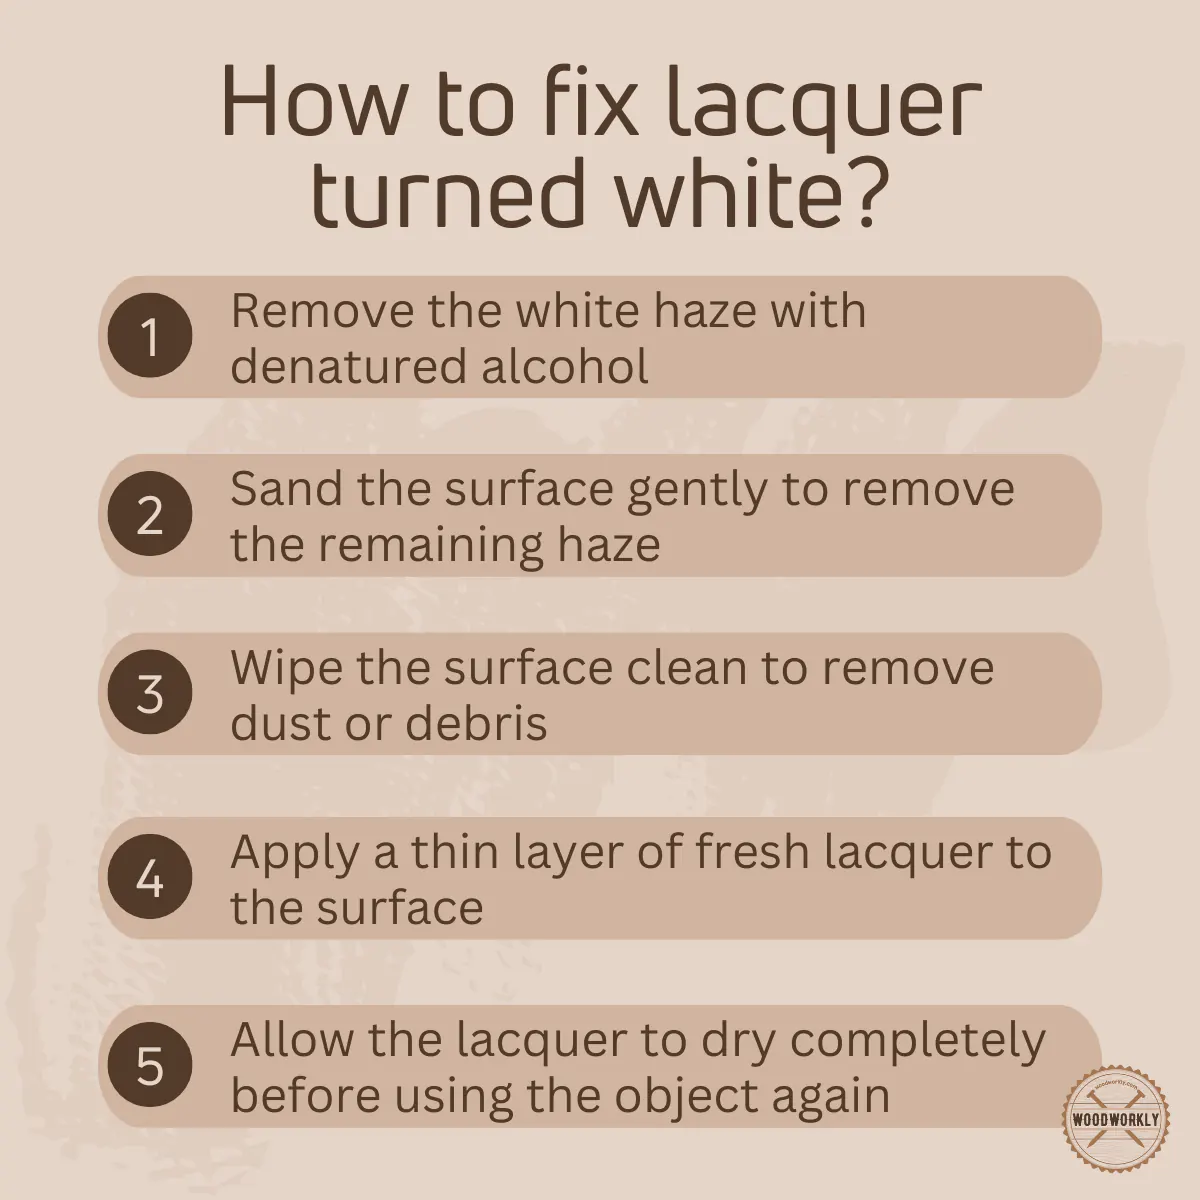
How can I fix a lacquer that has turned white?
In many cases, lightly sanding the surface and applying a fresh coat of lacquer under optimal conditions (low humidity, clean surface) can solve the problem.
How can I prevent my lacquer from turning white in the future?
To prevent white discoloration, ensure you work in a low-humidity environment, apply thin even coats, and give ample drying time between each coat. A clean, properly prepared surface and use of compatible materials also go a long way in maintaining the clarity of your lacquer.
Did I cover all you wanted to know about: Lacquer Turned White
In this article, we have deeply discussed why does lacquer turned white and how to fix lacquer blushing, and how to apply lacquer to avoid getting white spots with tips and tricks.
To fix lacquer that has turned white, sand the surface lightly to remove the whitened layer, clean it thoroughly, and then reapply a thin coat of lacquer under low humidity conditions. Ensure proper drying time between coats for optimal clarity and shine.
Furthermore, I’ve answered some frequently asked questions about using lacquer finish on wood as well to avoid any problems.
Hope you have gained good knowledge about how to apply lacquer without getting blushing with simple techniques.
Try the things you learned from this article for your next lacquer finishing project. Have fun in woodworking!