Ever wondered how to unveil the rich, deep hues hidden in Jatoba wood? Here’s your step-by-step guide to mastering the art of finishing Jatoba wood!
Jatoba wood, also known as Brazilian cherry, is a beautiful wood used for flooring, wooden gears, furniture making, and tool handles. It is an extremely durable and strong hardwood compared to others.
Finishing Jatoba wood is challenging since it contains oily resins that prevent the penetration of wood finishes into the fibers.

In order to find proper finishing techniques, I interviewed some wood finishing experts and found the best method to finish Jatoba wood, which will help to maintain its longevity.
So, let’s discuss, How to finish Jatoba wood?
To finish Jatoba wood, Fill the grain first with oil-based wood filler or Danish oil or water-based filler. Then apply or spray lacquer or varnish coats to seal the wood. Light sand between each coat and let each coat dry and cure properly to get a nice, and protective finish.
But that’s just the tip of the iceberg!
So, in this article, I’ll explore how to finish Jatoba wood in three different methods. So, you can decide what suits you the most according to your preference.
Furthermore, I’ll answer some frequently asked questions as well.
Let’s dive in!

Can You Finish Jatoba Wood?
Yes, you can finish Jatoba wood with many different types of finishing products.
Finishing Jatoba wood is challenging since it is so dense and hard which delays the drying time of finishing coats.
Plus, oily residue on top of the Jatoba wood prevents the wood finish from penetrating the wood fibers.
Because of that finishing and making a protective topcoat on Jatoba wood is difficult and you need to find a way to remove oily residue on top and make a protective coat on top to protect Jatoba wood furniture and woodwork from environmental elements.
Jatoba wood has an open pore structure. Therefore, first, you need to cover the open pore structure using a grain filler to smoothen and make the surface look even after finishing.
You’ll be able to increase the durability and get an enhanced look by finishing Jatoba wood with a quality finish.
With a protective finish, you’ll be able to protect Jatoba wood from environmental elements such as moisture, water damage, rotting, decaying, UV light, and insect damage.
Let’s find out what suits Jatoba wood to get the perfect finish we’re looking for.
Best Finish For Jatoba Wood
Jatoba wood also known as Brazilian cherry can be finished with numerous types of different products of grain fillers and sealers available in the local stores.
Jatoba has such a nice and beautifully natural color. Therefore, a clear, natural finish matches Jatoba wood perfectly.
There are three different ways to finish Jatoba wood.
- Danish oil or Linseed oil
- Oil-based wood grain filler with stain
- Water-based wood grain filler
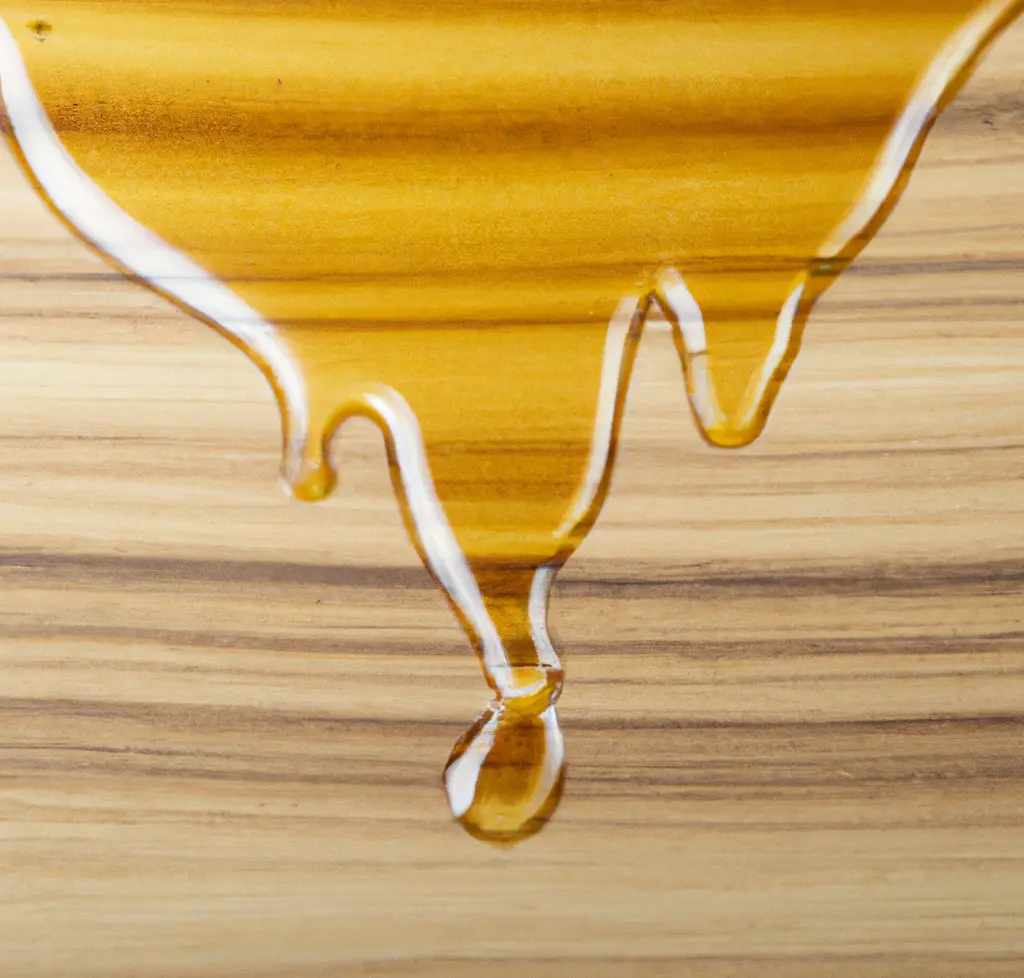
Finally, apply or spray coats of varnish or lacquer to seal and finish Jatoba wood
Using the above methods, you’ll be able to get the nice-looking, even color-protective finish you look for.
Is Grain Filler Necessary When Finishing Jatoba Wood?
Yes, applying grain filler is essential when finishing Jatoba wood since it is an open grain wood, and you need to cover pores before applying a sealer when finishing.
Jatoba wood has large pores which are visible even after applying a finish. Plus, having grain marks on the final finished surface decreases the value of the project.
By covering grain with a filler, you can make it more beautiful.
Using grain filler, you’ll be able to get a smooth, uniform finish with a glossy surface.
Grain filler covers open pores and makes the surface ready to take on a wood finish or sealer.
If you’re looking to go for a glossy finish on Jatoba wood, definitely use grain filler before applying a sealer to fill the pores.
Filling grain makes the Jatoba wood surface different, but better. Most people love it, but some don’t.
So, ultimately, applying a grain filler before sealing Jatoba wood is totally up to you.
In my experience, grain filler provides lots of positive results, especially with open-grain woods like Jatoba, Oak, and Mahogany.
Let’s have a look at how to finish Jatoba wood with all 3 finishing methods.
Finishing Jatoba Wood
You can finish Jatoba wood with three simple steps. They are,
- Fill the grain with grain filler
- Seal the wood with shellac
- Apply lacquer or varnish
All the finishing methods of Jatoba wood should pass the above three stages to get an even color, glossy finish.
In the first step, you can fill the grain with an oil-based or water-based grain filler or with sawdust from the wood itself.
The second step is finishing the coats with sanding sealer while sanding between each coat.
In the third step, lacquer or varnish coats are applied to protect Jatoba wood from weather elements and to enhance how it looks.
Hope you get to know the fundamentals of finishing Jatoba wood.
So, it’s time to dive deeper.

Tools And Materials To Finish Jatoba Wood With Oil-Based Wood Filler
- Oil-based grain filler
- Oil-based wood stain
- 220 grit sandpaper
- Shellac as a sanding sealer
- Spray lacquer or varnish
- Tack cloths
- Rags
- Jatoba wood
- Latex gloves
- Scoop
Tools And Materials To Finish Jatoba Wood With Water-Based Wood Filler
- Water-based wood filler – Jatoba color
- Water cup
- Shellac as the sanding sealer
- Spray lacquer or varnish
- Scoop
- 220 grit sandpaper
- 320 grit sandpaper
- Tack cloths
- Rags
- Jatoba wood
- Latex gloves
Tools And Materials To Finish Jatoba Wood With Oil Finish
- Danish oil or Linseed oil
- 220 grit sandpaper
- Shellac as the sanding sealer
- Spray lacquer or varnish
- Tack cloths
- Rags or paintbrush
- Jatoba wood
- Latex gloves
Get the things ready according to your preferred method of filling the grain of Jatoba wood when finishing.
Now it’s time to finish the wood.
How To Finish Jatoba Wood?
Here are the steps you need to follow when finishing Jatoba wood,
- Clean and prepare the wood surface
- Sand and remove sawdust
- Prepare the wood filler
- Apply grain filler or oil
- Let the coat dry and cure
- Light sand the surface
- Finish coats with sanding sealer
- Spray lacquer or varnish
So, let’s discuss each of the above steps in detail to know the grain-filling process of Jatoba and do the finishing perfectly as you wish.

1. Clean And Prepare The Wood Surface
First, take your Jatoba wood furniture or woodwork to an open space with good air circulation.
Use a well-ventilated area for wood finishing since it helps finish coats dry faster and more efficiently without ending up with a tacky surface.
Plus, having good air circulation is important to remove the harsh fumes and chemicals from artificial wood finishing products that contain volatile organic compounds that cause breathing issues and irritations.
After taking Jatoba wood to an open space clean the wood completely with a tack cloth to remove dust, debris, and grease.
Having dust and debris upon finishing reduce the performance of finishing products and you won’t be able to get the perfect nice-looking finish you wished for.
You’ll probably end up with a dull surface since dust gets trapped inside the wood finishing coats.
Therefore, clean the Jatoba wood surface well before finishing.
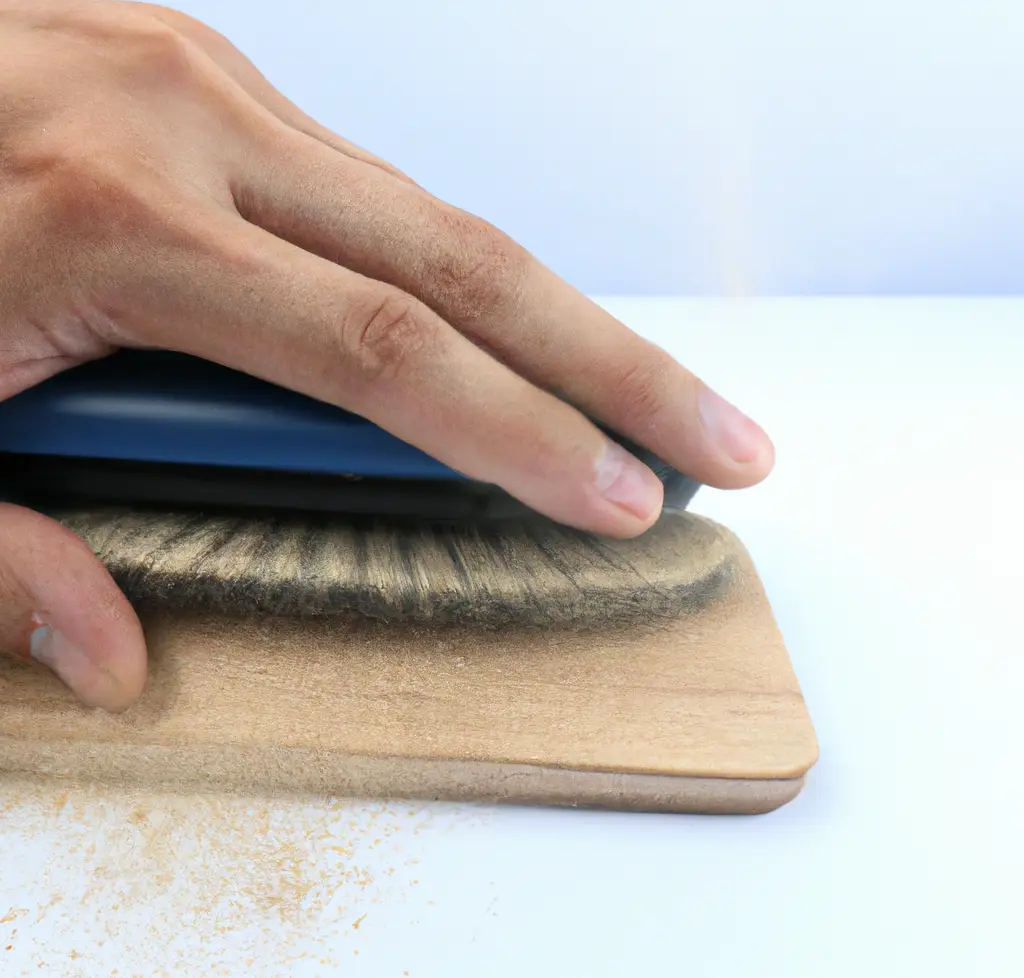
2. Sand And Remove Sawdust
After cleaning the wood properly, sand the entire Jatoba wood surface with 220 grit sandpaper to remove dirt, residue, and previous coats from the wood.
Sanding helps to smoothen the surface and eliminate imperfections on the surface like random bums and streaks.
Sanding Jatoba wood is easy because of having a strain grain pattern.
Sand along the direction of the wood grain to make the surface super smooth without leaving scratches and sanding marks.
Sanding makes the wood ready to take on finishing coats.
Once you’re done with sanding, remove the sawdust on the surface using clean rags or use a proper dust collection pipe system.
Leaving sawdust on the surface interrupts the finishing process and causes skin irritations.
Make sure to remove sawdust completely from the working space to do the finishing with freedom.
You can make fertilizer from the collected sawdust after drying them in a sawdust dryer.

3. Prepare The Wood Filler
The above two cleaning and sanding steps are all same for a person who selected oil-based filler, water-based filler or oil finish to fill the grain of Jatoba wood.
From here onwards you’ll have to follow different paths according to the way you selected to do the finishing.
The wood filler preparation method is different from oil-based wood filler and water-based wood filler.
But if you selected linseed oil or Danish oil to finish Jatoba wood, you can simply skip this preparation step since Danish oil or linseed oil can directly apply to Jatoba wood with no pre-preparation.
Only the people who selected oil-based filler or water-based filler for the grain filling process should follow this preparation step.
Preparation Of Oil-Based Grain Filler
Generally, oil-based wood fillers are pale in color.
So, before applying oil-based filler directly on Jatoba wood which has a darker color, you need to tint oil-based wood filler a bit with regular dark color oil wood stain.
To do that, pour two parts of oil-based wood filler into a plastic container and mix it with one part of oil-based wood stain.
Mix them well using a spoon or scope and prepare the wood filler mixture before applying it on the Jatoba wood surface.
Personally, I use Old masters Wood Grain Filler as an oil-based stain and Modern Walnut color oil-based wood stain. Mix them well to make the wood grain filler.
Preparation Of Water-Based Grain Filler
If you don’t like oil-based products since oil-based products are a little bit messy to clean up you can still make a grain filler with water-based filler.
Use Jatoba color water-based wood filler to prepare the grain filler.
Personally, I use Timermate water-based wood filler since it is compatible with all the finishes.
Jatoba color water-based wood filler is like a thick putty. In order to use it as a grain filler you need to thin it down with a little bit of water.
Add a sufficient amount of wood filler into a plastic container and pour a little bit of water and mix them well.
You’ll get a ketchup-like mixture upon mixing which is good enough to apply on the Jatoba wood surface.
That’s how you make oil-based grain filler mixture and water-based grain filler mixture to apply on Jatoba wood when finishing the wood.
From here onward, people who’re willing to use linseed oil or Danish oil also should join the finishing process.

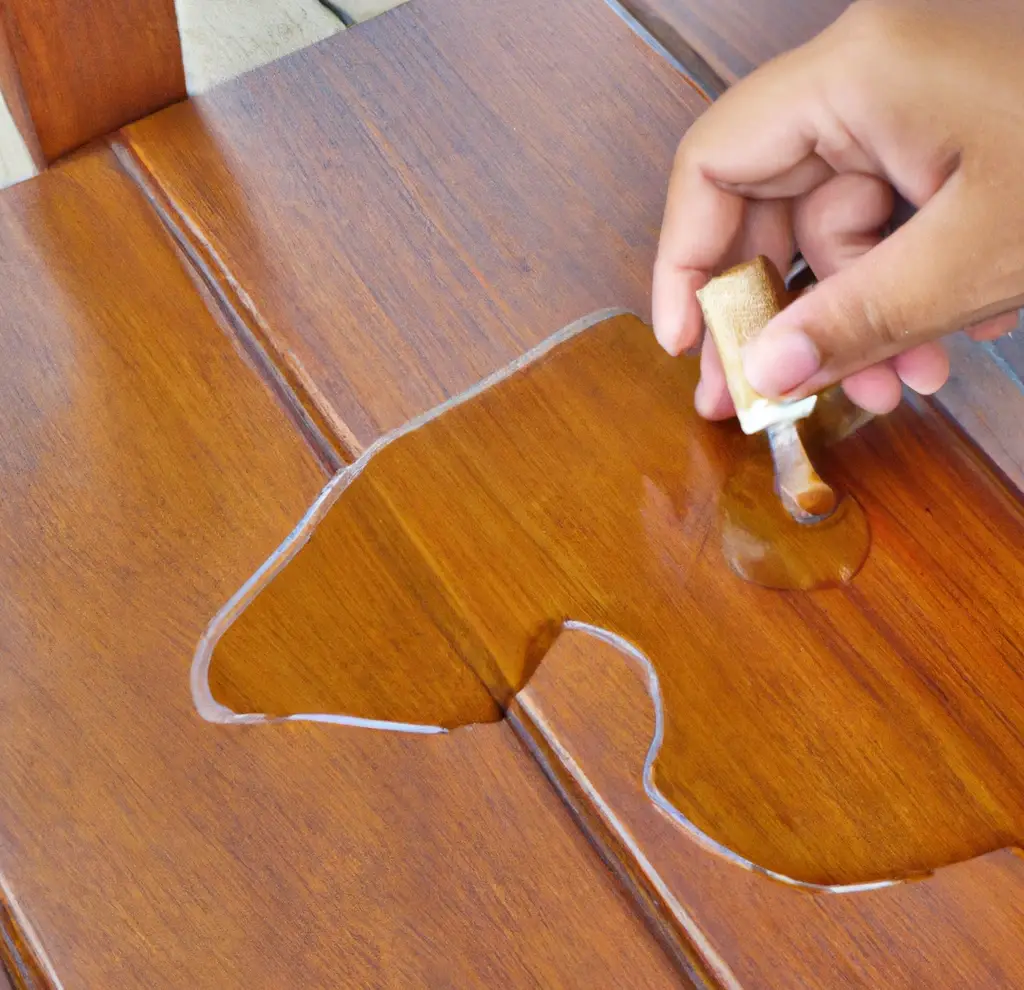
4. Apply Grain Filler Or Finishing Oil On Wood
It’s time to fill the grain with the prepared grain filler or with an oil finish. Those are two separate methods that I thought to discuss separately as below.
First, have a look at filling the grain of Jatoba wood with prepared oil-based grain or water-based grain,
Apply the prepared grain filler on the Jatoba wood surface using a paintbrush or wipe with a clean rag along the direction of the wood grain.
When applying the grain filler, it will pack into the pore structures of Jatoba wood and fill the grain.
After applying the grain filler all over the Jatoba wood let it sit on the surface for 15 minutes to settle on the surface and to make a top protective coat on the surface.
After that, wipe off the excess with a clean tack cloth by going across the grain and then lightly going along the grain.
That’s how to apply both water-based and oil-based grain filler on Jatoba wood upon finishing.
Now have a look at filling grain of Jatoba wood with Linseed oil or Danish oil,
First, apply a thick coat of Danish oil or linseed oil all over the Jatoba wood along the direction of the wood grain using a paintbrush or wipe with a clean rag.
Then sand the entire wood with fine 220 grit wet dry sandpaper along the direction of the wood grain.
Wood dust will produce upon sanding and soaks up the applied oil and packed into the pores of the Jatoba wood surface.
You can add little more oil as you need to. Then do the light sanding again.
Finally, let the surface sit for 30 minutes and wipe off the excess using a clean tack cloth.
Simple as that!
In Linseed oil or Danish oil method, you sand the wood dust that produces fills the grain of Jatoba wood which is so clever!
5. Let the Coat Dry And Cure
After filling the grain of Jatoba wood with grain filler or Linseed oil or Danish oil let the coats dry and cure overnight.
I highly recommend letting the coats dry and cure for at least 24 hours before moving on to the next steps since drying time may differ according to the thickness of the coats and according to the environmental humidity.
Now you know how to fill open pores of Jatoba wood upon finishing the wood in two separate but effective methods.
From here onwards the finishing and sealing process is the same for everyone who selected oil-based filler, water-based filler, linseed oil, or Danish oil since all of them should seal using the same method.
Let’s move forward.

6. Light Sand The Surface
Once the coats are dried and cured properly light sand the entire wood surface with 220 grit sandpaper along the direction of the wood grain.
Make sure to apply a little pressure on sandpaper since force sanding can damage the previously applied grain filler coats.
7. Finish Coats With Sanding Sealer
Now it’s time to seal the Jatoba wood surface that is already coated with grain fillers and oils.
You can use a sanding sealer to finish the coats of Jatoba wood like Shellac.
Shellac enhances the natural grain of the Jatoba wood with a beautiful appearance.
Apply 4 coats of shellac over Jatoba wood.
Make sure to lightly sand between each coat of shellac with 320 grit or finer grit sandpaper to get a better finish with no flaws, nibs, or surface imperfections.
After applying shellac let each coat dry and cure for 4 hours and then do the light sanding.
Never sand the shellac coat when it is wet because that may damage the coat and the wood surface.
After applying the final coat of shellac let it dry and cure for a minimum of 4 hours before moving on to the sealings step.
8. Spray Lacquer Or Varnish
In order to complete the finishing process of Jatoba wood, finally apply three coats of spray lacquer or varnish to seal the wood.
Make sure to let each coat of lacquer or varnish dry and cure properly before applying another coat of spray.
Lacquer or varnish coats seal the Jatoba wood surface by making a barrier from the outside world.
Lacquer or varnish prevents Jatoba wood from water damage, rotting, UV light, and insect attacks.
It basically seals the wood and prevents moisture and other weather elements from going inside the wood.
That’s it. This is how to finish Jatoba wood properly using quality products.
Follow the method that suits you the best and get the perfect-looking finish as you wish.

Does Jatoba hardwood Change Color?
Yes, Jatoba hardwood changes color after it is milled from light to dark upon exposure to direct sunlight and UV light. Exposure to direct sunlight causes wood discoloration.
You can apply the wood sealer with Anti-UV agents to prevent harmful UV light from hitting the Jatoba wood surface which causes wood discoloration.
Anti-UV agents absorb UV light and prevent them from damaging and fading the color of Jatoba wood.
This is useful, especially when placing Jatoba wood furniture outside to protect it from environmental elements.
Can You Stain Jatoba Wood?
Yes, you can stain Jatoba wood with numerous stains, but staining Jatoba is difficult since it is extremely hard, dense, and oily wood.
Wood stains pigments face difficulties when saturating the Jatoba wood fibers since it is hard and dense.
Plus, the Jatoba wood surface has an oily residue that is produced by the wood itself. These oily substances prevent wood stains from changing the wood color.
Therefore, first, you should apply an acetone-like substance to remove the oily residue from the Jatoba wood surface and then apply the wood stain.
Or you can apply a pre-stain wood conditioner before staining Jatoba wood to get a nice, even color finish all over the surface.
Let’s answer some frequently asked questions.
FAQs
What kind of finish should I use on Jatoba wood?
A popular choice for finishing Jatoba wood is using a high-quality oil-based finish, which enhances its natural color and provides a durable surface.
How should I prepare Jatoba wood before finishing?
Before applying any finish, ensure the Jatoba wood is sanded smoothly, clean, and free of any dust or debris to achieve the best results.
Does Jatoba wood require any special treatment due to its density?
Due to its density, it is recommended to pre-drill holes for screws and nails to prevent splitting and to allow for easier workability.
Can I use a water-based finish on Jatoba wood?
Yes, you can use a water-based finish on Jatoba wood; however, it might not enhance the natural color and grain as much as oil-based finishes.
How do I maintain the finish on Jatoba wood?
To maintain the finish on Jatoba wood, clean it regularly with a dry or slightly damp cloth and avoid using harsh chemicals which might damage the finish.
How many coats of finish are recommended for Jatoba wood?
Generally, applying 2-3 coats of finish is recommended to achieve a uniform and durable finish on Jatoba wood.
Is it necessary to seal Jatoba wood before finishing?
While it is not strictly necessary, sealing Jatoba wood before finishing can help to achieve a more uniform finish and prevent potential moisture problems.
What is the recommended drying time between finish coats on Jatoba wood?
It’s recommended to allow at least 24 hours of drying time between coats to ensure the best results and durability.
Did I cover all you wanted to know about: How To Finish Jatoba Wood?
In this article, I have widely discussed how to finish Jatoba wood perfectly using all the methods possible. we have discussed the materials and tools you need and the importance of using a grain filler before finishing the wood.
To finish Jatoba wood, first sand the surface smoothly, then apply a high-quality oil-based finish in 2-3 coats, allowing 24 hours drying time between each coat. This process enhances its natural color and ensures a durable finish.
Furthermore, I’ve answered some frequently asked questions as well.
That’s it, folks! Hope you learned everything you need to know about how to finish Jatoba wood using the correct methods.
Try to apply the things you learned in your next Jatoba woodworking project to see some wonderful results.