Made a polyurethane blunder? Wondering how to salvage your project? Fear not! Follow our guide and learn how to correct those pesky polyurethane mistakes!
Polyurethane is a popular wood finish available in oil-based and water-based options. They come in different varieties from satin to glossy. When applying polyurethane fish to your beautiful woodwork, we do follow different methods.
Whatever method you have followed, mistakes can happen during the application or even after the application is done. There were lots of mistakes I have done with the polyurethane finish.
I have found the solutions for all the mistakes that I have done when applying polyurethane finish. So, How to fix Polyurethane mistakes?
Here’s what I know from being a woodworker for several years:
Polyurethane mistakes can fix by light sanding, re-application of the polyurethane finish, using a quality, a new can of polyurethane finish, not subjecting polyurethane can to extreme weather, cleaning the surface well before applying polyurethane, and following proper guidelines when applying polyurethane coats.

But these aren’t the only solutions that can fix polyurethane mistakes. Here are some common polyurethane mistakes and issues.
- Bubbles in polyurethane finish
- Puddles in polyurethane finish
- Uneven polyurethane finish
- Separating issue
- Discoloration of polyurethane
- Surface roughness
- Orange peel effect
- Streaking
- Alligatoring
- Cratering
- Cloudy polyurethane finish
- Scratches on the polyurethane finish
- Blushing
- Polyurethane runs
- Trapping insects and dust in polyurethane finish
So, in this article, we’ll deep into every single mistake mentioned above and talk about how to fix polyurethane mistakes.
By the time you’re done reading this article, you’ll have no doubt about how to fix the polyurethane finish.
You’ll also have some cool techniques to use when applying polyurethane finish to your next woodwork without making any mistakes.
Just keep reading!
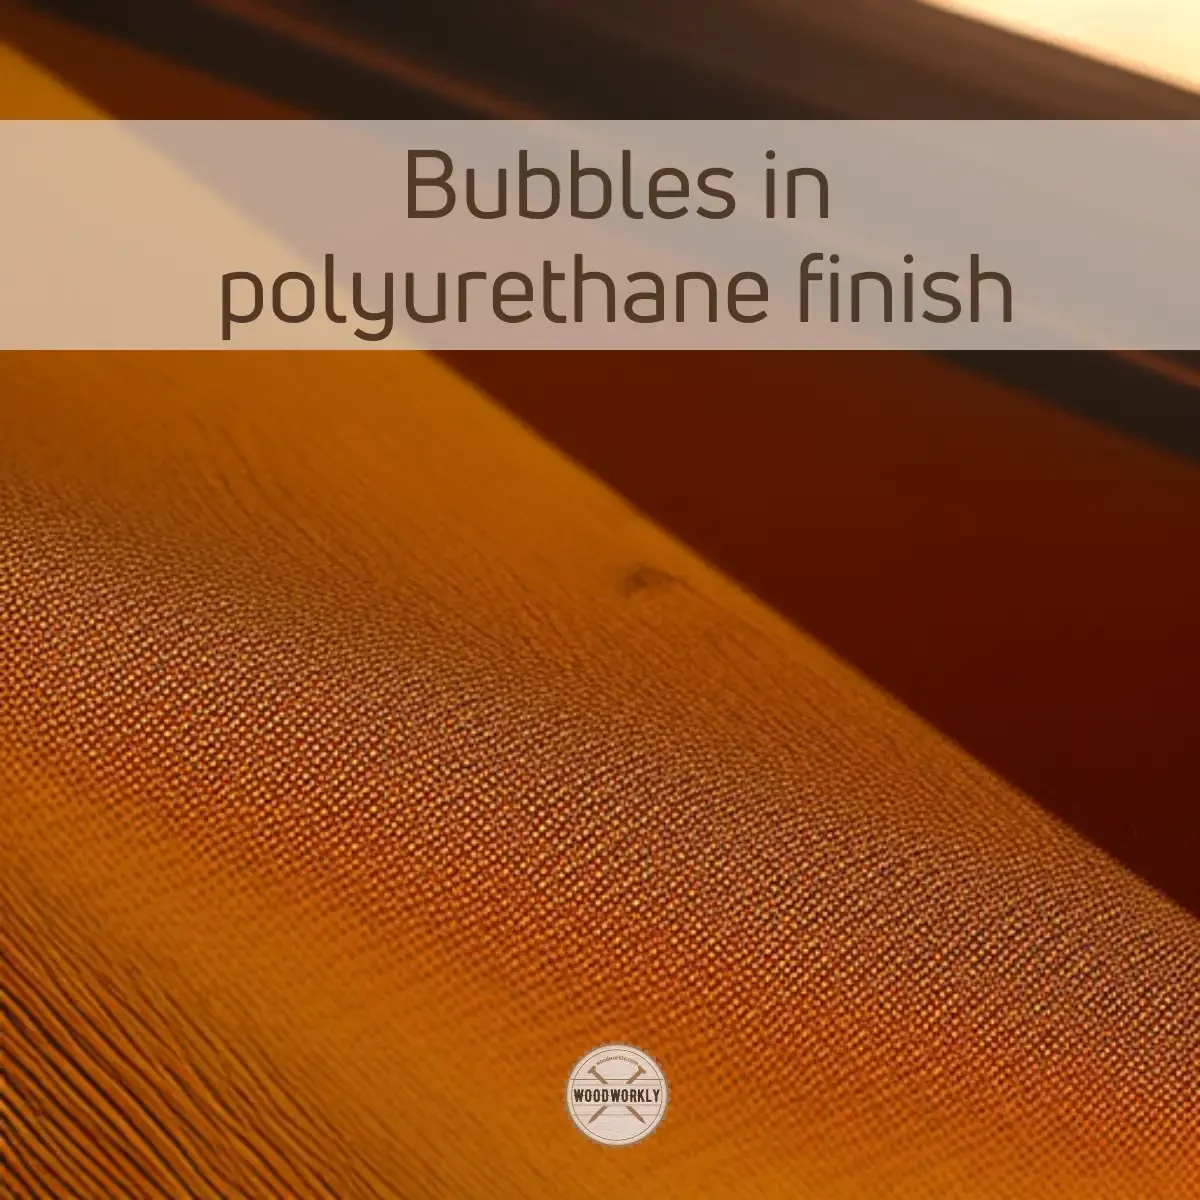
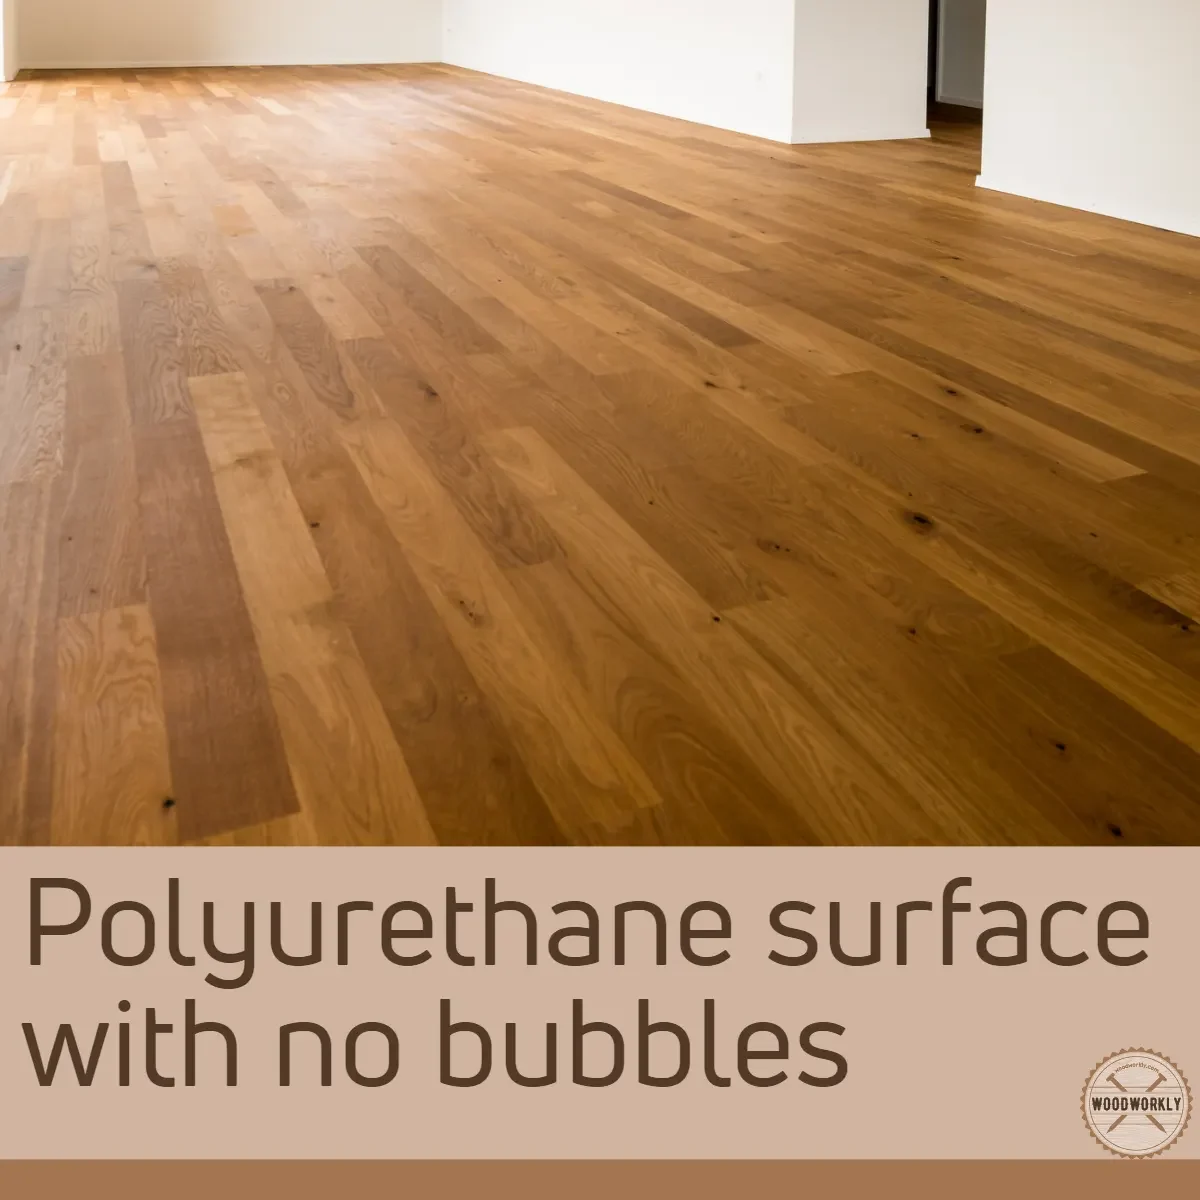
1. Bubbles in Polyurethane Finish
Once I applied polyurethane on my new dining room floor, I noticed small bubbles formed in the third coat after a few minutes of application.
Bubbles ruin the appearance of the polyurethane finish and they are caused by air becoming trapped in the finish as it dries.
This can happen for a variety of reasons, including brushing or rolling the finish too quickly or vigorously, using a low-quality brush or roller, or working in a warm, humid environment.
What Causes Bubbles In Polyurethane?
- Shaking the polyurethane can
- Wrong application method
- Improper brush preparation method
- Using a wrong brush type
- High humidity
- Polyurethane coats are too thick
Let’s discuss each of the above reasons that cause bubbles in polyurethane in detail to get a good view of this polyurethane problem.
1. Shaking The Polyurethane Can
By shaking the polyurethane can before applying, air can trap inside the polyurethane.
Never shake the polyurethane can upon use because it can create bubbles.
This trapped air can result in bubbles after applying the polyurethane layer, which is hard to avoid.
2. Wrong Application Method
Air bubbles in polyurethane finish form when using the wrong application methods such as applying thick coats, and not following the wood grain direction when applying polyurethane.
Formed bubbles ruin the wood’s appearance and won’t let the polyurethane finish make a good barrier over the wood for the outside moisture.
2. Wiping The Brush With The Side Of The Polyurethane Can
Wiping the brush along the side of the polyurethane can cause to form air bubbles that trap inside the brush fibers.
Then these air bubbles mix with polyurethane when applied, they got hard and can cause permanent bubbles in a polyurethane finish.
3. Dirty Or Dusty Surface And Brush Preparation
Before applying the polyurethane finish, you need to clean the wood surface and also prepare the brush by soaking it in a solvent.
Air bubbles can remain between the dust particles and trap inside the polyurethane finish when it hardens.
Plus, air bubbles can trap between the ferrule and bristle forming bubbles in the polyurethane finish.
4. Not Using The Correct Brush Type
Selecting the wrong brush type, won’t do the job smoothly and doesn’t go well with a polyurethane finish.
If the application surface is not compatible with the brush type, brushing will be difficult, and bubbles can easily occur.
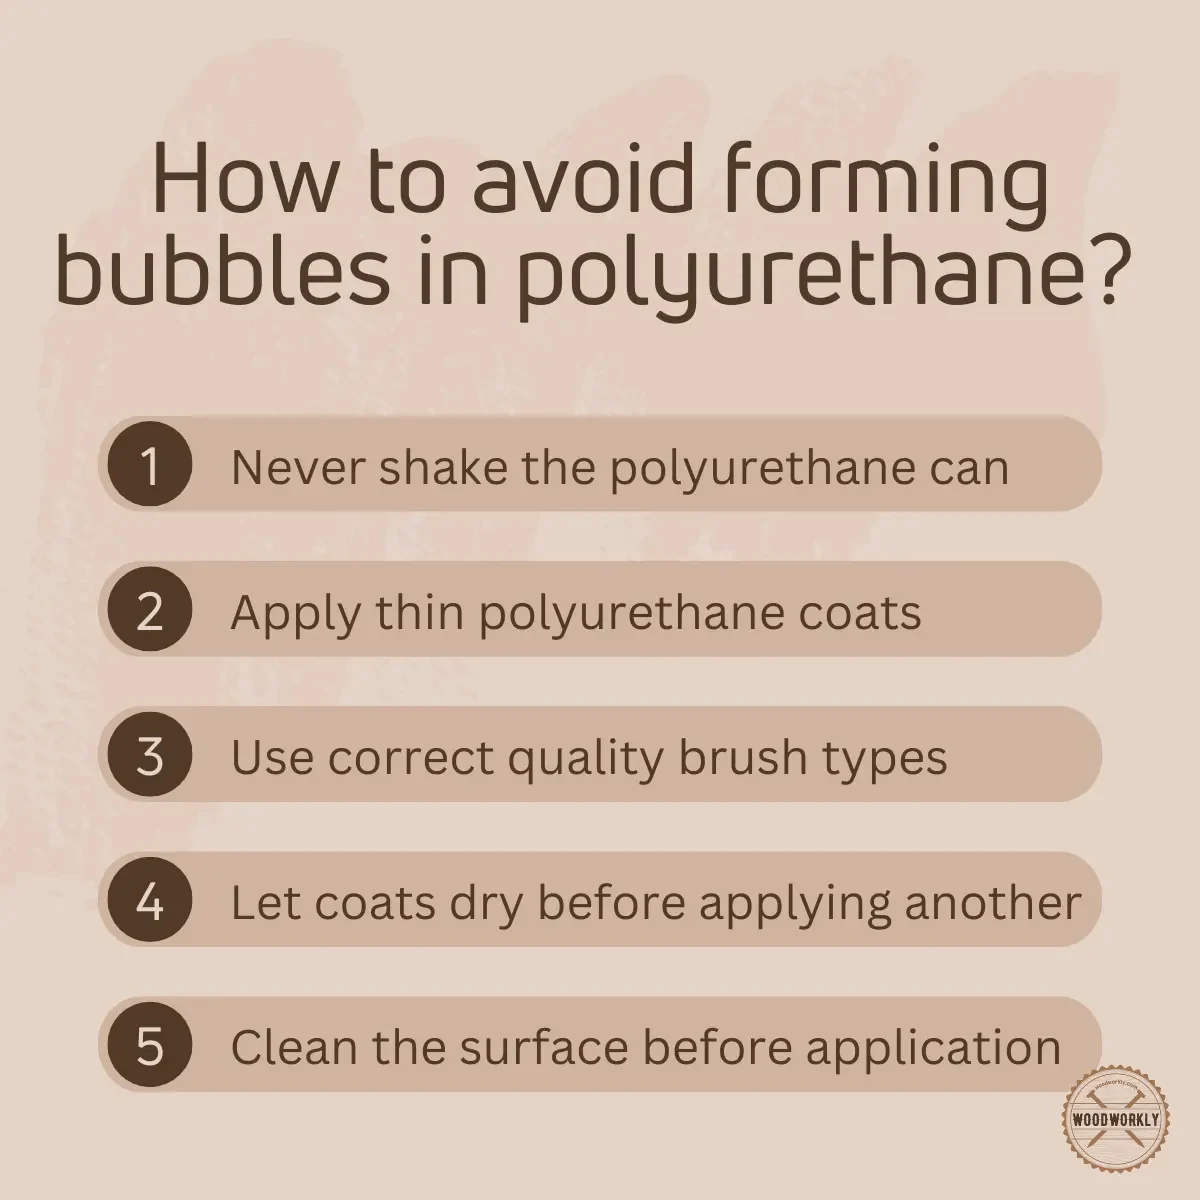
How to Fix Polyurethane Bubbles?
Here I have listed how you can fix polyurethane bubbles when and after applying the polyurethane finish.
- Stir the polyurethane can without shaking
- Clean the surface before applying polyurethane
- Apply thin coats of polyurethane
- Tap on bubbles before they dry
- Let the polyurethane coats dry well
So, let’s discuss each of the above methods to avoid polyurethane finish from forming bubbles.
1. Stir The Polyurethane Can Without Shaking
You need to stir the polyurethane can before use without shaking it rapidly.
By stirring, not only you’ll get a uniform composition of polyurethane all over the can, but also no air bubbles will trap inside.
2. Clean The Surface Well Before Application
Cleaning the surface before applying a polyurethane finish is a must. So, I highly recommend sanding and wiping the surface using a cloth before the first polyurethane coat.
Before wiping the surface with a cloth, you need to dip it in mineral oil (for oil-based polyurethane) or alcohol (for water-based polyurethane).
By wiping the surface with a dipped cloth, air bubbles that are trapped inside the surface will remove and don’t occur polyurethane bubbles after the application is done.
3. Apply Thin Coats
Never go for thick coats, because they not only have long drying times but also have enough rooms for air to trap inside while applying. So, always go for thin coats.
4. Tap On Bubbles Before It Dries
Once you apply the polyurethane finish, if you notice the bubbles are occurring, gently tap on the bubbles using the top of your brush until they flattened up.
This only works before your finish are dried. After it dries, there is no use in tapping.
5. Sand The Polyurethane coats Once They’re Dried
If you notice bubbles in the polyurethane finish after it is completely dried, the only option you can go is to do the sanding until the bubbles go and reapply the polyurethane coat in a proper method to avoid bubbles.
Plus, sanding between polyurethane coats helps to avoid layer separations and build a good adhesion between the coats.
That’s it, folks! Now you know how to fix bubbles in polyurethane finish easily with simple solutions.
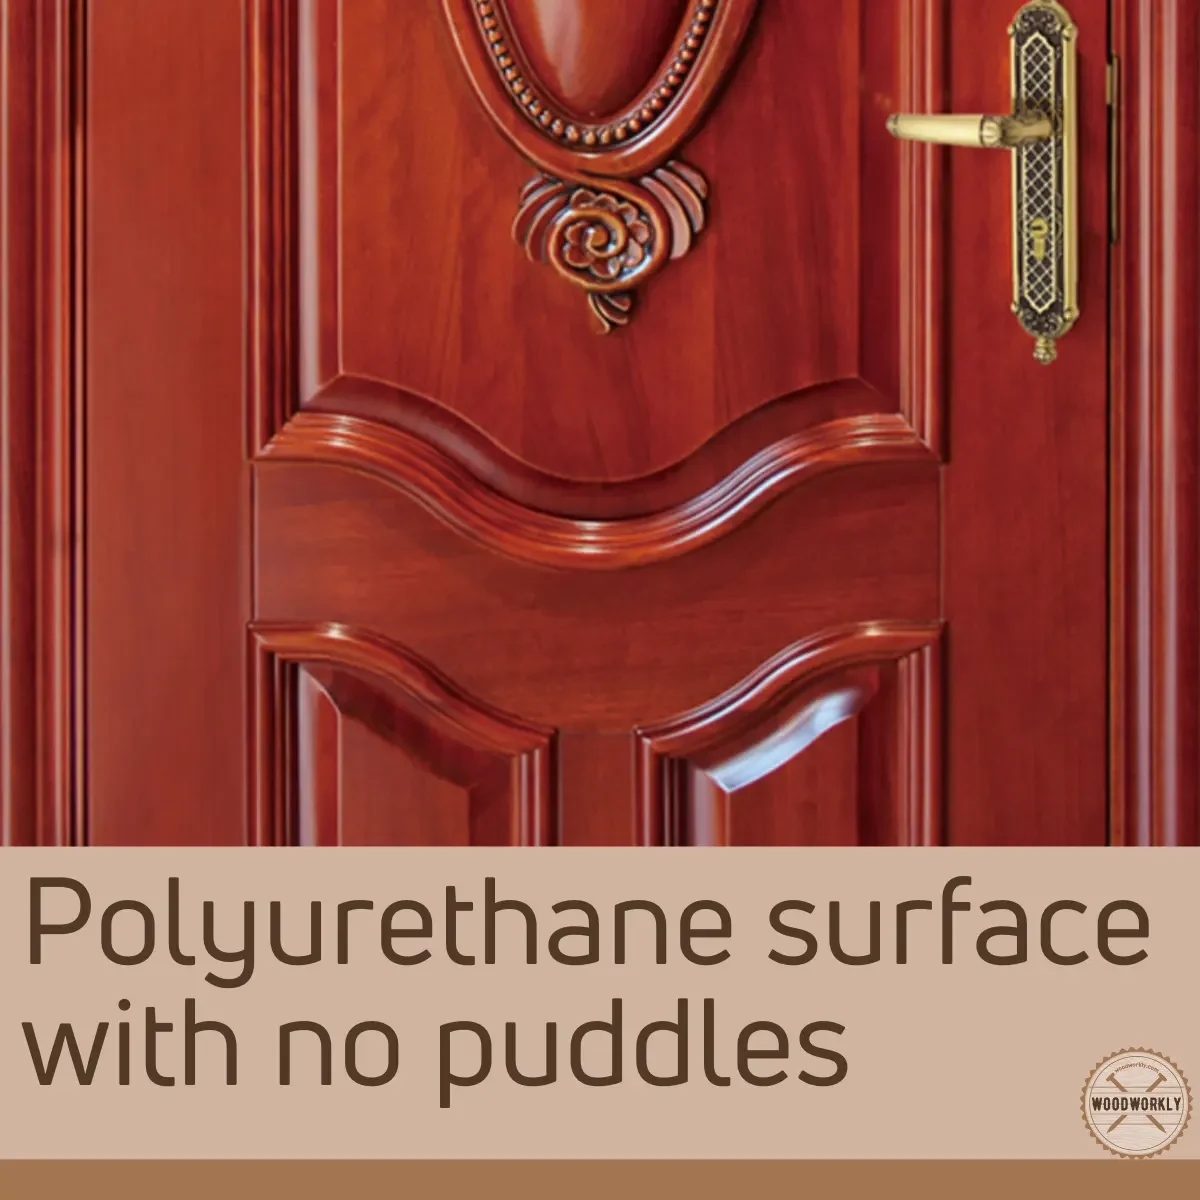
2. Puddles in polyurethane finish
After the final finish was done, most of the people notice puddle marks in the polyurethane finish.
Like bubbles, puddles also can occur due to various reasons and mistakes.
So, let’s talk about the reasons for puddles in a polyurethane finish and how to fix polyurethane mistakes.
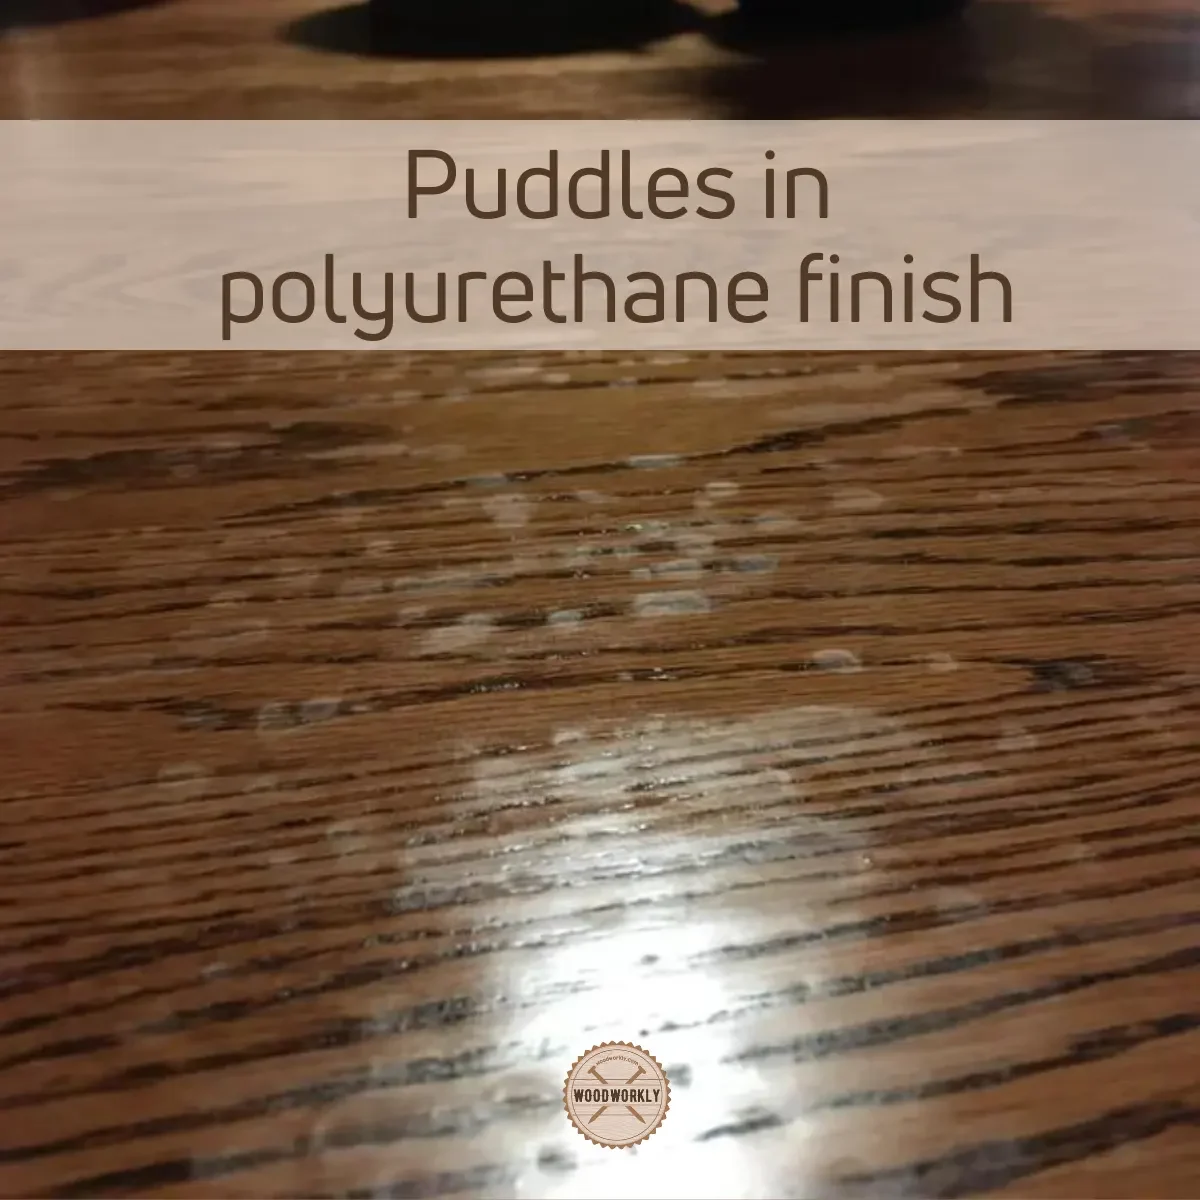
Causes for Puddles in Polyurethane Finish
- Poor drying times
- Applying thick polyurethane coats
Let’s discuss each of the above reasons that cause puddles in polyurethane finish in detail.
1. Not Letting Polyurethane Coats Dry Well Between Coats
After applying the first coat of polyurethane you need to wait till it 100% dries before going for the next coat.
Otherwise, puddle marks will occur once the finishing is done and cannot reverse easily.
2. Application Of Thick Layers
By applying thick layers of polyurethane, puddles can easily occur, because you cannot apply a uniform layer throughout the surface.
Some places will be thin and some are extra thick and cause getting puddles.
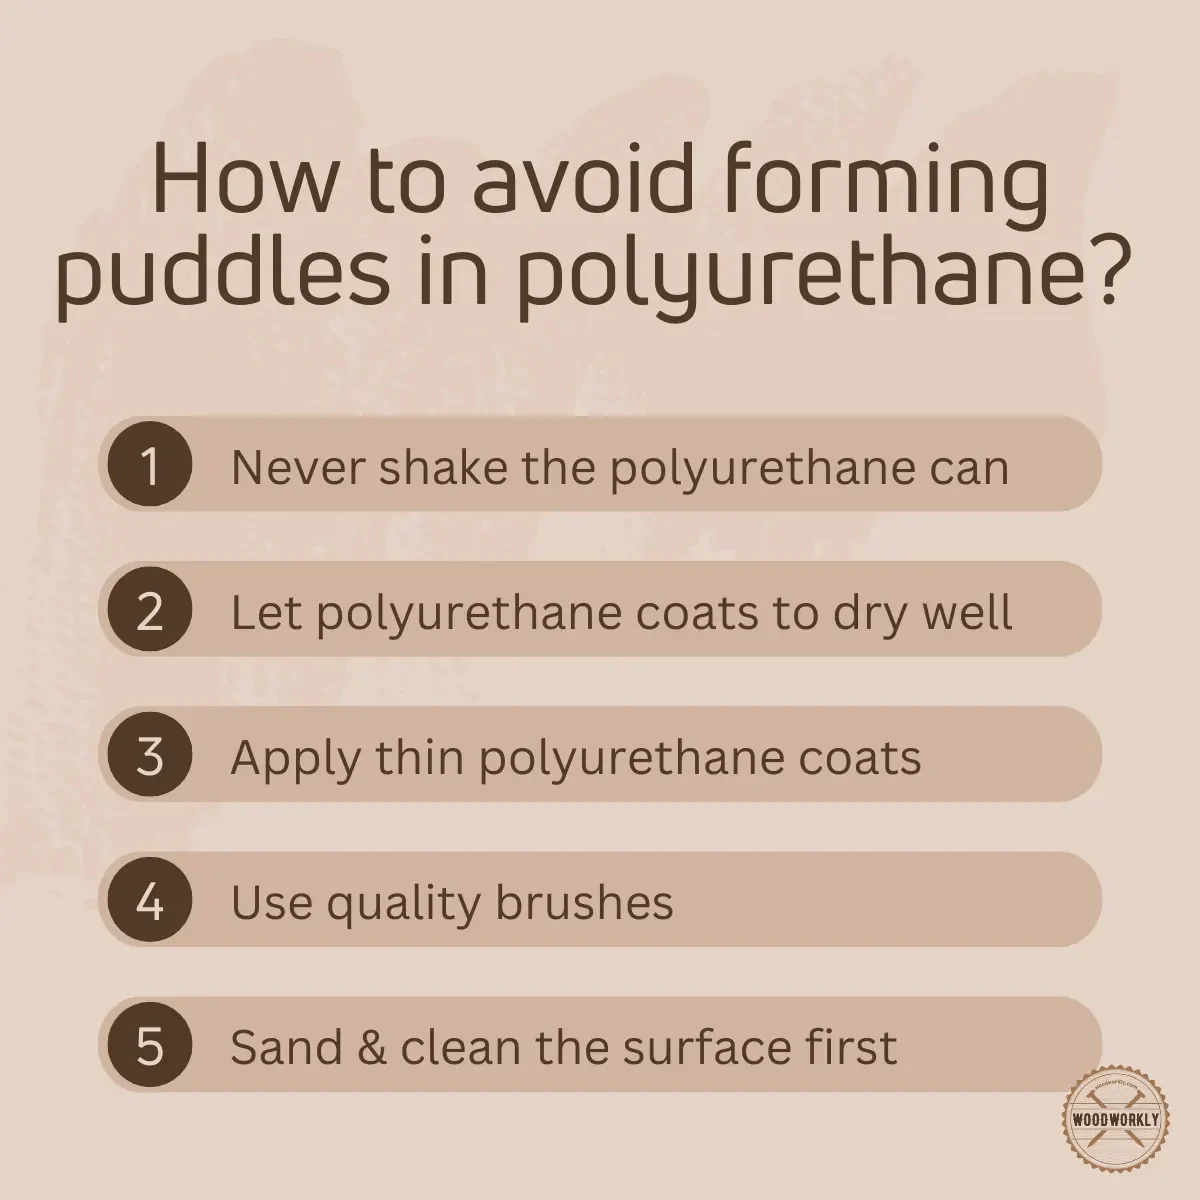
How to Fix Polyurethane Puddles?
- Wipe polyurethane finish with mineral spirits
- Sand the surface and start over
Let’s discuss solutions for puddles in polyurethane finish in detail.
1. Wipe With Rag-Soaked Mineral Spirits
If you notice puddles in the polyurethane finish, I highly recommend wiping your oil with a rag soaked with mineral spirit.
- Wipe off water-based polyurethane with a damp rag for 5-10 minutes.
- Wipe off flawed oil with mineral spirits for 20 minutes.
With water-based polyurethane, you need to be pretty quick since it dries quicker than an oil-based polyurethane finish
2. Sand And Start Over
If you couldn’t wipe the surface before it completely dries, sad to say, you probably should do the sanding again completely and reapply the polyurethane coats.
But this time, make sure to go for thin layers and wait for days until each coat dries completely before going for the next coat.
Hope you learned all you wanted to know about the method to fix puddles in a polyurethane finish.
3. Uneven Polyurethane Finish
Getting an even polyurethane coat is a crucial task. If you’ve noticed random dark color spots on the polyurethane finish as it dries, that’s probably an indicator of an uneven finish.
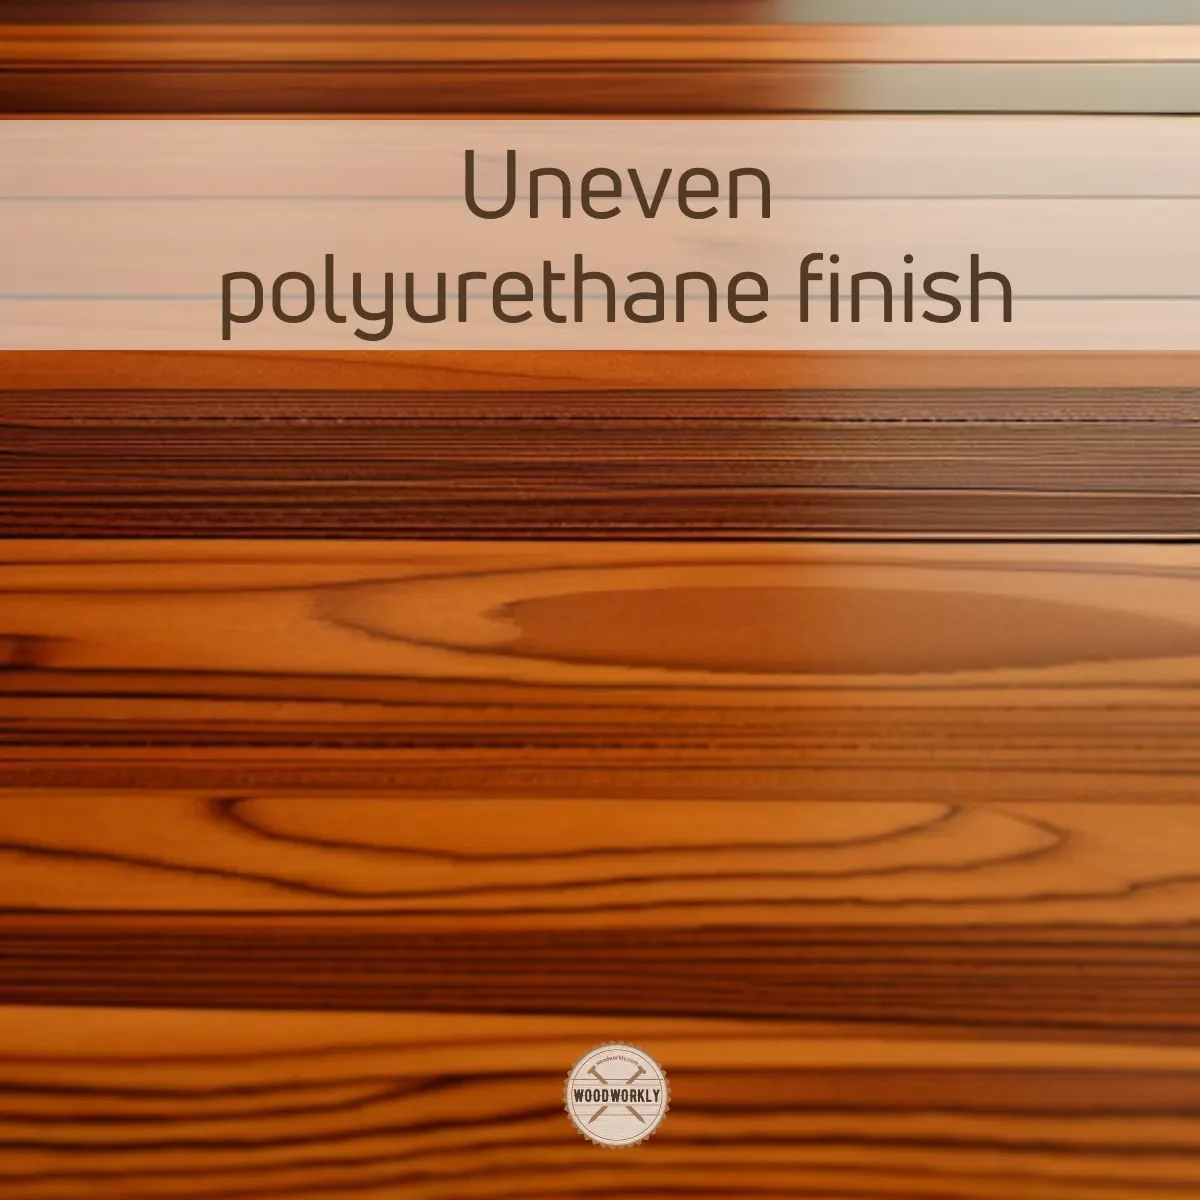
Plus, an uneven polyurethane finish may take a longer time to dry because some areas will dry significantly slower compared to others.
Causes For Uneven Polyurethane Finish
- Insufficient mixing
- Contaminated polyurethane
- Improper sanding and cleaning of the surface
- Uneven application of polyurethane finish
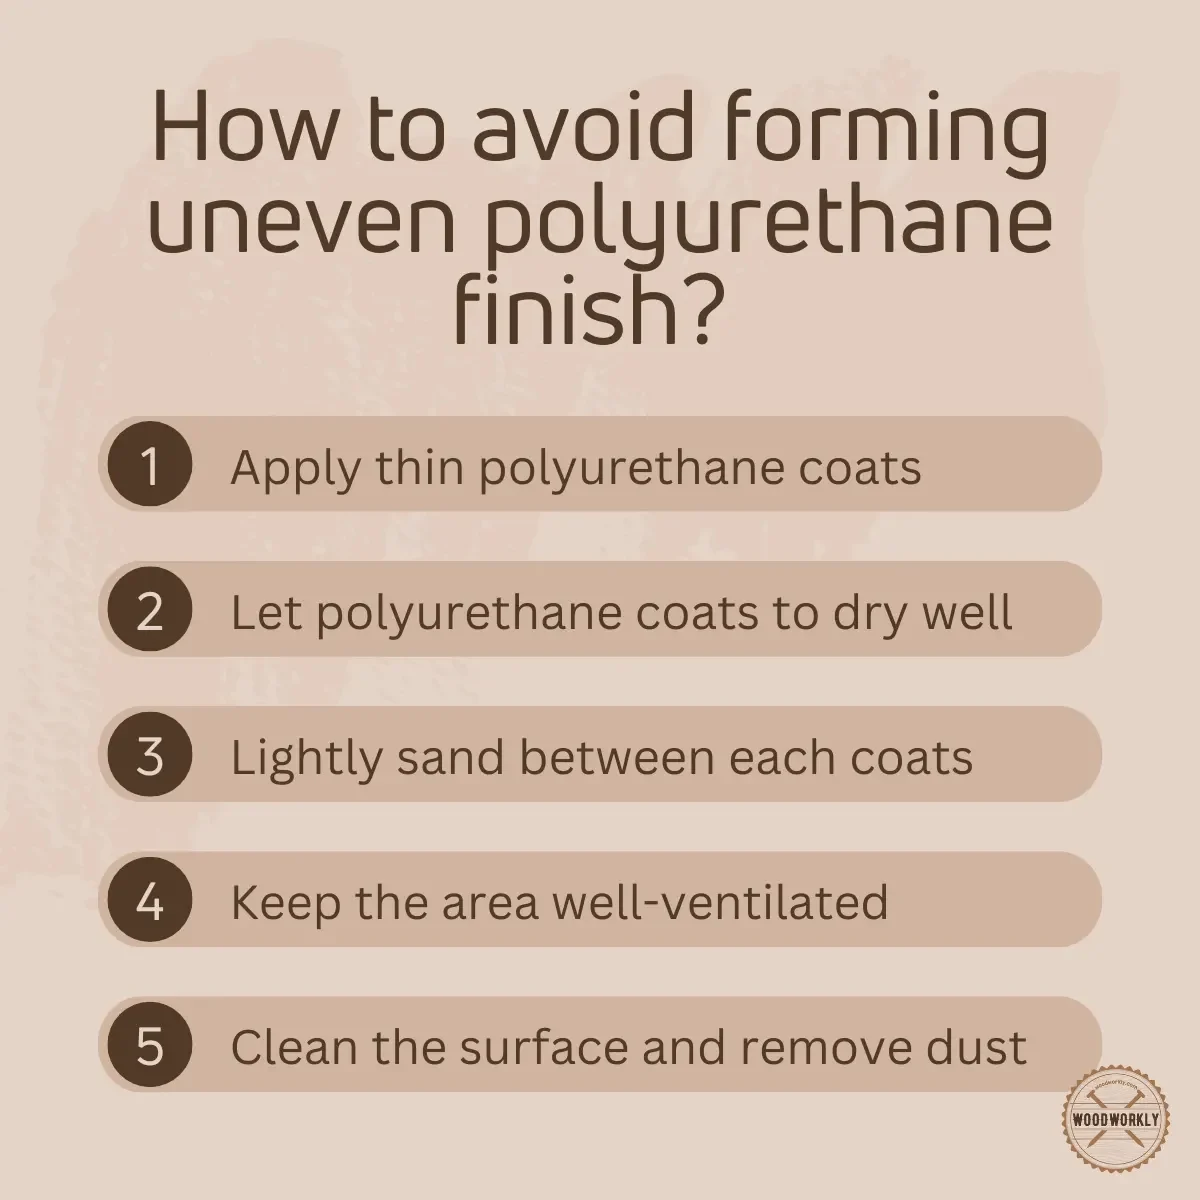
How to Fix Uneven Polyurethane Finish?
To fix uneven polyurethane finish, sand the existing polyurethane finish and start over.
Here I have listed the steps you need to follow to get an even polyurethane finish.
1. Sand the Uneven Finish
Sand the whole surface with a fine-grit sandpaper. Don’t sand too hard because it can damage the surface easily.
2. Clean The Surface
Wipe the surface using a clean cloth to remove dust and debris. Dirty surfaces make lots of trouble.
3. Apply Polyurethane Evenly
Get a soft brush and apply thin coats of polyurethane smoothly with uniform thickness all over the surface. Always go for thin coats.
Wait till the first coat dries completely before going for the second coat.
Likewise, I recommend going at least 3 coats to get the finish that you wish. Scuff sand between each coat if necessary.
4. Separating Issue in Polyurethane Finish
Polyurethane coat layer separation mostly occurs when the adhesion between the coats is poor.
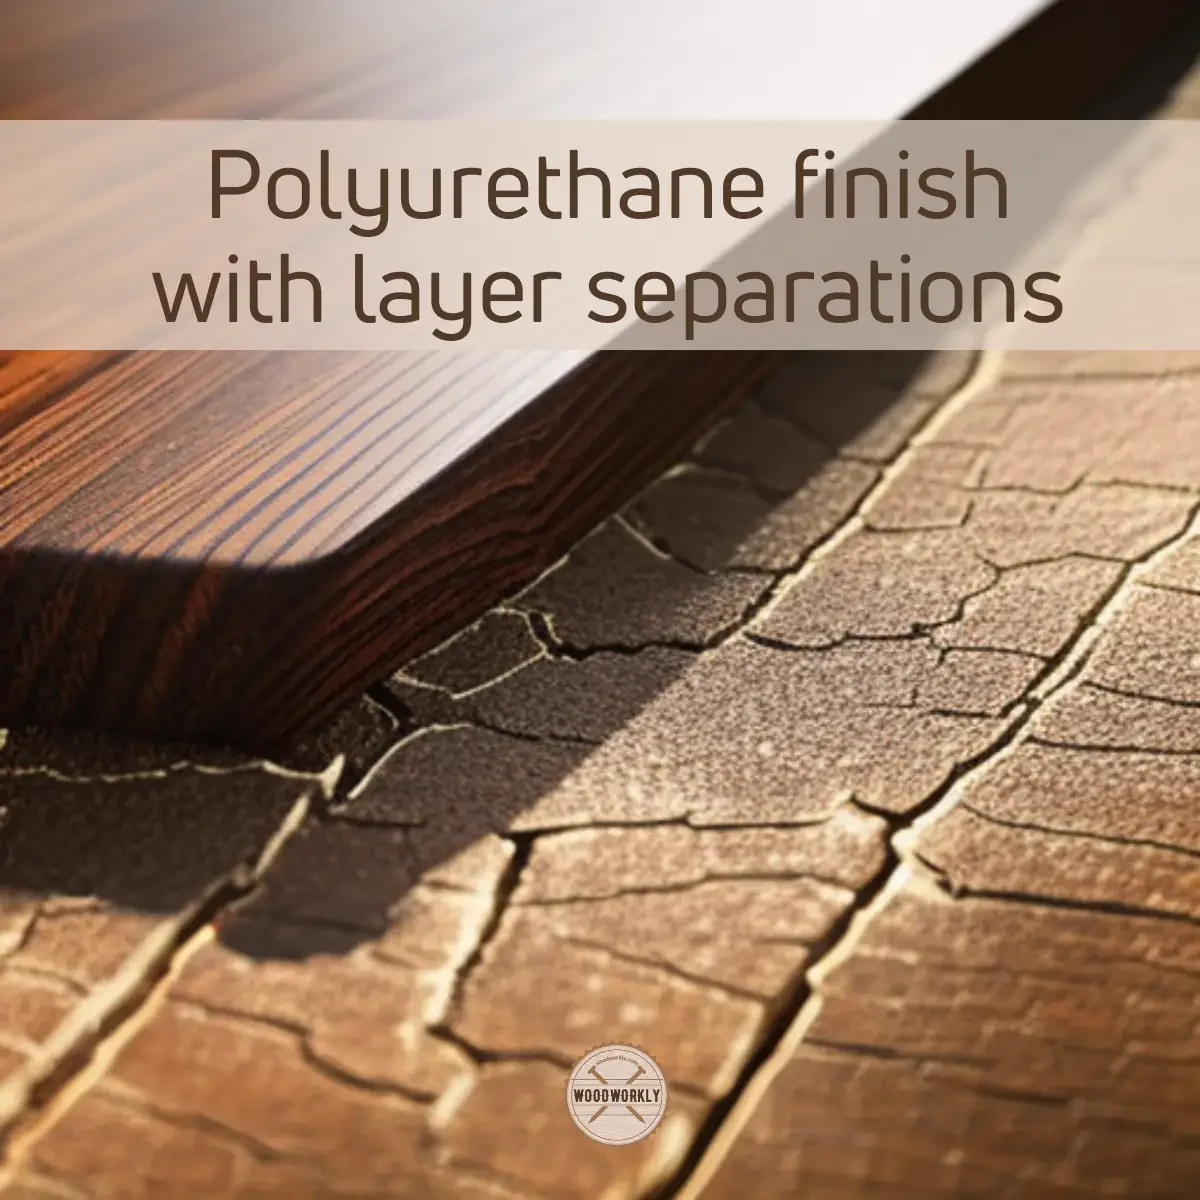
If you’ve noticed the polyurethane coats separate over time, that can happen because of the following mistakes,
Causes For Layer Separation In Polyurethane Finish
- The polyurethane finish is not mixed properly
- Polyurethane is contaminated
- Product is expired
- The surface wasn’t clean between each coating
- Poor or no light sand between polyurethane coats
- Wood is oily and doesn’t bond well with the finisher
- Due to the application of thick layers
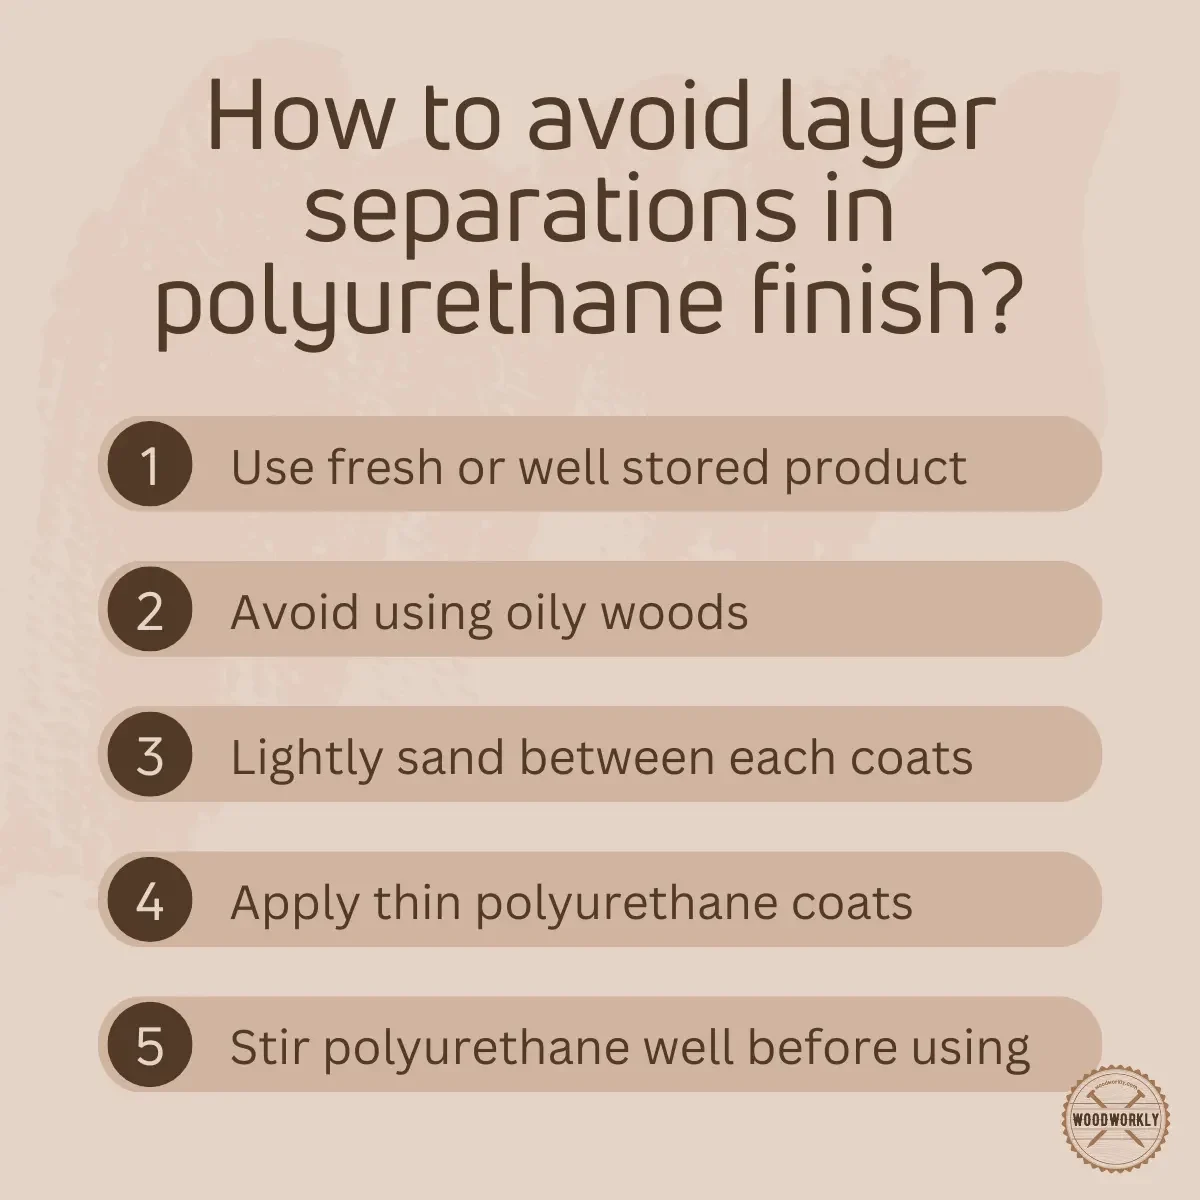
How to Fix Separation of Polyurethane Finish?
The only option you can do for fixing the separation issue polyurethane finish is, to sand everything and start over with a fresh new polyurethane finish from another manufacturer.
Here I have listed the steps you need to follow,
1. Sand The Existing Surface
Sand the whole surface with a fine-grit sandpaper. Don’t sand too hard because it can damage the surface easily.
2. Clean The Surface
Wipe the surface using a clean cloth to remove dust and debris. Do the cleaning after applying each coat before going for the next coat.
But make sure to wait until it completely dries before wiping the surface.
3. Apply Polyurethane Finish
Get a soft brush and apply a polyurethane finish smoothly with uniform thickness all over the surface. Always go for thin coats.
Wait till the first coat dries completely before going for the second coat.
4. Lightly Sand Between Polyurethane Coats
lightly sand each coat of polyurethane with fine-grit sandpaper (320 grit or finer) to give adhesive properties to the finish which helps the next polyurethane coat to stick well onto the existing coat.
Light sanding helps to build good adhesion between polyurethane coats.
Likewise, I recommend going at least 3 coats to get the finish that you wish. Scuff sand between each coat if necessary.
By following the above 3 steps properly, you won’t get any separation issues after the application of the polyurethane finish.
5. Discoloration of Polyurethane
Yellowing polyurethane is a natural process rather than considered a mistake.
Yellowing can be only seen in an oil-based polyurethane and quality water-based polyurethane won’t yellow.
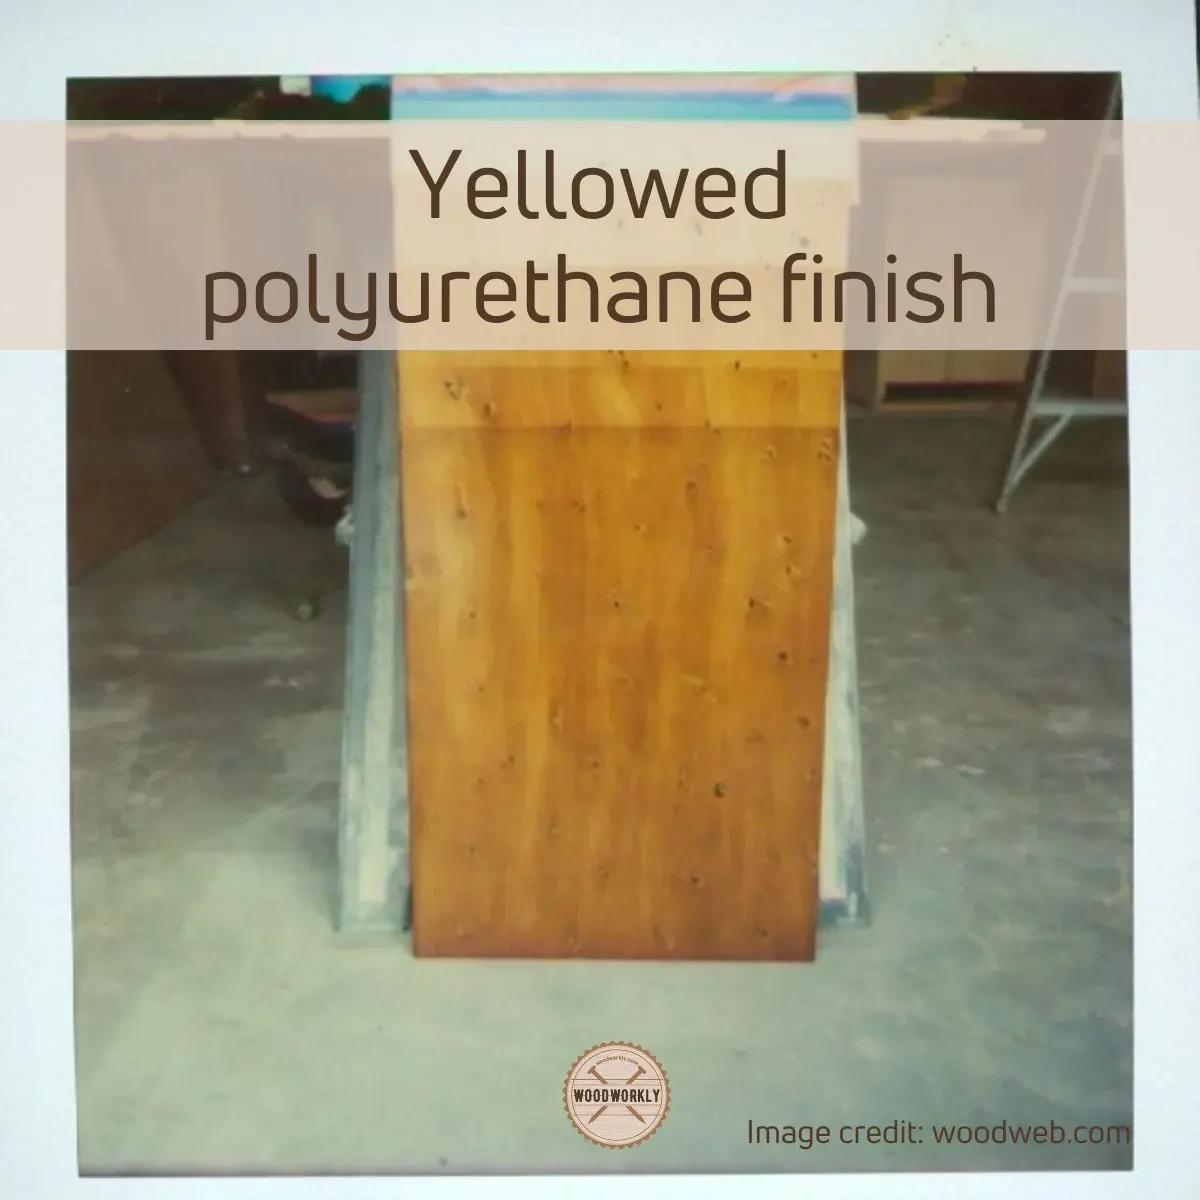
Once you apply a polyurethane finish over your hardwood, you’ll notice it turns yellow over time upon curing due to the volatile organic compounds in oil-based polyurethane.
But with proper care, you can prevent yellowing.
Causes For Discoloration Of Polyurethane Finish
- UV rays from the sun
- Using an Oil-based polyurethane finish
- Moisture
- Minerals
The above factors cause the discoloration of polyurethane and there are several things you can do to fix this.
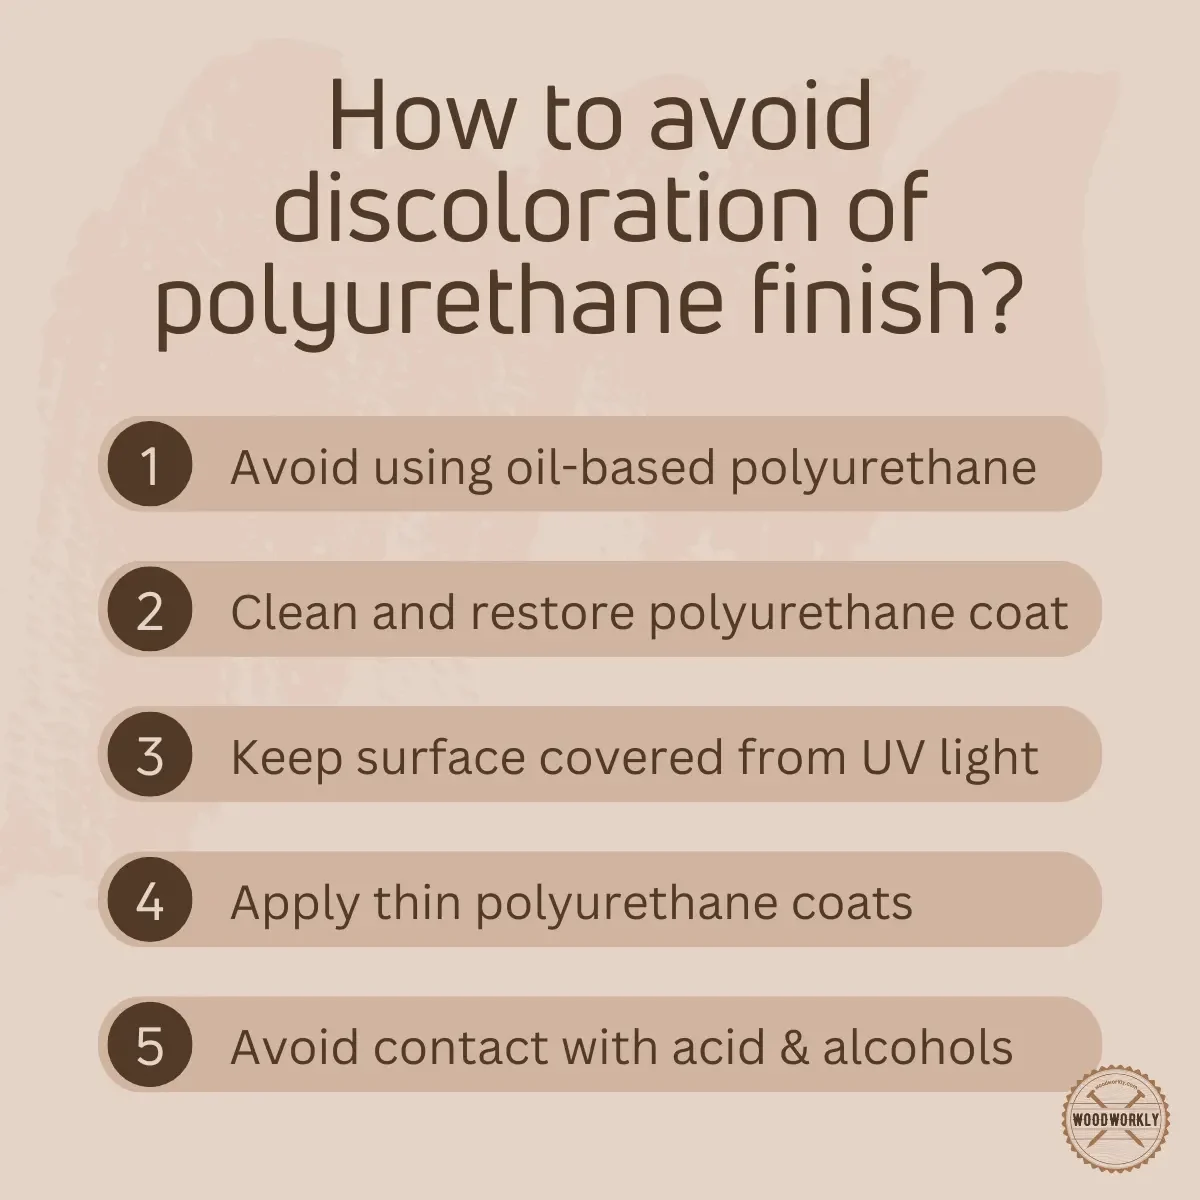
How to Fix Discoloration of Polyurethane?
You can fix the discoloration of polyurethane by sanding and reapplying the polyurethane finish from time to time because this is hard to avoid.
Proper shading is also good to go.
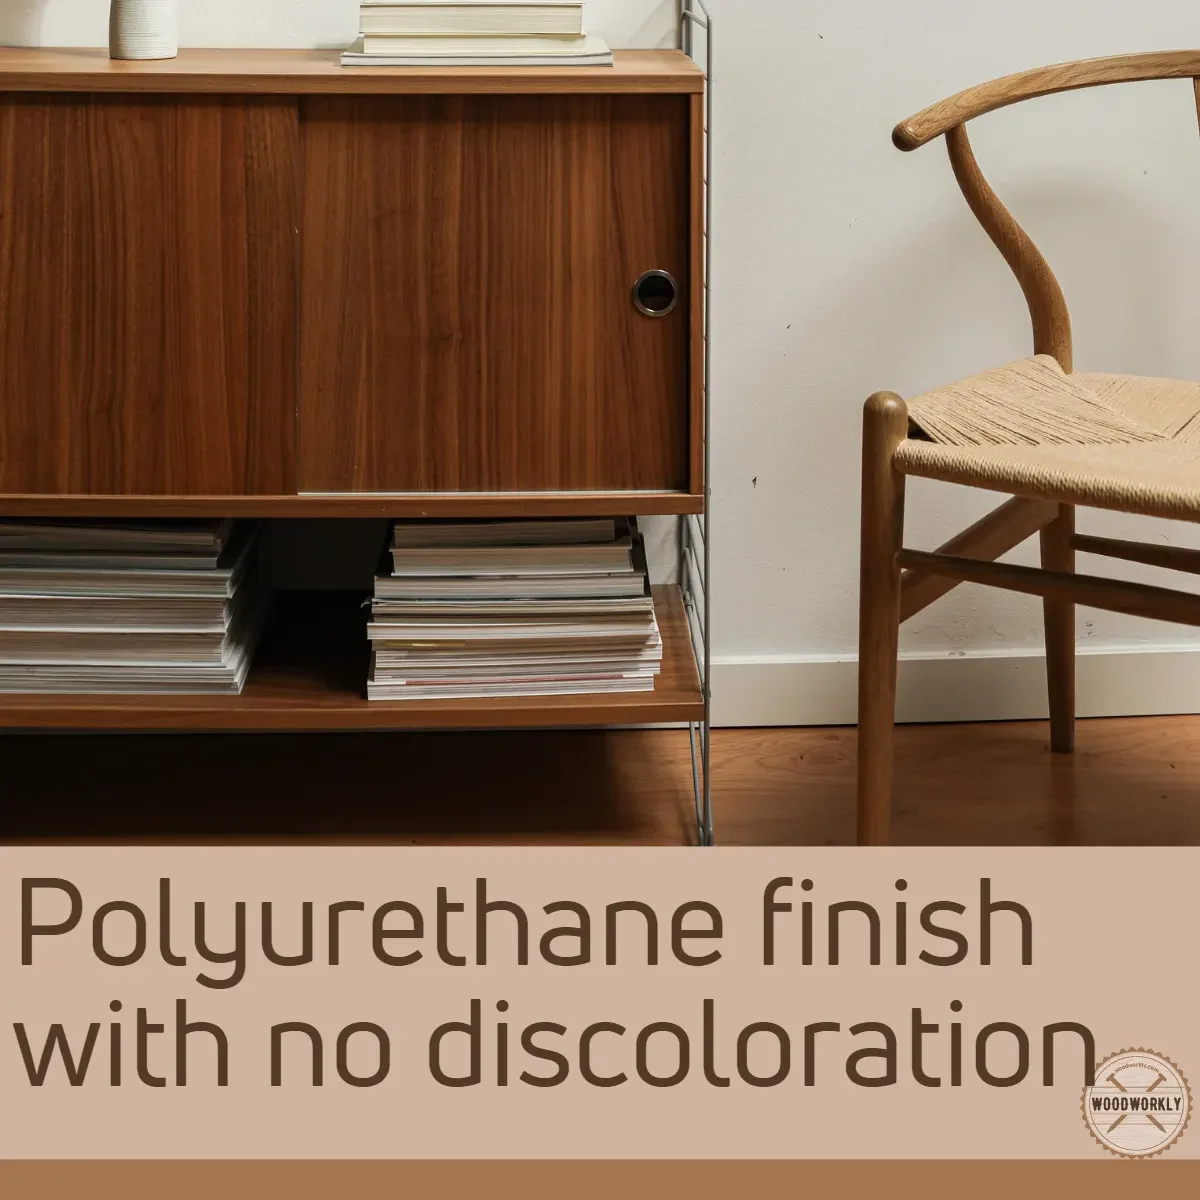
I highly recommend going with water-based polyurethane because it doesn’t discolor like oil-based polyurethane.
Also, don’t forget to go with thin coats with each layer.
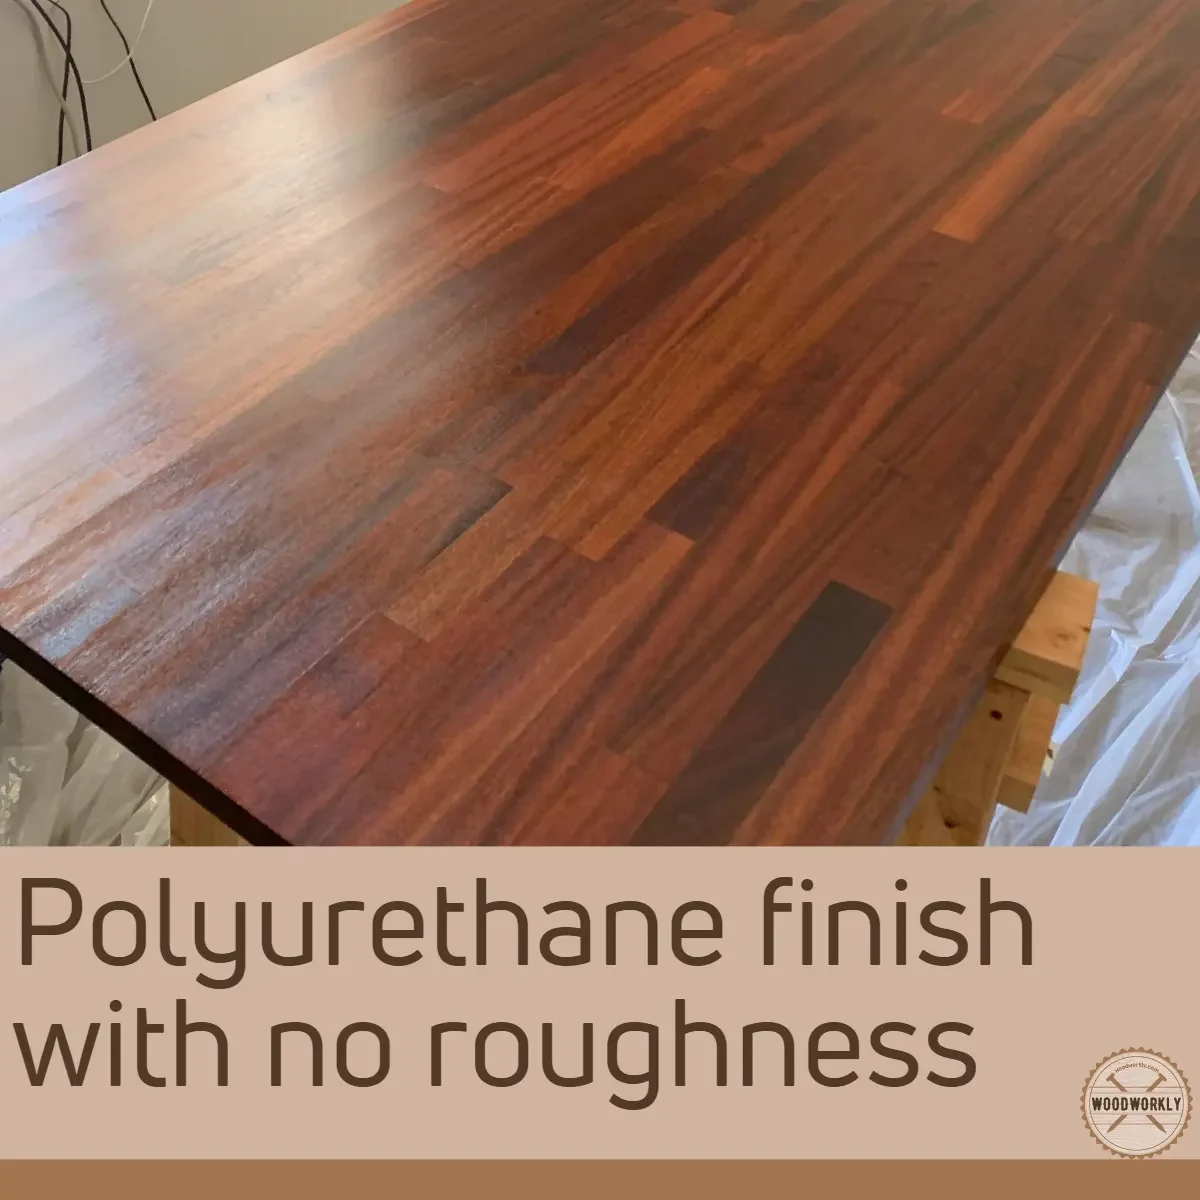
6. Surface Roughness of Polyurethane Finish
Rough polyurethane finishes mainly affect its physical appearance.
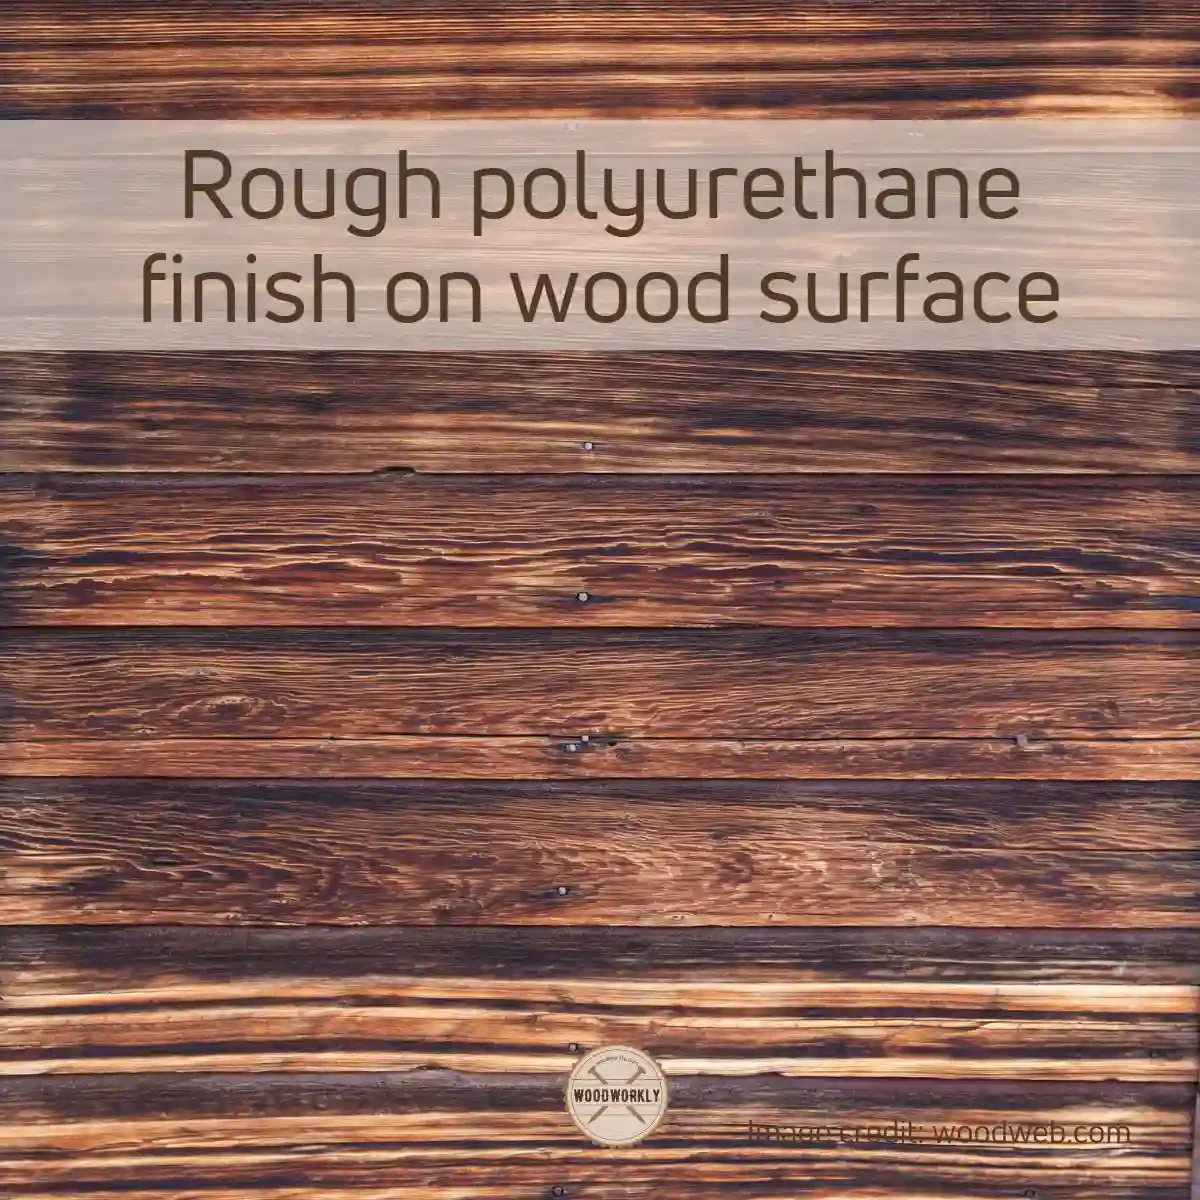
The surface roughness can occur because of the following reasons,
- Poor surface preparation
- Contaminated polyurethane product
- Poor sanding between coats
1. Insufficient Preparation
If the surface is not cleaned properly before applying the polyurethane finish, the surface will be rough when it is dried due to dust and debris.
2. Contaminated Product
If the polyurethane product is low quality or used, there is a high chance of it getting mixed with some other chemicals which cause roughness afterward.
3. Poor Sanding Between Coats
Light sanding between each coat of polyurethane is necessary to build good adhesion between surfaces and to avoid surface roughness.
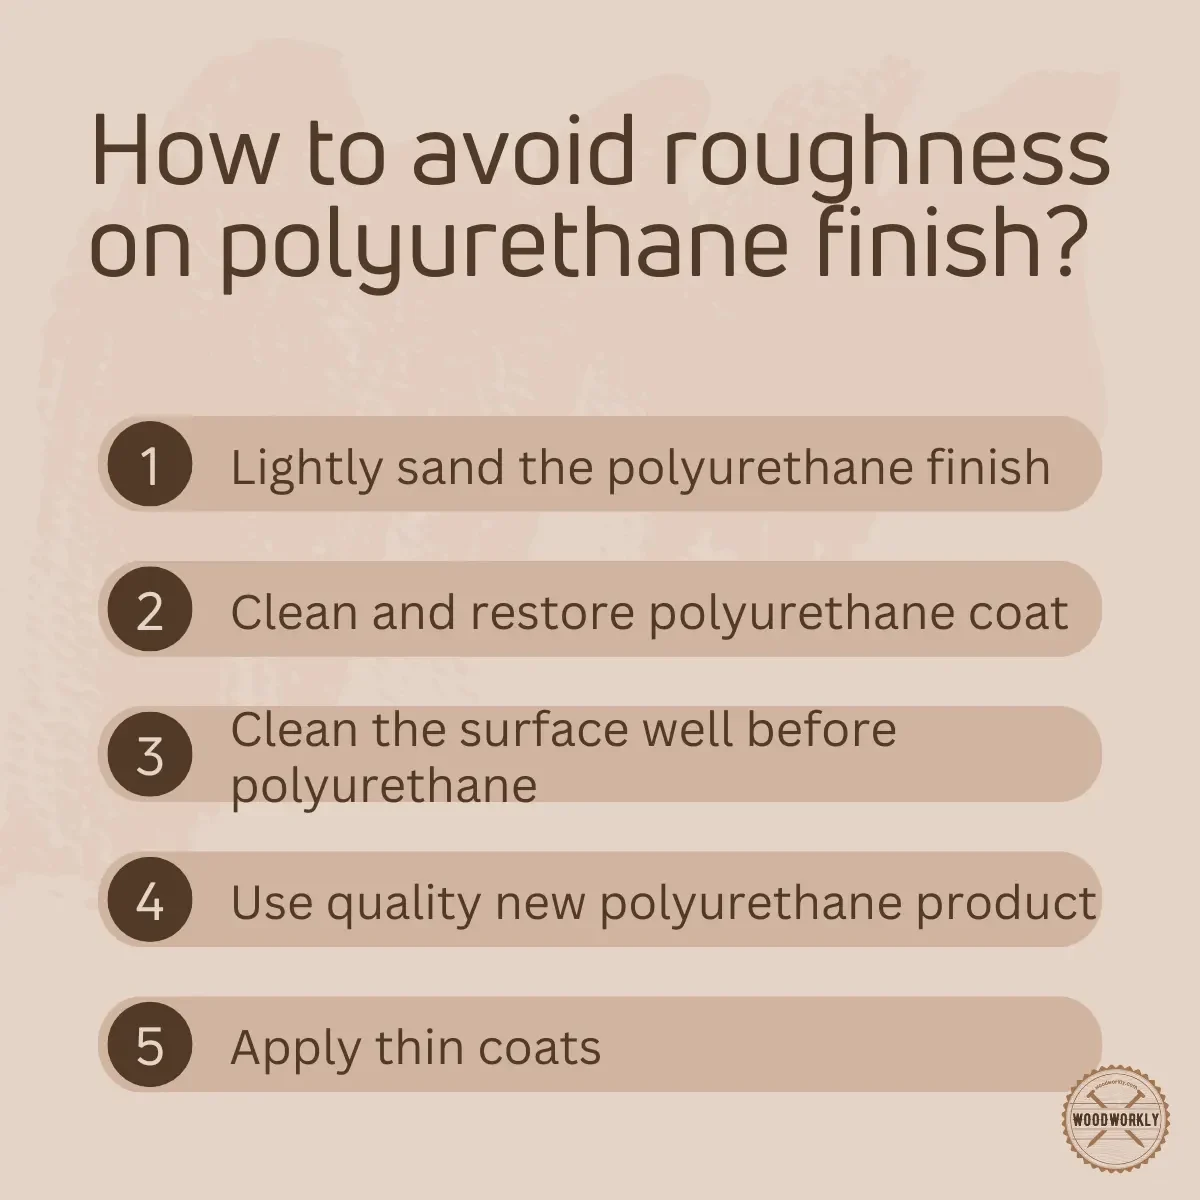
How to Fix Surface Roughness of Polyurethane Finish?
- Abrade and screen the finish well to get the gloss shiny look back
- Clean the surface properly with a cloth after each coat of polyurethane finish to avoid getting dust, moisture, and water between the coatings.
- Sand with fine-grit paper without damaging the surface after each coating has dried completely.
If none of the above methods work for the roughening issue, the only option you can do is sand the surface and reapply the polyurethane finish from the beginning.
You can learn to fix your mistakes!
7. Orange Peel Effect
The orange peel effect of polyurethane finish can occur because of using a roller instead of using a brush or spray.
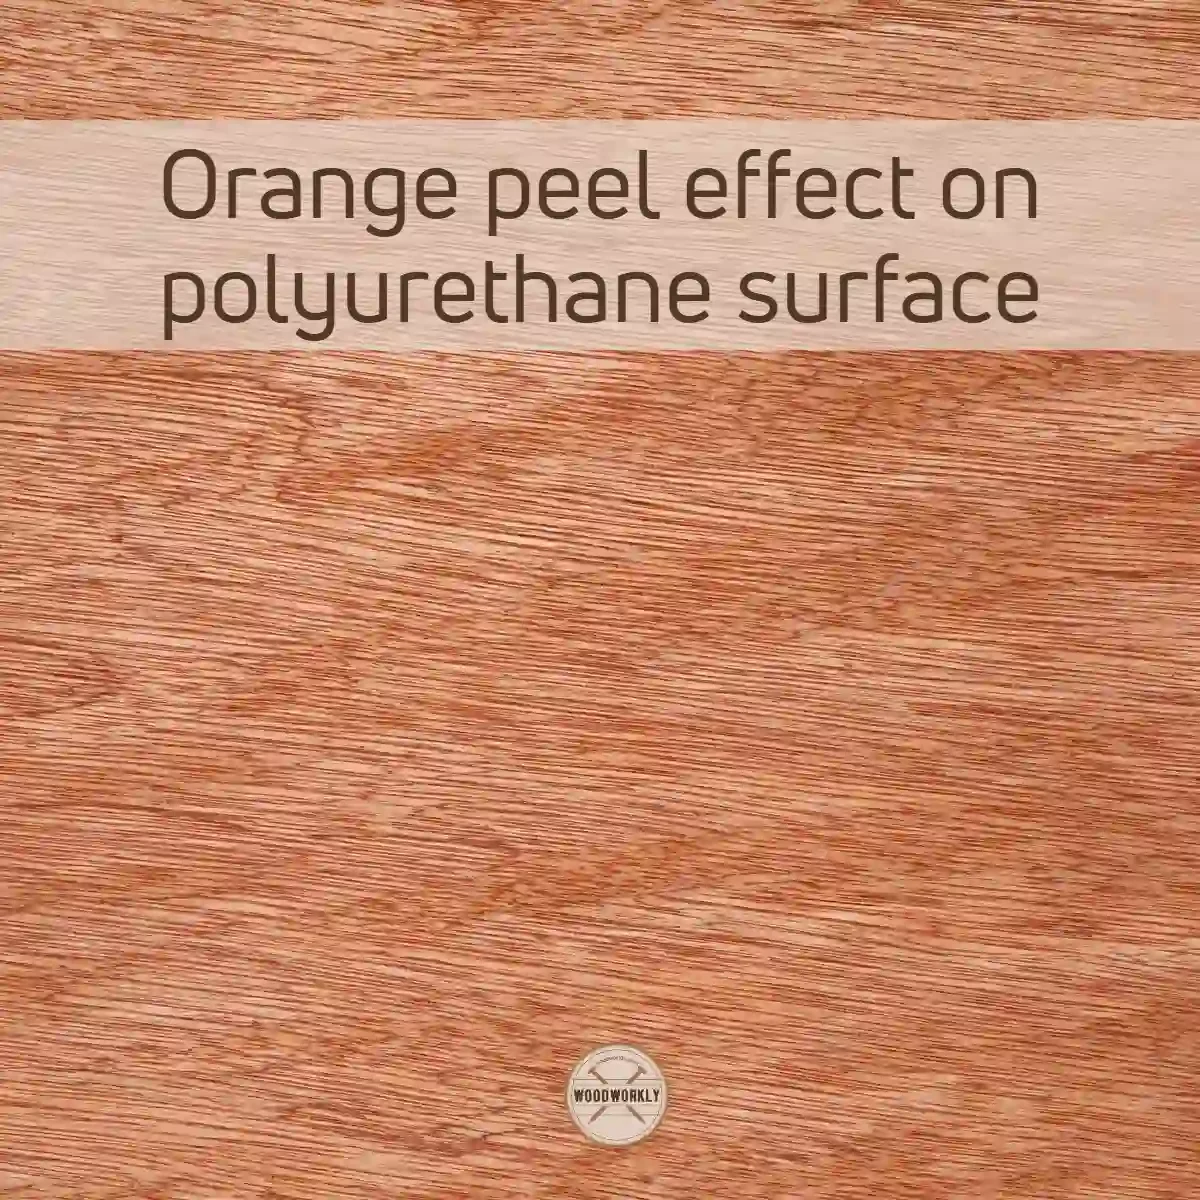
Orange peel color will occur on the polyurethane finish when the roller is not napped well.
Also, due to very low-temperature levels, the orange peel effect can occur in a polyurethane finish.
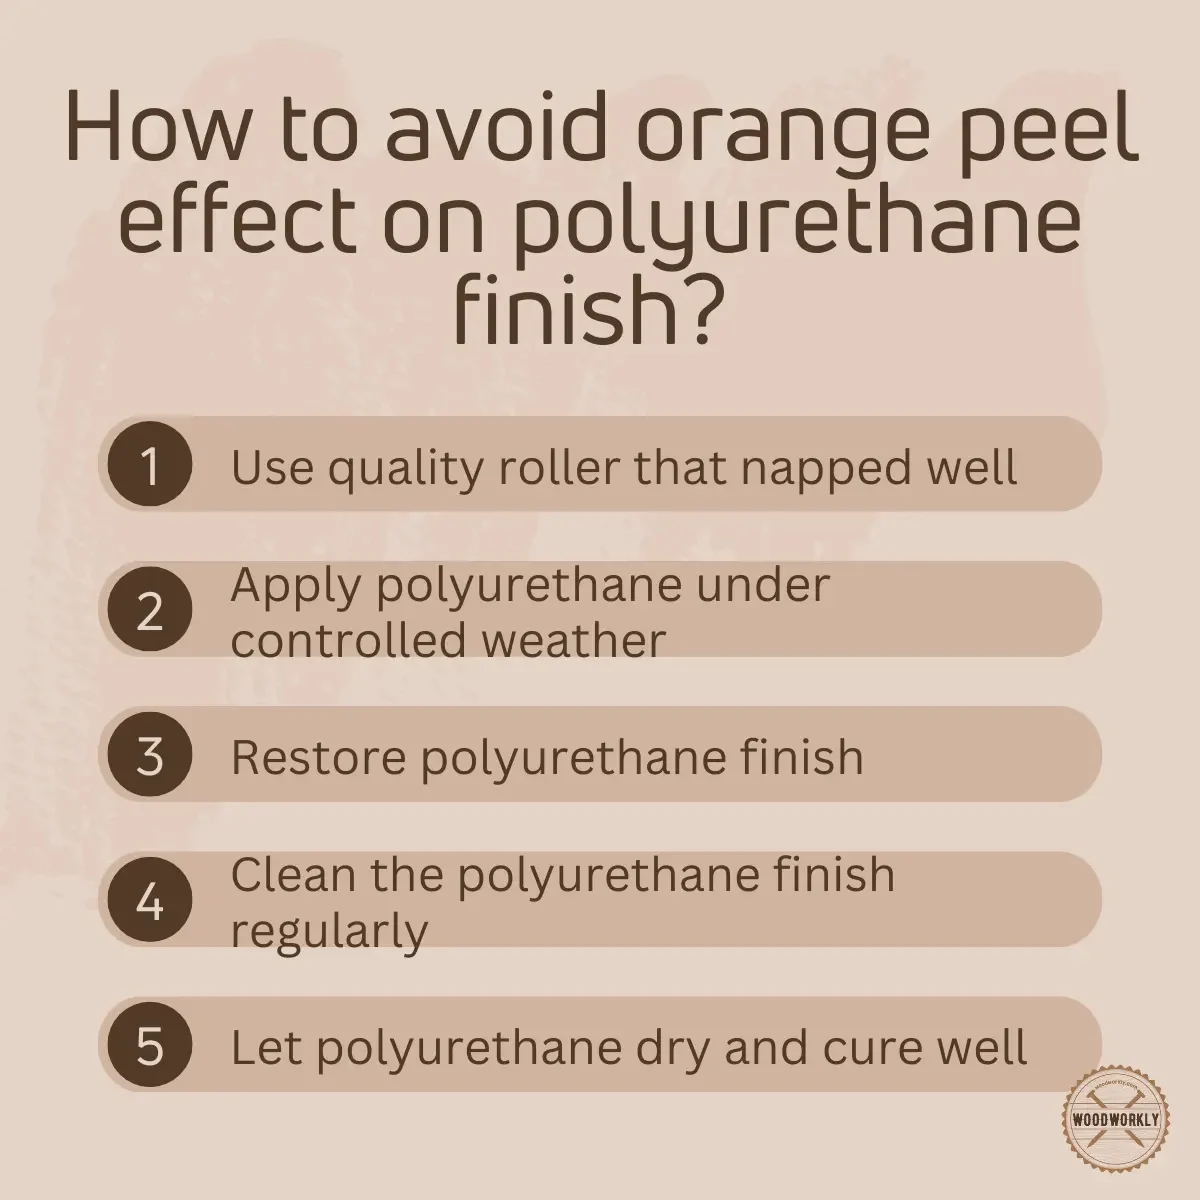
How to Fix the Orange Peel Effect of Polyurethane Finish?
The only option you can do for fixing the orange skin of the polyurethane finish is, to sand everything and start over with a brush or spray.
I don’t recommend using a roller when applying a polyurethane finish, without enough experience.
Also, make sure to keep the temperature level average (not extreme) while applying polyurethane coats and when they’re drying.
Extreme weather conditions can change the chemical compositions of the finisher and ruin the furniture or woodwork.
8. Streaking Polyurethane Finish
Streaking means brush marks. Those streaking marks appear because the polyurethane finish dries before the marks are gone.
This causes rapid gloss levels all over the surface. You may notice some areas have high gloss while some are not.
Causes For Streaks In Polyurethane Finish
- Excess-free movement of the brush
- Polyurethane is not mixed or stirred well
- Not having a wet edge
- No uniform spreading
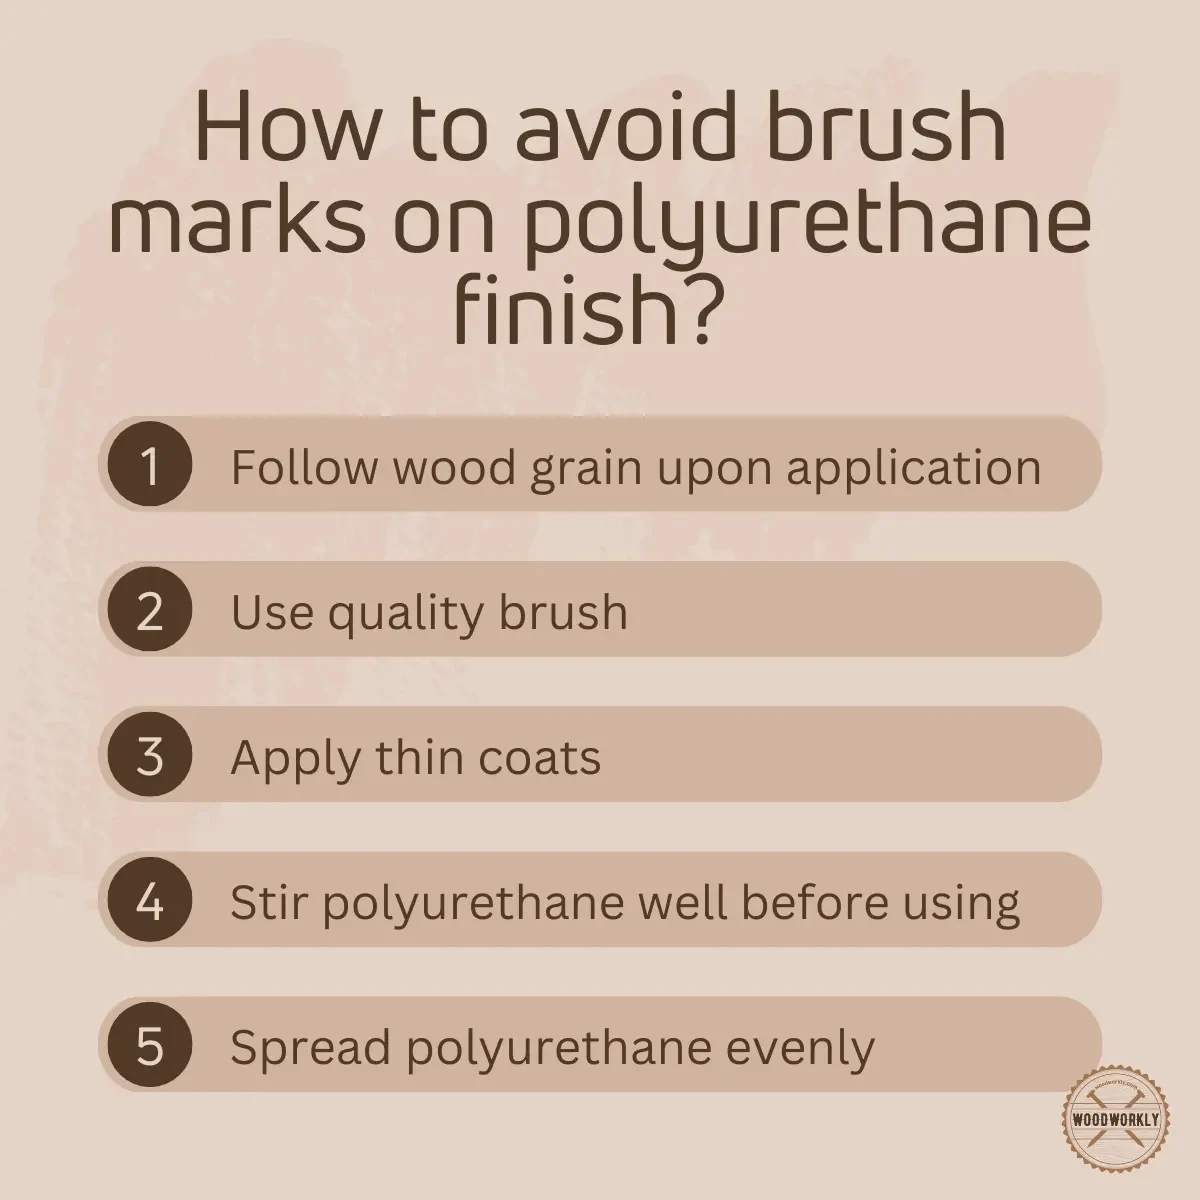
How to Fix Streaking of Polyurethane Finish?
Screen the surface and recoat with a new polyurethane layer. Sanding is required before applying each layer with fine-grit sandpaper (220 grit).
Also, if you’re good at finishing woods, put another coat of polyurethane where you can see low gloss levels and fill brush streaks carefully.
After that wait till it is completely dry and reapply the polyurethane coat after a little sanding.
9. Alligator Skin Polyurethane Finish
Yes, you read that correctly, if you do some mistakes your polyurethane finish will finally end up like an alligator skin with cracks and interconnected parts and ugly texture.
This is known as crazing.

Causes For Alligator Skin In Polyurethane Finish
- High moisture content
- Due to cold weather conditions
- If you’ve not removed the previously applied polyurethane coat layer completely, when you apply the new coat on top of that, the interconnected cracks can happen as crazing.
- Polyurethane coats are too thick
- If the product is expired or of low quality
If the moisture content in wood is too high when applying a coating, once the polyurethane coating dries, the water will trap inside and can cause the alligator skin texture.
So, let’s discuss how we can stop polyurethane finish getting alligator skin.
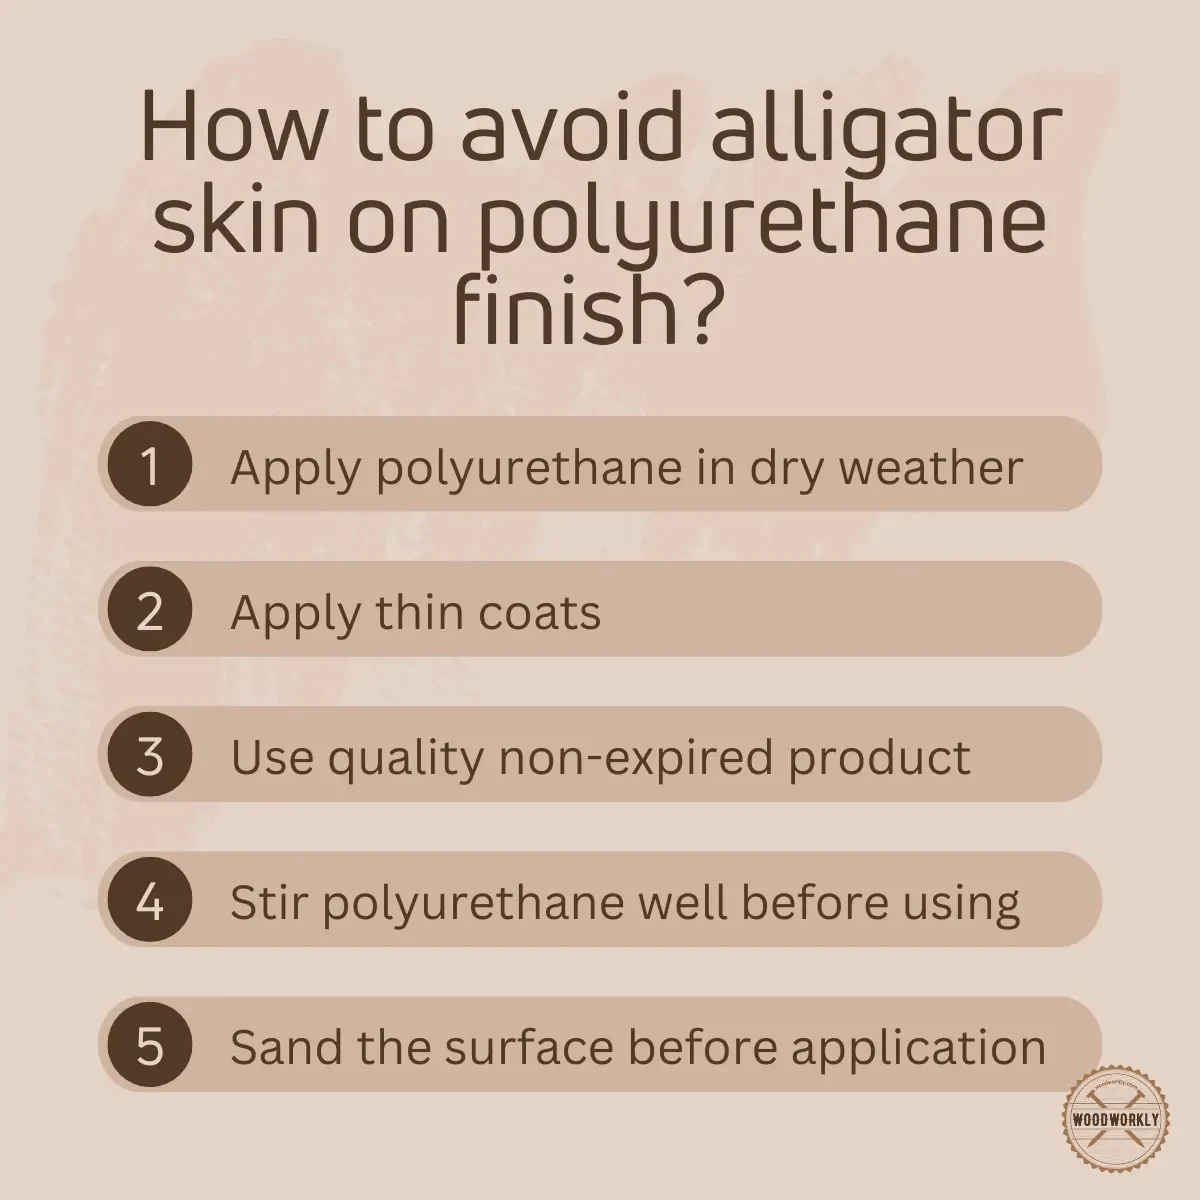
How to Fix Alligator Skin Polyurethane Finish?
Screen the surface and recoat with a new polyurethane layer.
Sanding is required before applying each layer with fine-grit sandpaper (220 grit) to make good adhesion.
10. Cratering Polyurethane Finish
Crates happen when the polyurethane finish or the surface gets contaminated by dust, chemicals, or other effects.
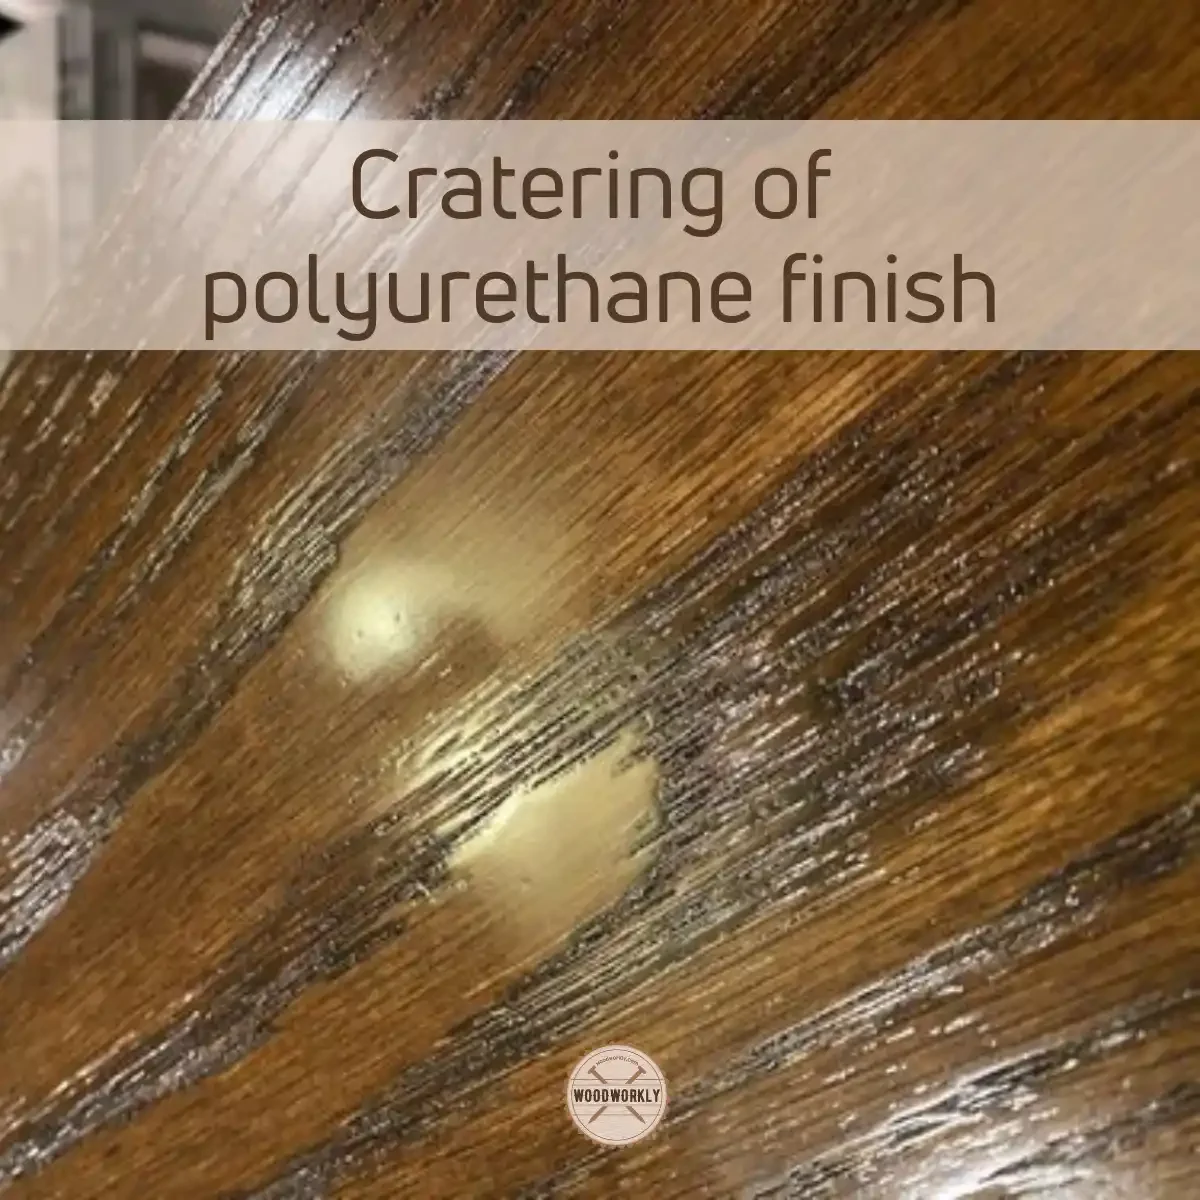
Sand and dust consist of silicon which causes cratering of the polyurethane finish.
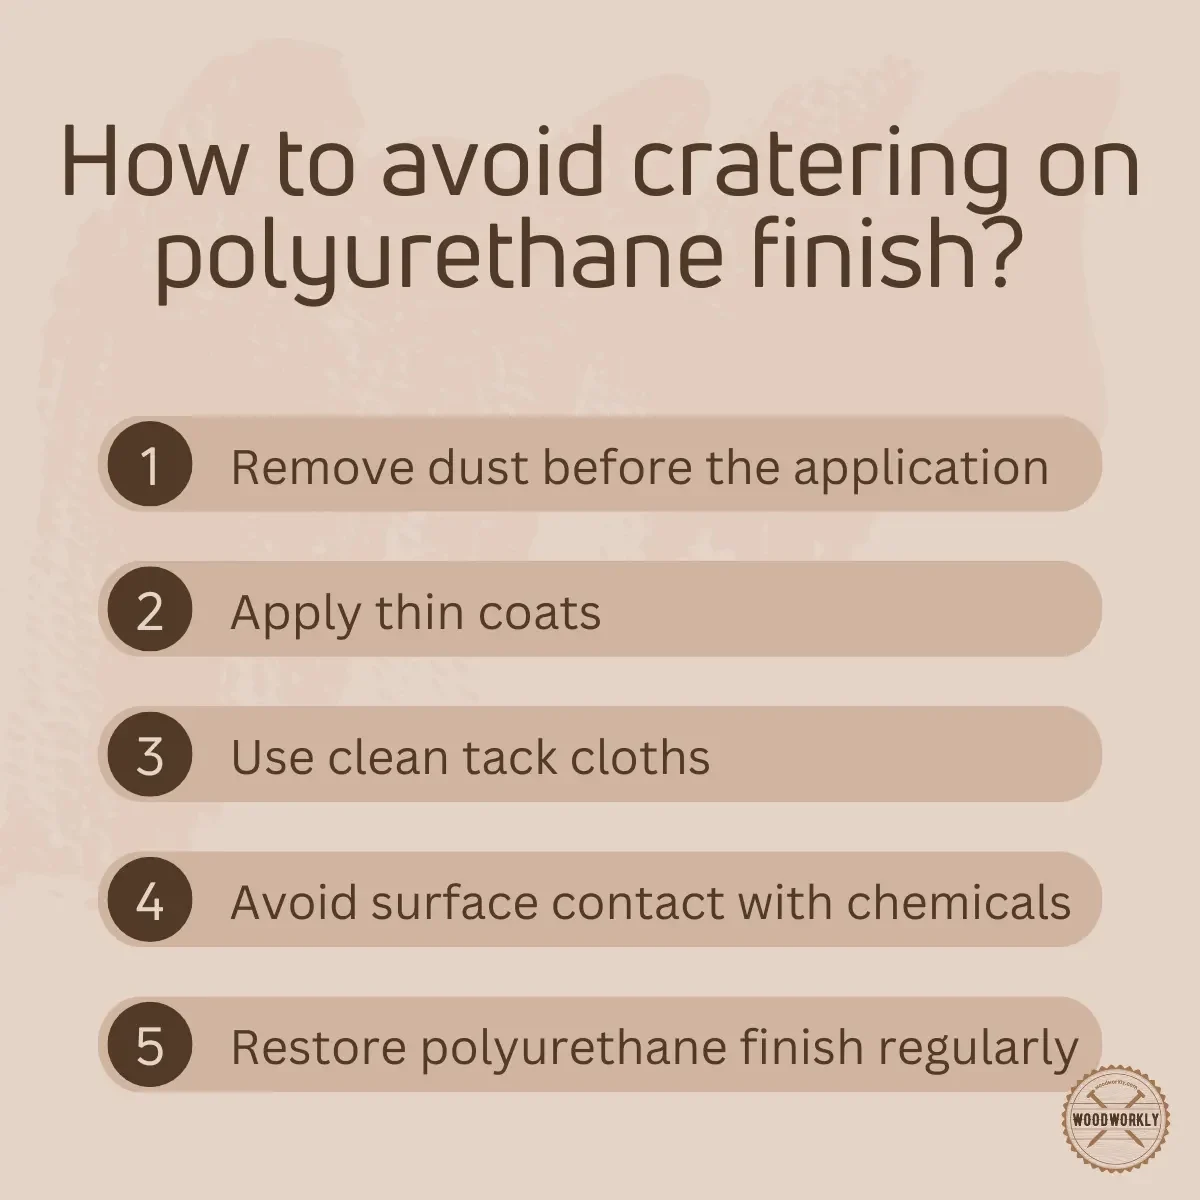
How to Fix Cratering of Polyurethane Finish?
To fix cratering of the polyurethane finish you need to sand the surface lightly and wipe the surface with a clean cloth and re-apply a thin polyurethane coat.
Once it is completely dried, you won’t notice any craters on the surface.
11. Cloudy Polyurethane Finish
Cloudy polyurethane finish happens mostly when the zinc oxide is trapped inside the polyurethane coats.
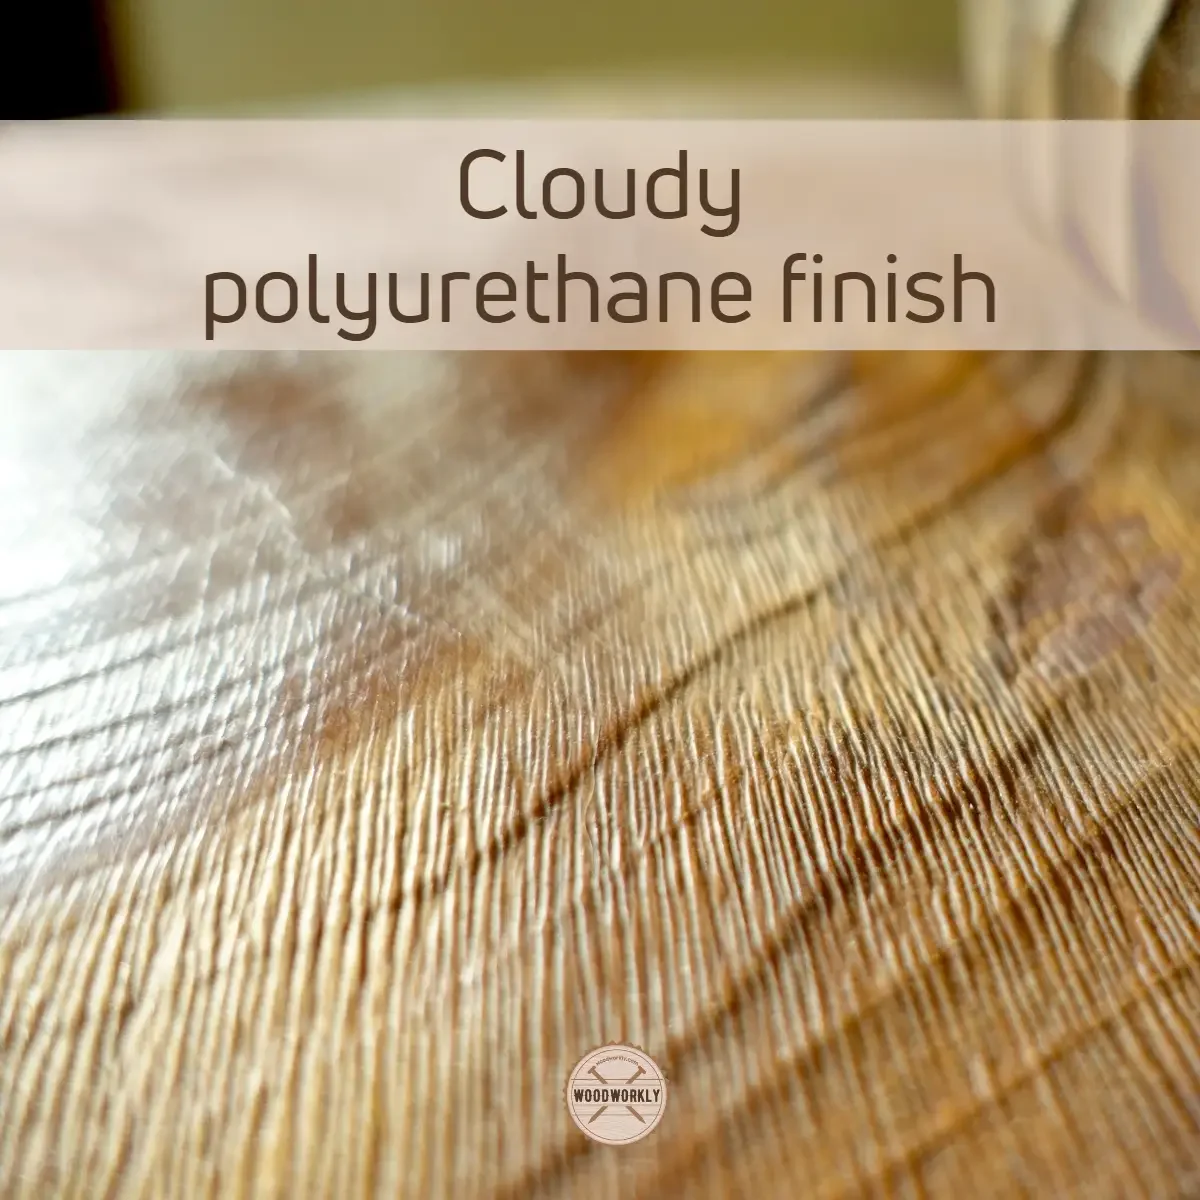
Here’re some other reasons that cause cloudy polyurethane finish,
- Using an old polyurethane finisher
- Extreme weather conditions
- Humid conditions
- Not stirring before application
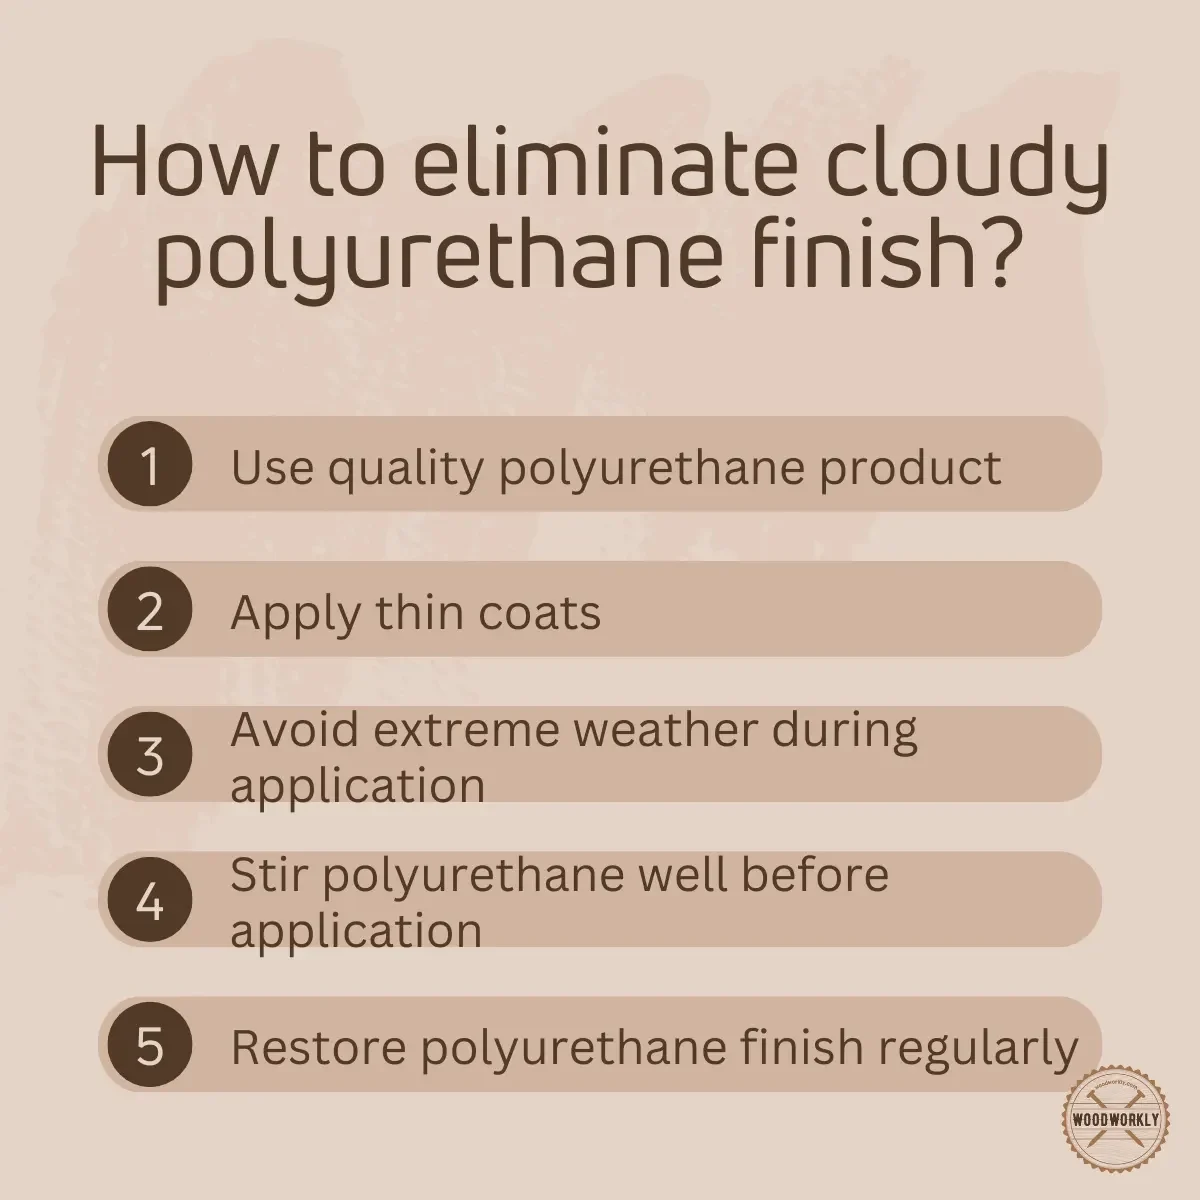
How to Fix Cloudy Polyurethane Finish?
You can easily get rid of the cloudy polyurethane finish by following these steps with good focus.
- Check whether your polyurethane finish coat is completely dried.
- Remove flames or any other hating of cooling sources nearby
- Get a clean cloth and add some mineral spirit to it and wipe the surface to remove any dust and debris.
- Repeat the same wiping procedure until the blotching is gone and let the surface dry.
- Sand the surface with fine-grit sandpaper (220 grit) until the cloudiness disappears and until the polyurethane finish is removed.
- Clean the surface and re-apply 3 thin coats of polyurethane finish and let each coat dry completely before applying the next coat.
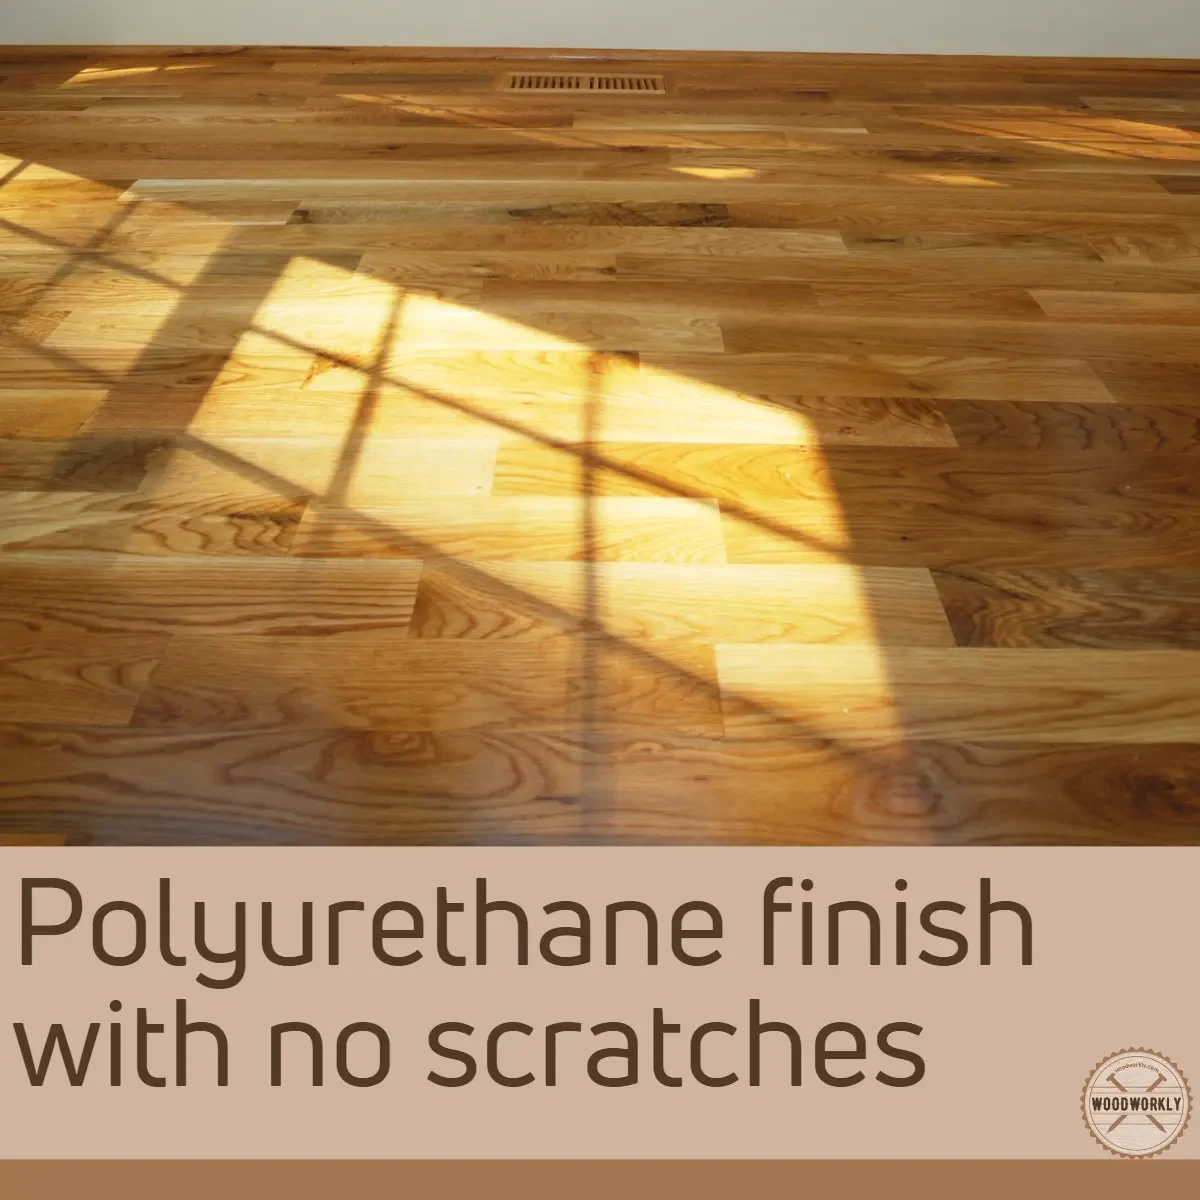
12. Scratches On Polyurethane Finish
Any wood surface that applied a polyurethane finish can form scratches over time because of wear and tear.
With heavy usage scratches are possible to happen.
Scratches can occur even when we are applying polyurethane finish because of some mistakes like sanding too tough etc.
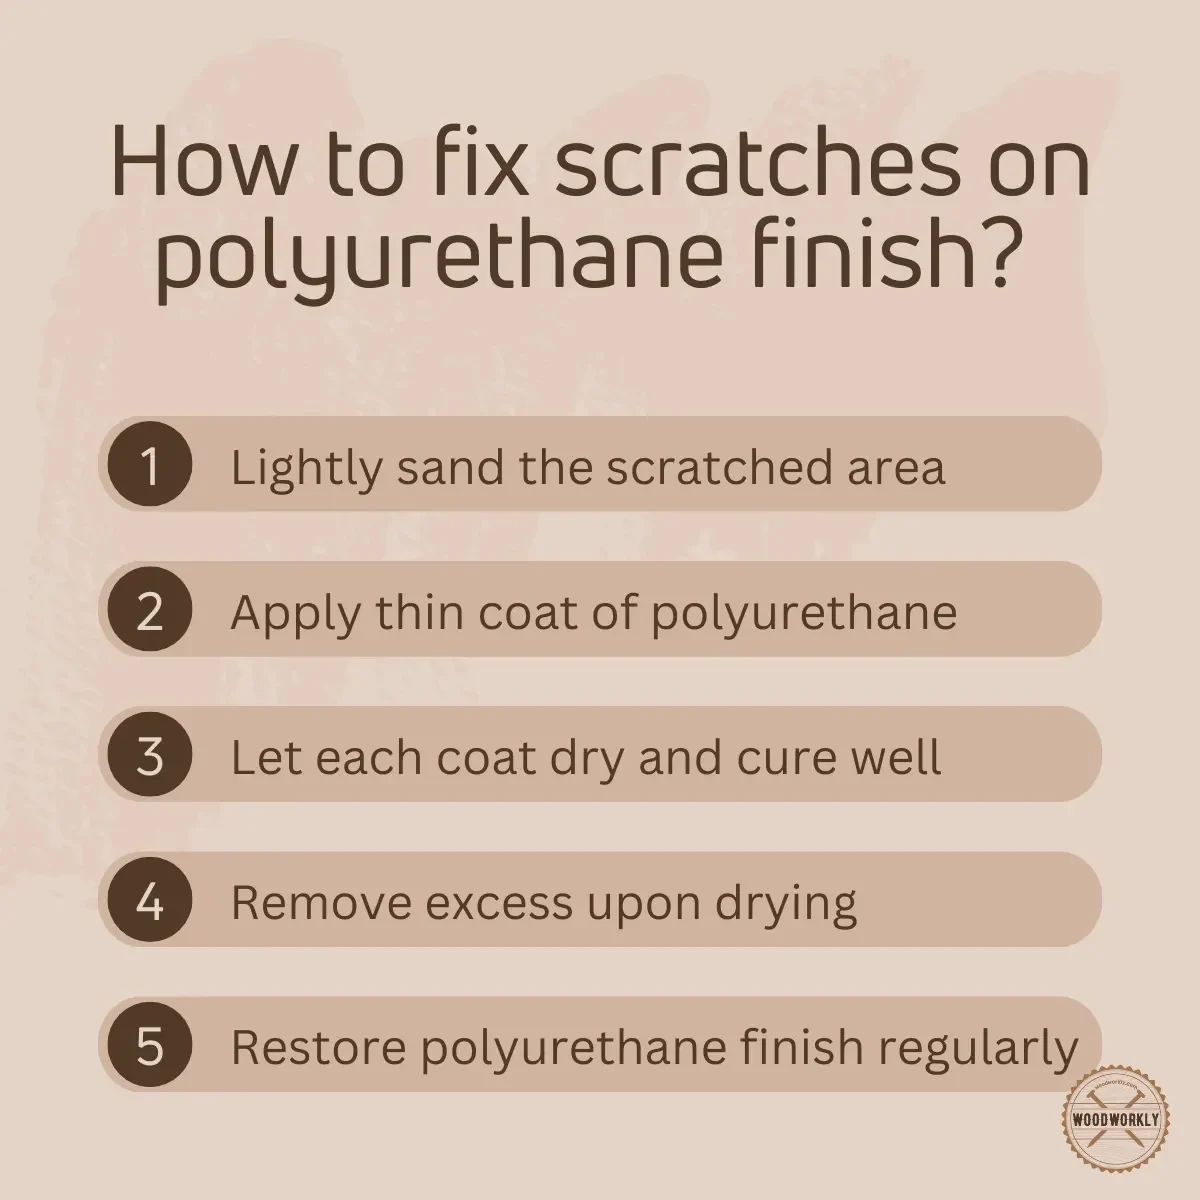
How to Fix Scratches on Polyurethane Finish?
We can fix any scratches on polyurethane finish by sanding everything and starting over. Here I have listed the steps you need to follow to get an even polyurethane finish.
1. Identify the scratches
First, you need to examine whether the scratch is too deep or not. If it is too deep you need to do more sanding and more finishing is required.
2. Sand the scratched areas
Sand the whole surface with 220 grit or finer-grit sandpaper. Don’t sand too hard because it can damage the surface easily.
3. Clean the area
Wipe the surface using a clean cloth to remove clouds of dust and debris. Dirty surfaces make lots of trouble.
4. Apply New Polyurethane Coat
Get a soft brush and apply a polyurethane finish smoothly with uniform thickness all over the surface. Always go for thin coats.
Wait till the first coat dries completely before going for the second coat. Scuff sand between each coat if necessary.
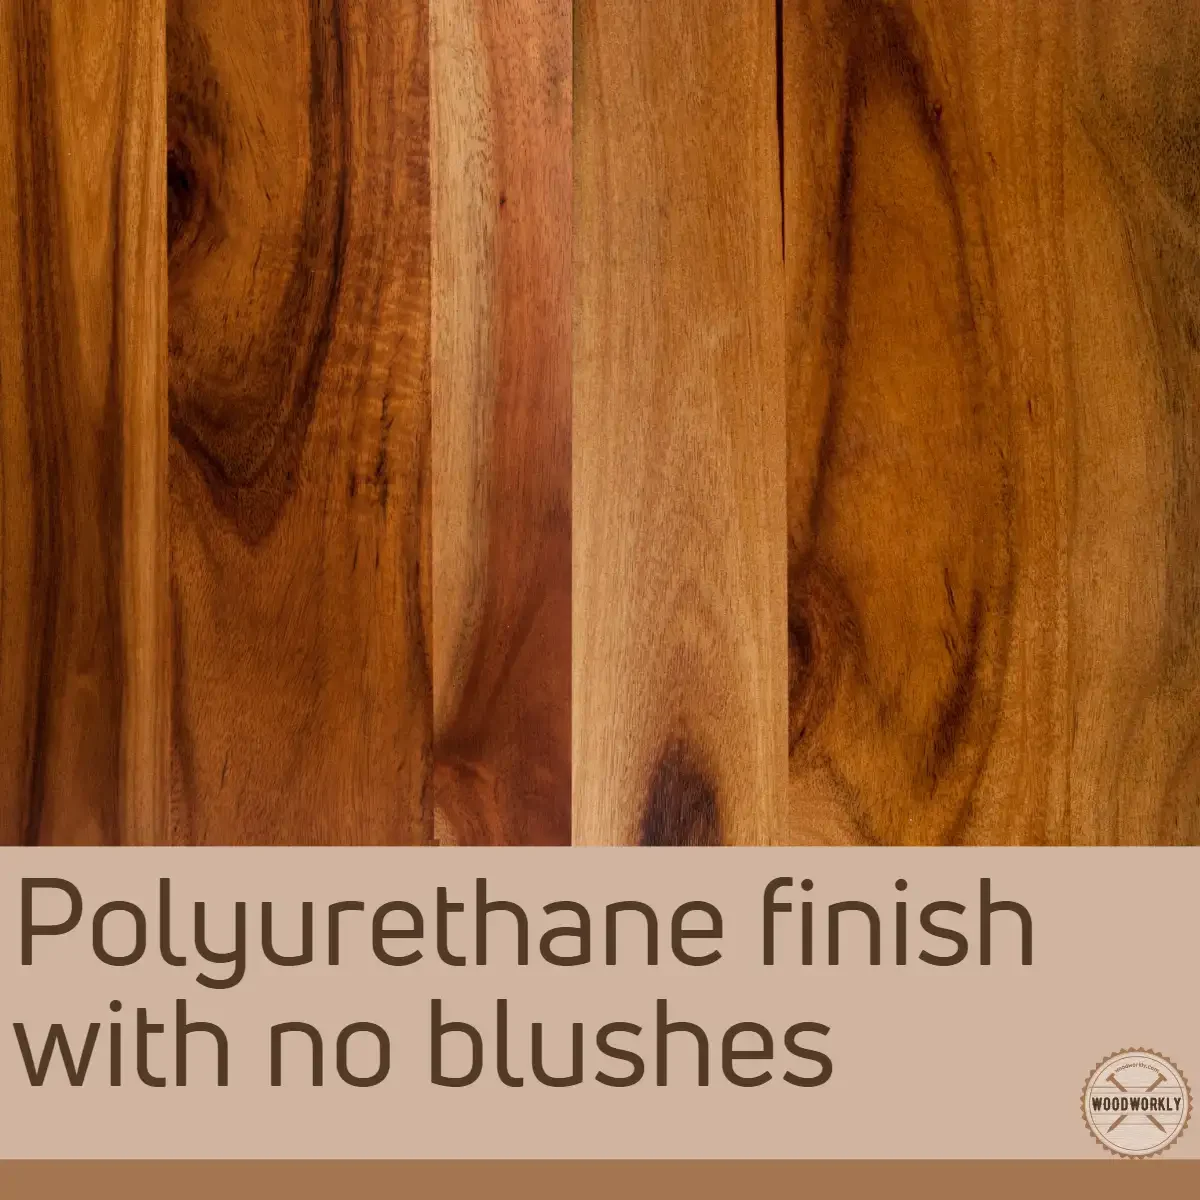
13. Blushing on Polyurethane Finish
There is a light milky color that can be seen in some polyurethane wood finishes and happen with lacquers as well. This happens because moisture and water are trapped inside the finisher.
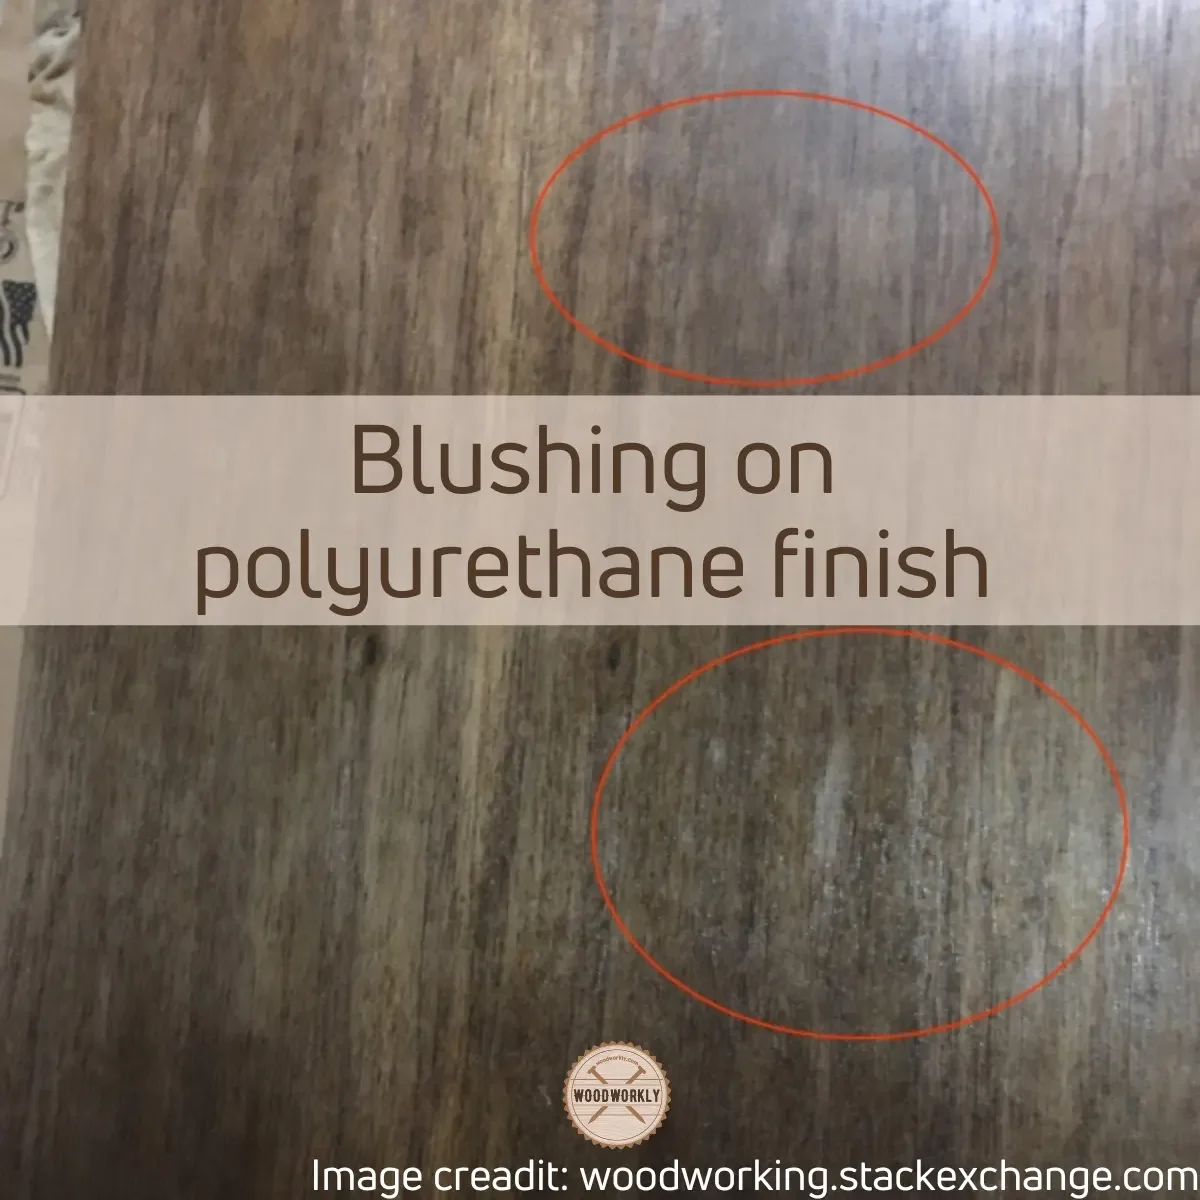
This happens because of not cleaning the surface and not sanding properly before the finisher is applied. The moisture trapped inside the wood tends to penetrate to the finishing layers/coats with the changes in humidity.
Causes For Blushes In Polyurethane Finish
- Incompatible stain – Like applying water-based polyurethane over an oil-based stain
- High humidity
- Placing wet objects or water droplets in the same area for a long period of time
So, let’s discuss how can we fix blushing on a polyurethane finish.
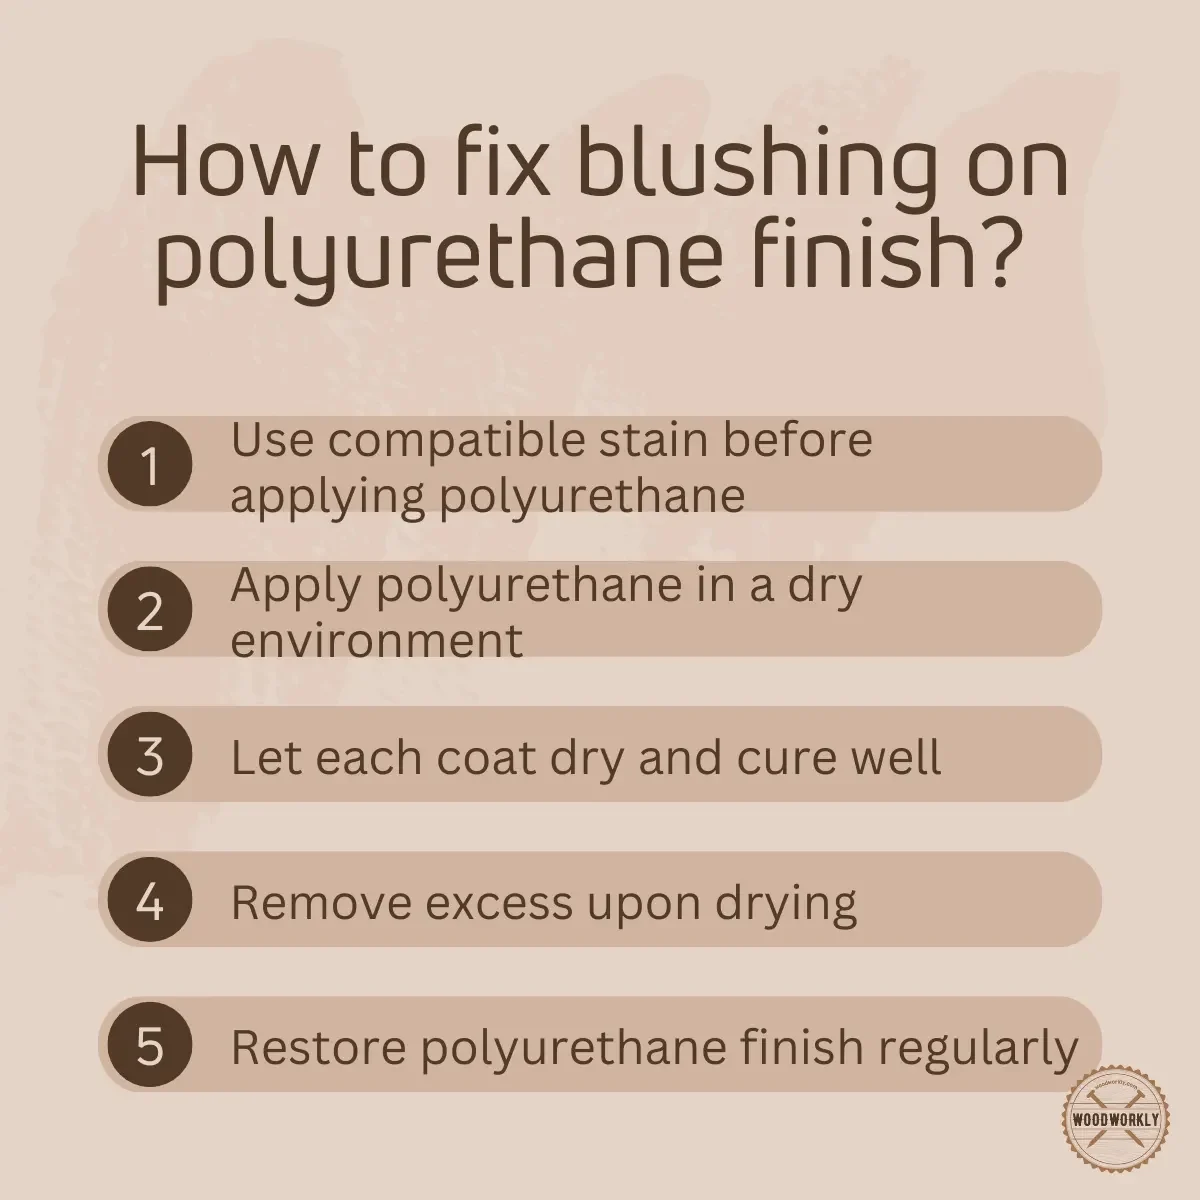
How to Fix Blushes of Polyurethane Finish?
- Gently wipe the area that is blushed with a damp cloth after dipping it in alcohol. You should do this gently without much force. Wet the blushed surface with alcohol and let it evaporates and completely dries the surface.
- Secondly, you need to wipe the surface with the same cloth after dipping again with alcohol until the blushes went completely all over the surface.
- Sand with 180-grit sandpaper to remove excess blushing. Do this smoothly until you notice the dull look of the wood
- Finally, apply a thin coat of new polyurethane finish and let it completely dry. After that go for its second coat and finish the process.
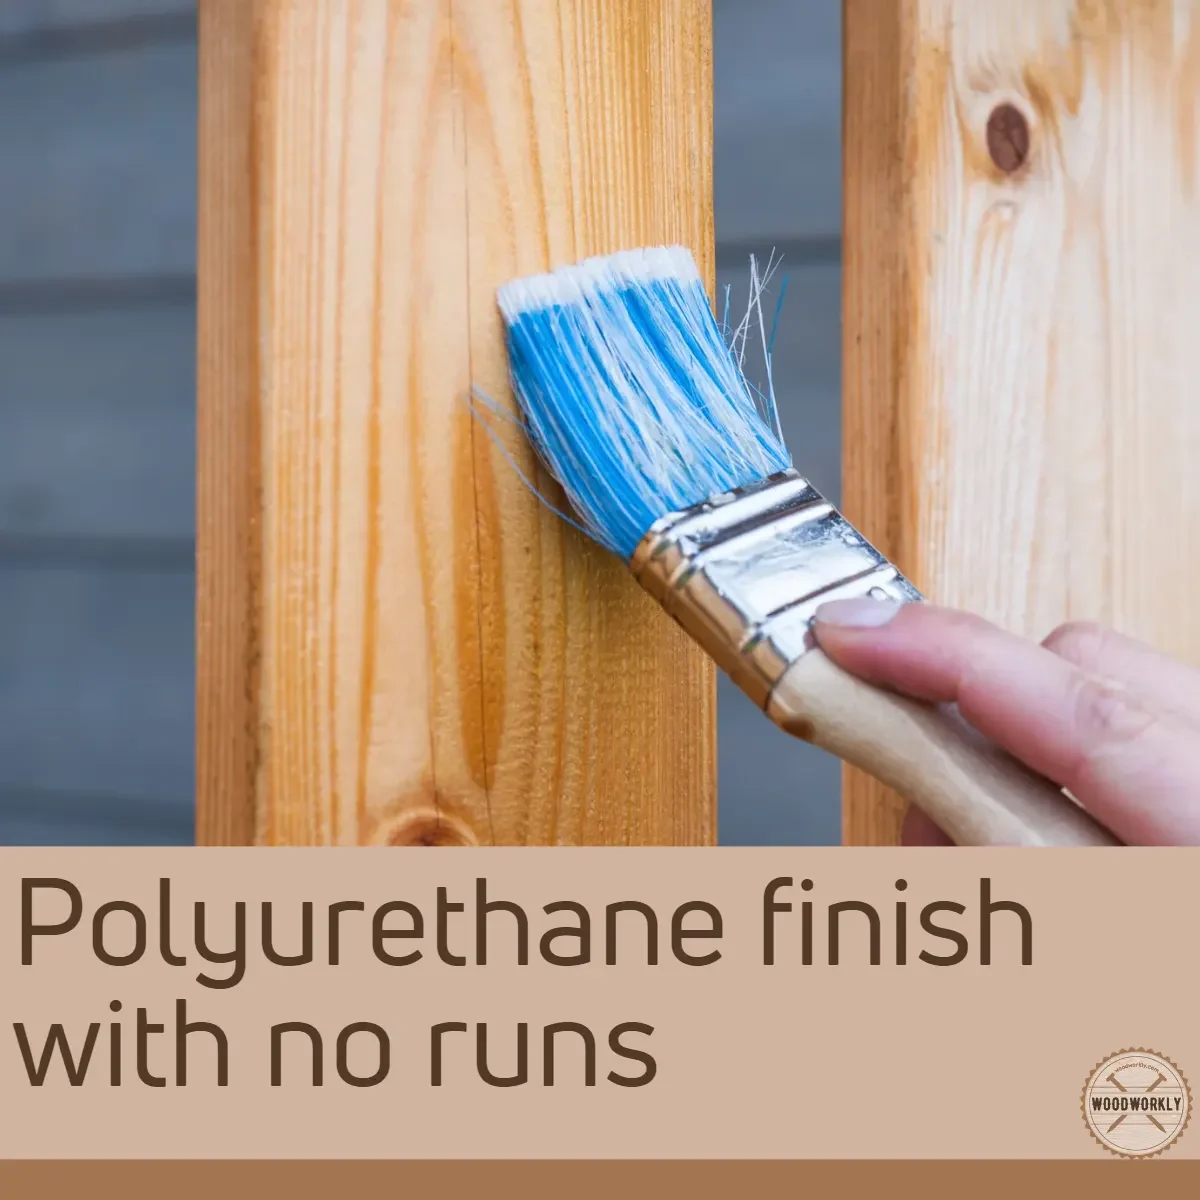
14. Polyurethane Runs
Runs can happen when drying the polyurethane finish. This is known as one of the biggest problems in the woodworking world.
Runs are common to occur in polyurethane finishes because of its slow drying time.
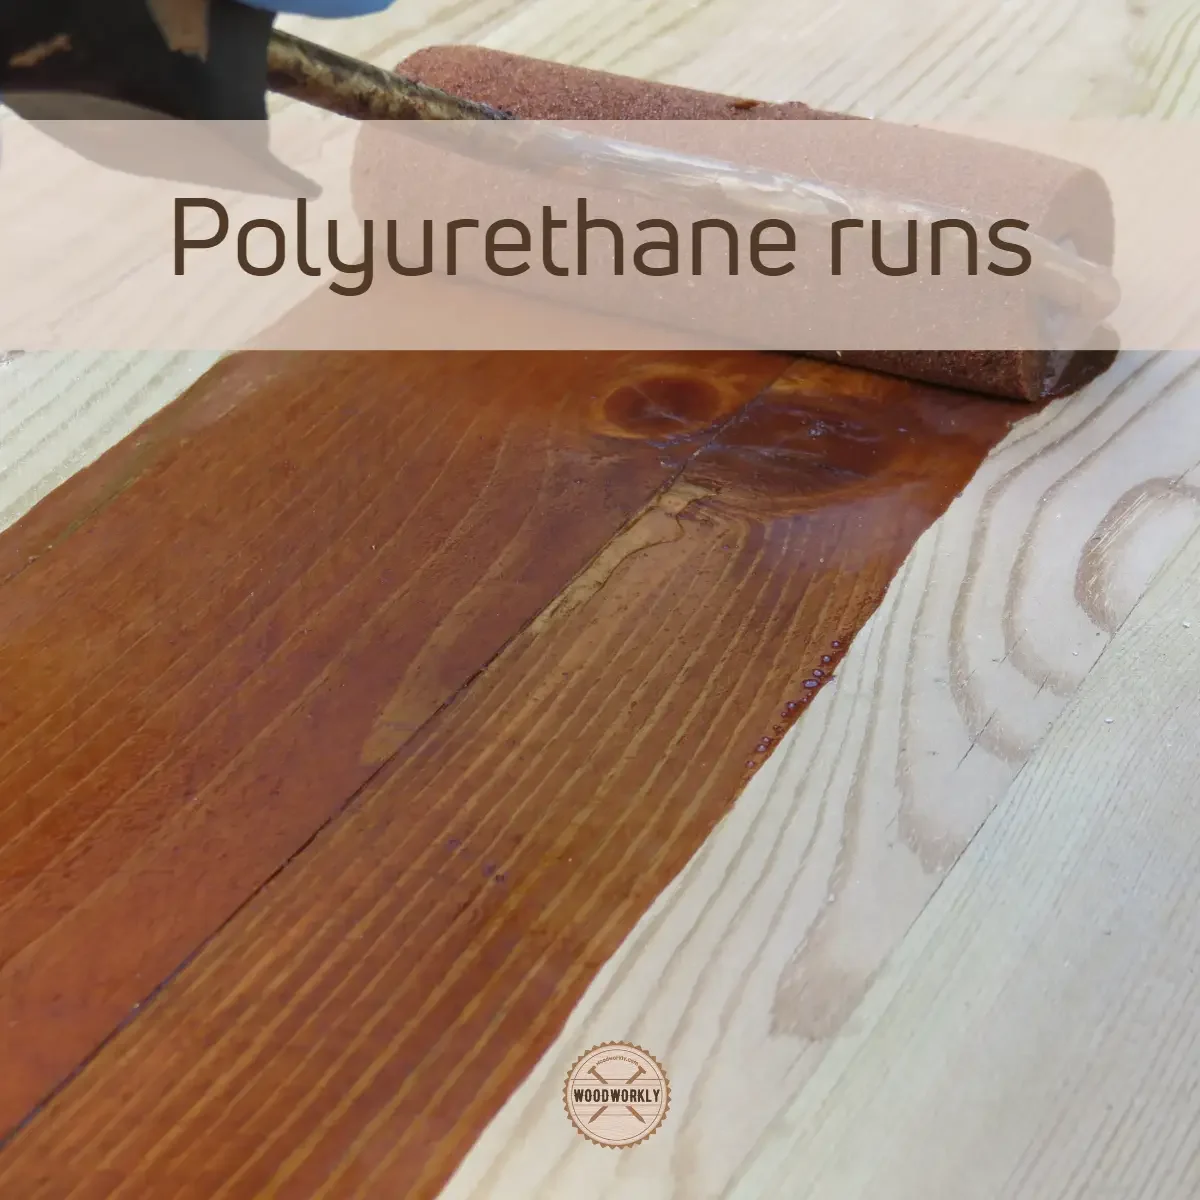
Runs can be seen when drying both water-based and oil-based polyurethane finishes. Runs can occur due to applying thick layers of polyurethane or by spreading too much.
So, let’s talk about how we can fix polyurethane runs effectively.
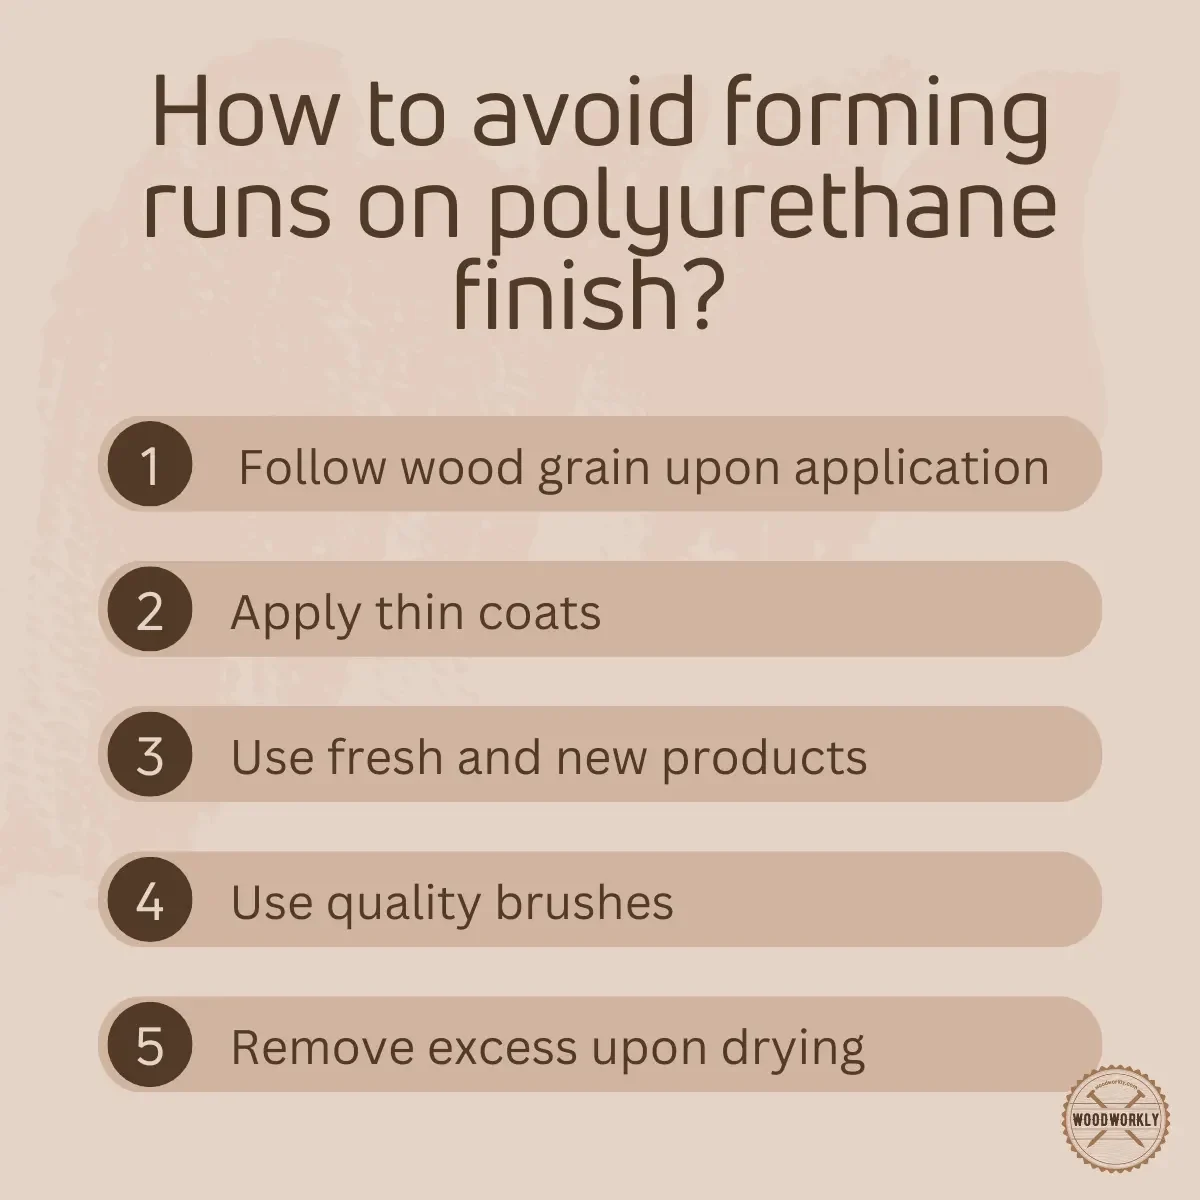
How to Fix Polyurethane Runs?
- Check the surface while brushing the surface through reflected light. While moving your head and wood, you’ll be able to notice if any runs there in a polyurethane finish.
- If you identified runs, you can easily eliminate them using the brush by removing excess polyurethane finish or dragging it to where less amount of finish is applied.
- If you identified runs after the finish has dried, wait till they harden more and do light sanding until all the runs are gone. Once you feel ok, re-apply the additional coat of polyurethane for a better finish.
15. Trapping Insects and Dust in Polyurethane Finish
This is the biggest headache that I suffered when working with a finisher. There are times bugs are landed on the surface as soon as I do clean the whole surface and start to apply the finisher.
So, I did cleaning the surface again.
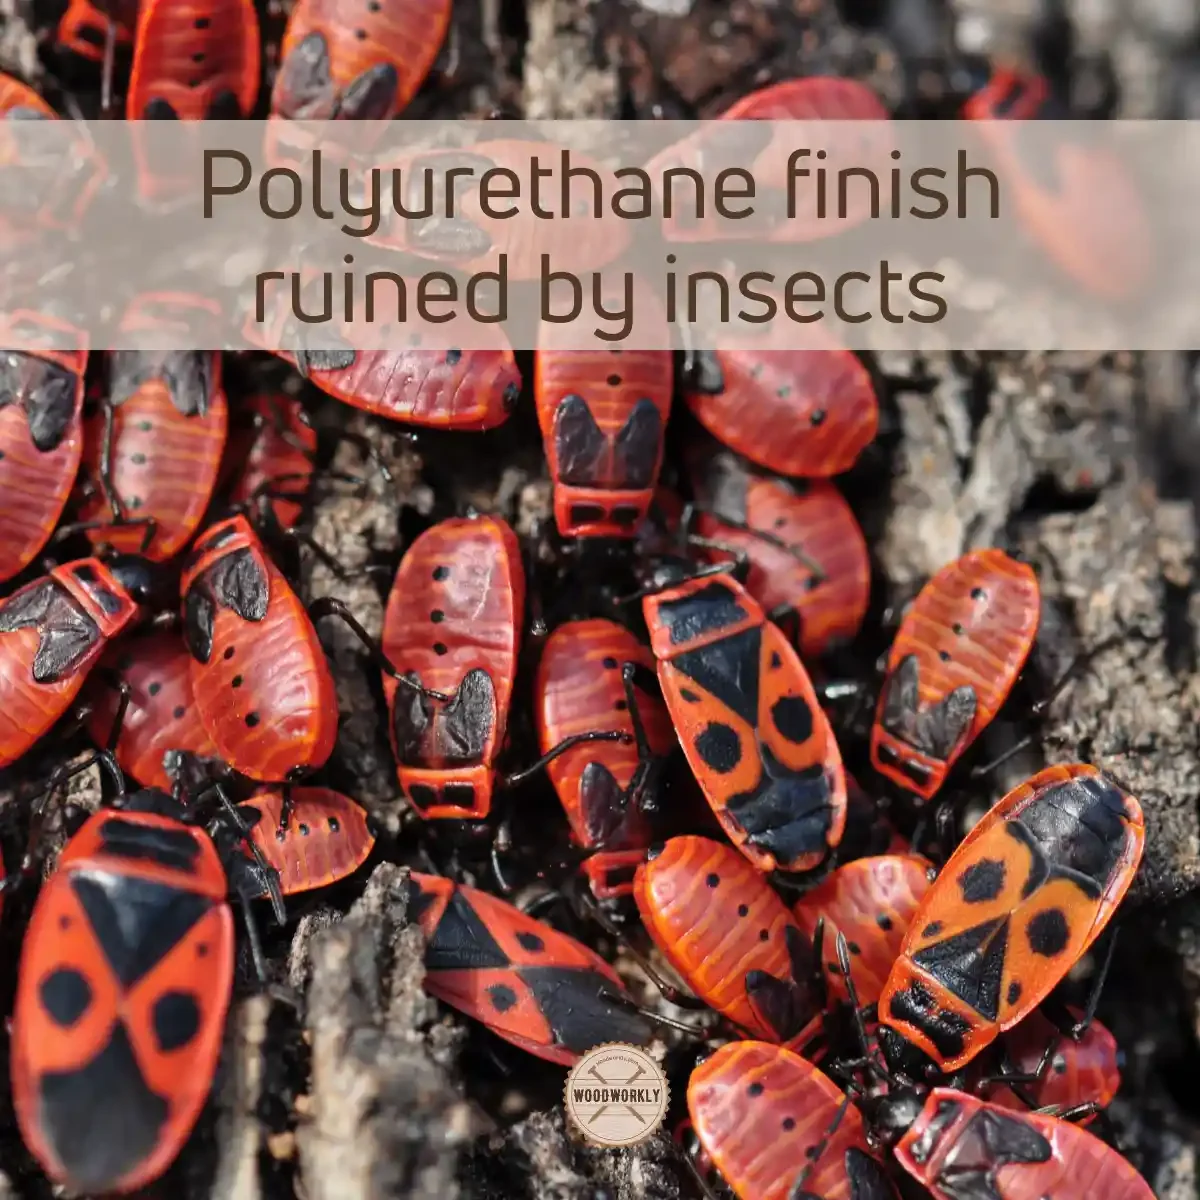
Some people ignore bugs and apply polyurethane coats over them. But eventually, that small mistake will cost you more than you imagine.
So, you need to pay extra attention to keep the surface clean without touching any dust, insects, and debris.
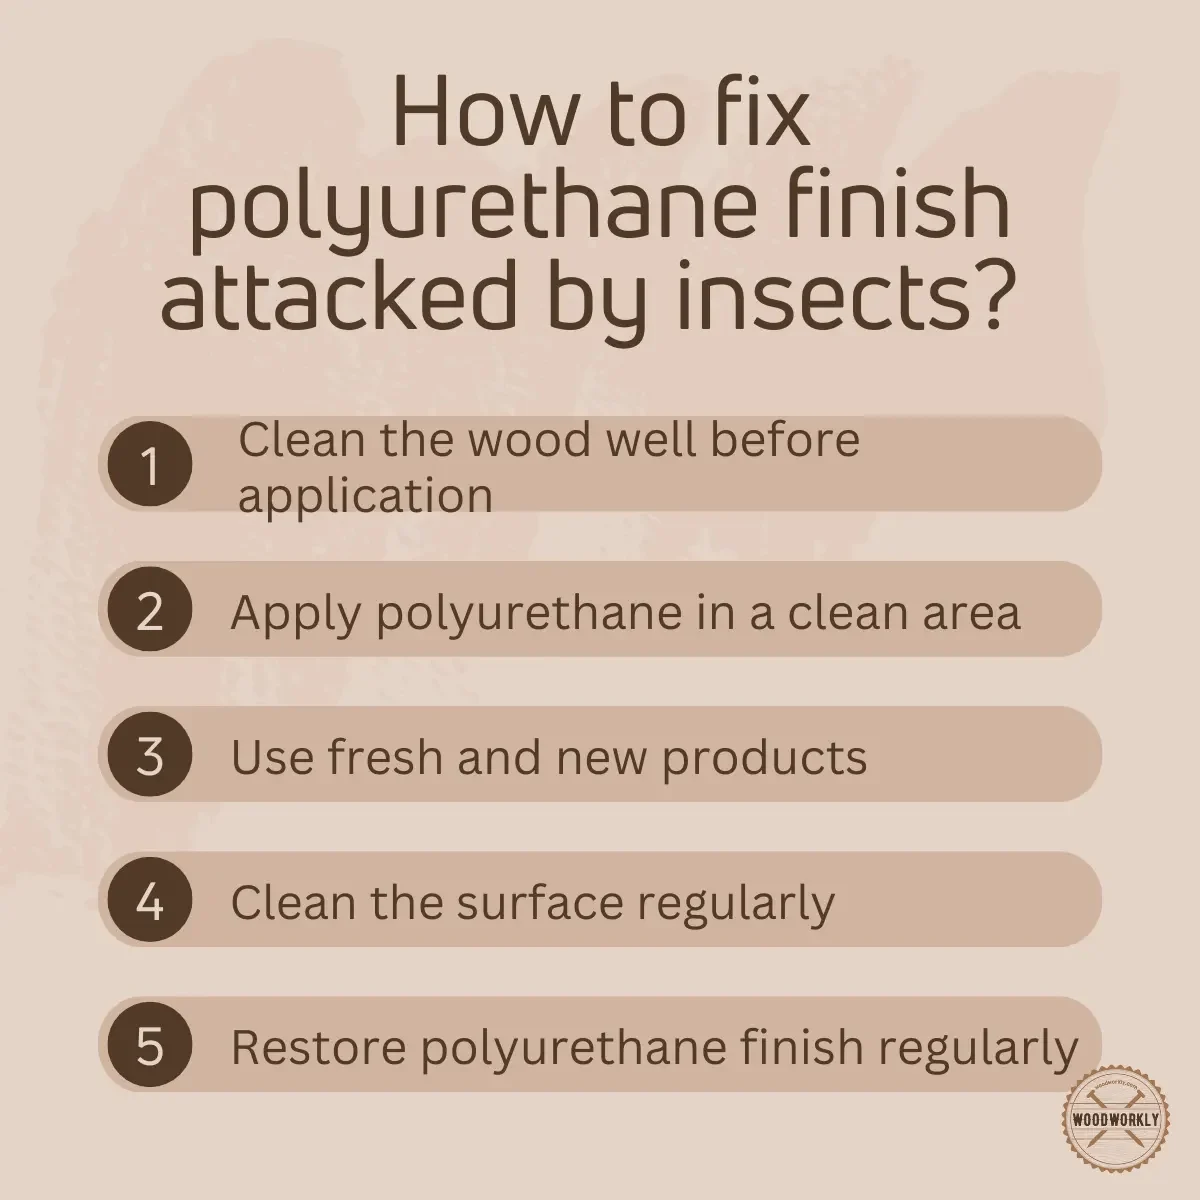
How to Fix Polyurethane Finish After Trapped Insects, Dust?
If the insect landed on the polyurethane finish while the surface is wet, you can remove it simply using a toothpick or needle. Normally wet finishes will eventually recover once the insect is removed.
But I suggest you apply a small amount of finisher to the area insect landed.
If an insect has landed on the surface while it is drying, I don’t recommend using a toothpick. You need to wait until the surface is completely dried.
Once it is dry, remove the insect and do light dry sanding with fine-grit paper (400 grit).
Never go for wet sanding because the finish can be mimicked by the lubricant, and you won’t notice the cutting.
After light dry sanding, re-apply a thin layer of polyurethane finish and let it dry completely.
So, those are the 15 proven methods to fix polyurethane mistakes.
Let’s have a look at the summary with all the mistakes and the most possible solution for each of them.
Summary: How to Fix Polyurethane Mistakes?
| Mistake/ Problem | Solution |
| Polyurethane bubbles | Sanding and Reapplication of polyurethane finish, Tapping the bubbles |
| Polyurethane puddles | Wipe with mineral spirit, Sanding, and reapplication of polyurethane finish |
| Uneven polyurethane finish | Sanding, and reapplication of polyurethane finish |
| Polyurethane separation | Sanding, and reapplication of polyurethane finish |
| Polyurethane discoloration | Sanding, and reapplication of polyurethane finish |
| Roughness in polyurethane finish | Sand with fine-grit paper |
| Orange peel effect | Sanding, and reapplication of polyurethane finish |
| Streaking in polyurethane finish | Sanding, and reapplication of polyurethane finish |
| Alligator skin | Sanding, and reapplication of polyurethane finish |
| Cratering | Sanding, and reapplication of polyurethane finish |
| Cloudy polyurethane finish | Wipe with mineral spirit, Sanding, and reapplication of polyurethane finish |
| Scratches on polyurethane finish | Sanding, and reapplication of polyurethane finish |
| Blushing | Wipe the area with a damp cloth after dipping it in alcohol |
| Polyurethane runs | Gently brush |
| Trapped insects and dust | Remove with a toothpick and reapplication of polyurethane finish |
Polyurethane Finish Problems
Here’re some common polyurethane finish problems,
- Discoloration
- Bubbles and puddles in polyurethane finish
- Streaks in polyurethane finish
- Blotchy finish
- Uneven polyurethane finish
- Polyurethane layer separation
- Rough polyurethane finish
- Cloudy polyurethane finish
- Alligatoring
- Cratering
- Blushing
- Polyurethane runs
- Trapped insects in polyurethane finish
- Orange peel effect
Most of the above polyurethane problems can be fixed by sanding with 220 grit or finer sandpaper and reapplying with a new polyurethane coat without making any mistakes.
How To Repair Damaged Polyurethane Finish?
Repairing damaged polyurethane finish is easy.
Follow the below steps to repair the damaged polyurethane finish,
- Clean the damaged polyurethane area with mineral spirit and a clean rag. Remove dust and dirt.
- Let the clean dry properly
- Lightly sand the damaged polyurethane finish with 320 grit or finer sandpaper
- Wipe off the dust and clean the surface
- Apply a new thin coat of polyurethane over the damaged area along the wood grain evenly
- Wipe off the excess and let the new polyurethane coat dry for 24 hours
- Lightly sand the dried polyurethane finish to remove bubbles and dust nibs.
- Repeat the same application procedure until you get promising results.
If you’re willing to apply wood stain instead of polyurethane as a finisher, better to know what mistakes can happen during wood staining and how to fix those as well.
How To Fix Too Much Polyurethane?
Too much polyurethane can increase the drying time and cause a tacky finish with an unpleasant appearance.
To fix too much polyurethane, remove the excess polyurethane on the surface after 30 minutes of application and lightly sand the polyurethane finish when it is completely dried.
Lightly sanding with 320 grit or finer sandpaper can reduce the thickness of too much polyurethane layer and give nice, even and thin polyurethane finish.
What Is The Best Way To Apply Polyurethane?
Polyurethane is easy to apply on any wood to protect it from moisture, weather elements, and extreme temperature levels.
Here’s the best way to apply polyurethane,
- Clean the entire surface to remove dust and dirt. Use TSP to remove stubborn dirt.
- Sand the surface with 180-grit sandpaper to smoothen the surface and remove bumps and other residues.
- Clean the surface
- Apply the first coat of polyurethane finish
- Let the polyurethane coat dry for 24 to 48 hours
- Lightly sand the polyurethane finish
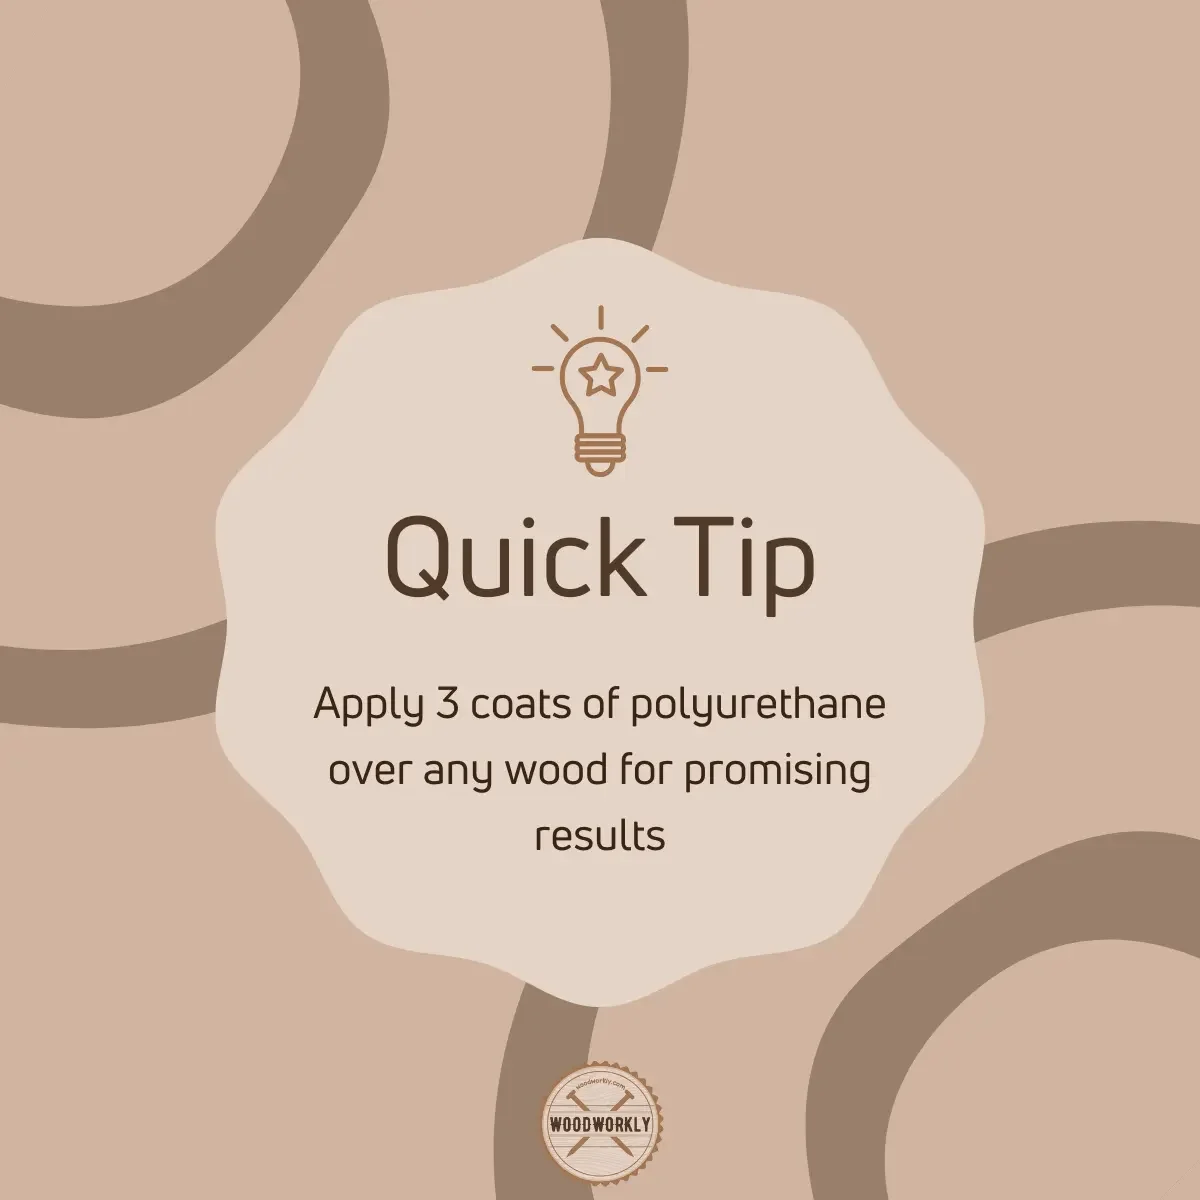
- Apply 3 to 5 polyurethane coats
- Let the final coat dry and cure for 2 to 3 days.
How To Fix Cloudy Polyurethane?
A cloudy polyurethane finish appears when the zinc oxide is trapped inside the polyurethane coats.
Generally, polyurethane gives a glossy finish. In order to get a satin or matte finish, manufacturers add zinc oxide to it.
Since zinc oxide is denser than polyurethane, it collects at the bottom of the can.
When you apply polyurethane on wood without stirring or shaking the can, the zinc oxide won’t mix well with polyurethane and they disperse the reflected light by giving a cloudy finish.
Plus, a cloudy finish may appear when the polyurethane can is not stored properly. Extreme temperature and weather conditions can affect the quality of the polyurethane finish and give it a cloudy finish.
Here’s how To Fix Cloudy Polyurethane,
- Sand down the cloudy finish
- Apply new polyurethane coat
- Sand and polish the surface
Let’s discuss each of the above steps separately.
1. Sand down the cloudy layer
Lightly sand down the polyurethane cloudy layer using fine-grit sandpaper (220 grit or higher). Don’t sand too deeply or you risk damaging the surface underneath.
Dust should be removed using a fresh, dry cloth.
2. Apply a new coat of Polyurethane
Applying a second coat of polyurethane requires adhering to the manufacturer’s mixing and application guidelines.
The second coat should assist to minimize any cloudiness and even out the finish’s appearance.
3. Sand and polish the surface
You can try sanding the second coat with fine-grit sandpaper and then buffing it with a polishing compound if the second coat does not entirely remove the cloudiness. This can assist to get rid of any lingering haze or cloudiness and leave a surface that is smooth and clear.
If none of the aforementioned remedies work, you might need to completely peel the surface and start over with a fresh coat of polyurethane.
When putting on a fresh coat of finish, make sure to follow the manufacturer’s directions for stripping and preparing the surface.
That’s it, folks! Now you know how to fix polyurethane mistakes easily using simple methods.
Make sure to clean your polyurethane brush properly once the project is done!
Let’s answer some frequently asked questions.
What Happens If You Recoat Polyurethane Too Soon?
If you recoat polyurethane too soon, you will end up with a blotchy or splotchy surface. Let each polyurethane coat dry for at least 24 to 48 hours before recoating.
Check the dryness of the existing polyurethane coat before recoating. Recoating polyurethane too soon can ruin the appearance of the finish and reduce its performance and durability of the polyurethane finish.
Letting Polyurethane coats dry well between coats is a must to get a nice, even finish with no random blotches and streaks.
Therefore, never recoat polyurethane too soon.
How To Fix Polyurethane Not Adhering?
Polyurethane won’t adhere when the existing polyurethane coat is too thick, not dried well or when the polyurethane finish is tacky.
To fix polyurethane not adhering issues, lightly sand the existing polyurethane finish with 320 grit or finer sandpaper, clean the surface and apply a new thin coat of polyurethane along the wood grain.
Simple as that!
How Do You Smooth Out Polyurethane Finish?
To smooth out the polyurethane finish, First let the polyurethane finish dry and then, and the entire polyurethane finish with 220-grit or 300-grit sandpaper lightly along the direction of the wood grain.
Sand with even pressure with light force to avoid leaving sanding marks or scratches. Sanding helps to remove bumps and randomness on the polyurethane finish and makes it super smooth.
Plus, sanding helps the next polyurethane coat to stick well with the existing coat since it gives adhesive properties to the existing finish.
This will avoid layer separation and you’ll be able to get a nice, smooth and even polyurethane finish with ease.
Can You Touch Up Polyurethane?
Yes, you can touch up polyurethane if the mark is only affected the polyurethane coat, not the wood underneath. You can clean and lightly sand the surface and apply a new coat to fix the polyurethane finish.
Here’s how to touch up a polyurethane finish,
- Clean the polyurethane finish – First, clean the entire area thoroughly to remove any dirt or debris. You can use a soft cloth dampened with hot water or a mild cleaning solution.
- Let the finish dry – After cleaning the existing finish, let it dry properly for a few hours.
- Sand the finish: Lightly sand the damaged area using fine-grit sandpaper (such as 220-grit). Sanding too forcefully can remove more finish than is necessary, so exercise caution.
- Apply the new finish: On the sanded area, apply a thin layer of the new polyurethane finish using a small brush or foam applicator. Make sure to mimic the current finish’s shine and color as precisely as you can.
- Let it dry: Per the manufacturer’s recommendations, let the new finish air dry fully for 24 to 48 hours.
- Sand and apply again: If required, lightly sand or buff the new finish with fine-grit sandpaper and apply the touch-up several times until it is smooth.
If the touched-up area is still marginally visible, try lightly sanding the surrounding area and adding a thin coat of finish to the area to help it blend in.
Note: To provide an even and uniform appearance, it may be best to reapply the polyurethane finish to the entire surface, depending on the extent of the damage and the size of the area that has to be touched up.
How to Fix Blotchy Polyurethane Finish?
The blotchy polyurethane finish ruins the wood’s appearance and won’t give the protection we wish for the wood underneath.
Here’s how to fix the blotchy polyurethane finish,
- Sand the blotchy surface: Lightly sand the surface using fine-grit sandpaper, such as 220-grit. To prevent causing fresh blotches, make sure to uniformly sand the entire surface with even pressure.
- Apply a wash coat: A wash coat is a thin coating of finish that is placed before the final coat. You can create a wash coat by mixing polyurethane with thinner like mineral spirits. Follow the manufacturer’s instructions when diluting your polyurethane finish with mineral spirits or another suitable solvent to create a wash coat. With a brush or foam applicator, dispense a thin, even coat of the wash coat, and allow it to completely dry.
- Apply a second coat: Cover the surface with a second coat of polyurethane finish after the wash coat has dried. Apply it evenly and smoothly, careful not to leave any bubbles or brush strokes behind.
- Let it dry: Follow the manufacturer’s recommendations and let the last coat dry completely for 24 to 48 hours. This can vary on environmental humidity.
- Sand and reapply: If necessary, use fine-grit sandpaper to lightly sand the surface once more and carry out the application procedure once more until the blotching is completely eliminated.
Simple as that!
How Do You Buff Imperfections In Polyurethane?
You can buff imperfections in polyurethane by lightly sanding with 1500 grit or finer sandpaper.
Or you can buff the imperfections in polyurethane by buffing the surface with an electric buffer or a drill-attached polishing pad.
Work in small sections at a time, and move the buffer in a circular manner. Don’t put too much pressure or use too much force. Make sure to uniformly buff the entire surface.
Can I Put Another Coat Of Polyurethane Without Sanding?
Never apply another coat of polyurethane without sanding since sanding smoothen and even out the existing finish by building good adhesion between the polyurethane finish.
Sanding helps to next polyurethane coat to stick well onto the previous coat since it makes the coat smooth. Sand with 220 grit or finer sandpaper to stick the polyurethane coat well onto the existing finish.
Putting another coat Without first sanding the surface, you may risk the new coat of polyurethane adhering improperly to the prior one and peeling or flaking the surface.
Also, since any flaws from the preceding layer will be accentuated with each additional layer, the surface could not be even and smooth.
How Do You Remove Polyurethane Streaks?
You can remove polyurethane streaks by lightly sanding the existing polyurethane finish with 300 grit or finer sandpaper. Then, clean the entire surface and reapply a new coat of polyurethane evenly without forming streaks.
Let the new polyurethane coat dry well for 24 to 48 hours and lightly sand when it is dry to get an even and smooth finish with no streaks.
How To Fix Hardwood Floors Rough After Polyurethane?
Following the application of polyurethane, there are a few actions you may do to smooth up your hardwood floors:
1. Floors Must Be Sanded First
Use fine-grit sandpaper, such as 220 grit, to sand the floors. To smooth down the surface and eliminate the rough areas, use a floor sander or hand-held sanders.
2. Clean the floors
After sanding, use a shop vac or other comparable tool to suck up any dust or other debris from the floor. This will lessen the chance of dust particles becoming trapped beneath the subsequent polyurethane layer.
3. Apply a Second Coat of Polyurethane
With a fresh paintbrush or roller, apply a second layer of polyurethane to the flooring. Be sure to adhere to the drying time recommendations provided by the manufacturer.
4. Lightly sand the surface
Using fine-grit sandpaper, sand the floors once more once the second coat has dried fully. This will assist in removing any blemishes or peaks in the finish.
5. Clean and Buff the surface
To restore the sheen and smoothness of the surface, clean the floors with a hardwood floor cleaner and buff them with a soft cloth or buffing machine.
Your hardwood floors may need to be professionally assessed to identify the best course of action if these methods don’t eliminate their roughness.
What Does Vinegar Do To Polyurethane?
Because vinegar is acidic, improper dilution or use could result in harm to a polyurethane finish.
Vinegar is mostly used to clean wood to remove dirt and stubborn residue from the surface. Therefore, use Vinegar carefully without damaging the polyurethane finish.
These are some things to remember when using vinegar over polyurethane:
- Dilute with water: It’s crucial to dilute the vinegar with water if you want to use it to clean a polyurethane finish. One part vinegar to three parts water is the standard ratio.
- Test first: To be sure that vinegar won’t harm or discolor your polyurethane finish, apply a small amount to a hidden place first.
- Usage sparingly: When applying vinegar to a polyurethane finish, even when diluted, take caution. The finish might be damaged by excessive vinegar exposure and become dull or foggy.
- Clean properly: When using vinegar, use a soft lint-free cloth or sponge and refrain from scrubbing too hard. Scrubbing too hard might scrape the finish or harm it in numerous ways.
Did I cover all you wanted to know about: How to Fix Polyurethane Mistakes?
In this article, we took an in-depth look at common polyurethane mistakes and how to fix them.
We examined all the methods and techniques you can use to avoid problems when working with a polyurethane finish.
As I have mentioned, most of the polyurethane mistakes you can simply avoid by sanding with fine-grit sandpaper and reapplying the polyurethane finish using proper guidelines and giving enough time to dry completely.
you can use the same procedure when fixing polyurethane finish on floor as well.
Hope this article gave you a proper understanding of how to fix polyurethane mistakes from your next woodworking project without any issues.
So, let’s give it a try!
My table was looking good after 3 coats, then I applied another and a couple of areas appeared to not take up the polyurethane leaving a couple of patchy areas with streaks like brush strokes only I used a foam brush. I sanded with a mirror finish sand block and repeated polyurethane with same results. Help?
I suggest you to try polyurethane from a different manufacturer. Hope you’ll gain the best results.
I just refinished my 1st piece of furniture ever. Bought an $85 dresser at Goodwill that turned out to be BEAUTIFULL walnut. So, accidentally I’ve become a wood refinisher! I’ve been making lots of mistakes and learning as I go. Luckily my vintage dresser’s wood has been very forgiving. I’m having so much fun doing this! But here’s where I’m stuck… All the other surfaces look great after three coats of wipe-on oil based poly, but the drawers have spots of milky looking areas that are tacky to the touch. They look blochy. I sanded the rest of the dresser with 100, 180, and 220 but the drawers I just did with 180 and 220 because I thought they were so beautiful and I was scared to mess them up. I’m wondering if I didn’t get all the finish off. I also may have put a second coat of finish on before the first was dry. Then, a third after that. Argh! Should I start over and with sanding? Such a relief to be able to ask a real person!
Hi Rachel!
Thank you for the question you raised. Yes, to get the maximum output you’ll have to start over from the beginning with sanding. Screen blotchiness and many other polyurethane mistakes happen when we apply coats before they are dried. So, better to sand again and reapply. You’ll eventually become a pro at this. Never give up!
THANK YOU! WOODWORKLY!!!!
I 220 sanded my table project cleaned with tack cloth and proceeded to 2nd coat of Poly. IT LOOKED AWFUL! In a panic I started trying to find a solution and came across your article
“How to Fix Polyurethane Puddles?”
I sprinted to my mineral spirits ( my 20 minutes was expiring quick) currently my project looks like it was saved! thank you so very much!
Hi Shanen!
Awesome. Happy to help. Thank you so much for your feedback.
I’m impressed, I have to admit. Truly rarely must i encounter a weblog that’s both educative and entertaining, and let me tell you, you’ve got hit the nail for the head. Your notion is outstanding; the catch is an element that not enough people are speaking intelligently about. I am very happy which i found this around my hunt for something in regards to this.
Thermal Paper… Hello! I will be coming back more for your interesting articles and for great Reading soon. I would like to give a thumbs up for the great information you have here on this site!…
Very well written story. It will be valuable to anyone who usess it, including yours truly . Keep up the good work – can’r wait to read more posts.
This is a splendid post. Thanks a lot for spending some time to describe this all out for all of us. It truly is a great guide!
Perfectly indited subject material, thanks for information .