Ever struggled to carve tough wood? Discover the secrets to softening wood and transform your carving experience. Ready to delve in?
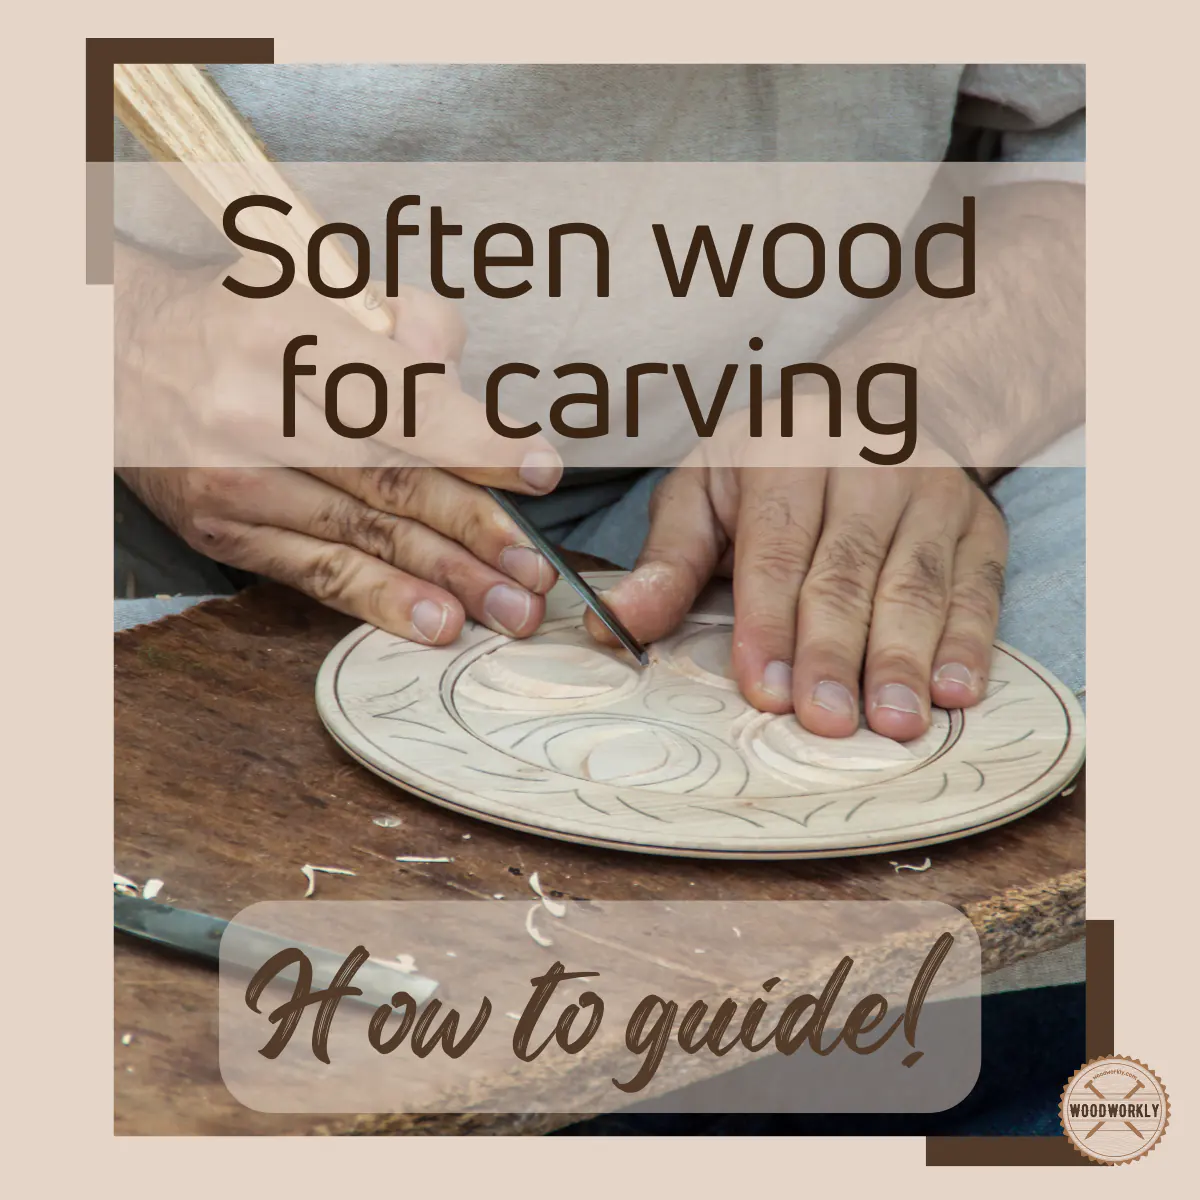
As a seasoned woodworker, I vividly recall my early days grappling with tough, inflexible wood while attempting a simple spoon carving.
Just like many beginners, I pondered, “How can I soften this wood for easier carving?”
After consulting with industry experts and diving deep into research, I’ve discovered effective techniques to achieve just that.
So, let’s find out, How to soften wood for carving?
To soften wood for carving, spray a 50/50 mixture of rubbing alcohol and water onto the wood, allowing it to penetrate the grain. Alternatively, soak the wood in water, place it in a humid environment, or use steam. Working with green wood, which is naturally soft, is also recommended.
But there’s more to know!

So, in this article, I’ll explore the 10 best methods to soften wood for carving with the pros and cons of each.
Plus, I’ll answer some frequently asked questions as well.
Let’s jump in!
How Do You Make Wood Soft and Easier to Carve?
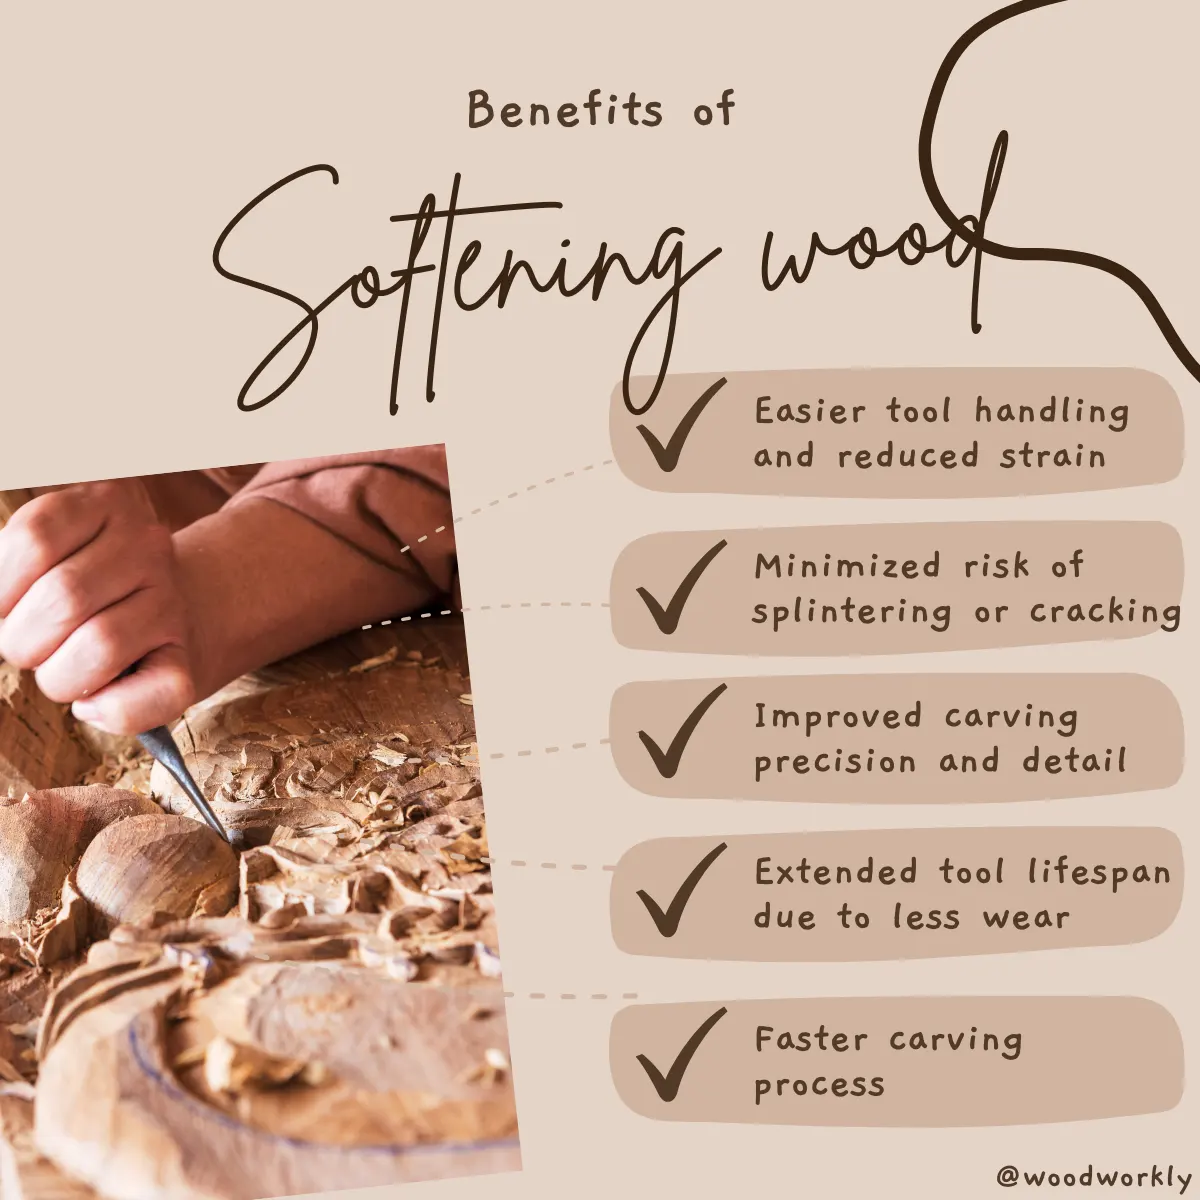
There’re many ways to soften wood for carving. By softening wood before carving, you’ll be able to make clean cuts without chipping or cracking the wood.
Softening makes the wood flexible and increases its workability.
Especially when you’re working with dry hardwood, softening wood before carving is a must to achieve promising results.
Here’re the 10 best methods to soften wood for carving,
- Steaming the wood
- Soaking wood in boiling water
- Keeping wood in a humid environment
- Spraying and rubbing the wood with alcohol
- Using mineral oils
- Applying kerosene
- Treating with Ammonia
- Air drying wood
- Apply paint thinner
- Spraying WD-40
So, let’s discuss each of the above methods one by one with the pros and cons to identify which method suits you perfectly to make the wood soft and carvable.
Just keep reading!
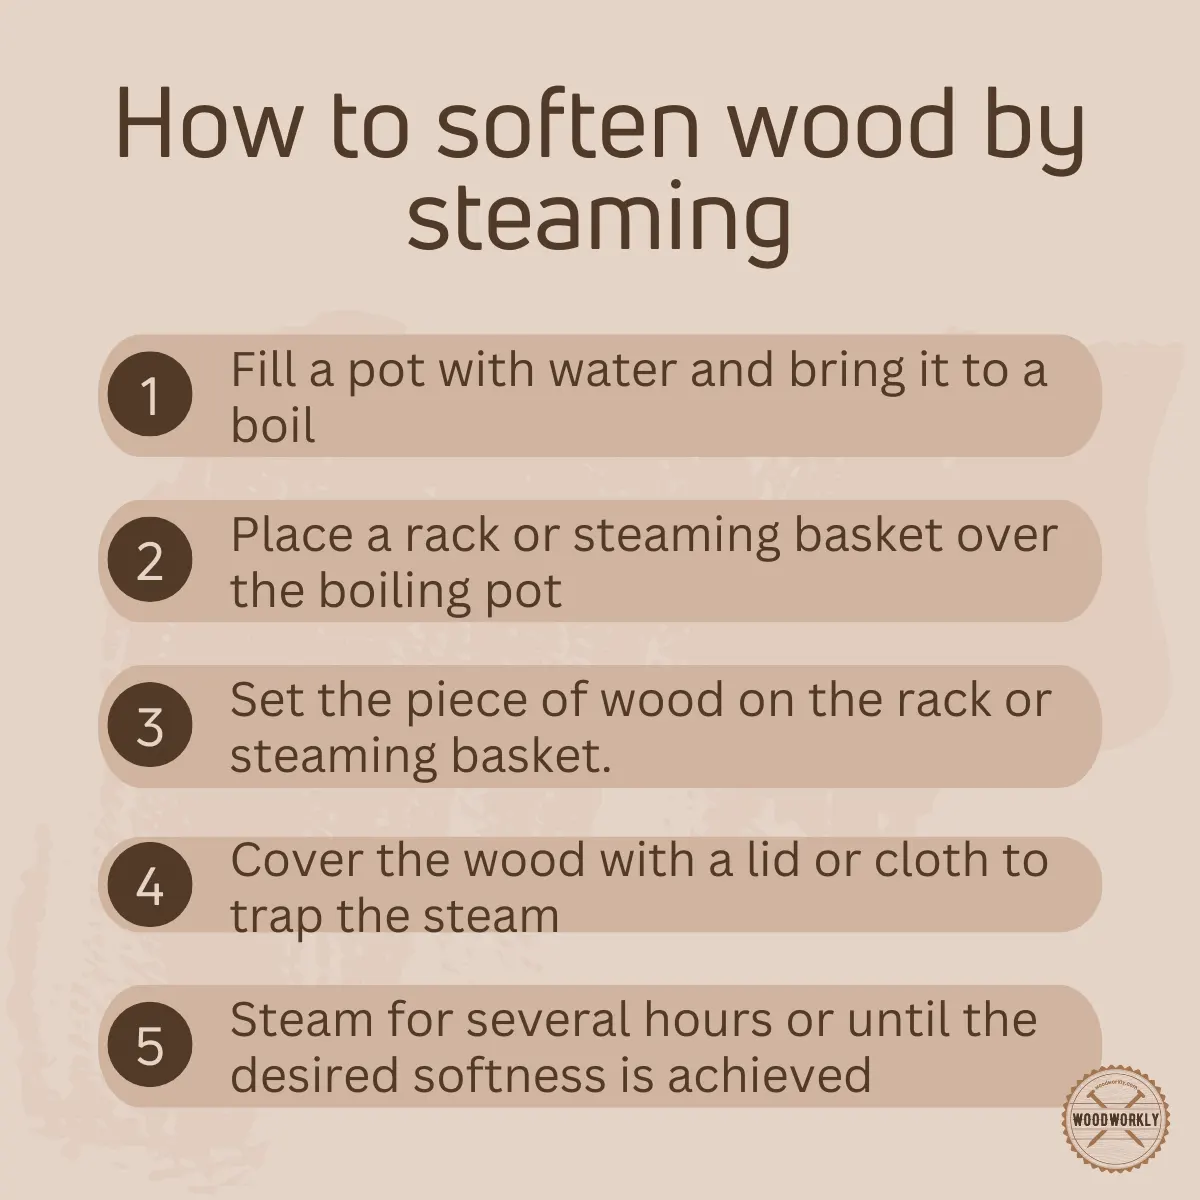
1. Steaming the Wood
Steaming wood is one of the best methods of softening wood for carving because doesn’t change the wood’s shape.
First of all, place the wood pieces in a chamber and heat the chamber to the water boiling temperature.
When the chamber is very hot, humid, and steamy the softening process will initiate.
Steaming loosens up the bonds between wood fibers and water molecules which are included in steam will penetrate through the upper layer of fiber and make the fiber cells saturated with water.
As a result of that, wood fibers will be flexible. Overall, wood will be softened.
Most importantly softening wood with the steam method doesn’t harm the interior or exterior structure wood.
It only works through the porous structures and makes the wood carvable.
After keeping wood pieces that need to be softened in the chamber for a very long time, make sure to carve them quickly once they take out.
Because if you took so long to carve them after taking them out, you’ll probably end up cracking and breaking the wood.
If they’re still hard to carve after taking out from the chamber, that indicates the wood needs more time to soften.
Therefore, keep them again in the chamber.
Once the wood is soft enough to carve out take them out and test it with a carving chisel.
Using the wood quickly after taking it out of the chamber can cause wood to crack and break.
Because they’re hot and haven’t settled in. Therefore, it is considered one of the major drawbacks of the steaming method.
Generally, the steaming method can be used for both thin and thick kinds of wood and produce excellent results with seasoned wood and green wood as well.
In conclusion, here’re some pros and cons of steaming wood for carving.
Pros And Cons of Using Steam To Soften Wood
| Pros | Cons |
| Doesn’t lose wood chape | High waiting time |
| Doesn’t change the wood color | Need hot, humid chamber |
| Soften wood from both inside and outside | Need to carve it quickly after taking it out from the chamber |
| Useful for both thin and thick kinds of wood |
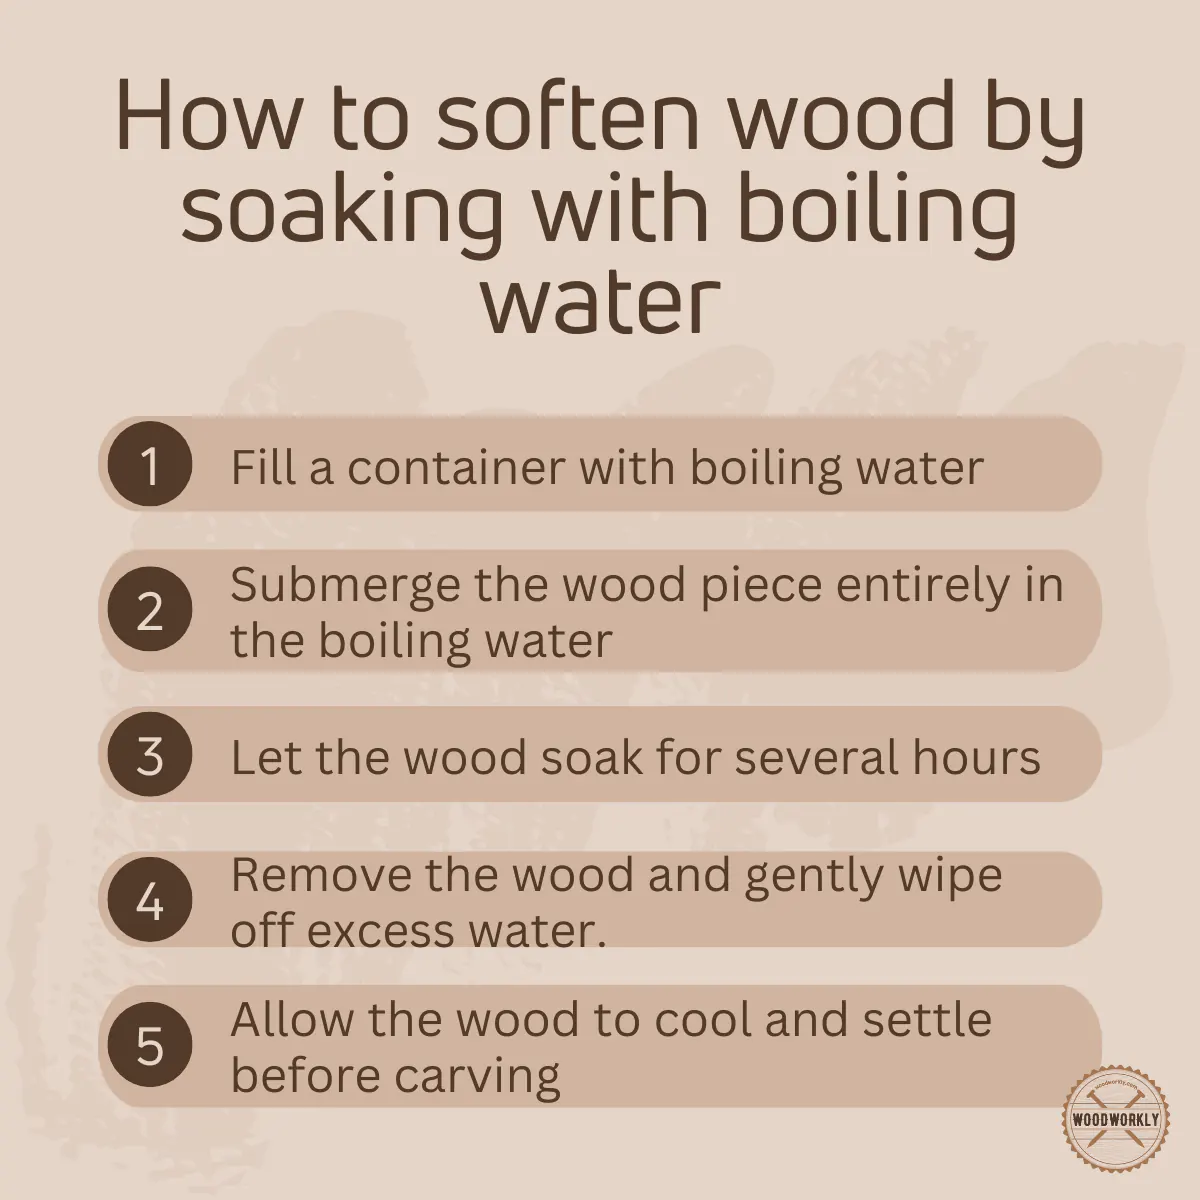
2. Soaking Wood in Boiling Water
Softening wood by soaking it in water is considered one of the cheapest methods to soften the wood. It is the most popular method among wood carvers.
First, pour clean water as much as possible into a pot with enough space to fit your wood.
Then place wood inside the boiling hot water carefully because boiling water can splash out and can get into contact with your skin.
After keeping wood in boiling water, the softening process will begin.
Boiling water will go inside the wood fibers and make fiber cells saturated. This makes the wood more flexible and softer. This will wet wood form both inside and outside.
You must need to be more careful when working with boiling water.
Wear gloves and make sure to boil water when they’re already inside the pot.
On the downside, hot water can damage the interior structure of the wood which can cause wood to crack and break.
Plus, hot water can change the physical appearance of the wood by changing its color which causes discoloration of the wood.
Use the boiling water method to soften wood only if the wood is a straight grain. Because if it’s not you’ll probably end up with cracked and splintered wood.
Once the process is done and the wood is soft enough, test it with a wood carving tool to check whether it’s ready to use for carving.
In conclusion, here’re some pros and cons of softening wood for carving with water.
Pros And Cons of Soaking in Boiling Water to Soften Wood
| Pros | Cons |
| Doesn’t lose wood chape | Cause wood discoloration |
| Easy process | Can damage and crack the wood |
| Soften wood from both inside and outside | Not good for expensive woods |
| Cheap method | |
| Make the wood flexible and carvable |
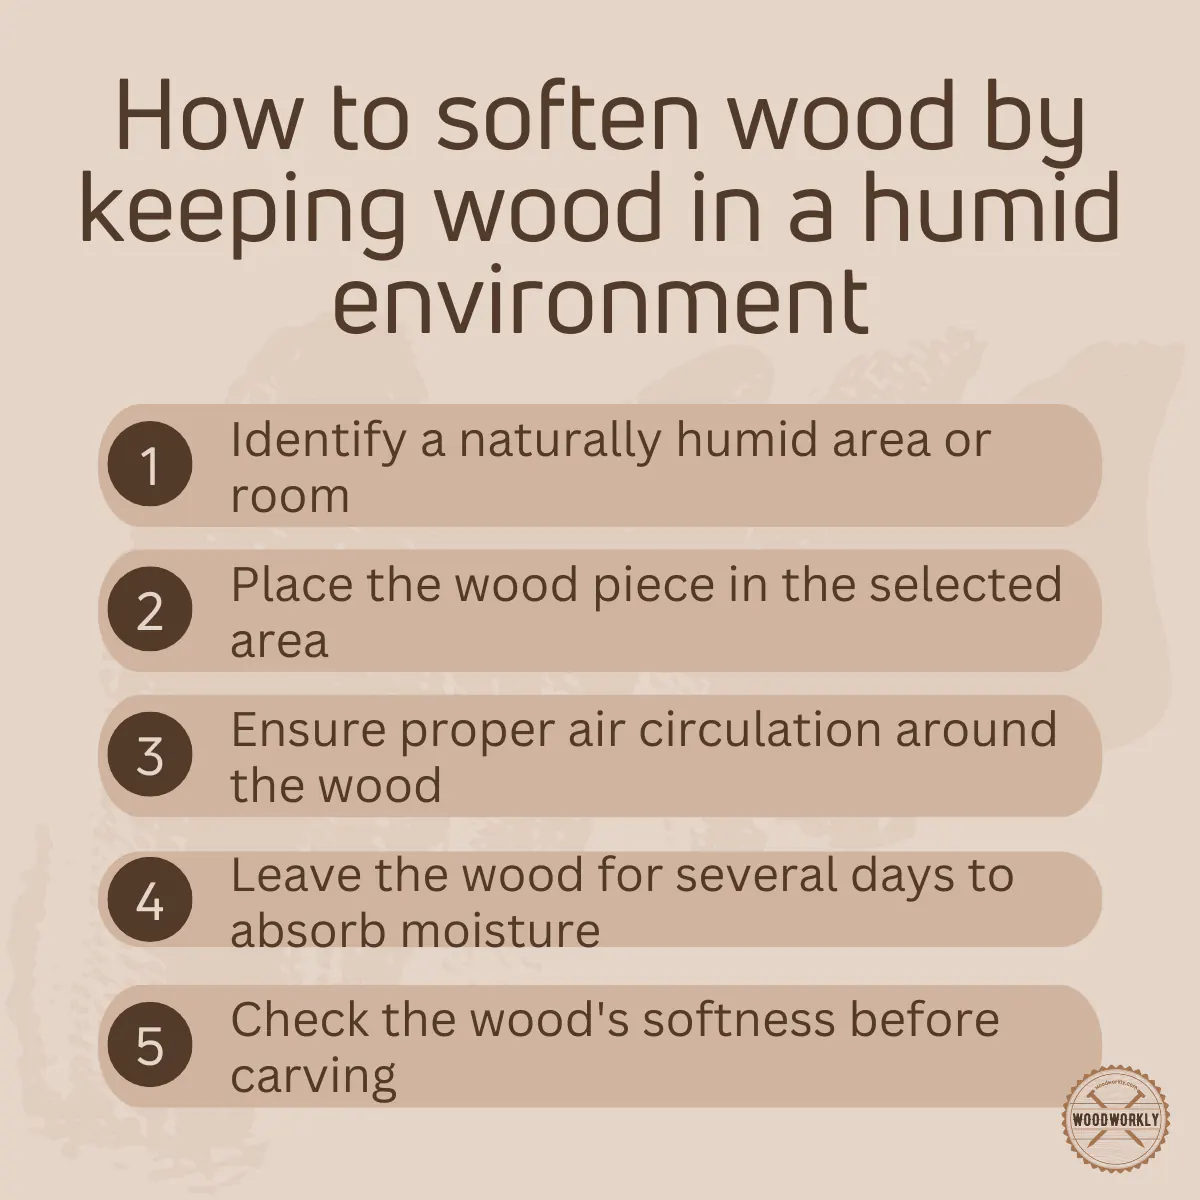
3. Keeping Wood in a Humid Environment
By storing wood that use to carve in a humid environment, you’ll be able to soften them well and can directly use them for the application.
If the storage area is too dry this is not the best method for you to soften the wood for carving.
Usually, garages and woodsheds have humid environments excellent to soften the wood for carving. Or you can store wood under a trap outside.
If you’re a commercial woodworker, better to go for an artificial humidifier and store wood that you need to carve in a storage area with around 60% -70% of humidity.
Never store wood in an area with 20% – 30% of relative humidity. Because they will dry up your woods instead of making them wet and soften.
When you store wood in a humid area, the moisture concentrations inside and outside of the wood are not the same.
Therefore, in order to minimize the imbalance between inside and outside water concentrations, water molecules will penetrate inside of the wood.
As a result of that, wood fibers will get saturated with water and make the wood flexible and soft.
Usually carving wood should have a moisture content between 5% -15%. The more you dry the wood, the wood fibers get tighter, and it became hard to carve.
Therefore, if the moisture content is below the required range of 5% – 15%, keep the wood in a humid environment to increase the moisture content inside the wood.
The main drawback of keeping wood in a humid environment is the risk of building fungus and the wood may tend to decompose quickly.
In conclusion, here’re some pros and cons of softening wood for carving by keeping it in a humid environment.
Pros And Cons of Keeping Wood In a Humid Environment to Soften Wood
| Pros | Cons |
| Doesn’t lose wood chape | Wood tends to decompose quickly |
| Easy process | High waiting time |
| Soften wood from both inside and outside | Not good for dry areas |
| Environmentally friendly | Can get attacked by insects |
| Make the wood flexible | Need storing space |
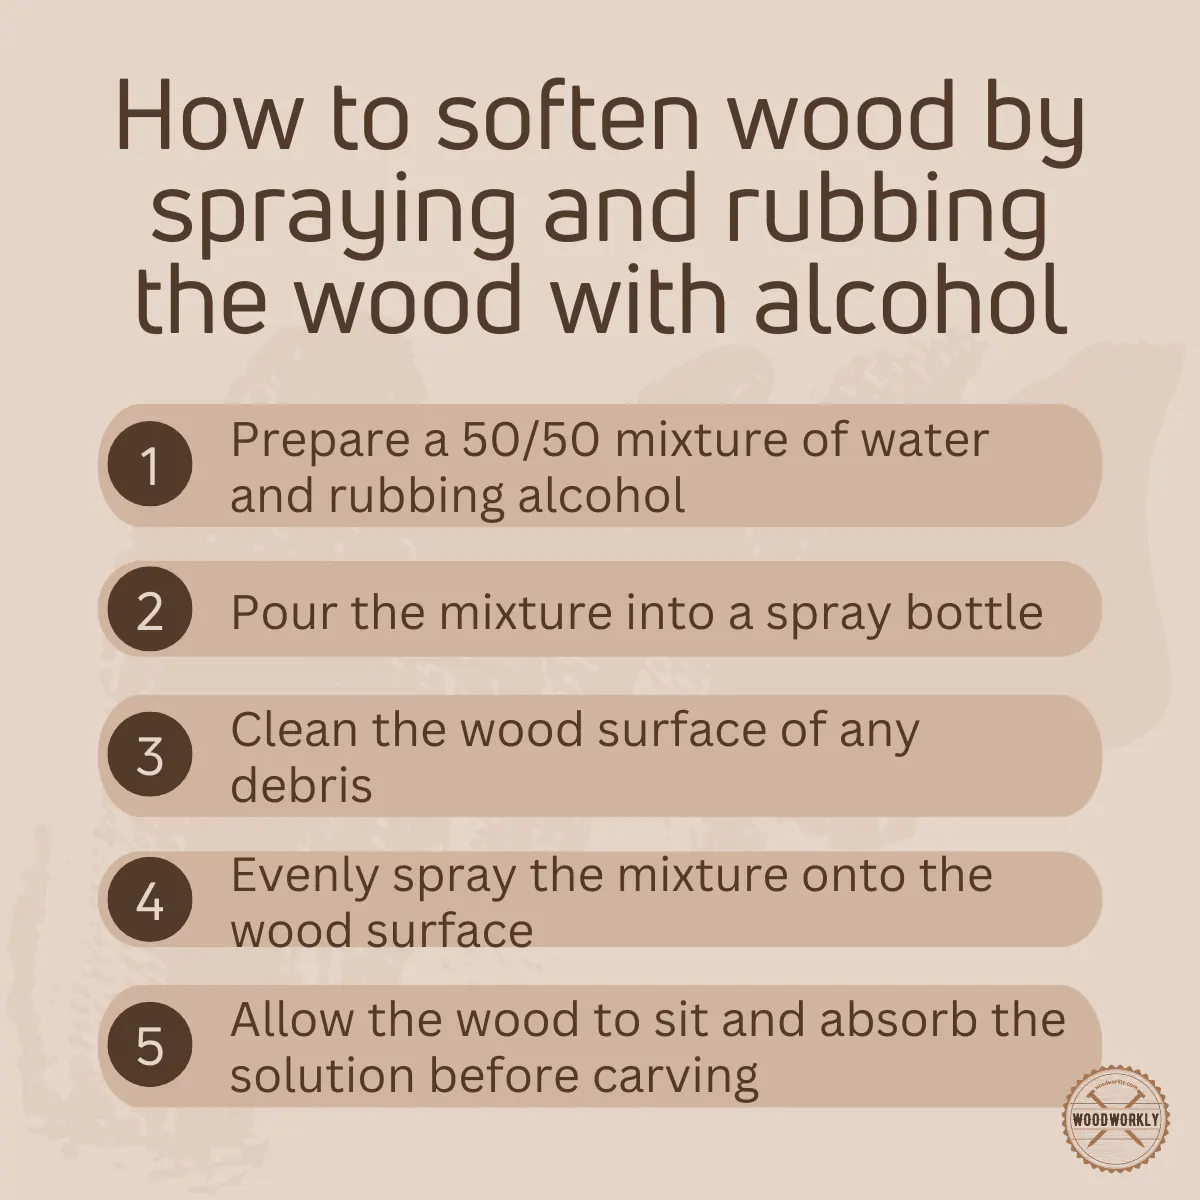
4. Spraying and Rubbing Wood with Alcohol
There’re two methods of softening wood for carving by using alcohol. One is the rubbing method and the other one is the spraying method.
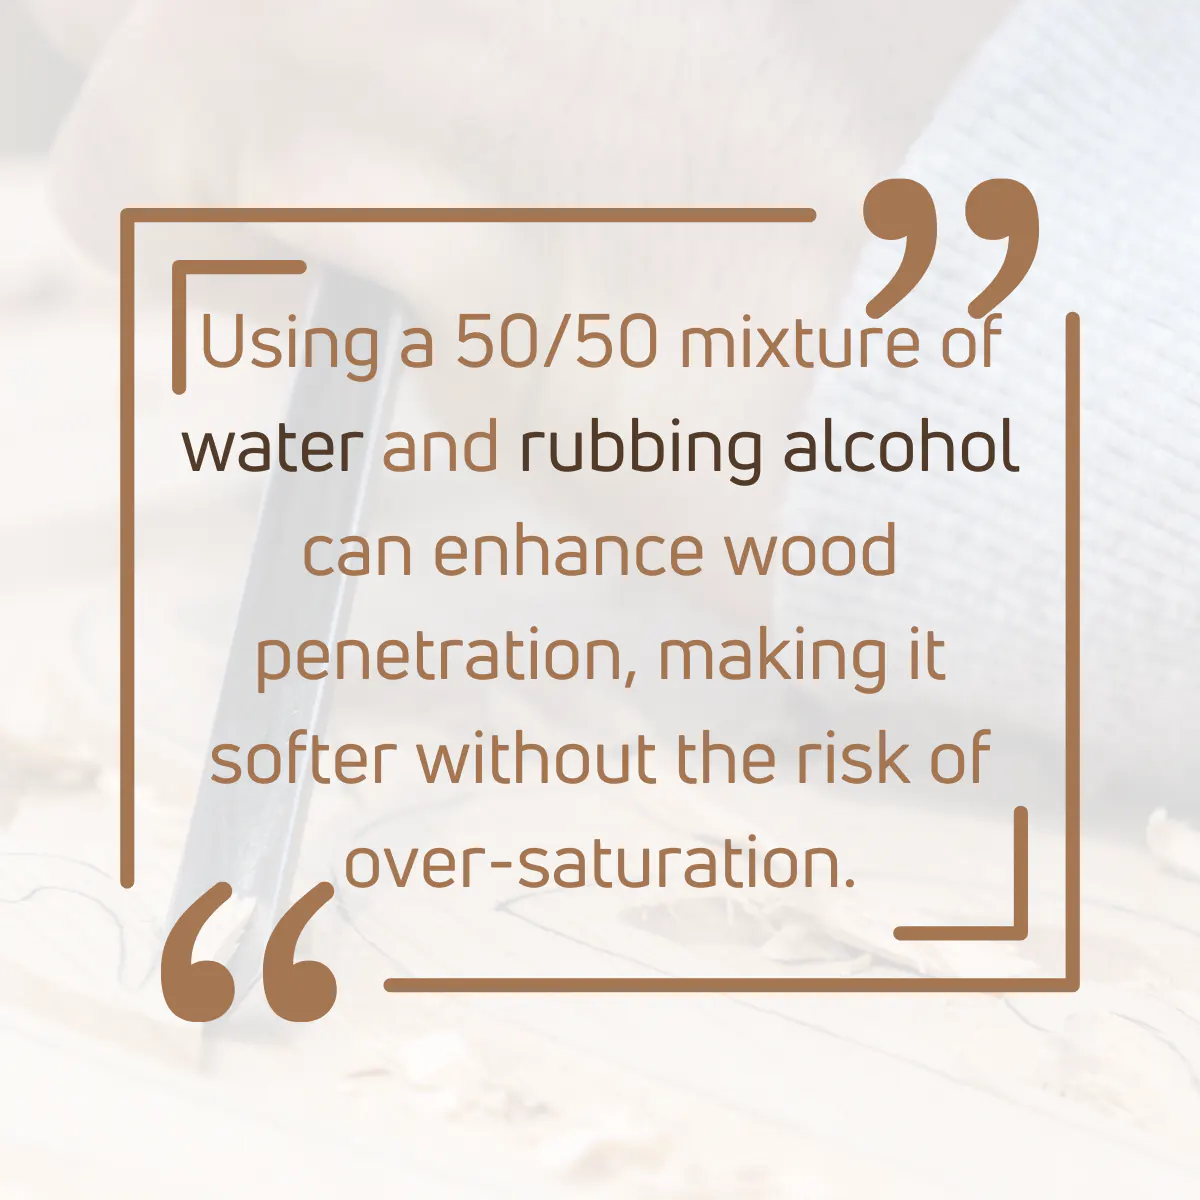
Add equal amounts of alcohol and water to a plastic cup and mix them well.
Then add the mixture to a spraying bottle and spray all over the wood without missing any spots.
Or you can use denatured alcohol to make the wood soften by putting them in a spray bottle and directly apply to the wood.
Denatured alcohol does not need to be mixed with water because it already contains 94 % alcohol which is stronger and more efficient in wood softening than the alcohol-water mixture.
Other than that you can use lint free soft cloth and dip and soak it in a prepared alcohol-water mixture of denatured alcohol and rub the wood surface.
Rubbing alcohol is more advantageous than spraying because rubbing will loosen up the surface tension of water and make it easier for alcohol to penetrate the wood.
However, make sure to test alcohol on scrap wood before heading into the main woodwork. Because some wood types have no positive response to alcohol.
Plus, scrap wood must need to be from the same wood type as your main project.
When you’re done with rubbing or spraying alcohol, let the surface dry for about 30 minutes before starting wood carving.
In conclusion, here’re some pros and cons of softening wood for carving with alcohol.
Pros And Cons of Using Alcohol to Soften Wood
| Pros | Cons |
| Doesn’t lose wood chape | Can impact wood structure due to alcohol |
| Easy process | Need an experiment before application |
| Make the wood flexible | Excess application may leave wood with watermarks |
| Less waiting time | |
| Soften wood from inside and outside |
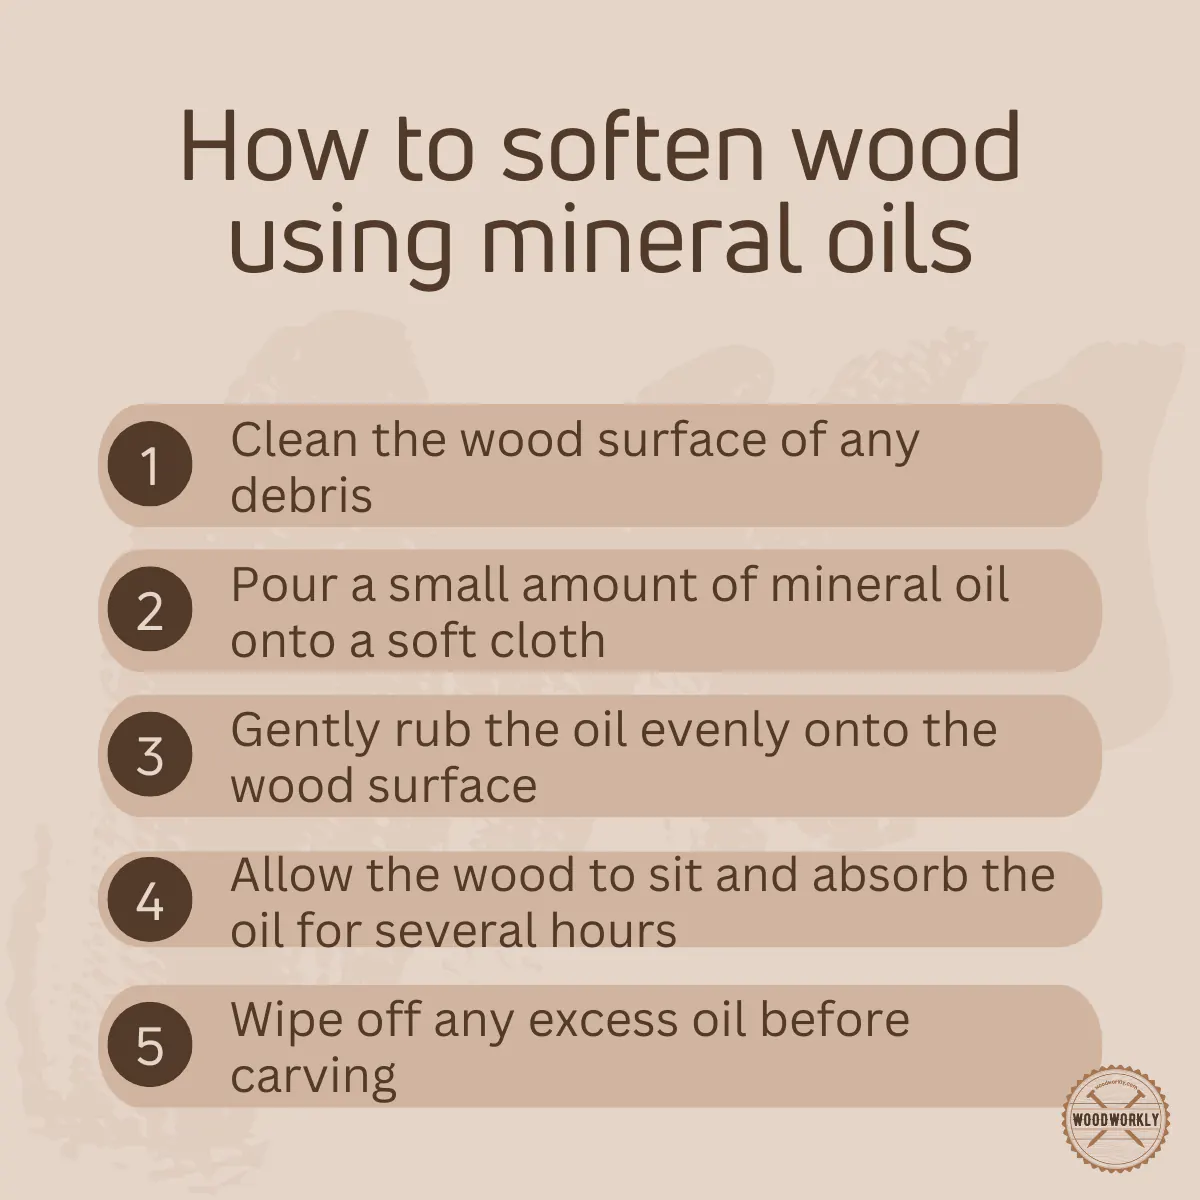
5. Using Mineral Oils
Mineral oil is an excellent liquid to soften wood for carving. We all know mineral oil is filled with lots of woodworking qualities.
Use mineral oil on areas that you wish to engrave.
Soak a lint-free soft cloth in mineral oil and take a sufficient amount from it. Then wipe down the area you want to engrave with mineral oil without missing any spots.
Wait for 2 -3 hours to complete the absorption process of mineral oil the oil will soak into the wood and make the wood fibers saturate and loosen up the bonds between them.
This makes the wood flexible and soft.
Usually, mineral oils take so long to sink deep into any wood.
Sometimes you’ll have to wait for weeks until it finishes absorption.
Even though the process takes time, the results are excellent. You’ll be able to make cuts using any carving tool smoothly without chipping the wood.
Patience is the key to success especially when you’re using mineral oils.
If you want quick results to soften wood for carving, this method is not recommended.
In conclusion, here’re some pros and cons of softening wood for carving with mineral oils.
Pros And Cons of Using Mineral Oils to Soften Wood
| Pros | Cons |
| Doesn’t lose wood chape | High waiting time because of the slow mineral oil absorption |
| Excellent results | Relatively expensive method |
| Make the wood super flexible | Only apply to the engraving area |
| Soften wood from inside and outside | |
| Able to cut wood easily |
6. Applying Kerosene
Use low-odor kerosene to soften wood for carving. Kerosene has high abruption power and absorbs quickly into any wood and making it soften and lats there for a very long time.
Take a paintbrush and dip it in kerosene and apply it all over the wood. Make sure to absorb along the direction of the wood grain, if possible, for fast and efficient absorption.
You’ll notice it absorbs quickly especially when the wood is dry.
After applying kerosene make sure not to keep wood from an open flame because kerosene is a highly flammable chemical. Plus, apply low-odor kerosene in a well-ventilated.
Kerosene will penetrate through wood fibers and make them saturated. It will loosen up strong bonds between wood fibers and make them more flexible. As a result, the wood will be softened.
Kerosene-soaked wood is easy to cut and able to use for any woodcarving project.

In conclusion, here’re some pros and cons of softening wood for carving with mineral oils.
Pros And Cons of Applying Kerosene to Soften Wood
| Pros | Cons |
| Doesn’t lose wood chape | Need ventilated area |
| No waiting time | Relatively expensive method |
| Make the wood super flexible | Need low odor version of kerosene |
| Soften wood from inside and outside | |
| Able to carve wood easily |
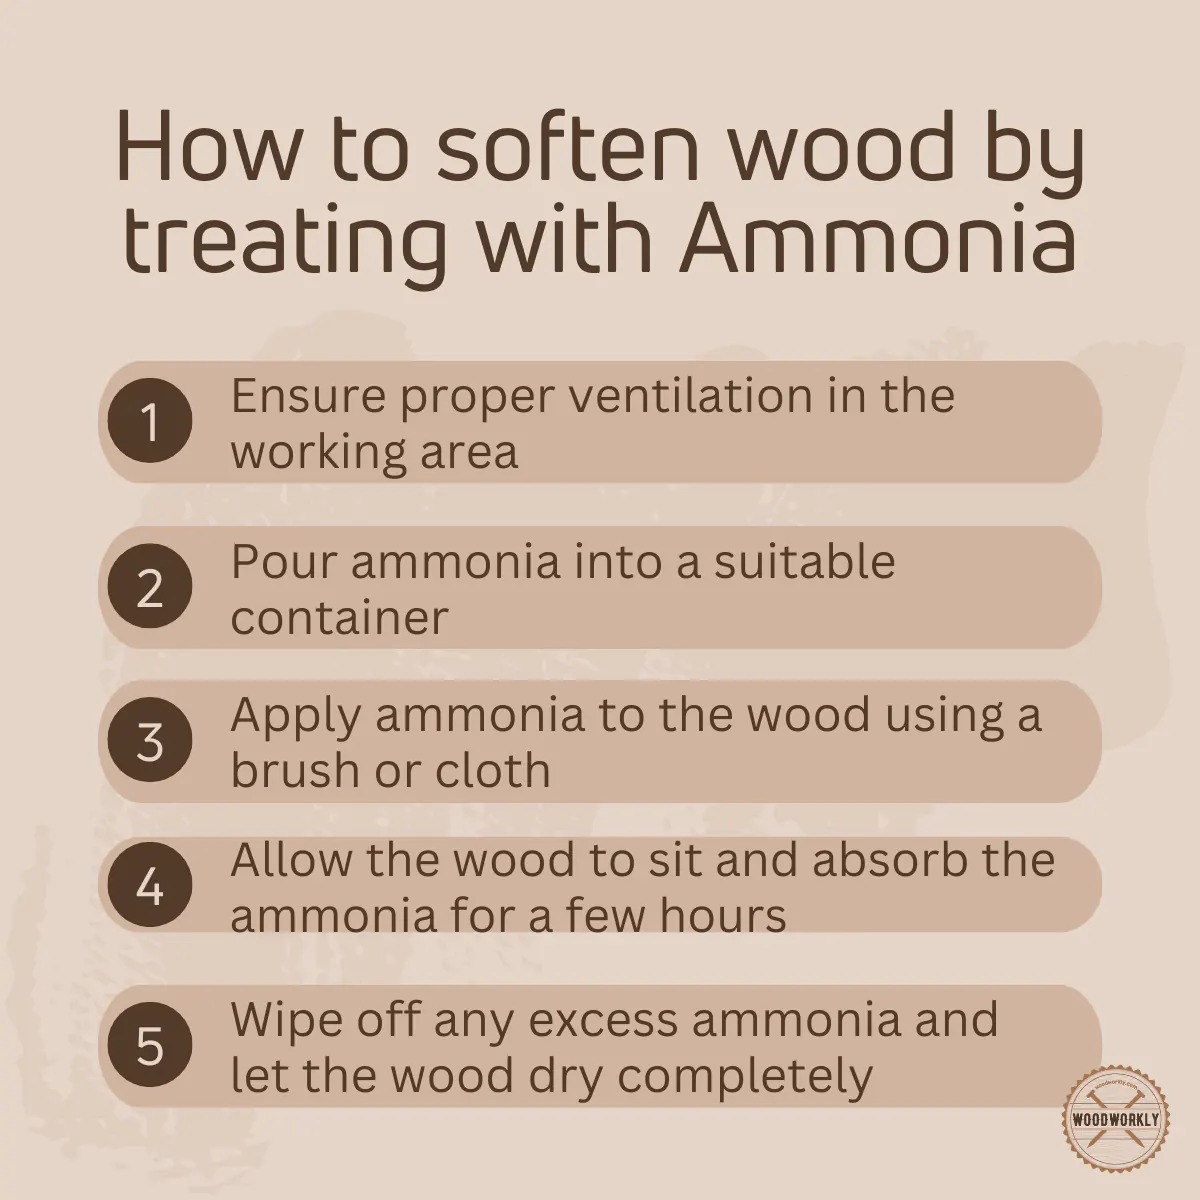
7. Treating with Ammonia
Ammonia gas and ammonia-based treatments are great to soften wood for carving. Ammonia gas works as steam.
It soaks the wood fibers and makes them flexible and carvable.
Fill up ammonia solution in a spray bottle and apply it all over the wood without missing any spots.
Make sure to do this in a well-ventilated area. Because ammonia releases harsh chemicals.
Before directly applying the ammonia solution to the main project, better to test it with scrap wood for extra safety of the wood.
In conclusion, here’re some pros and cons of softening wood for carving with ammonia.
Pros And Cons of Treating with Ammonia to Soften Wood
| Pros | Cons |
| Doesn’t lose wood chape | Need ventilated area |
| No waiting time | Relatively expensive method |
| Soften wood from inside and outside | Need well-ventilated area |
| Able to carve wood easily |
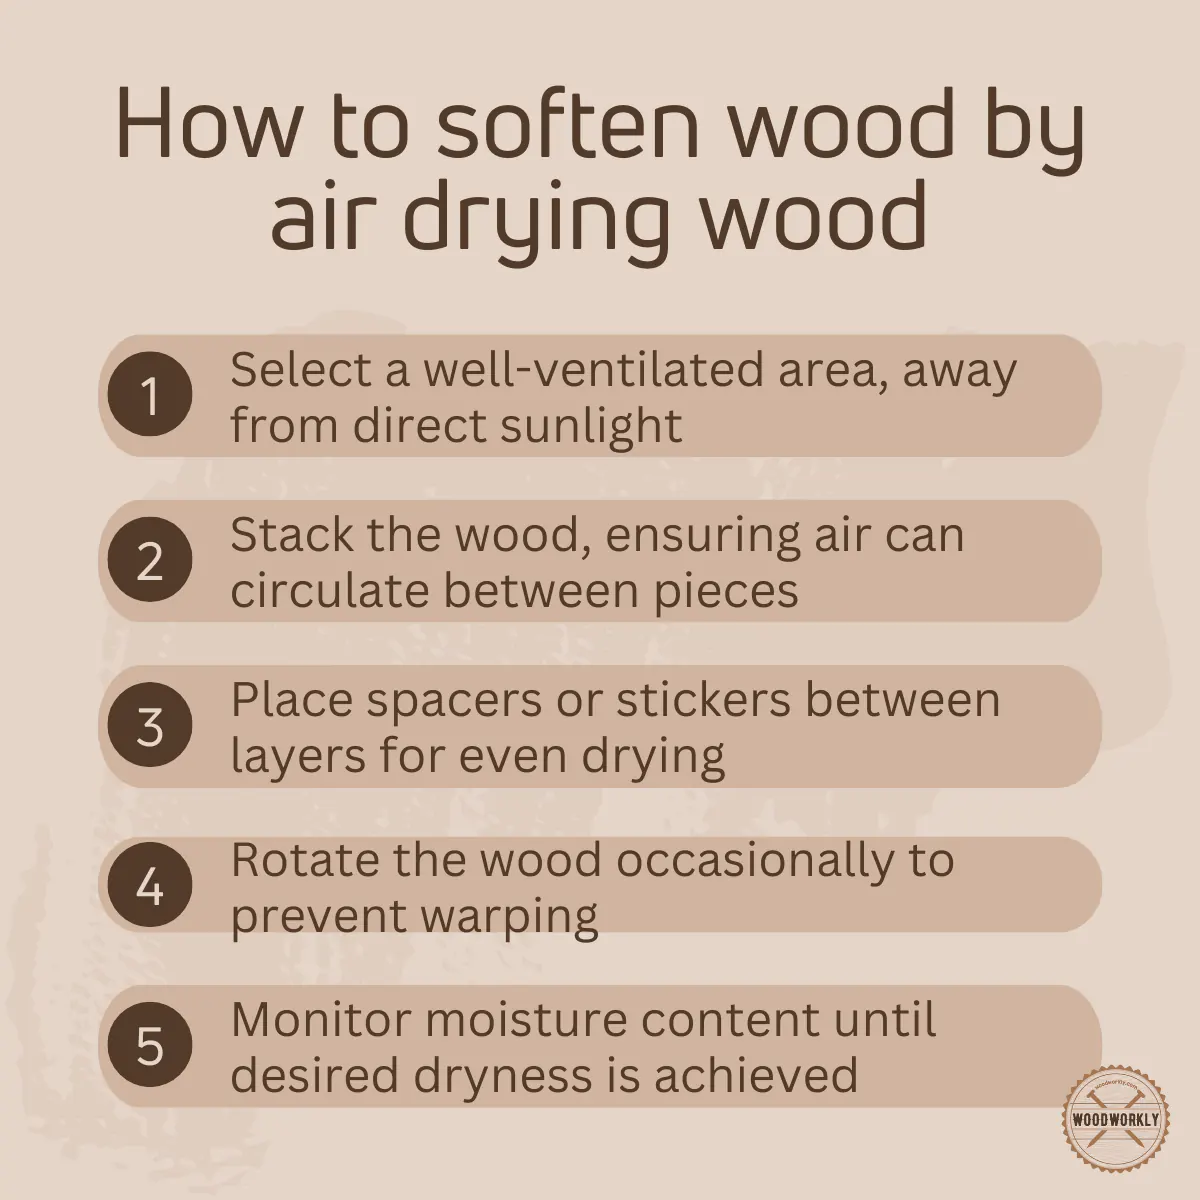
8. Air Drying Wood
Air-dried wood softens more easily than kiln-dried wood. Air-dried wood absorbs moisture naturally from the outside environment and makes it saturated.
The water molecules will fill up the fiber cells and make the wood soften for carving.
But kiln-dried wood doesn’t absorb moisture naturally from the outside world. It takes days to absorb a very little amount of water not like air-dried wood.
Therefore, kiln-dried wood has some tight bonds between wood fibers and they’re difficult to carve.
Therefore, when you are selecting wood to carve, always go for air-dried wood to work with ease.
In conclusion, here’re some pros and cons of softening wood for carving with air-dried wood.
Pros And Cons of Air Drying to Soften Wood
| Pros | Cons |
| Doesn’t lose wood chape | Need ventilated area |
| No waiting time | Color fades easily |
| Absorb moisture naturally | Need more space |
| More flexible and easy to carve | |
| Less expensive |
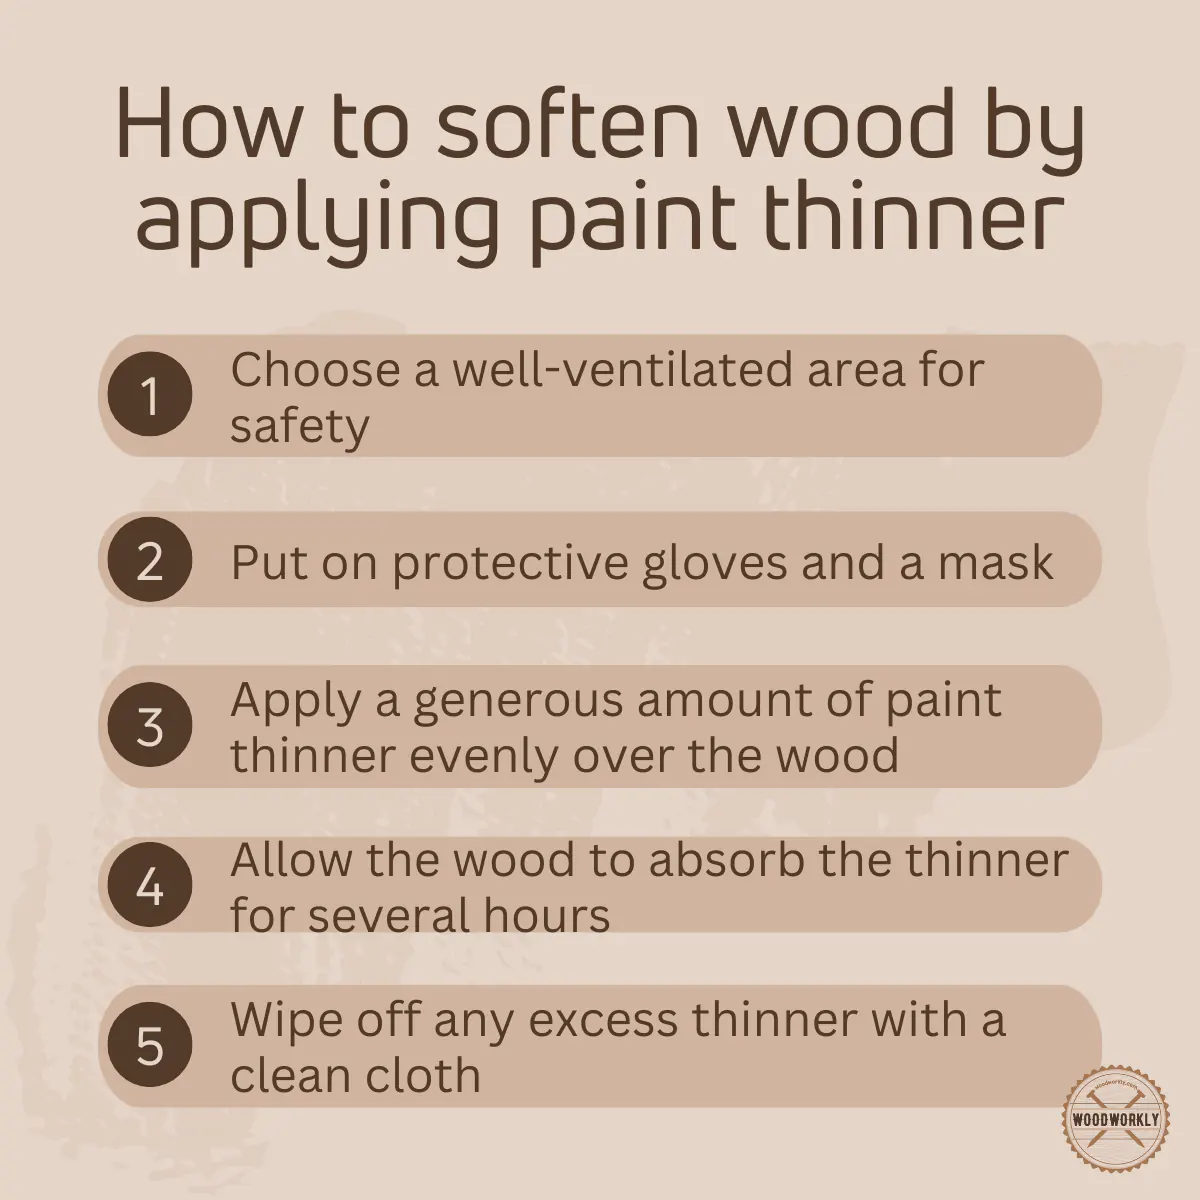
9. Apply Paint Thinner
Odorless paint thinner is excellent to soften wood for carving.
This is more beneficial if you’re willing to seal or paint your carved project in the future.
Because you’ve already finished applying one coat of paint thinner which will help you to minimize mistakes when wood finishing.
Take a paintbrush and soak it in odorless paint thinner and apply it to the carving areas of wood for a better softening process.
Paint thinner absorbs quickly into the wood and makes the wood fibers saturated. This will make the wood flexible and ready to carve.
Make sure to use odorless paint thinner because it is less toxic and has fewer fumes.
However, using paint thinner in a well-ventilated area is a must because it has some harsh chemicals.
Before directly applying paint thinner to the main project, better to test it with scrap wood for extra safety of the wood.
In conclusion, here’re some pros and cons of softening wood for carving with paint thinner.
Pros And Cons of Applying Paint Thinner to Soften Wood
| Pros | Cons |
| Easy to use | Need ventilated area |
| Less waiting time | Hazardous chemical |
| Absorb moisture naturally | Need well-ventilated area |
| More flexible and easy to carve | Expensive method |
| Absorb quickly | Need to test with scarp wood |
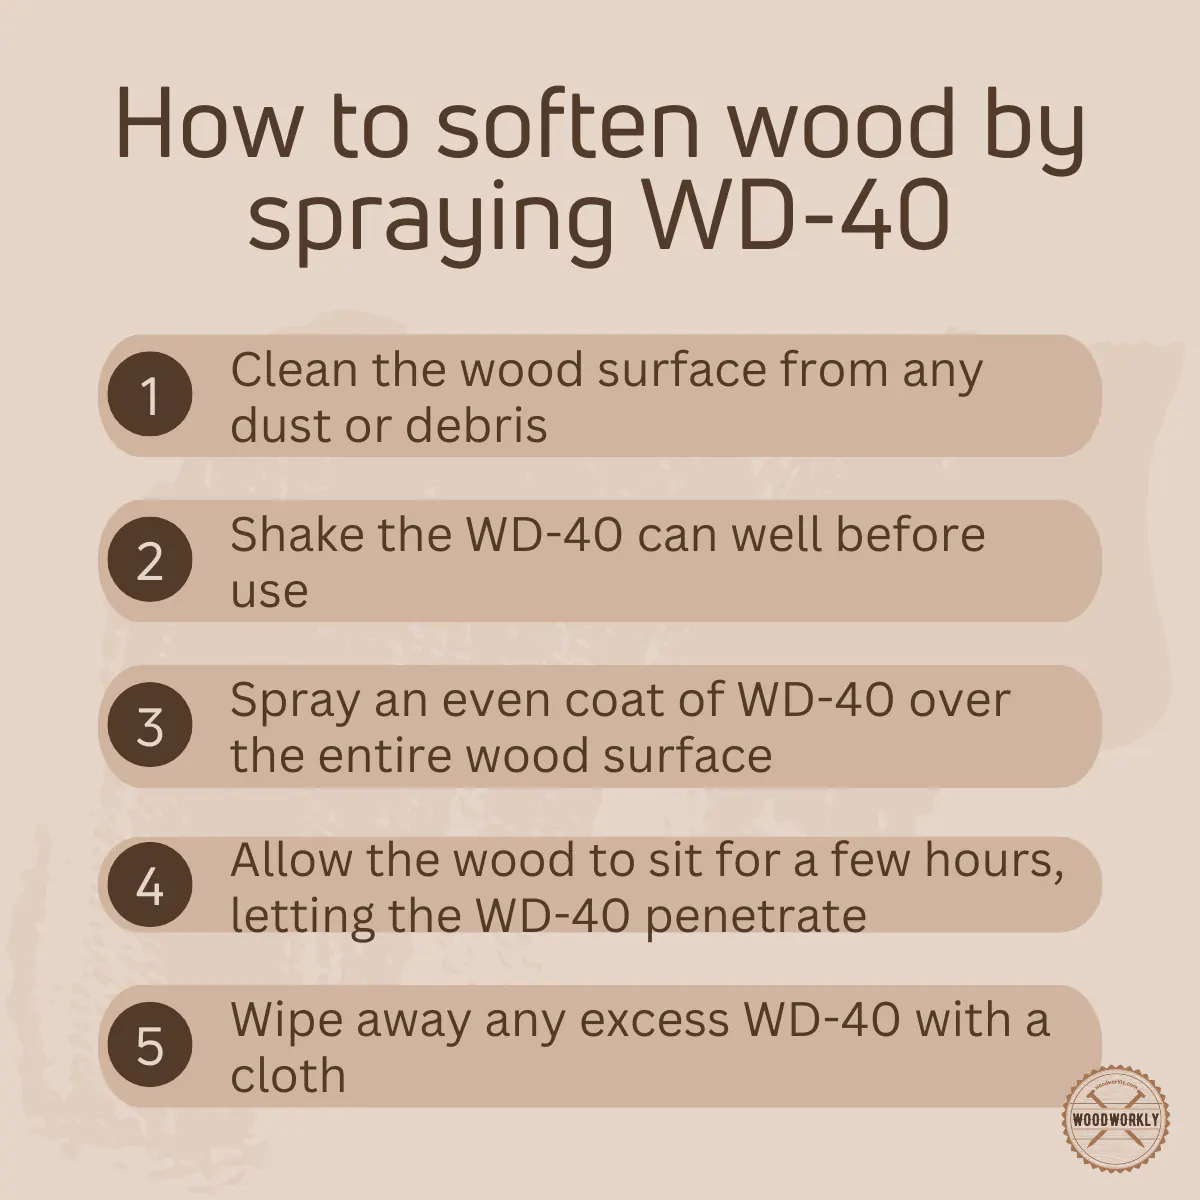
10. Spraying WD-40
WD-40 is excellent to soften wood before carving.
It is made of mineral spirits and some other solvents which absorb into the wood quickly and make it soft and ready to carve.
Spray WD-40 to the area that you wish to carve. it makes the wood fibers flexible and easy to carve. Usually, it takes 1 -2 minutes to complete the absorption process.
When the wood is wet its absorption power is less.
Therefore, make sure to apply WD-40 to dried wood for better absorption and better softening. When the wood is dry it takes 10 – 20 seconds for absorption.
The waiting time for using WD-40 is significantly less than most other products that we use to soften wood for carving.
Never use WD-40 for the woods that use to carve kitchen bowls, kitchen utensils, spoons, and children’s toys because it has some toxic chemicals as ingredients.
Other than that, you can use WD-40 for any item that doesn’t get in contact with food.
Apply WD-40 in a well-ventilated area for better safety.
In conclusion, here’re some pros and cons of softening wood for carving with WD-40.
Pros And Cons of Spraying WD-40 to Soften Wood
| Pros | Cons |
| Easy to use | Need ventilated area |
| No waiting time | Hazardous chemical |
| Absorb moisture naturally | Need well-ventilated area |
| More flexible and easy to carve | Expensive method |
| Absorb quickly | Need to test with scarp wood |
| Absorbs within 10 seconds | Not food safe |
That’s all folks. Now you know how to soften wood for carving with the most simple and accurate methods.
Hereby I have discussed the top 10 methods that I personally use and recommend for my clients.
What Is a Soft Carvable Wood?
Not all woods need to be softened before carving. Some woods are already soft and excellent for carving.
Here’re some best soft carvable woods,
What Chemical Soften Wood Quickly?
Here’re some chemicals that can be used to soften wood quickly,
- Acetone
- Ammonia
- Caustic potash
- Caustic soda
- Alcohol
- Mineral oils
Make sure to apply the above chemicals in a well-ventilated area.
Is Better to Carve Wood Wet Or Dry?
Mostly dry woods are better to carve because they can soften quickly by absorbing moisture from outside.
Wet woods don’t absorb moisture from outside and they’re hard to soften. Therefore, difficult to carve.
Overall, dry woods are easier to carve because we can use moisture as a key to loosen fiber bonds, make them saturated and soften the wood with high flexibility.
Therefore if you’re starting out wood carving, I recommend using dry wood to learn many wood carving ticks easily without worrying about cracking the wood.
Congrats folks! Now you know how to soften wood for carving in different methods.
Likewise, if you’re interested in bending wood, read to know, How to soften wood for bending!
So, let’s answer some frequently asked questions.
FAQs
What is the most common method to soften wood for carving?
The most common approach to soften wood for carving is spraying a 50/50 alcohol-water solution on the wood. This method is favored for its effectiveness and ease of application.
How can I maintain green wood for future carving projects?
To maintain green wood for future carving, you can store unfinished workpieces in the freezer. This can help keep the wood fresh without pressure to complete the project immediately.
What precautions should I take if I decide to soak wood in water for softening?
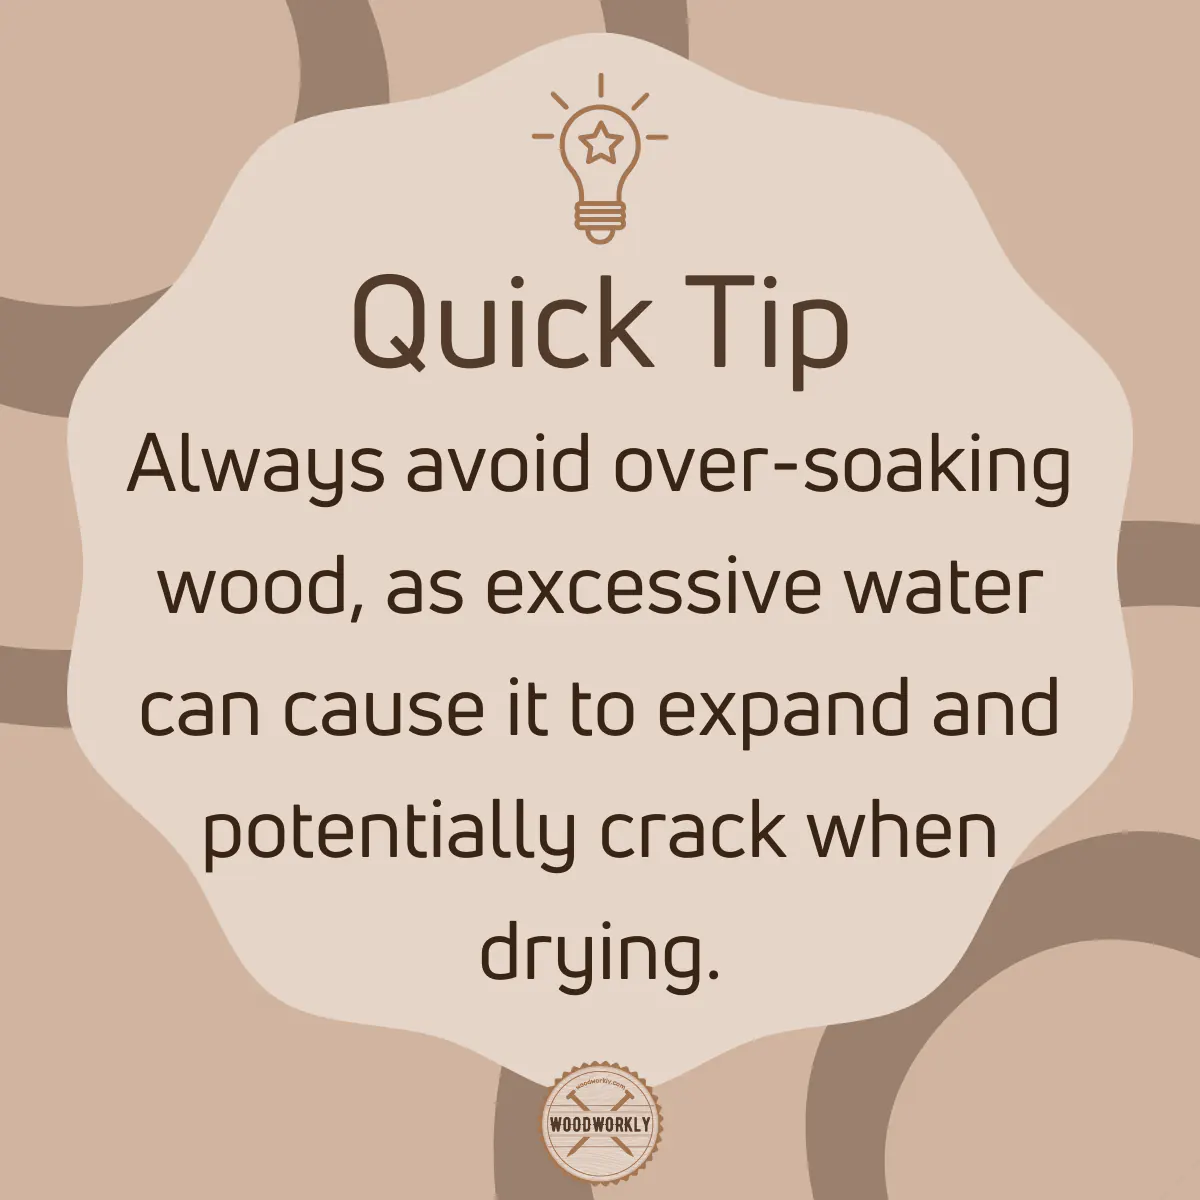
When soaking wood in water, be mindful of the soaking duration and ensure both ends of the grains are underwater. Over-soaking can cause the wood to expand and crack as it dries.
What’s the difference between using denatured alcohol and a water-alcohol solution for softening wood?
Denatured alcohol can be used alone to soften wood, whereas a water-alcohol solution typically consists of even proportions of water and alcohol, such as 70%. The water-alcohol mix helps to keep the wood wet longer, while denatured alcohol might react differently depending on the type of wood.
How does carving green wood differ from carving soaked wood?
Greenwood is naturally soft and pleasant to carve but might split as it dries. Carving soaked wood is easier than dry wood but might be tricky for details, as the knife can slip, and the wood dries quickly.
What care should be taken with tools when carving softened wood?
When carving softened wood, particularly soaked wood, tools should be well cared for by keeping them sharp and applying oil after carving, as the process might be harder on the tools than carving soft dry wood.
Did I cover all you wanted to know about: How To Soften Wood For Carving?
In this article, I have deeply discussed how to soften wood for carving with 10 different ways how to soften wood for carving with boiling water, steam, alcohol, placing in a humid environment, using ammonia, kerosene, paint thinner, WD-40, air drying and mineral oils.
You can soften wood for carving by steaming, soaking wood in boiling water, spraying alcohol, keeping it in a humid area, using air drying, and applying mineral oil, kerosene, paint thinner, and WD-40. Use clamps to hold still wood and soften the wood. Then Softened wood leaves to dry and use for carving.
As a woodworker, I prefer the steaming method to soften wood before carving because it doesn’t change the wood shape and is non-toxic. Plus, it doesn’t need much money and time.
Overall, all the 10 methods are great in their own ways, and you have the freedom to select the one that matches you perfectly according to the purpose.
Furthermore, I have answered some frequently asked questions regarding how to soften wood for carving as well.
Hope you have learned a lot of new things about wood softening for carving.
Now let’s start your next carving project with hardwood and try to soften it using one of the above methods that we discussed above to get the best results. Keep practicing!