Eager to uncover the secrets of wood carving? Wondering how to turn a simple block of wood into a captivating masterpiece? Dive in to explore this age-old art form and kick-start your wood carving journey!
Wood carving is suitable for anyone to try. It is a popular hobby that speeded widely all over the world. Some do woodcarving for fun, while others do woodcarving as a business.
Whatever the purpose, woodcarving is a field that mostly depends on your creativity.

I was curious about wood carving and was able to learn lots of things about wood carving from the field experts.
So, Let’s figure out, How to Start Wood Carving?
To start wood carving, begin by selecting a suitable style (whittling, chip carving, relief carving, etc.), gather essential tools like knives, chisels, and sharpening stones, and choose a beginner-friendly wood type. Start with simple projects to develop basic techniques and gradually progress to more complex designs as you improve.
But that’s just a quick rundown of the question.
Dive into our comprehensive guide about how to start wood carving to unlock the secrets of wood carving techniques, tools, and inspiration.
So, grab your chisels and let your imagination run wild as we explore the enchanting world of wood carving!
First of all let’s have a look at a brief introduction to the interesting subject, of woodcarving to identify how important is to learn woodcarving for beginners.
Introduction to Wood Carving
Wood carving, an age-old craft, has fascinated countless individuals across the epochs.
From elaborate patterns adorning ancient furniture to expressive sculptures gracing art galleries, wood carving occupies a unique niche in the artistic realm.
This multifaceted and captivating art form offers not only a creative outlet but also a sense of achievement and relaxation to those who immerse themselves in it.

The Ancient Roots of Wood Carving
Tracing back to the dawn of human history, wood carving has been an integral part of our cultural heritage.
Civilizations like the Egyptians and Greeks relied on wood carving for practical and aesthetic purposes.
As time marched on, wood carving became increasingly intricate, with craftspeople devising specialized tools and techniques.
Continually evolving, wood carving thrives today with fresh styles and methods emerging regularly.
The Many Facets of Wood Carving
A kaleidoscope of styles, techniques, and materials characterizes wood carving. From delicate chip carvings to audacious sculptures, the potential is boundless.
Furthermore, wood carving isn’t confined to specific wood types, permitting artisans to explore various species, each boasting distinct properties and traits.
The Satisfaction and Benefits of Wood Carving
Transforming a simple block of wood into an objet d’art yields immense satisfaction.
The tactile nature of wood carving, melded with elaborate details and methods, renders it a deeply gratifying endeavor.
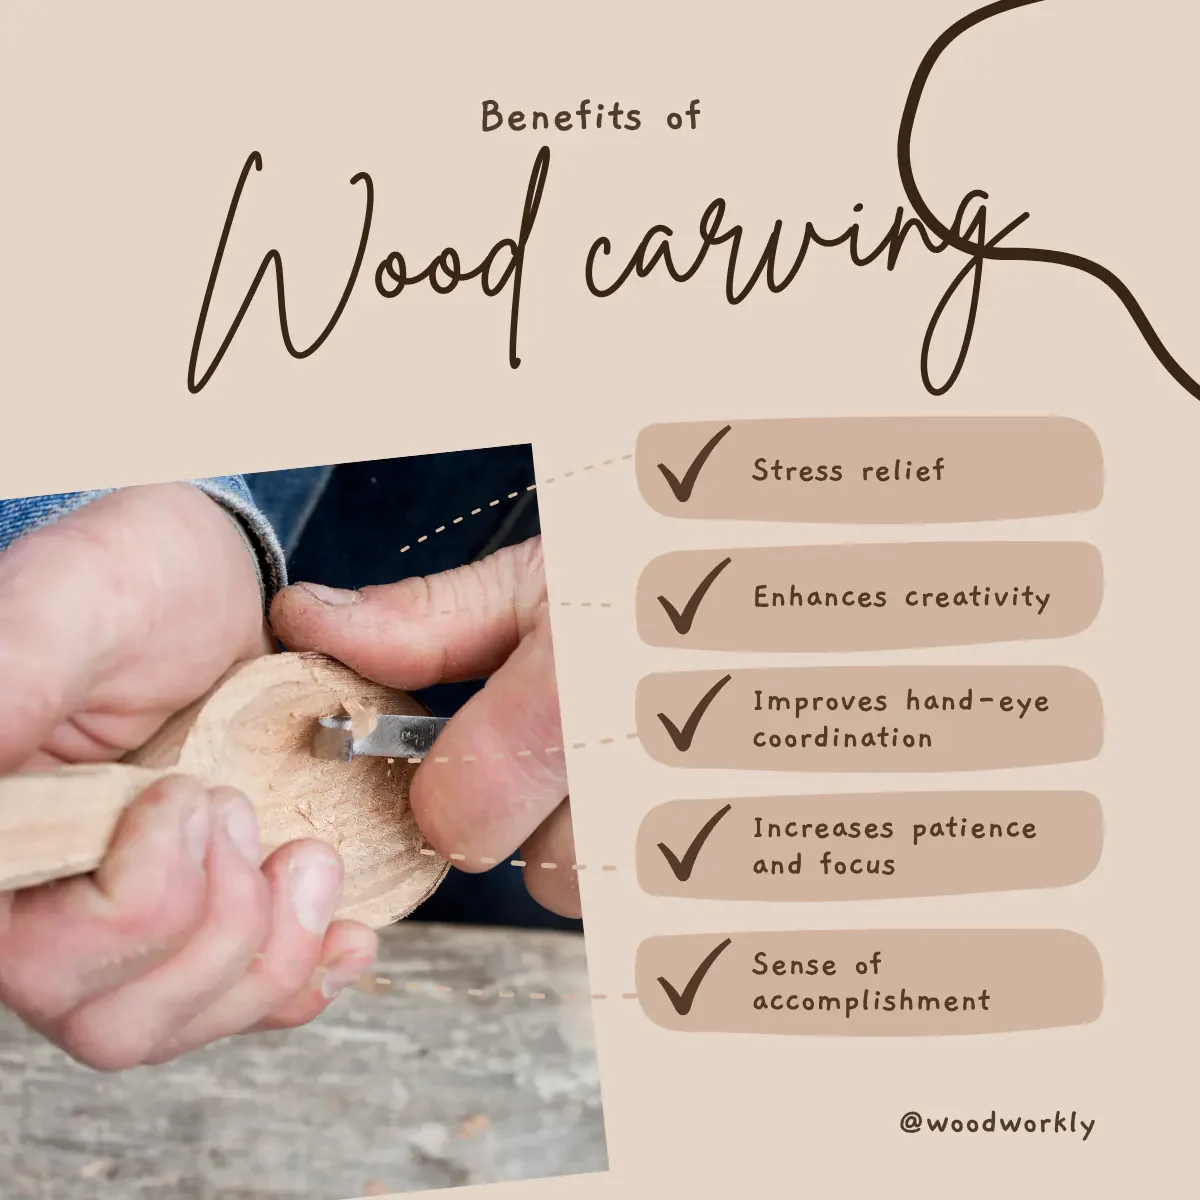
Among the benefits of wood carving are:
- Creative expression: Unleash your imagination and materialize your concepts as tangible art.
- Stress relief: Carving’s meditative process offers solace from daily stressors.
- Improved focus and concentration: Patience and precision are paramount, honing your attention.
- Sense of accomplishment: Witnessing your project’s progression and completion instills pride and self-esteem.
The Wood Carving Community
The wood carving community’s camaraderie and support provide an unparalleled experience.
Irrespective of your expertise, a wealth of resources, forums, and workshops await.
Welcoming and encouraging, this community is the perfect environment for those seeking to explore and master the enthralling art of wood carving.
First things first, before moving into the woodcarving world, let’s have a quick look at the things you should know before starting woodcarving to make this easier for you to understand.

What do You Need to Know Before Starting Wood Carving?
I know you’re excited to jump into carving your first project. But before that like any other field, there are several things you need to be familiarized with.
Here I have mentioned what you need to know, and what you need to practice before starting wood carving.
Here’re the things you should know before starting wood carving,
- Selecting the right wood
- Selecting the right tools
- Always follow a plan
- Wear gloves
- Sanding is must
- Embrace the commitment
- Set realistic expectations
- Mastering techniques takes time
- Create an ideal workspace
- Crafting a safe environment
Let’s discuss each of the above factors you need to know before starting the wood carving journey in detail.
1. Selecting the right wood
If you know the perfect wood to get the perfect output, it’ll save your time and increase your desire to learn more.
So, selecting the correct wood is important to know before you go for carving.
2. Selecting the right tools
never waste your money on unnecessary stuff before knowing how and when you want to use them.
There are some tools in wood carving applicable for multiple tasks.
So, before anything you need to have a clear idea about what tools you really need and their uses.
3. Always follow a plan
before starting any kind of wood carving, make a plan by yourself or download one from the internet.
There are plenty of wood carving pans in there. You need to figure out measurements and where should you put cuts.
So, take a piece of paper and a pencil and draw the plan before anything.

4. Wear Gloves
Safety is important in wood carving. You have to work with machines, knives, cutting and peeling tools, and many other hard metals sharp stuff.
So, make sure always you wear gloves for both hands.
When you’re a pro at wood carving games, there is a certain point at you can do things even without wearing gloves to get fine details that are difficult wearing gloves.
But until then wearing gloves is a must for wood carving for beginners.
5. Sanding is a must
Whatever wood you going to carve, sanding is important.
By sanding you can prevent happening a lot of issues like cracks, dents, and debris, and it smoothens up the surface.
So, do sand with fine-grit sandpaper before starting carving.
6. Embrace the commitment
Wood carving demands a certain level of commitment, with time and patience being vital components of the process.
As you delve deeper into this craft, you’ll discover the importance of practice and the value of learning from mistakes.
Accepting that mastery doesn’t materialize overnight is crucial. Embrace the journey and allow yourself to grow with each new project.
7. Set Realistic Expectations
As a beginner, don’t expect to create intricate masterpieces immediately. Start with simple projects that build your foundational skills.
Once you’ve honed these techniques, gradually progress to more complex endeavors.
Embrace the learning curve and remember that even seasoned carvers face challenges.

8. Mastering Techniques Takes Time
Patience is a virtue, particularly in wood carving. While you might feel eager to tackle intricate projects, it’s crucial to remember that developing your skills takes time.
Invest in mastering basic techniques before advancing, as this will ultimately contribute to your long-term success and satisfaction.
9. Create an Ideal Workspace
Setting up a dedicated workspace enhances your carving experience and promotes safety.
Consider the following when designing your carving haven:
- Proper lighting: Ensure your workspace is well-lit to prevent eye strain and reduce the risk of accidents.
- Ventilation: Adequate airflow minimizes dust accumulation and safeguards your respiratory health.
- Organization: A well-organized space enhances productivity and allows for easy access to tools and materials.
- Comfort: Invest in ergonomic furniture and anti-fatigue mats to reduce strain during long carving sessions.
10. Crafting a Safe Environment
Safety should be a top priority when starting wood carving.
Invest in proper safety gear, such as gloves and eye protection, and learn the correct techniques to avoid injuries.
Additionally, keep your tools sharp and well-maintained, as dull tools can lead to accidents.
Preparing yourself for the wood carving journey involves understanding the commitment, setting realistic expectations, and creating a safe and conducive workspace.
With time, patience, and practice, you’ll be well on your way to mastering the art of wood carving and enjoying its many rewards.
By having good knowledge about all the above factors, it is easy to catch the methods and techniques of wood carving.
When I was a beginner those are the things that I have mainly focus on before starting wood carving.

Types of Wood Carving
Wood carving can be categorized under several fields. I highly recommend going through each niche and finding what fits you best.
Types of wood carving are,
- Whittling
- Chip carving
- Relief carving
- Pyrography
- Flat-plane carving
- Carving in the round
- Chainsaw carving
When you come across wood carving you can select one field from them and continue learning through it or you can learn them all.
So, let’s dig into each type of wood carving to get an idea of what fits you perfectly.
Whittling
Whittling is the oldest wood carving type. Whittling uses a straight knife/pocket knife to carve the wood.
For whittling, we always go for softwoods, because hardwoods are difficult to cut and add fine details.
Whittling is a traditional carving technique where you use a knife to shape wood into intricate designs.
Whittling is ideal for small, handheld projects, this approach focuses on simplicity and portability. Some basic techniques include:
- The straight cut
- The push cut
- The pull cut
Whittling is perfect for beginners, as it requires minimal tools and allows for easy experimentation.
This is also known as the carving in the round. You can give various shapes and designs to the wood by cutting it using a knife. To display the marks of the knife, mostly wood carvings made by whittling don’t sand.
By cutting small slices of softwood, you can make beautiful things like a wooden spoon, a wooden bunny, a wooden flower, and many more small figures. Whittling does not need huge and costly tools.
Most of the wood carvings only need a pocket knife and a softwood piece.
If you love to make small wood carvings with fine details as a hobby, in my opinion, Whittling is the best niche for you.

Chip Carving
Chip carving is a perfect niche for beginners. You can make cool attractive designs using softwood and a good old chisel with some small cuts.
Chip carving is mostly used for decorative purposes. Other than that chip carving is great for picture frames, cabinetry designs, or other workbench tasks.
Whittling is for figures while chip carving is for designs. However, both types are great for beginners.
Chip carving is a decorative technique that involves chipping away at a wooden surface to create patterns, designs, and motifs.
Chip carving requires specialized tools, such as:
- Chip carving knives
- Gouges
- Chisels
This style demands precision and attention to detail, making it a great choice for those who enjoy intricate work.

Relief Carving
Relief carving needs some advanced carving techniques. In relief, carving figures are made in flat wood. In relief carving the design has 3D look from the front and a flat surface from the back.
Relief carving entails creating images and designs on flat wooden panels. By removing material around the subject, you give the illusion of depth and dimension.
This style is well-suited for those with artistic inclinations, as it often involves detailed sketches and planning.
To succeed in relief carving, you’ll need various gouges, chisels, and mallets.
There are two types of relief carvings known as a high relief and low relief which vary on how deep the cut is.
By relief carving, you can describe people, places, animals, and activities easily because of its 3D look.
If you’re a beginner in woodcarving, it’s better to practice several other types of designs before starting with relief carving, because of its difficult, advanced methods.

Pyrography
Pyrography is a unique wood carving type that use to decorate wood with freehand burn marks. Pyrography is also known as writing with fire.
Pyrography is done with a heated pen tool and the results are impressive. With a good pyrography kit, you’ll be able to make beautiful drawings with awesome textures.
Pyrography, also known as wood burning, is the art of creating designs on wood using heated tools.
This technique demands steady hands and an understanding of temperature control, as different shades and textures are achieved through varying heat levels.
Pyrography tools range from simple soldering irons to specialized wood-burning kits.
Pyrography is also great for a beginner in wood carving, which needs to have good creativity.

Flat-Plane Carving
Flat-plane carving is a minimalist style characterized by sharp, angular cuts and minimal rounding.
This Scandinavian technique produces folk art-inspired pieces, such as figurines and animals, with a distinctive geometric appearance.
Flat-plane carving typically uses knives and gouges and is an excellent choice for those who appreciate simplicity and clean lines.
Flat plane carving does require sanding or rounding. Easy to follow with good carving wood like Basswood.
Carving in the Round
Carving in the round involves sculpting three-dimensional figures from wood, creating lifelike representations of animals, people, or objects.
This advanced technique requires a comprehensive understanding of wood grain, anatomy, and perspective.
Tools for carving in the round include gouges, chisels, mallets, and rasps.

Chainsaw Carving
Chainsaw carving is the most trending carving type in the world. If you like to combine wood carving methods with modern technology to create amazing masterpieces, this is the best niche for you.
With chainsaw carving, you can carve whatever you want like people, figures, animals, toys, places, and many more.
Chainsaw carving is the art of sculpting wood using a chainsaw as the primary tool.
This high-speed technique is ideal for creating large-scale sculptures and requires a strong understanding of chainsaw safety and maintenance.
With practice, chainsaw carving allows artists to produce impressive, large-scale works in a fraction of the time required by traditional methods.
As a woodworker, I’m 100% sure chainsaw carving will be the most useful hot topic in near future. If you’re a beginner, highly recommend chainsaw carving. You’ll not regret it at all.
wood carving offers a myriad of styles and techniques to suit different preferences and skill levels.
Experimenting with various styles, such as whittling, chip carving, and relief carving, will help you discover your niche and foster a deeper connection with this captivating art form.
So, for your question, how to start wood carving, you already have good knowledge about the categories of wood carvings.
So, let’s head into what are tools you need to have for wood carving. This section is important because most beginners tend to waste their money on unnecessary wood carving tools.
Wood Carving Tools
There are several wood carvings tools that everyone should have and need to have good practice. But most importantly, you need to have good knowledge about the item you’re planning on carving.
For example, if you stick with classical wood carves like spoons, bowls, and cups, all you want are the hook knife and softwood.
But there are many wood carvings that need specialized tools to get the fine details of them.
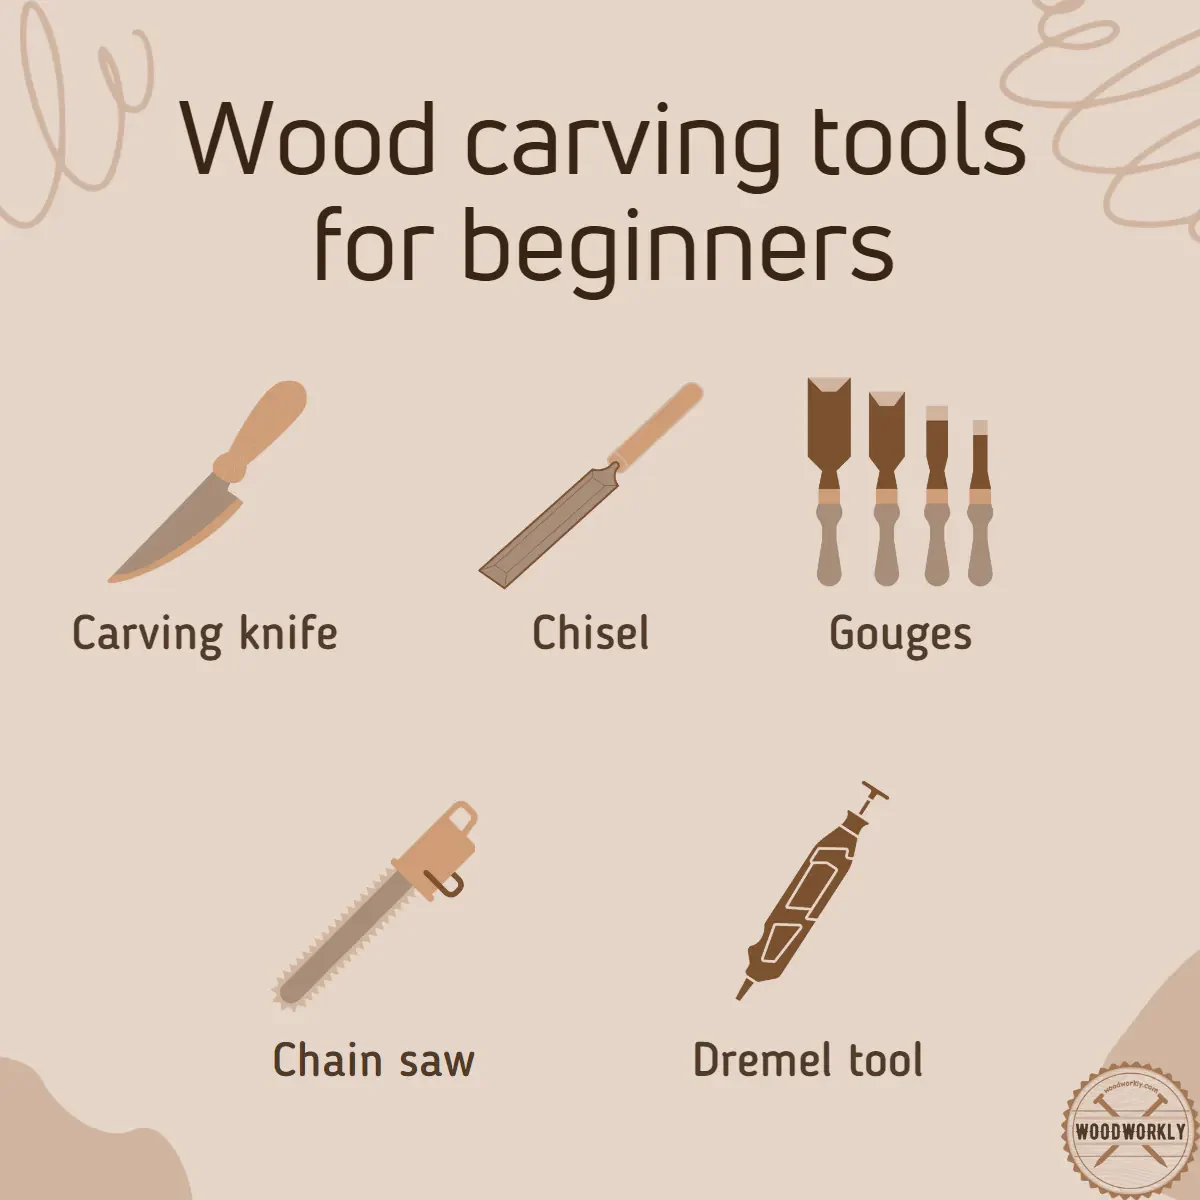
Wood carving tools can be divided into 4 groups. They are,
- Wood carving knives
- Chisels
- Gouges
- Power tools
To embark on your wood carving journey, you’ll need a set of essential tools to create your masterpieces.
This section outlines the primary tools required for various carving styles, along with tips for choosing, maintaining, and sharpening them.

Wood Carving Knives
Knives are mainly used for whittling. Wood carving knives have long-handled and fixed blades.
The pocket knife is great for some basic wood carve like spoon making and bowls.
But for many other wood carvings, you need to buy a chip carving knife that is uniquely designed for wood carving.
Whittling knife is great for advanced wood carving projects, because of being able to accurately add very fine details to the wood.
Because of having long handles, you can easily hold the knife and do the cutting without slipping it away.
A quality carving knife is the foundation of your toolkit.
Different types of knives cater to specific carving styles, such as whittling, chip carving, and relief carving.
When choosing a knife, consider the following factors:
- Blade quality: High-carbon steel blades maintain their sharpness longer.
- Handle comfort: An ergonomic handle ensures comfort during prolonged use.
- Size and shape: Choose a knife that suits your preferred carving style and projects.

Wood Carving Chisels
Wood carving chisels can push with your palm to make cuts and remove wood slices easily. Chisels are mainly used for chip carving and relief carving.
Wood carving chisels have blades on both sides. There are chisels with different sizes that use differ according to the item you going to make.
Chisels have a straight edge which is used for creating different shapes.
There are 2 types of chisels available in the market. They are,
- Skew chisels – blade angle is 450 and use for dovetails cuts.
- Fishtail chisels – the chisel looks like a fishtail and uses to make deep cuts.

Wood Carving Gouges
Gouges are known as the most important wood carving tool ever. If you’re a beginner at wood carving, the gouge is the tool that you need to consider buying in the first place.
Wood carving gouges do the same task as chisels for making different cuts and shapes on wood. Gouges also can push with your palm to make cuts and remove wood slices easily.
Gouges are known as chisels with curvatures.
Gouge’s used for chip carving, relief carving, crevices, channels, and contours.
Well-sharpened Gouges are curved tools that can scoop the wood.
There are 3 types of gauges available in the market. They are
- U gouges – They have curved cutting edges.
- V gouges – They have a V-shaped tip that helps to cut a wood piece from the main wood block.
- Bend and spoon gouge – these gouges are used for special purposes like making spoons with bends in front, back, left, and right directions.
Wood Carving Power tools
Most of us use the strength in our hands when wood carving. But with power tools, carvers can give power to the wood carving tools outside of their physical strength.
Power tools are mechanized tools built for large and small wood carving projects.
If Power tools can handle any large task pretty easily whenever labor power is not enough.
The chain saw is the best example of power tool in wood carving. Apart from that, there are many other types of power tools available in the market, that can use without beating a chisel to carve. They are,
- Electronic wood chisel tool – Useful for sculptures
- Rotary tools – Able to do multitasking functions.
Tip: Always keep in mind that, you don’t need expensive tools if you’re a beginner at wood carving.
Power carving tools offer speed and precision for those interested in exploring advanced techniques.
A popular option is the Dremel rotary tool, which features interchangeable bits for various carving, sanding, and polishing tasks.
While not essential for beginners, power tools can be a valuable addition as your skills progress.
Go for cheap wood carving tools and practice with them enough until you feel it’s time to switch to the better ones.
Wood carving is a passionate hobby that completely depends on your skills, not on expensive tools and stuff. So, always try to improve your wood carving skills rather than focusing on expensive stuff.

Sharpening Equipment
A sharp tool is crucial for accurate, efficient, and safe carving.
There are various types of sharpening stones available, including:
- Water stones: Soaked in water before use, these stones provide a smooth, even sharpening surface.
- Oil stones: Utilize honing oil for lubrication and offer a slower but more controlled sharpening process.
- Diamond stones: Known for their durability and fast cutting action, these stones are an excellent choice for frequent sharpening.
Develop a sharpening routine to maintain your tools’ performance and extend their lifespan.

Proper Maintenance of Carving Tools
Regular maintenance is vital for preserving the quality of your carving tools.
Some essential maintenance tips include:
- Cleaning: Wipe tools with a cloth after each use to remove debris.
- Rust prevention: Apply a light coat of oil to prevent rust and corrosion.
- Storage: Store tools in a dry, well-ventilated area to minimize moisture-related damage.
Equipping yourself with essential wood carving tools, such as knives, sharpening equipment, and proper maintenance supplies, ensures a successful and enjoyable carving experience.
As you advance in your craft, consider incorporating additional tools and accessories to further hone your skills and explore new techniques.

Selecting the Right Wood for Your Project
The success of your wood carving project greatly depends on the type of wood you choose.
Each wood species has unique properties, such as grain, hardness, and workability, which impact the final outcome.
In this section, we’ll discuss how to select the right wood for your carving projects, focusing on softwoods for beginners and avoiding harder woods initially.
Softwoods for Beginners
For those new to wood carving, softer woods are ideal for practicing and honing your skills.
These woods are more forgiving and easier to carve, reducing the risk of mistakes and tool damage.
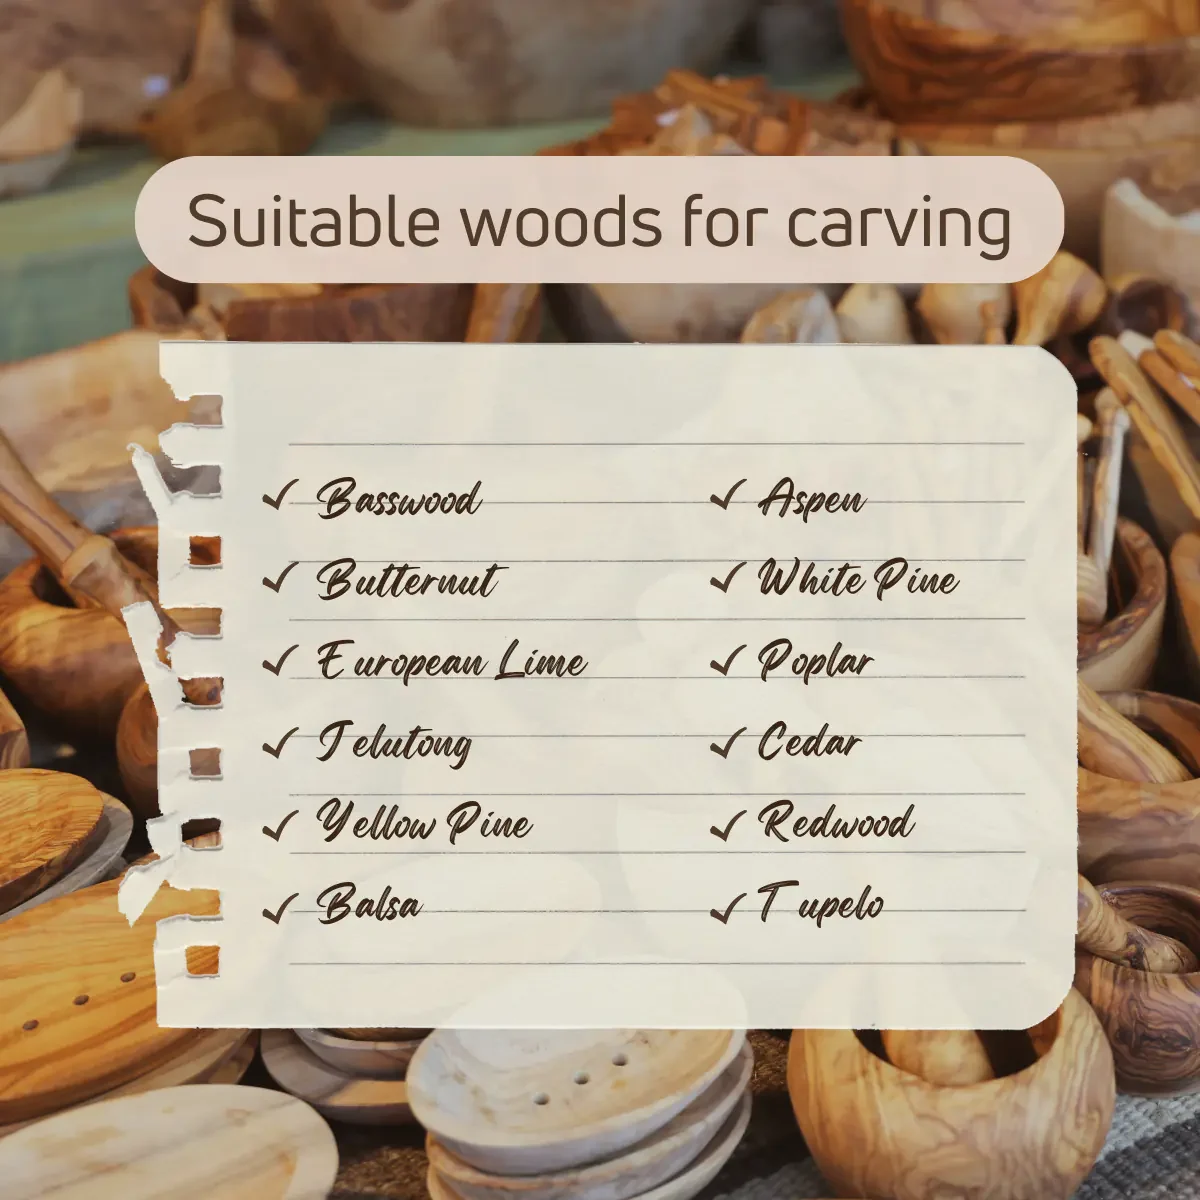
Some recommended softwoods for beginners include:
- Basswood: Known for its fine grain and minimal resistance, basswood is a favorite among carvers. Its light color allows for excellent visibility while carving.
- Butternut: With a similar grain structure to basswood, butternut is another excellent choice for beginners. Its warm, light brown hue adds a touch of color to your finished projects.
- European Lime: This pale, straight-grained wood is highly workable and perfect for intricate designs. Its smooth surface requires minimal sanding and finishing.
- Jelutong: Offering a fine, even texture, jelutong is easy to carve and holds detail well. It’s a popular choice for model making and pattern carving.
- Yellow Pine: While slightly harder than other beginner-friendly options, yellow pine’s even grain and affordability make it an attractive choice for practice projects.
Avoiding Harder Woods for First Projects
Although harder woods like cherry, walnut, and maple are highly regarded for their beauty and durability, they’re not recommended for beginners.
Dense woods require more force and precision, increasing the risk of mistakes and injuries.
They also dull carving tools more quickly, necessitating frequent sharpening.
As you gain experience and confidence in your carving abilities, you can gradually transition to harder woods to expand your skillset and create more intricate, long-lasting projects.
As you can see, selecting the right wood for your carving projects is crucial for success.
Starting with softer woods allows you to develop your skills and build confidence before progressing to harder, more challenging materials.
As you gain experience, don’t be afraid to explore different wood species to discover their unique properties and potential for your artistic creations.

5 Tips to Get Started in Wood Carving
Here I have mentioned some useful tips that’d be helping you to get started in wood carving.
1. Setup the Workbench for Wood Carving
This is important and you don’t need to have a fancy expensive workbench. Plywood board is good to use as your workbench. Garage or shed space is also fine.
2. Learn to use Wood Carving Tools
Learn how to grab and handle your knife properly. Learn how to place the knife on the wood and start carving. Get a good idea about using Gouges and chisels. Practice them continuously until you feel good at handling wood carving tools.
3. Carve Along the Grain
Always make sure to cut along the grain. This will easily slice the wood without splitting. If the wood tends to tear while you carving, change the direction as soon as possible because you were carving in the wrong direction.
If you’re cutting the wood in the wrong direction, you can notice it even from the sound as well.

4. Hold the Wood Firmly
Always try to clamp the wood onto a table or workbench without placing it on your laps. Do the cutting and shaping from your knife. In the beginning, you don’t need to rush. Always try to be safe and learn from each mistake you do.
Take the time as much as you want and learn with discipline.
5. Sketch the Design Before Start
Take a piece of paper and pencil and sketch your design before touching the wood. Mention the measurements and imagine how you should give a 3D wood model for that design.
This method always gives good results in the end. It’s like converting a design from 2D to a 3D model.

Beginner Wood Carving Projects
Embarking on your wood carving journey can be an exciting experience. Starting with beginner-friendly projects allows you to develop your skills and gain confidence in your abilities.
In this section, we’ll explore some of the best wood carving projects for beginners, focusing on whittling and chip carving techniques.
These projects will help you progress from simpler designs to more intricate and personalized creations.
Whittling Projects
Whittling is an excellent starting point for beginners, as it requires minimal tools and materials.
By carving small handheld items, you’ll learn to navigate the grain of the wood and develop control over your carving knife.
Here are some beginner-friendly whittling projects to try:
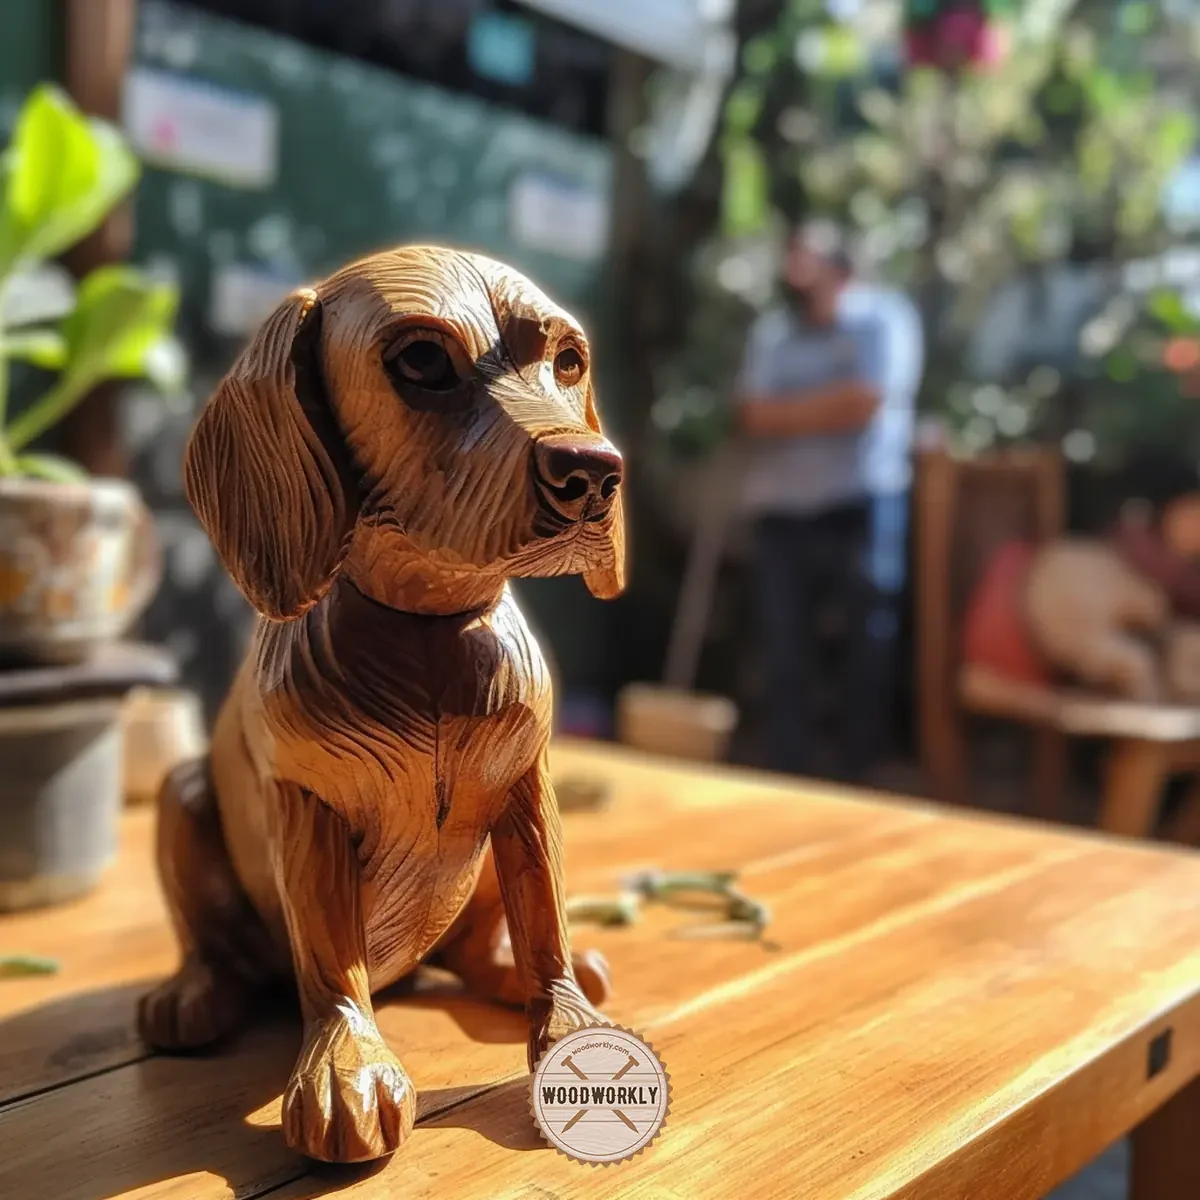
- Small animal figures: Carve creatures such as birds, turtles, or fish, focusing on basic shapes and contours before adding finer details.
- Whistles: Craft a functional whistle by hollowing out a small piece of wood and shaping the mouthpiece and airway.
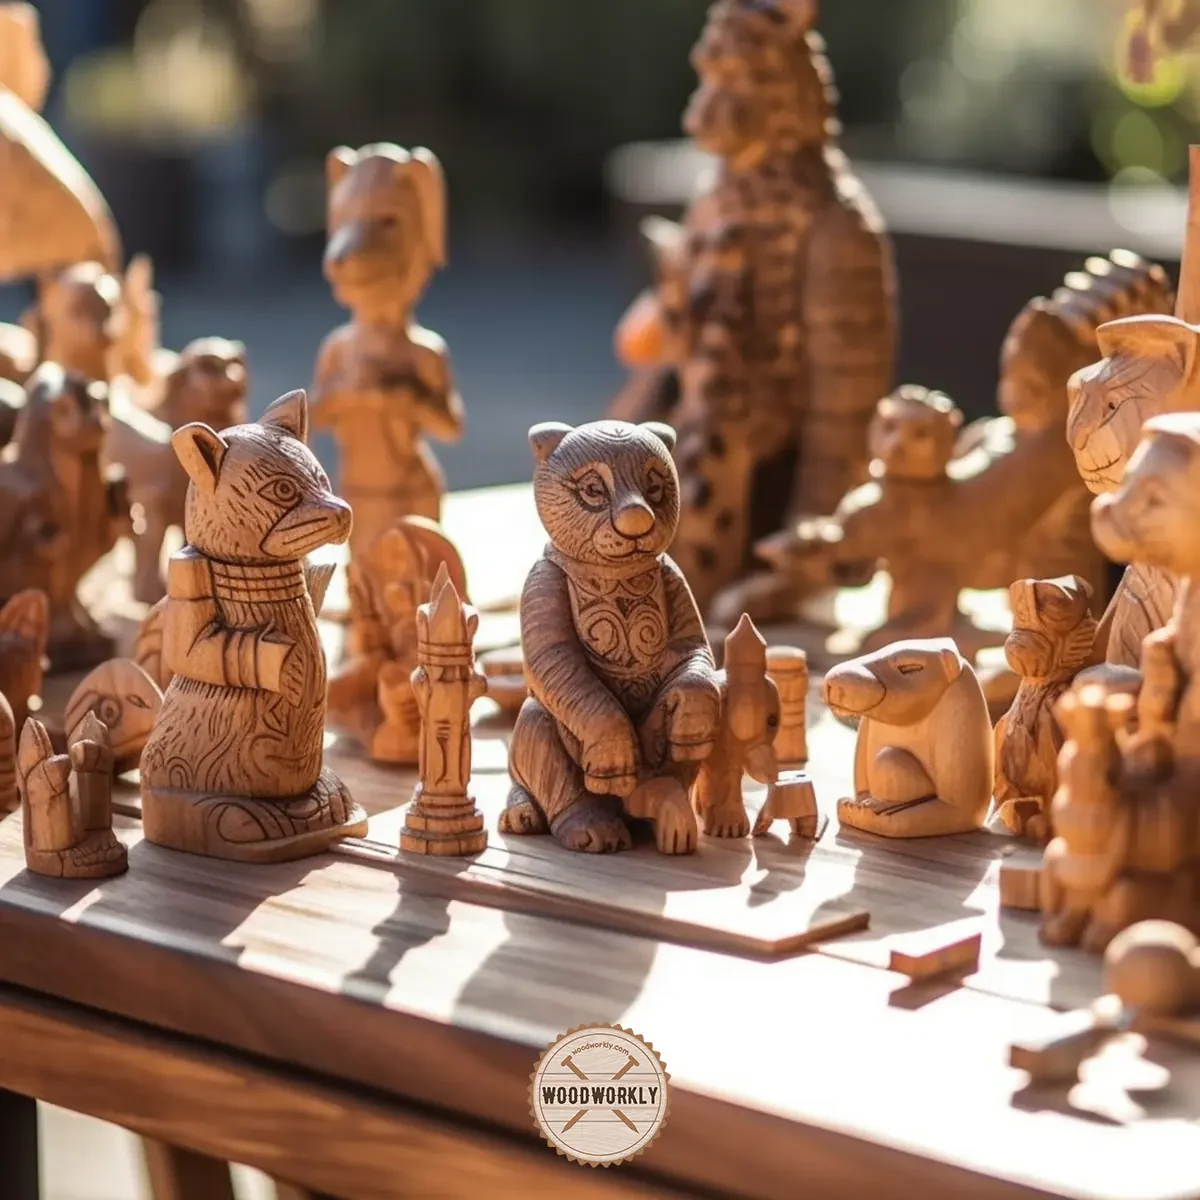
- Chess pieces: Develop your skills by carving a set of chess pieces, each with a unique design and shape.
- Spoons and knives: Create functional and decorative utensils, starting with simple designs before tackling more complex shapes and patterns.
- Gnomes and movie characters: Bring your favorite characters to life by carving small figurines with recognizable features.
- Simple faces: Practice capturing human expressions by carving basic facial features on a small piece of wood.

Chip Carving Projects
Chip carving involves the removal of small chips from the wood’s surface to create patterns and designs.
This technique is perfect for personalizing items or adding decorative elements to your projects.
Here are some ideas for chip carving projects:
- Creating and tracing patterns: Find or create patterns that appeal to you, and trace them onto the wood. Popular choices include geometric shapes, floral designs, and letters or words.
- Adding personal touches: Customize your projects by incorporating your initials, a meaningful date, or a unique symbol. This can add a personal touch to gifts or keepsakes.
As you work on these beginner projects, remember that patience and practice are essential for honing your skills.
Don’t be discouraged by mistakes; they’re a natural part of the learning process.
As you progress, challenge yourself with increasingly complex designs and projects, always seeking to expand your creativity and mastery of wood carving techniques.
In order to make things easier, I have included some of the beginner wood carving ideas for you by going through each one in detail.
5 Cool Wood Carving Ideas for Beginners
As a beginner in wood carving, I recommend you start with some simple classical designs.
Those designs can teach you lots of techniques in wood carving and you can correct your mistakes while doing them.
If you directly head into advanced designs, you’ll be exhausted with lots of issues. So, here I have listed some of the wood carving ideas for beginners to give a try and practice frequently.
1. Wood Carving Spoon
Estimated Time Needed – 2 Hours
Carving spoon is known as the easiest wood carving project anyone can go with. Even though it’s the simplest, you’ll be able to learn lots of wood carving techniques and whittling methods by making it.
In my opinion, the carving spoon project is an experiment you can learn a lot of new stuff about positioning the knife and can get a good experience. At the end of this project, you came to know that wood carving is fun!
2. Whittling a Bunny
Estimated Time Needed– 30 Minutes
This project will teach you how to add fine details to the bunny, especially when whittling its ears, eyes, and paws. Softwood and whittling knife are enough for the whole project.
Make sure your knife is sharp because in this project there are many small cuts to do. The knife should be well-sharpened to get a satisfying result.

3. Whiskey Barrel
Estimated Time Needed – 45 minutes
This can carve using a hook knife. After the barrel part is done you can do the decorations using the pocketknife. This not only gives you good knowledge about how to handle knives and make good cuts but also is an incredible gift for a whiskey lover.
4. Whittling a Flower
Estimated Time Needed – 30 minutes
There are different carving methods you can try to carve the flower. Firstly, draw the basic shape of the flower and transfer what you have drawn in the sheet to a wooden chunk.
By doing this you’ll be able to learn about its dimensions and you can easily remove excess parts from wood chunks as well.

5. Carve a Heart
Estimated Time Needed – 20 minutes
This is also known as one of the simplest wood carving projects. By making a wooded heart, you’ll be able to know how to get the curved shape by adding small cuts all over the wood chunk.
This can be a perfect Valentine’s or birthday gift for your loved ones as well.
There’re lots of beginner wood carving projects you can try out to sharpen your knowledge and learn lots of new woodcarving tricks and techniques.
Relief Carving for Beginners
Relief carving is a captivating form of wood carving that brings images and designs to life by removing material from a flat wooden panel, leaving the desired image raised above the background.
For beginners, it’s essential to start with simple projects and focus on developing a three-dimensional vision.
In this section, we’ll explore the basics of relief carving and discuss tools and techniques to help you get started.
Developing 3-Dimensional Vision with Simple Relief Projects
As a beginner, it’s vital to develop an understanding of how to translate 2-dimensional images into 3-dimensional carvings.
Begin by selecting simple designs with minimal details, such as basic shapes or simple patterns.
This will help you become familiar with the process of shaping and contouring the wood while also learning to navigate its grain.
Once you feel comfortable with simpler designs, gradually progress to more intricate projects that incorporate depth and perspective.
By practicing with various projects, you’ll hone your skills and develop the ability to envision how a flat image will appear in three dimensions.
Tools and Techniques for Relief Carving
When starting with relief carving, it’s important to have the right tools and techniques at your disposal.
Here are some essential tools for beginners for relief carving:
- Chisels: These are flat-edged tools designed for cutting, shaping, and removing wood. You’ll need chisels of various widths to accommodate different design elements and detail levels.
- Gouges: These curved cutting tools come in a range of shapes and sizes and are essential for creating concave and curved surfaces in relief carvings.
- Mallet: A mallet is a small wooden hammer used for striking chisels and gouges to achieve precise cuts and control over the carving process.
- Bench or table vise: This tool secures your workpiece, providing stability and safety while you carve.
- Sandpaper: You’ll need various grits of sandpaper for smoothing and refining your carving.
As you become more proficient in relief carving, you may also want to explore additional tools like V-tools, which are versatile for creating intricate details and sharp corners.
Remember, when learning relief carving, patience and perseverance are crucial.
Allow yourself time to practice and refine your techniques.
By starting with simple projects and gradually working your way up to more complex designs, you’ll develop the skills and confidence needed to create stunning relief carvings that showcase your artistic abilities.

Wood Carving Techniques and Safety Tips
Wood carving, as an art form, requires not only talent but also knowledge of correct techniques and a keen sense of safety.
In this section, we’ll explore the four foundational cuts and offer up some crucial safety guidelines, ensuring that your wood carving experience is both enjoyable and secure.
Mastering the 4 Basic Cuts In Wood Carving
When starting your wood carving journey, it’s essential to become proficient in these four fundamental cuts:
- Push cut
- V cut
- Stop cut
- Paring cut
Let’s discuss each of those cuts which are essential to learning wood carving in detail.
1. Push Cut
By pushing the blade away from you and holding the wood firmly, the push cut is perfect for shaping and removing large chunks of material. Mastering this technique allows for efficient carving.
2. V Cut
This cut, also known as a parting cut, is used to create V-shaped grooves in the wood, ideal for outlining designs and adding depth.
It’s a versatile technique that adds dimension to your creations.
3. Stop Cut
The stop cut sets limits and prevents the blade from cutting too deep.
It’s an indispensable technique for creating crisp edges and defining shapes in your work.
4. Paring Cut
Paring involves pulling the blade toward you while steadying the wood. It’s great for refining and smoothing surfaces, giving your carvings a polished look.
Experiment with these cuts on various woods and grain orientations, building a comprehensive understanding of how they interact with the material and enhancing your carving skills.
Safety Precautions
Safety is paramount in wood carving. Consider these vital tips:
- Protective Equipment: Wearing Kevlar or cut-resistant gloves can save your hands from accidental injuries.
- Proper Knife Handling: Firmly hold the knife and use controlled movements, avoiding excessive force or sudden, jerky motions that may lead to accidents.
- Carving Direction: Always carve away from your body and hands, maintaining control over the blade.
- Staying Focused: Fatigue can lead to mistakes, so stay alert and only carve when you’re well-rested.
- Securing Materials: Use a bench vise or clamps to hold your workpiece in place, ensuring stability and reducing the risk of slippage.
By incorporating these techniques and safety tips, you’ll progress on your wood carving journey with confidence.
Remember, practice is key, so dedicate time to honing your skills and exploring different styles and projects.
With patience and persistence, you’ll soon find yourself crafting beautiful, intricate carvings that showcase your unique artistic vision.
Finishing Your Wood Carving Project
Once you’ve put your heart and soul into a wood carving project, adding the right finish is crucial.
Finishes help to make a protective coat over your loving wood carving projects while enhancing their natural look. They improve both durability and the attractiveness of the wood carvings at the same time.
This vital step not only protects your masterpiece but also brings out the wood’s innate beauty, making it all the more alluring.
In this section, we’ll explore various finishing options and guide you through the process of applying a wax finish.
Finish Options for Wood Carvings
Many finishing options are available to match your project’s requirements.
Here are some popular finishes for wood carvings,
- Wax: Be it beeswax or paste wax, wax finishes lend a gentle sheen and accentuate the wood’s natural hues. While offering modest protection, wax finishes are a breeze to apply and maintain.
- Oil: Finishes like linseed or tung oil seep into the wood’s surface, exuding a natural look. Easy to apply and maintain, oil finishes may not be as protective as other options.
- Lacquer: Providing a durable, protective layer on the wood’s surface, lacquers yield a high-gloss or satin finish. Though more difficult to apply than wax or oil, lacquers are excellent moisture and wear barriers.
- Other options: Shellac, varnish, and polyurethane finishes also exist, each with unique characteristics and application techniques. Do your research and choose the finish that aligns with your project and desired aesthetic.

Applying a Wax Finish
Wax finishes are sought after for their user-friendly application and unassuming appearance.
Follow these steps to apply a wax finish seamlessly on wood carvings:
- Prepare the surface: Sand your carving to a smooth finish and eliminate dust. A clean surface paves the way for even application and an improved final result.
- Apply the wax: Employing a spotless cloth or brush, apply a thin wax layer to the wood, working in small sections and following the grain. Remember, moderation is key—avoid slathering on too much wax.
- Buff away: Allow the wax to dry according to the manufacturer’s guidelines. Once set, use a plush, clean cloth to buff the surface in a circular motion. This step eradicates excess wax and generates a silky, uniform sheen.
- Reapply if necessary: For a higher sheen or added protection, you can layer multiple coats of wax. Just remember to let each coat dry and buff between applications.
By carefully selecting and applying the ideal finish, your wood carving project will be elevated in appearance and durability.
As you become more experienced, feel free to experiment with different finishes to find the perfect match for your artistic preferences and chosen materials.

How To Improve Your Wood Carving Skills?
As you delve deeper into the world of wood carving, you’ll likely yearn to hone your skills and become a more accomplished artist.
To help you achieve your goals, we’ve compiled a list of strategies for advancing from a beginner to an intermediate wood carver.
Follow each of the below guidelines carefully and gradually to become a pro player in the woodcarving field.
Mastering the Art of Wood Carving: Methods and Techniques
Embarking on the journey to improve your wood carving skills, you’ll find a plethora of methods to choose from.
Here are some popular methods and techniques to improve your wood carving skills,
- One-on-one lessons
- Group lessons
- Online courses
- Books
- Practice
Let’s discuss each of those practices to improve your wood carving skills better than anyone else.
1. One-on-one lessons
Private lessons with an experienced wood carver allow for personalized instruction, tailored to your skill level and learning style.
Such sessions can quickly help you refine your techniques and troubleshoot any issues.
2. Group lessons
Collaborative learning environments foster camaraderie and provide opportunities for peer feedback.
In group classes, you can observe different approaches and learn from the collective experiences of fellow students.
3. Online courses
The internet is a treasure trove of wood carving courses, catering to various skill levels and interests.
Online learning grants you the flexibility to progress at your own pace and in the comfort of your home.
4. Books
Many wood carving books cater to different skill levels, detailing techniques, projects, and tips.
These resources can serve as a valuable reference, allowing you to revisit pertinent information whenever needed.
5. Practice
The age-old adage, “practice makes perfect,” rings true in wood carving.
To sharpen your skills, allocate time for regular practice and tackle progressively more challenging projects.
Recommended Resources for Continued Learning Of Wood Carving
To foster your growth as a wood carver, consider exploring these resources,
- Wood carving forums
- YouTube channels
- Books
- Online course platforms
- Local woodworking clubs
Let’s have a brief knowledge about each of those platforms to improve your current wood carving knowledge.
1. Wood carving forums
Online communities, such as Woodcarving Illustrated and The Carving Path, offer platforms to share your work, ask questions, and exchange tips with fellow carvers.
2. YouTube channels
Visual learners can benefit from YouTube channels like Gene Messer and SharonMyArt, which provide a wealth of tutorials and project ideas.
3. Books
“The Complete Book of Woodcarving” by Everett Ellenwood and “Woodcarving: Tools, Material & Equipment, Volume 1” by Chris Pye are two highly recommended books that can enhance your wood carving knowledge.
4. Online course platforms
Websites like Udemy, Craftsy, and Skillshare feature an array of wood carving courses that cater to different skill levels and interests.
5. Local woodworking clubs
Joining a local woodworking or wood carving club can provide you with a supportive community, access to experienced mentors, and opportunities to participate in workshops and events.
By exploring various learning methods and resources, you’ll continue to develop your wood carving abilities, allowing you to tackle more intricate projects and become a more accomplished artist.
Embrace the journey, relish in the satisfaction of your progress, and never stop learning.

That’s it, folks! Now you know how to start wood carving and continue it using proper tools, methods, tips, and techniques.
Let’s answer some frequently asked questions that might appear when you’re starting wood carving.
What is the best wood for beginner wood carvers?
Basswood, butternut, European lime, jelutong, and yellow pine are ideal wood carving choices for beginners.
These softwoods are easier to carve and allow for a more forgiving learning experience as you develop your skills.
What is the Best Wood For Wood Carving?
Softwoods such as Basswood, Pine, Cedar, Aspen, Butternut, Balsa wood are known as the best and strongest wood for wood carving.
Apart from softwoods, hardwoods such as Poplar, Birch, Maple, Cherry, Black walnut, and Apple are also excellent choices for wood carving.
How Much Does Wood Carving Cost?
Wood carving is not expensive. The only expensive thing is the wood you’re going to choose.
If you do wood carving 2-3 times per week, I’m pretty sure the wood carving cost is less than half of your petrol bill.
Never stop learning wood carving because of money. You only need a pocket knife and a small piece of wood to start wood carving as a hobby.
How do I choose the right wood carving knife?
Selecting the perfect knife depends on the type of carving you intend to do.
For whittling, a general-purpose carving knife is suitable, while chip carving requires knives with specialized shapes.
When purchasing, prioritize comfort, blade quality, and sharpness.

How can I sharpen and maintain my wood carving tools?
Regular maintenance ensures your tools remain in top condition. Utilize sharpening stones, such as water, oil, or diamond stones, and hone the blade at the appropriate angle.
Moreover, clean and store your tools correctly to extend their longevity.
Can I use any type of wood for carving projects?
Not all woods are suitable for carving. Beginners should avoid dense, hard woods, such as cherry, which can be challenging to carve and work with.
As you gain experience, you can gradually experiment with various wood types to find your preference.
How do I ensure safety while wood carving?
Prioritize safety by wearing protective equipment, like Kevlar or cut-resistant gloves.
Practice proper knife handling, carve away from your body, and keep materials securely fastened.
Additionally, maintain focus and avoid distractions during carving sessions.
Can I learn wood carving online, or do I need in-person lessons?
While in-person lessons offer personalized instruction, online courses, YouTube tutorials, and woodworking forums provide valuable learning opportunities as well.
Choose the method that best suits your learning style and circumstances.
How long does it take to become proficient at wood carving?
The time required to develop proficiency varies for each individual.
Consistent practice, along with a willingness to learn from mistakes and embrace challenges, will accelerate your progress.
Remember, patience is key in mastering this wood carving art form.
How Long Does it Take to Learn How to Carve Wood?
The amount of time needs to learn how to carve wood depends on your skills. If you practice well and learn new skills and techniques quickly, it takes less time to learn wood carving.
This depends on how passionate you are about wood carving.
As a full-time woodworker, I know there is no exact time frame for learning wood carving because there is always something new to learn for anyone. The wood carving world is full of mysterious things.
How do I carve wood?
To carve wood, first choose a suitable wood type, such as basswood or butternut.
Gather essential tools like carving knives, chisels, and gouges. Start with simple cuts, like push, V, stop, and paring cuts.
Practice working with the wood grain and maintain safety precautions.
As you gain confidence, progress to more intricate projects, honing your techniques, and expanding your skillset.
Remember, patience, persistence, and learning from mistakes are key to mastering wood carving.
How do I make wood sculptures?
To create wood sculptures, begin by selecting an appropriate wood type and size for your project.
Sketch your design onto the wood, keeping in mind the grain direction.
Equip yourself with carving tools like knives, chisels, gouges, and possibly power tools.
Start removing material gradually, working from larger to smaller details, and follow the grain to prevent splitting.
Maintain safety precautions and stay focused.
As your sculpture takes shape, refine and smooth the surface, then apply a suitable finish to protect and enhance your creation.
Practice and patience are essential for mastering this art form.
Did I cover all you wanted to know about How To Start Wood Carving?
In this post, we walked through how to start wood carving and what you need to know before starting wood carving.
Apart from that we also looked at types of wood carving, wood carving tools with their uses, wood carving ideas for beginners.
To start wood carving, begin by choosing a suitable style (whittling, chip carving, relief carving, etc.) and gathering essential tools like knives, chisels, and gouges. Select softwood for your first projects and practice basic carving techniques. As you gain experience, progress to more complex projects, learn new methods, and explore various wood types.
Finally, we have answered all frequently asked questions from beginners before starting wood carving as a hobby or business.
But most importantly, we learned how to start wood carving without any problem and how to be passionate about this subject.
I advise you to keep learning, keep practicing until you become a pro at wood carving.
So, let’s give it a try for your first wood carving project!