Ever wondered how woodworkers effortlessly bend wood into intricate shapes? Can this sorcery be achieved using vinegar? Let’s unravel the art and science of bending wood with vinegar together!

Wood bending has a long history which comes from the time of the ancient Egyptians.
It is a process that is used to make different woodworking projects such as musical instruments such as violins, guitars, boats, and furniture.
Once I was looking for a method to bend oak wood sticks cost-effectively since I couldn’t afford to invest in expensive tools which are specialized for wood bending.
That’s where vinegar came to the rescue as a recommendation from my fellow woodworker.
I’ve tested several scarp planks of wood with vinegar and was able to learn the best technique to bend wood with vinegar after several attempts.
Now with all the experience that I’ve gained over the past few years, here’s what I know about, How to bend wood with vinegar?
To bend wood with vinegar, soak the wood in white distilled vinegar for few hours or overnight, depending on the thickness and the wood type. Once softened, carefully bend the wood to the desired shape by handing it gently without breaking the wood. Let the bent wood dry well.
But that’s just a quick snapshot of the question.

So, in this article, I’ll explore how to bend wood with vinegar properly by explaining each and every step in detail to ease your DIY project. plus, I’ll share with you some tips and tricks that I follow during the process.
Furthermore, I’ll answer some frequently asked questions as well.
Let’s dig in!

Can You Bend Wood with Vinegar?
Yes, you can bend wood with vinegar. Vinegar is an inexpensive, easily accessible, and effective solution for wood bending projects.
Usually, vinegar is good for cleaning wood surfaces. But have you really thought about using it for wood bending? Yes, you can.
You can use vinegar to soften the wood and change the shape of the wood without breaking it.
But what’s the specialty of vinegar for having this kind of ability? Let’s talk about that!
Why Use Vinegar for Wood Bending?
Vinegar is equipped with acetic acid as the primary ingredient which helps to break down the lignin in wood. As a result of that, wood will become more pliable and easier to bend.
Acetic acid is the key player which makes vinegar an excellent choice for wood bending projects.
Plus, bending wood using vinegar solution is an easy, straightforward process that even a beginner in woodworking can follow.
If you don’t want to spend money on expensive tools and complex techniques like steam bending that are specialized for wood bending, vinegar is the one you should go with as a DIYer.
Let’s see what advantages you’ll about to gain as a result of using vinegar for your wood bending project.
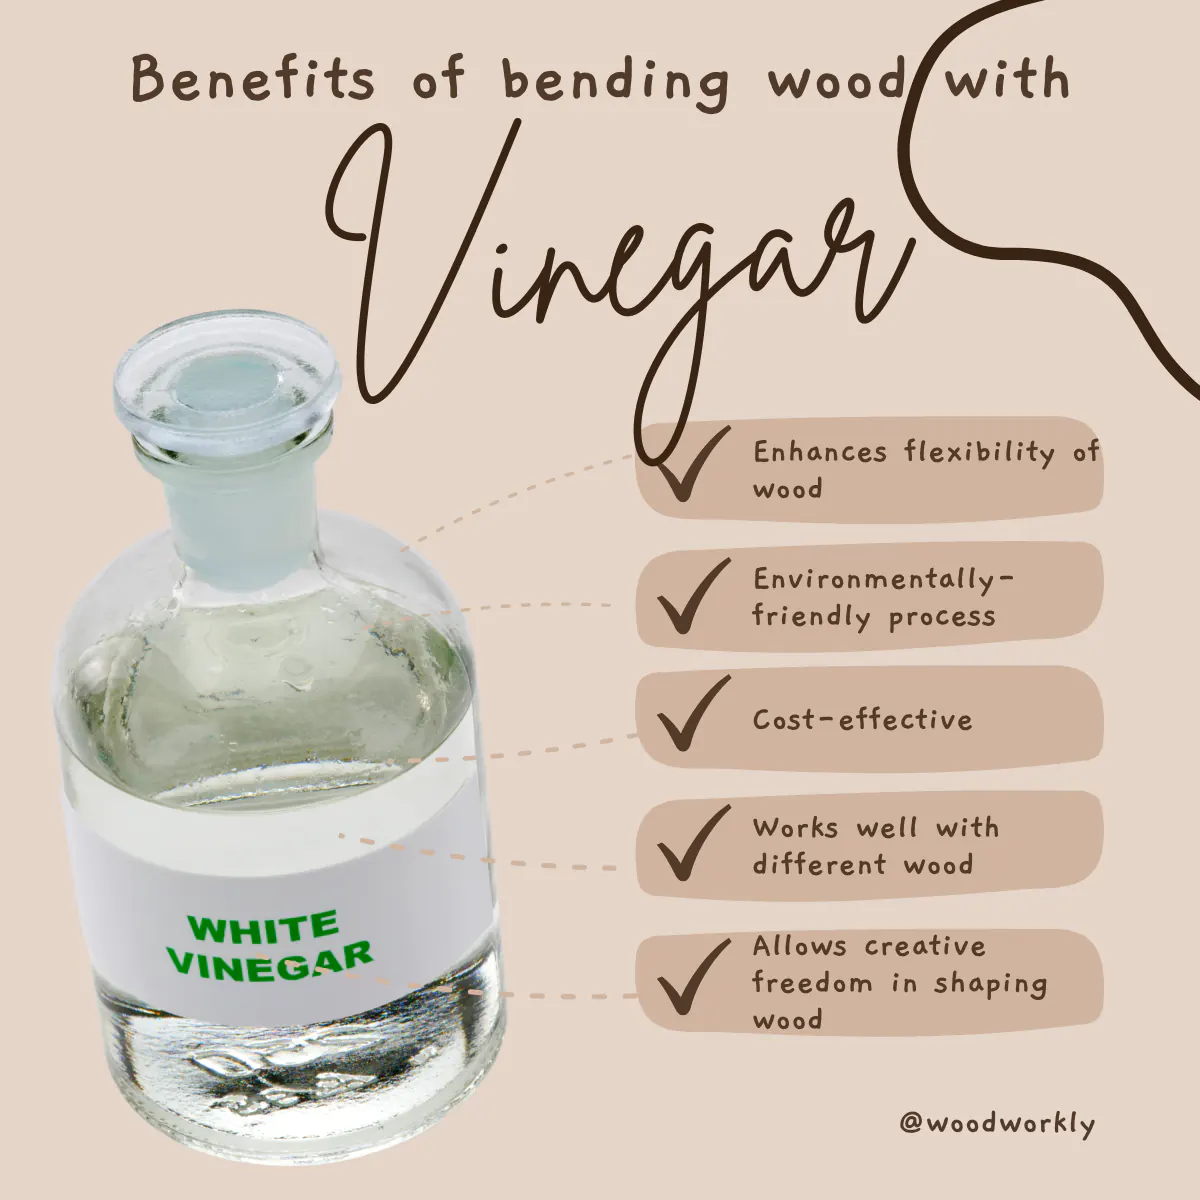
Benefits of Using Vinegar for Wood Bending
- Cost-effective method: Vinegar is relatively inexpensive compared to other wood-bending methods and can be easily found in grocery stores. You can use vinegar to bend wood without breaking it.
- Easy to use: Not like some other wood bending techniques, using vinegar doesn’t require any specialized equipment or machinery, making it an accessible option for anyone and those with limited resources.
- Non-toxic: Vinegar is a natural and non-toxic substance, making it a safer alternative to some chemical-based wood bending methods.
- Versatile: Vinegar can be used with various wood types and thicknesses, offering flexibility in your wood-bending projects.
- No heat required: you don’t need to use high-temperature levels or steam for the vinegar bending method, unlike steam bending. This makes it a safer option for those who are not experienced with wood bending techniques.
- Easy cleanup: After the wood bending process, vinegar can be easily rinsed off the wood and the workspace, since it can be also used as a cleaning agent.
Tip: Vinegar might not be suitable for bending any type of project and wood types. Therefore, you’ll have to test it first with a scrap wood piece to how the process goes on.
For example, vinegar may not be the best choice for bending very thick or large pieces of wood.
To bend thick wood, alternative methods like steam bending or laminated bending might be more appropriate.
In order to clarify the process even more, let’s see what wood types best are for working with vinegar for the bending process.
Best Wood for Bending with Vinegar
When it comes to wood bending with vinegar it is so much important to know what wood types work well with it.
Otherwise, the money you spend on vinegar can be wasted and you might probably end up damaging your beautiful furniture or wood project.
Some wood types are more amendable to bending than others due to their inherent properties.
Let’s see what wood types are ideal for vinegar bending and what factors you need to look for when selecting a suitable wood type for bending.
Ideal Wood Species for Vinegar Bending
There’re some wood species are known for their flexibility and ease of bending when treated with vinegar.
Here’re the best wood species ideal for vinegar bending,
- Oak: Oak is an excellent wood for bending projects since it has high tannin content. Both red and white oak react well with vinegar, but white oak is more suitable for the bending process with vinegar.
- Ash: Ash is great for bending with vinegar since it has good flexibility and a straight-grain texture. You can bend it with vinegar without breaking it and shape it well once it dried completely.
- Walnut: Walnut is a hardwood that is also great for bending with vinegar. But walnut can be slightly difficult to bend compared to oak and ash, but it’s possible with proper technique. It has a beautiful color and grain.
- Cherry: Cherry has a rich color and straight grain, which can bend easily with vinegar. But it tends to break when bending. Therefore, you need to care about it more during the bending process.
- Maple: Maple is a strong and flexible wood that can be bent with vinegar. But generally, maple takes longer soaking time compared to other types of wood.
Those are the best wood for bending with vinegar. But note that, each wood has its own unique soaking times and handling techniques when bending.
Therefore, take a good understanding of the type of wood you’re going to bend before entering the process for promising results.
Test the wood you select with a small portion of vinegar in a small area to determine the optimal soaking duration and the technique you need to follow when bending the main project.
Wood Grain and Moisture Content For Bending
In addition to the type of wood species, you need to have a good understanding of the following factors as well for bending with vinegar,
- Wood Grain: Wood types with straight and even grain patterns, as are less likely to split or crack during the bending process. Woods with irregular or wavy grain patterns may not bend as smoothly and could lead to issues during the project.
- Moisture Content: The moisture content of wood plays a crucial role in its ability to bend. Wood with higher moisture content is generally easier to bend than dry wood, as the moisture makes the fibers more pliable. It’s essential to choose wood with an appropriate moisture level for your project to achieve optimal results.
Because of the above reasons, better to go for wood type with no imperfections, high moisture content inside, and having straight and even grain pattern when bending with vinegar to avoid wood from breaking.

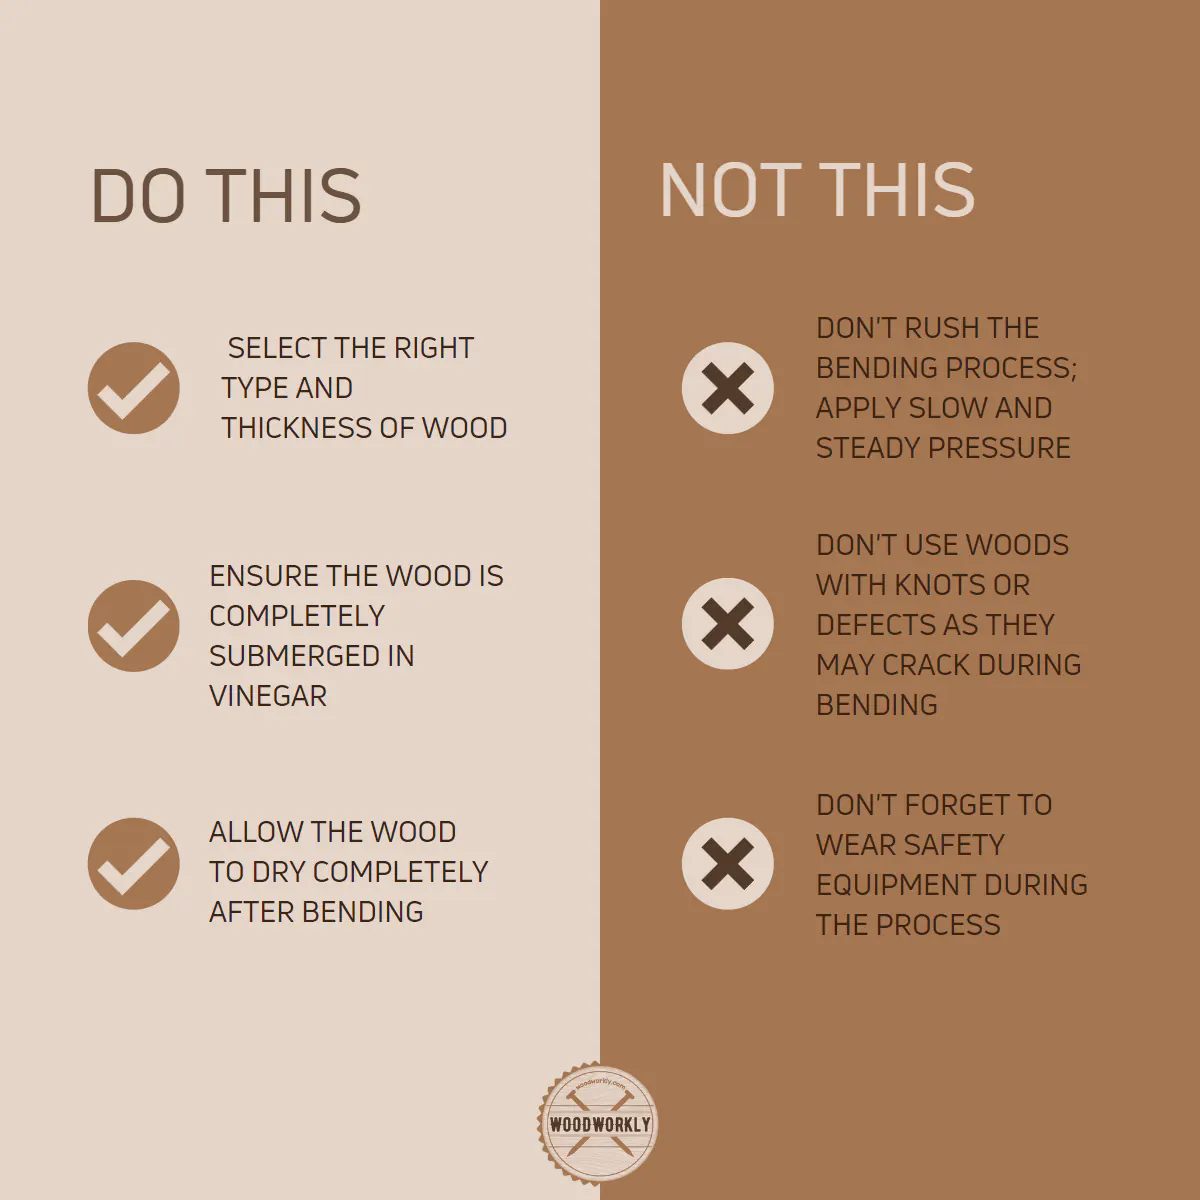
After selecting the wood that suits the bending process, it’s time to prepare it for bending. This step is a must to follow to avoid wood from breaking or cracking during the operation.
How To Prepare the Wood for Bending with Vinegar?
Before starting to bend wood with vinegar, preparation of wood is essential for a successful outcome.
Here’re the steps you need to follow when preparing wood for bending with vinegar,
- Selecting the right size and thickness.
- Ensuring wood is free from knots and defects.
- Sanding the wood surface.
- Cleaning the wood.
Let’s discuss each of the above wood preparation steps in detail to achieve the best results when bending the wood.
1. Selecting the Right Size and Thickness
First, you need to consider the right size and thickness of the wood piece you need to select for bending with vinegar.
Generally, thinner wood pieces are easier to bend. But if your project requires thicker wood, you may need to soak the specific thicker wood piece in vinegar for a longer time duration.
2. Ensuring Wood is Free from Knots and Defects
Inspect your wood for defects like knots, cracks, or splits. These imperfections can make it more difficult to bend the wood smoothly and may even cause breakage or uneven bending during the process.
As discussed, select a wood type with straight grain patterns with minimal imperfections to make the bending process lot easier and smoother.
3. Sanding the Wood Surface
Proper sanding is essential to smoothen the surface and for better bending without forming cracks.
Therefore, before soaking the wood in vinegar, sand the entire wood surface with a fine-grit sandpaper along the direction of the wood grain to make the surfacer super smooth and even.
Leaving rough surfaces can lead to uneven absorption of vinegar, resulting in irregular bending.
Sand the entire wood surface with even pressure without missing any spots to get a smooth surface which allows an attractive pleasing product.
4. Cleaning the Wood
After sanding the wood clean the whole wood surface to remove any dust, dirt, oil, and residue which can affect the absorption process of vinegar during bending.
Wipe down the wood surface with a slightly damp cloth to remove any dust from the sanding.
Or you can use a wood cleaning agent like Trisodium phosphate (TSP) to remove oils, grease, and other residues that accumulate on the wood surface.
Make sure to let the wood dry completely before soaking it in vinegar to get an effective absorption.
Take your time when preparing the wood for bending with vinegar to get nice results.
Proper wood selection, sanding, and cleaning are essential to get even and smooth bending.
Now it’s time to start the wood softening and bending process after the preparation of the wood.
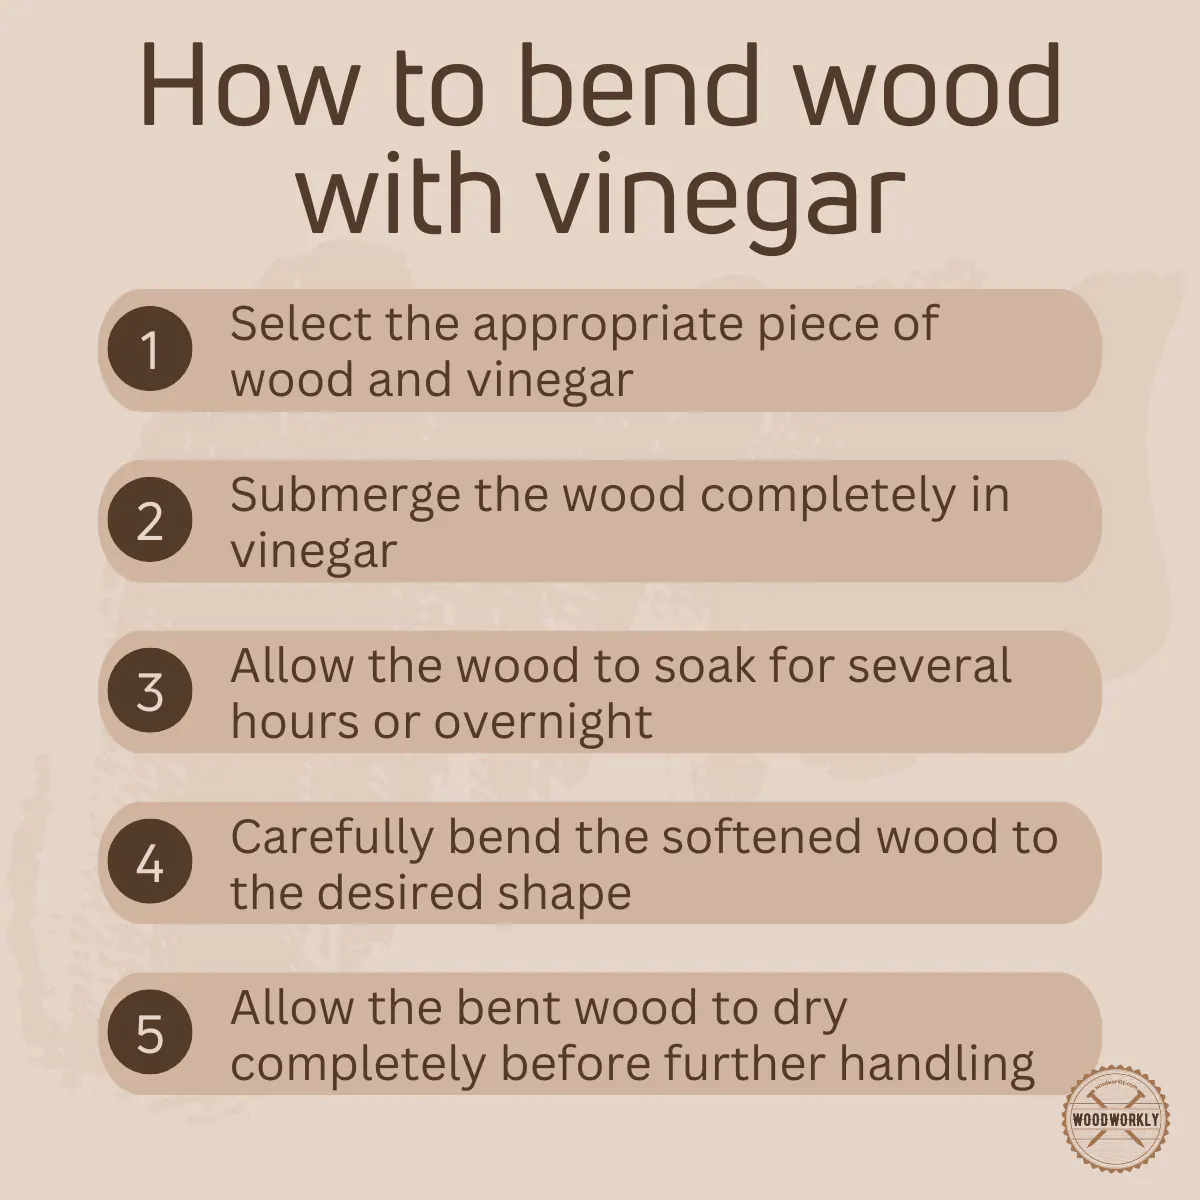
How To Bend Wood with Vinegar?
Bending wood with vinegar is super easy after you prepare the wood properly as discussed.
Here’re the steps you need to follow when bending wood with vinegar,
- Gather materials and prepare the workspace.
- Soak the wood in vinegar.
- Spray vinegar on wood (optional step).
- Bend the wood.
- Let the wood dry and set.
- Finish the wood.
Let’s discuss the above bending procedure steps in detail to get excellent results.
1. Gather Materials and Prepare the Workspace
First, you need to gather the necessary materials and ensure you have a suitable workspace.
Materials needed to bend wood with vinegar,
- Wood piece
- White distilled vinegar (or another type of vinegar)
- A container large enough to hold the wood (tub)
- A spray bottle (optional)
- Gloves, eye protection, and a well-ventilated area
- Clamps and a bending form (if necessary)
2. Soak the Wood in Vinegar
After gathering the materials, first, place the prepared wood piece in the container.
Then, pour enough vinegar to completely submerge the wood.
Allow the wood to soak in vinegar. Soaking duration depends on the wood’s thickness and type.
Thinner pieces may require just a few hours, while thicker pieces might need overnight soaking.

3. The Vinegar Spray Technique (Alternative)
If you cannot submerge the wood due to size constraints or workspace limitations, you can use the vinegar spray technique.
This is an alternative step to soaking wood in vinegar when you cannot use or find a tub to soak the wood.
Fill a spray bottle with vinegar.
Generously spritz the wood with vinegar.
Allow the vinegar to soak into the wood until it becomes more flexible and ready for bending.
If you want to know more information about softening wood, read my latest comprehensive guide about, How to soften wood for bending!
4. Bend the Wood
Carefully remove the wood from the vinegar or stop spraying once it’s sufficiently softened.
Now, gently bend the wood into the desired shape. Patience is crucial at this stage to prevent the wood from cracking or breaking.
Better if you can practice this bending procedure with a scarp wood piece first before heading into the actual project for a better outcome.
If using a bending form, place the wood onto the form and use clamps to hold it in place while it dries.
Make sure to keep them soaking for at least an hour before removing them to clamp them to the form.
5. Let the Wood Dry and Set
After bending the wood properly, let the wood dry well before using it for any application.
Allow the wood to dry thoroughly in its bent shape.
Bent wood drying process may take anywhere from a few hours to several days, depending on the wood’s thickness and environmental conditions.
Once the wood is completely dry, carefully remove any clamps or supports.
6. Finishing the Wood
Once the wood is completely dried, Inspect the bent wood for any rough spots or splinters.
Lightly sand, if necessary, removes small imperfections on the wood surface.
Apply a finish, such as paint, stain, or clear coat, to protect the wood from weather elements and enhance its appearance.
That’s it, folks! Now you know how to bend wood with vinegar properly.
Now I’m going to tell you some useful tips and tricks which make this bending process so much easier.
Tips for Bending Wood with Vinegar
Let’s discuss useful tips for bending wood with vinegar in detail.
Choose the Right Wood
Select an appropriate wood type to interact with vinegar for proper bending.
Go for test rounds first to see how the wood reacts with vinegar and check to see whether you can achieve success in bending wood.
If the vinegar is not the right choice, immediately change the wood or go for an alternative method to bend the wood.
Don’t worry folks! I’ll discuss alternative methods as well in a later section of this article.
Woods with flexible characteristic features such as ash, oak, and cherry are easy to bend.
Make sure to avoid brittle woods that are prone to splintering since they may break during the bending process.
Monitor Soak Time
Pay close attention to the soak time of the wood you selected. Some woods soak quickly since they have highly porous structures while others take some time.
However, don’t take the wood out until its whole surface soaks in vinegar.
Generally, thinner wood pieces soak quickly while thick ones take time.
Plus, the soaking time can vary on the wood type and its characteristic features.

Work Slowly and Gently
Patience is the key to success in wood bending. Work slowly and gently to avoid wood from cracking and breaking during the process.
If you feel resistance while bending, stop the process, insert it into the tub, and give it more time to soak in vinegar.
Use Bending Form
Use bending forms for complex or precise wood bends. Bending forms are helpful to get a consistent shape and avoid unwanted distortions in wood.
Dry the Wood Properly
After bending the wood let the wood dry completely before finishing it or using it for other applications.
The wood will adjust to its new shape upon drying. If the wood is affected by any force during this time, there’s a high tendency of breaking it.
Drying time can vary from a few hours to several days depending on the thickness of the wood you have and the environmental humidity.
Ventilation and Safety
When using vinegar, it will release a strong fume which can cause breathing issues. In order to avoid that, work in a well-ventilated area.
Plus, wear gloves and eye protection to ensure your safety throughout the process.
I have already mentioned that soaking time can vary on the wood’s properties.
But I thought to explain this little more since most of my students have messed up the soaking and damaged their beautiful woodworking projects.
So, let’s talk about the soaking time a little more in detail.
How Long Do You Have To Soak Wood in Vinegar to Bend It?
The soaking time for wood in vinegar depends on many factors. Appropriate soaking time is a must to achieve excellent results in bending.
Soaking time mainly depend on the wood’s thickness and the wood type.
Generally thick woods take more time to soak since they have a high individual fiber amount to react with the vinegar and they have high lignin amount to break.
Let’s have a look at the average soaking time based on wood thickness and type to make your DIY project a lot easier.
Average Soaking Times of Vinegar Based on Wood Thickness and Type
| Thickness Of the Wood | Average Soaking Time |
| Thinner wood (1/4 inch or less) | 2 to 4 hours |
| Medium thick wood (1/4 inch to ½ inch) | 6 to 8 hours |
| Thicker wood (more than ½ inch) | 24 hours or more |
I made this chart based on a survey collected from woodworkers in San Francisco and some are from Asia.
Please note that these are general guidelines. The actual soaking time of your wood can vary based on the wood type.
More flexible woods such as ash, oak, and cherry will soak quickly, as most other harder and denser woods.
Factors Influencing Soaking Duration Of Vinegar
- Wood Species: As discussed, some wood species are naturally more flexible than others, requiring less soaking time to soften them for bending.
- Grain Pattern: Wood with a straight grain pattern is typically easier to bend and may require less soaking time than wood with a more complex grain pattern.
- Moisture Content: The initial moisture content of the wood can also impact the soaking duration. Wood with a higher moisture content may need less time to soak, while drier wood may require a longer soaking period to become flexible.
- Desired Bend Radius: The degree of bend you are attempting to achieve can also impact the soaking duration. Tighter bends may necessitate a longer soaking time to ensure the wood is soft enough to bend without breaking.
However, you need to let the wood have enough time to soak before bending to avoid uneven bending and to avoid wood from cracking and splintering.

After testing scrap wood pieces with vinegar, what if you find your wood type does not bend well with vinegar?
Don’t worry! there are some alternatives, that might be better methods for you to try to bend the wood.
So, let’s talk about them in brief.
Alternative Methods for Bending Wood
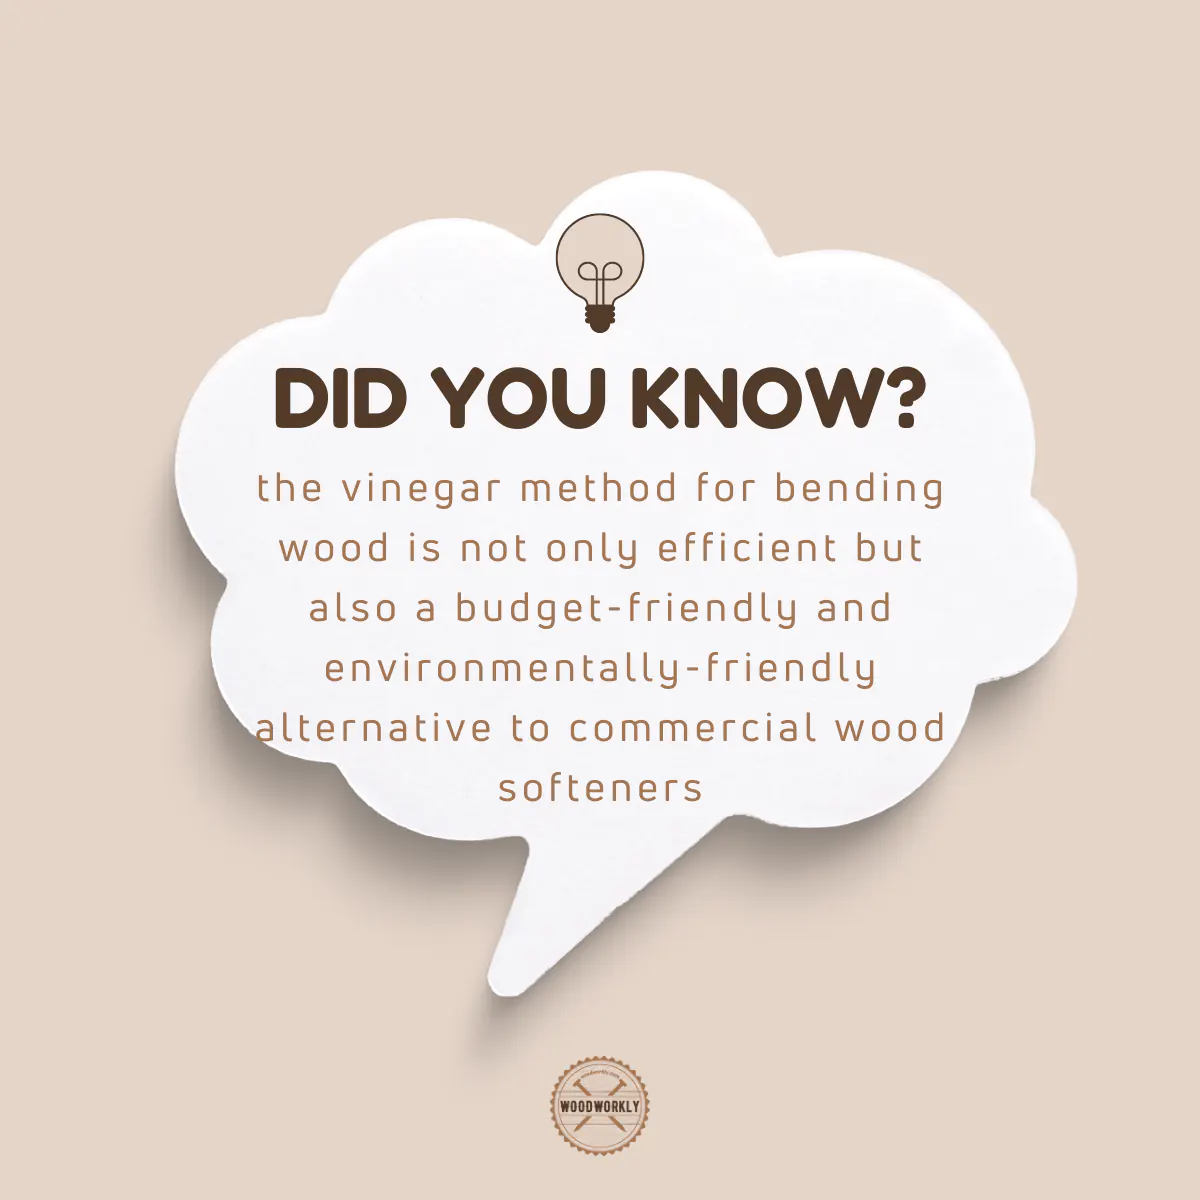
Vinegar is a convenient and cost-effective method you can use to bend wood.
But if doesn’t work according to the technique that I described above, you can go for an alternative method, depending on your personal preferences and the resources available.
Here’re some alternative methods for bending wood,
- Steam bending
- Kerf cutting
- Laminated bending
- Microwave bending
Let’s discuss each of them in brief with the pros and cons.
Steam Bending
Steam bending is a traditional wood-bending method that involves exposing the wood to steam to soften its fibers.
Once the wood is pliable, it’s carefully bent around a form and left to cool and dry.
Here’re some pros and cons you might face in the steam bending method,
| Pros | Cons |
| Effective for bending a variety of wood types and thicknesses | Requires specialized equipment, such as a steam box and steam generator |
| Does not require the use of chemicals | Can be time-consuming |
| Can create tight bends and complex curves | May result in wood discoloration or damage if not done correctly |
If you want to know more information about this process, read my latest comprehensive guide about, How to bend wood with water and steam!
If you want to try out a method to bend without using steam, Read my comprehensive guide about bending wood without steam!
Kerf Cutting
Kerf cutting involves making a series of parallel cuts, or “kerfs,” along the backside of the wood piece.
The wood can then be bent along these cuts, with the front surface maintaining a smooth appearance.
Once the desired bend is achieved, the kerfs can be filled with wood glue and sawdust or another filler material.
Here’re some pros and cons you might face in kerf cutting method,
| Pros | Cons |
| Suitable for bending thicker wood pieces | Reduces the strength of the wood |
| Does not require steam or chemicals | Can be challenging to execute cleanly and accurately |
| Allows for precise bends | May require additional reinforcement or veneer covering to hide kerfs |
Laminated Bending
Laminated bending involves cutting the wood into thin strips and gluing them together while clamped around a bending form.
As the glue dries, the strips bond together, maintaining the desired shape.
Here’re some pros and cons you might face in the laminated bending method,
| Pros | Cons |
| Effective for creating complex curves and shapes | Can be labor-intensive and time-consuming |
| Minimizes wood waste | Requires additional materials, such as glue and clamps |
| Results in a strong and stable bent piece | The final appearance may show glue lines or require additional finishing |
Microwave Bending
Microwave bending involves heating the wood in a microwave to make it pliable.
The wood is then bent to the desired shape and held in place until it cools and dries.
Here’re some pros and cons you might face in the microwave bending method,
| Pros | Cons |
| Rapid heating method | Not suitable for larger wood pieces |
| No specialized equipment is required besides a microwave | Requires careful monitoring to avoid overheating and damaging the wood |
| Useful for smaller pieces of wood | The risk of uneven heating and the potential for breakage |
These alternative methods for bending wood offer a variety of options to suit different project requirements and resources.
As you can see each method has its own benefits and drawbacks. Therefore, select the one that suits you the most to get promising results when bending the wood.
Let’s answer some frequently asked questions.
FAQs
What is the purpose of soaking wood in vinegar for bending?
Soaking wood in vinegar effectively softens the wood fibers, making them more pliable and easier to bend, a trick that woodworkers employ for achieving precise shapes without snapping the material.
Does vinegar affect the color of the wood?
Typically, vinegar does not noticeably alter the color of wood; however, depending on the wood type and its natural coloration, slight changes might occur.
Can I use any kind of vinegar to soften wood?
Yes, any type of vinegar can be used to soften wood, but white distilled vinegar is most commonly used due to its affordability and its less likelihood to stain the wood.
Is there a specific type of wood that bends better with vinegar?
Flexible wood species like ash, oak, and cherry tend to bend more easily with vinegar, while brittle woods or those prone to splintering may not bend as successfully.
Can I speed up the wood drying process after bending?
Yes, placing the bent wood in a well-ventilated area or using fans can help speed up the drying process; however, ensure the wood doesn’t dry too rapidly, which could cause cracking.
Does vinegar damage wood?
No, Vinegar does not damage the wood. It can impart a strong smell, and if not properly dried and treated afterward, it could make the wood more susceptible to mold and mildew.
What if my wood piece is too large to soak in vinegar?
If your wood piece is too large to be submerged, you can use a spray bottle to generously spritz vinegar onto the wood, allowing it to soak in and soften.
Can I use vinegar to bend plywood?
Bending plywood with vinegar might not yield satisfactory results, as the glue used in plywood could interfere with the soaking process, and plywood layers might separate during bending.
Does vinegar-soaked wood require a special finish?
No special finish is required for vinegar-soaked wood, but applying a finish can protect the wood, enhance its appearance, and help resist mold and mildew.
How long does the vinegar smell last on the wood?
While vinegar can leave a strong smell on the wood initially, it typically dissipates once the wood is thoroughly dried and aired out.
What is the Correct mixture ratio of vinegar and water for wood bending?
Typically, pure vinegar is used for wood bending. However, if you’re trying to conserve vinegar or reduce its strong odor, a 50:50 mixture of vinegar and water can also work, though it may slightly extend the soaking time required for softening.
How do I maintain the bent shape until the wood dries?
To maintain the bent shape until the wood dries, you can use clamps, weights, or a specially designed form that matches the desired shape. Keep the wood secured in this position until it’s fully dried to preserve the new form.
How long does it take for the wood to dry after bending?
Drying times can vary greatly depending on the type and thickness of the wood, the degree of the bend, and the ambient conditions. It can take anywhere from several hours to a few days. Monitor the wood carefully and only remove supporting structures once it’s fully dry.
Does soaking wood in vinegar make it more flexible?
Yes, soaking wood in vinegar softens the fibers, making the wood more flexible and easier to bend. The degree of flexibility achieved depends on the wood type and the soaking duration.
How to bend sticks with vinegar without breaking them?
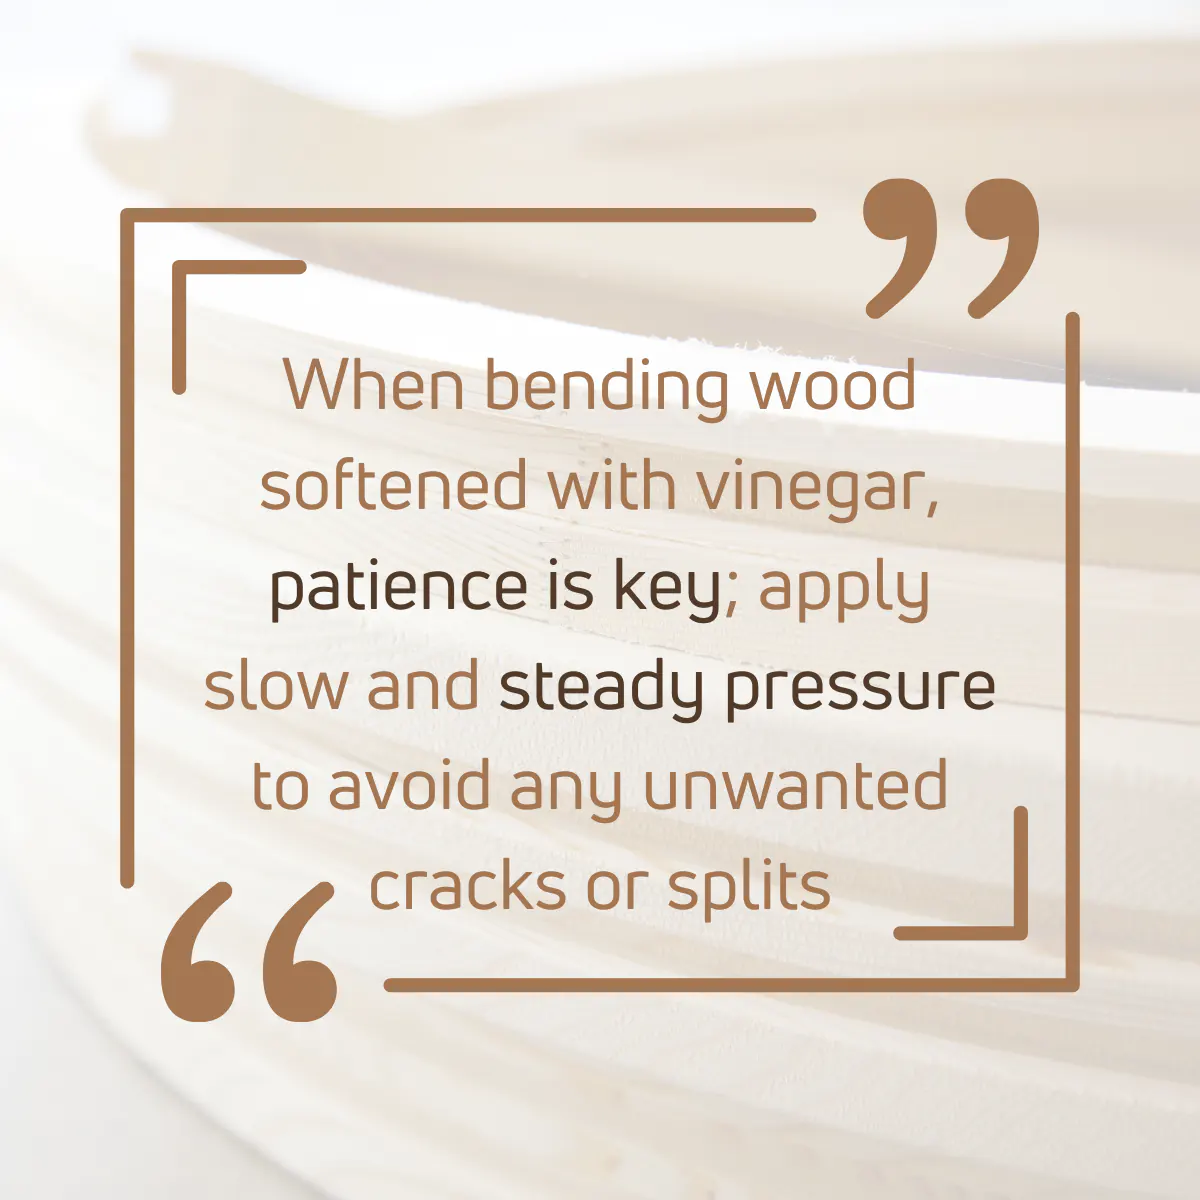
To bend sticks with vinegar without breaking them, first, ensure they’re adequately soaked in vinegar – a few hours for thinner sticks. When bending, apply slow, steady pressure, and avoid forcing the stick into a sharp bend too quickly. Use supports or clamps to hold the shape as the stick dries.
Did I cover all you wanted to know about: How to Bend Wood with Vinegar?
In this article, I’ve deeply discussed how to bend wood with vinegar properly using the correct technique.
Plus, I’ve shared with you some useful information about soaking times of vinegar and other tips and tricks to make your bending project a lot easier.
Bend wood with vinegar by soaking your wood piece in distilled vinegar for several hours or overnight, depending on the wood’s thickness. Once the wood has softened, carefully bend it to the desired shape. After bending, allow the wood to thoroughly dry before handling further.
Furthermore, I’ve answered some frequently asked questions as well.
Hope you learned everything you wanted to know about how to bend wood with vinegar step by step.
Practice makes you perfect.
Therefore, practice the above bending method with scarp wood first to see how wood reacts with vinegar, and go for the actual project if you’re satisfied with the results.