How to Cut a Groove in Wood With a Drill? (7 EASY Steps!)

Ever struggled with cutting a groove in wood for your DIY projects? Discover the versatile world of using a drill for precise grooves, and let’s dive into the techniques that’ll make you a pro in no time! Ready to master the art?

how to cut a groove in wood with drill

Drill is a multipurpose tool in the woodworking world that can use pretty much for anything.

When it comes to cutting grooves, routers, and table saws are specialized for them. But they’re less mobile and don’t fit in every area.

But you might wonder if it’s possible to cut a groove in wood using a drill especially when you don’t have a route. Or when you need to cut a groove inside a tight space, like a cabinet or cupboard.

The answer is Absolutely YES!

So, let’s see, How to cut a groove in wood with a drill?

To cut a groove in wood with a drill, select the suitable drill bit, mark the groove line, prepare the workspace and equipment, and finally, drill the groove while tiling the drill. Or you can create a depth guard, mark the groove path and then, drill while guiding the groove.

But that’s just a quick snapshot.

Where can we send your
FREE Tool Care Guide?

    Privacy Policy: We hate spam and promise to keep your email address safe.

    So, in this article, I’ll explore how to cut a groove in wood with a drill properly by explaining the step-by-step in deep. I’ll help you to select the appropriate drill bit for the projects and what tips and tricks you need to know when drilling groove to make the process looks easier.

    Furthermore, I’ll answer some frequently asked questions as well.

    Just keep reading!

    Cutting a groove in wood with drill
    Cutting a groove in wood with drill

    Can You Cut a Groove with a Drill?

    Yes, you can cut a groove with a drill by handling and guiding the drill properly in any wood.

    Let me be honest with you! Usually, router and table saw are considered the best tools for cutting grooves.

    But if you don’t have a router, or when your router is broken, or when you have to groove inside a tight space like a cabinet or cupboard, you don’t need to panic.

    The drill is absolutely fine!

    Even though the drill is not the most appropriate and specialized tool to cut grooves in wood, you’re able to make precise and accurate cuts efficiently with the drill as well.

    With enough practice and proper guidance, you can eventually be a pro at making grooves with a drill and tell who needs a router with a smirk on your face.

    Drills are versatile tools, and with the right technique you can create grooves in wood without investing in specialized tools like a router or table saw.

    With the correct drill bit, you can cut grooves in the wood. this makes drill a valuable addition to any woodworker’s toolkit, epically when you’re working with limited space or budget constraints.

    Benefits of using a drill to cut a groove
    Benefits of using a drill to cut a groove

    When and Why to Use a Drill for Cutting Grooves

    There’re a few occasions where using a drill to cut grooves might be the best option. Such as,

    • Small-scale projects: If you only need to create a single groove or a few short channels, a drill can be a convenient and cost-effective choice.
    • Tight spaces: If you’re working in a confined area, such as inside a cabinet, a drill might be easier to maneuver than larger tools like a router.
    • Limited tools: If you don’t have access to a router or table saw, a drill can be a resourceful solution to create grooves in the wood.

    Limitations of Using a Drill for Grooves

    Now you already know drill is a good and suitable tool to make grooves in any wood. But some limitations hold you back which need to consider,

    • Precision: Achieving a perfectly straight and even groove cut can be difficult when you’re using a drill. Especially for freehand grooves. A router or table saw provides better results by making straight and even cuts.
    • Speed: Cutting a groove with a drill can be time-consuming, especially if you’re new to the technique. If you need to create multiple grooves or work on larger projects, a router or table saw may be more efficient.
    • Bit limitations: Drills may not offer the same variety of bit options as routers, limiting the shapes and sizes of grooves you can create.

    By overcoming those limitations, you can make a precise groove with uniform cuts. Let me guide you to show you how it is done.

    Did you know fact about drilling a groove in wood
    Did you know fact about drilling a groove in wood

    But first, there’re several things you need to consider when drilling wood to make a groove which I will describe next.

    Factors To Consider When Cutting a Groove in Wood with A Drill

    Here’re the factors you need to consider when cutting a groove in wood with a drill,

    • Determining the groove size and location.
    • The type of wood being used.
    • Safety precautions and protective gear.
    • Workspace setup.

    Let’s discuss each of those things in detail to consider before grooving the wood with a drill for promising results.

    Determining The Groove Size And Location

    Before you start to cut the groove, it is important to determine the size and the location of the groove you want to make.

    That means you need to have a clear idea about the width, depth, and placement of the groove you’ll be creating.

    This helps you to select the right drill bit and guide your technique throughout the drilling process.

    Therefore, consider the following,

    1. Width: Select a drill bit that matches the desired width of the groove.
    2. Depth: plan how deep you’re going to cut the groove. You can use depth stop or masking tape on the drill bit to ensure consistent depth throughout the process.
    3. Placement: Mark the location you need to make grooves on the wood with a pencil or chalk, using a ruler or straightedge to ensure lines are straight with high accuracy.

    The Type Of  Wood Being Used

    You need to have a good understanding about the wood species you’ve selected to cut the groove.

    Some softwood species don’t need much effort to drill while some are challenging to drill due to their high density.

    Therefore, consider the hardness and the grain patterns of the wood that you’ve selected which can impact the ease of cutting a groove.

    For example, hardwoods like oak and maple may require more effort and slower drilling speed to make grooves than softwoods like pine and cedar.

    Plus, you need to consider the direction of the grain pattern when drilling the wood for making grooves.

    Because cutting along the direction of the wood grain is so much easier than cutting across it since the wood fibers are more likely to separate cleanly.

    Cutting across the grain can cause wood to chip away and damage the rest wood. Therefore, you need to be mindful of the grain direction when planning to cut your groove.

    Cordless power drill
    Cordless power drill

    Safety Precautions and Protective Gear

    Safety should always be a top priority when working with power tools like drills.

    Follow below safety guidelines to protect you when cutting grooves in wood with a drill,

    • Wear safety goggles to shield your eyes from debris and dust.
    • Use gloves to improve grip and protect your hands from splinters.
    • If using a corded drill, ensure that the power cord is out of the way to avoid tripping or entangling hazards.
    • Keep your work area well-lit and free of clutter to minimize the risk of accidents.

    Follow safety guidelines well when working with drills to build up as a responsible woodworker.

    Workspace Setup

    Your working space needs to be well-organized to improve the efficiency and safety of your groove-cutting process.

    First, you need to secure the wood using clamps to hold the wood steady during the cutting process. Individual movements when cutting can damage the groove you make and also can cause injuries.

    Use a metal straightedge to mark the groove location accurately which is important to use as a guide when cutting the groove with a drill.

    Plus, make sure to work in a well-ventilated area with proper air circulation since lots of sawdust can release upon drilling and they can cause breathing problems and skin, and eye irritations.

    Therefore, keep your working space clear and clean before working on the groove-cutting process.

    By considering the above factors, you’ll be able to make precise and even cuts when making grooves in wood with the drill and achieve satisfying results.

    Let’s have a look at another important thing you need to pay special focus which is selecting the right drill bit. This can directly affect the shape of the groove you’re going to make.

    Drill Bits Suitable For Cutting Groove In Wood

    Choosing the right drill bit is an essential thing you should focus on a lot before starting to drill the wood.

    Drill bit affects the precision and efficiency of your groove-cutting process.

    Various drill bits are designed for different applications. so, you need to have a good understanding of their applications which helps you to decide which drill bit you should go with when cutting a groove.

    Here’re the suitable drill bits for cutting grooves in wood,

    • Twist drill bits – the most common type
    • Spade or paddle bits – for wider grooves
    • Forstner bits – for precise grooves

    Let’s have a look at those suitable drill bits for groove-cutting in detail helping you to decide which one suits you the most.

    Twist Drill Bits

    Twist drill bits are the most popular drill bit type for cutting grooves in the wood and other various applications.

    They have a spiral design which helps to remove debris from the wood workpiece as you drill.

    Twist drill bits are specialized for drilling holes. But, with little adjustment and proper control and guidance, you can use them to create narrow grooves.

    When cutting grooves you just have to tilt the twist drill bit carefully guiding it along the marked line.

    This needs to be done carefully with a lot of focus, patience, and control since one mistake can damage the groove and the wood you’re cutting.

    Twist drill bits are great for drilling grooves with limited tools and small projects.

    Spade or Paddle Bits

    Spade bits, also known as paddle bits, are flat and wide with a sharp point at the center.

    These bits are great for cutting larger holes or wider grooves in the wood.

    When using a spade bit for cutting a groove, you’ll need to start at an angle and gradually bring the bit horizontal while maintaining a steady forward motion.

    Cutting grooves with spade or paddle bits is suitable for creating wider grooves. But it won’t provide the cleanest or most precise results when cutting grooves.

    Forstner Bits

    Forstner bits are specialized drill bits that produce clean, flat-bottomed holes or grooves in the wood.

    They’re an excellent choice for cutting grooves with precision and minimal tear-out.

    Therefore, Forstner bits are the best drill bits you should go for when cutting a groove in wood with a drill which I personally recommend.

    These bits have a center point that helps to maintain accurate positioning and a circular cutting edge that creates smooth and consistent grooves.

    To cut a groove with a Forstner bit, you can follow the below methods,

    1. Use a drill press for added stability and precision.
    2. Employ a handheld drill with a steady hand and careful guidance.

    Forstner bits are an ideal choice for groove-cutting projects that need a high level of accuracy and a clean finish, such as cabinetry or fine woodworking.

    As you can see, by selecting the right drill bit, you’ll be able to achieve a precise groove with a successful process.

    Go through the above drill selection guidance several times and select the one that matches you the most according to your groove-cutting needs.

    So, let’s head into the tool-gathering process, the last thing you should do before drilling the wood.

    Basic Tools For Cutting a Groove in Wood

    • Drill
    • Suitable drill bits (twist drill bits or Forstner drill bits)
    • Clamps for securing the workpiece.
    • Metal straightedge for accurate markings.
    • Sandpaper for smoothing and finishing.
    • Tape measure
    • Ruler
    • Pencil
    • Safety equipment (goggles, hearing protection, dust mask)

    Gather the above tools and get ready to start the groove-cutting process with the drill.

    How To Cut a Grove in Wood with a Drill?

    You can cut a groove in wood with a drill by following two different methods,

    1. Method 1: Tilt the drill
    2. Method 2: Freehand grooves

    Each of the above methods has different techniques to achieve precise results when cutting a groove with a drill.

    Let’s have a look at the tilt of the drill method to cut a grove in wood with a drill properly.

    Method 1: Tilt The Drill

    You can cut a groove in wood with a drill by tilting the drill at an angle and guiding it along the marked line.

    This tilt the drill method can be challenging for some people since it is different than using a specialized bit. It uses a twist drill bit which is easier to find and popular.

    But this method is useful for the ones with limited tools or smaller projects.

    Here’re the steps you need to follow when drilling a groove in wood by tilting the drill method,

    1. Mark the groove line.
    2. Secure the wood.
    3. Choose the right drill bit.
    4. Wear protective gear.
    5. Start drilling at an angle.
    6. Gradually tilt the drill.
    7. Clan and finish the groove.

    Let’s have a look at each of the above steps in detail to cut a groove in wood with a drill using the tilt the drill method properly.

    1. Mark the Groove Line

    First, you need to take the pencil and mark the groove line where you want to cut the groove using the metal straight edge or ruler.

    The line you draw should be straight and clearly visible with high accuracy since this is the path that we drive your drill to cut the groove.

    If you made a mistake when marking the line, the same mistake will happen when you’re cutting the groove.

    2. Secure the Wood

    Now place your wood on a flat and stable work surface, such as a workbench. Then secure it by clamping it to avoid any individual movements when drilling the wood.

    Any individual movement during the groove-cutting process might cause injuries and damage the wood.

    This step is super important for safety and to achieve clean and precise cuts.

    3. Choose the Right Drill Bit

    Now select the drill bit that suits you the most depending on your project purpose. you can refer to the guidelines which I’ve already given when selecting the right drill bit for the task.

    Since we don’t use any specialized drill bits, twist drill bits are a fine option for this method.

    But make sure the bit diameter matches the groove size you’re going to cut.

    Then, install the selected drill bit to your drill.

    4. Wear Protective Gear

    Now you’re ready to cut the groove in wood. But make sure to wear protective gear such as goggles, dust mask, and hearing protection like earplugs before starting the groove-cutting process.

    They help you to protect yourself from debris and potential accidents.

    Safety is first!

    5. Start Drilling at an Angle

    Now hold the drill at a 45-degree angle to the wood surface, aligning the drill bit with the marked line.

    Then, start drilling the wood slowly by allowing the bit to create a small groove that will help you to guide and gain more control of the process.

    Drilling a groove in wood
    Drilling a groove in wood

    6. Gradually Tilt the Drill

    After making the initial groove, carefully tilt the drill towards the wood surface until the drill bit is horizontal, and keep drilling.

    Make sure to maintain a steady hand and constant even pressure as you move the drill along the marked line.

    This ensures the groove remains even and aligned.

    7. Clean and Finish The Groove

    After cutting the entire length of the groove in wood with a drill, sane the groove and the surrounding area with fine-grit sandpaper to eliminate surface irregularities and smooth any rough edges and achieve a clean, polished look.

    As you can tilting the drill is a versatile easy method of cutting groove. But you need to have good control of the drill with lots of practice and patience and attention to detail.

    How to cut a groove in wood with a drill
    How to cut a groove in wood with a drill

    Let’s see the second method of cutting groove in wood with a drill, the freehand grooves method.

    Method 2: Freehand Grooves

    The Freehand grooves method is less precise than the tilt the drill method or using specialized bits methods but is useful for quick projects or when you’re working with rough or uneven surfaces.

    If the surface has lots of bumps with unevenness, it can be challenging to cut a groove using other methods. This is where the freehand grooves method comes to the rescue.

    Here’re the steps you need to follow when cutting a groove in wood with a drill using the freehand grooves method,

    1. Mark the groove line.
    2. Secure the wood.
    3. Choose the right drill bit.
    4. Wear protective gear.
    5. Start drilling along the marked line.
    6. Maintain a steady hand.
    7. Clean and finish the groove.

    Let’s have a look at each of the above steps in detail to get promising results when cutting grooves using a drill.

    1. Mark the Groove Line

    As with the previous method, start by marking the line where you want to cut the groove using a straight edge or ruler and a pencil.

    This line will help guide you as you cut the groove freehand.

    2. Secure the Wood

    Place the wood on a stable work surface, such as a workbench, and secure it with clamps to prevent any movement while you’re cutting the groove.

    This step is vital for safety and achieving a clean, precise cut.

    3. Choose the Right Drill Bit

    Select a suitable drill bit for the groove width you want to achieve.

    Twist drill bits can be used for this method, but keep in mind that the bit diameter should match the desired groove size.

    4. Wear Protective Gear

    Before starting the cutting process, wear safety goggles and gloves to protect yourself from any debris or potential accidents.

    5. Start Drilling Along the Marked Line

    This is the step where the freehand groove method differs from the previously explained tilt the drill method.

    Hold the drill perpendicular to the wood surface and align the bit with the marked line. Start drilling slowly, applying even pressure as you move the drill along the line.

    Be cautious not to press too hard, as this can cause the bit to bite too deeply into the wood and create an uneven groove.

    6. Maintain a Steady Hand

    When cutting freehand grooves, it’s essential to maintain a steady hand and constant pressure as you move the drill along the marked line. This will help ensure the groove remains even and aligned. You might need to make multiple passes to achieve the desired depth.

    7. Clean and Finish the Groove

    After cutting the entire length of the groove, use sandpaper or a small file to smooth any rough edges and achieve a clean, polished look.

    The freehand grooves method is less precise than other methods when cutting a groove in wood, but it can be useful in specific situations.

    Congrats folks! Now you know how to cut a groove in wood with a drill using the correct procedure. Follow the given steps carefully as instructed and get cool results.

    Dos and don'ts when cutting a groove in wood with a drill
    Dos and don’ts when cutting a groove in wood with a drill

    Let’s have a look at some useful tips that help you to succeed when drilling and cutting the groove.

    Tips To Cut a Groove in Wood with a Drill

    Follow the below steps to cut a groove in wood with a drill precisely,

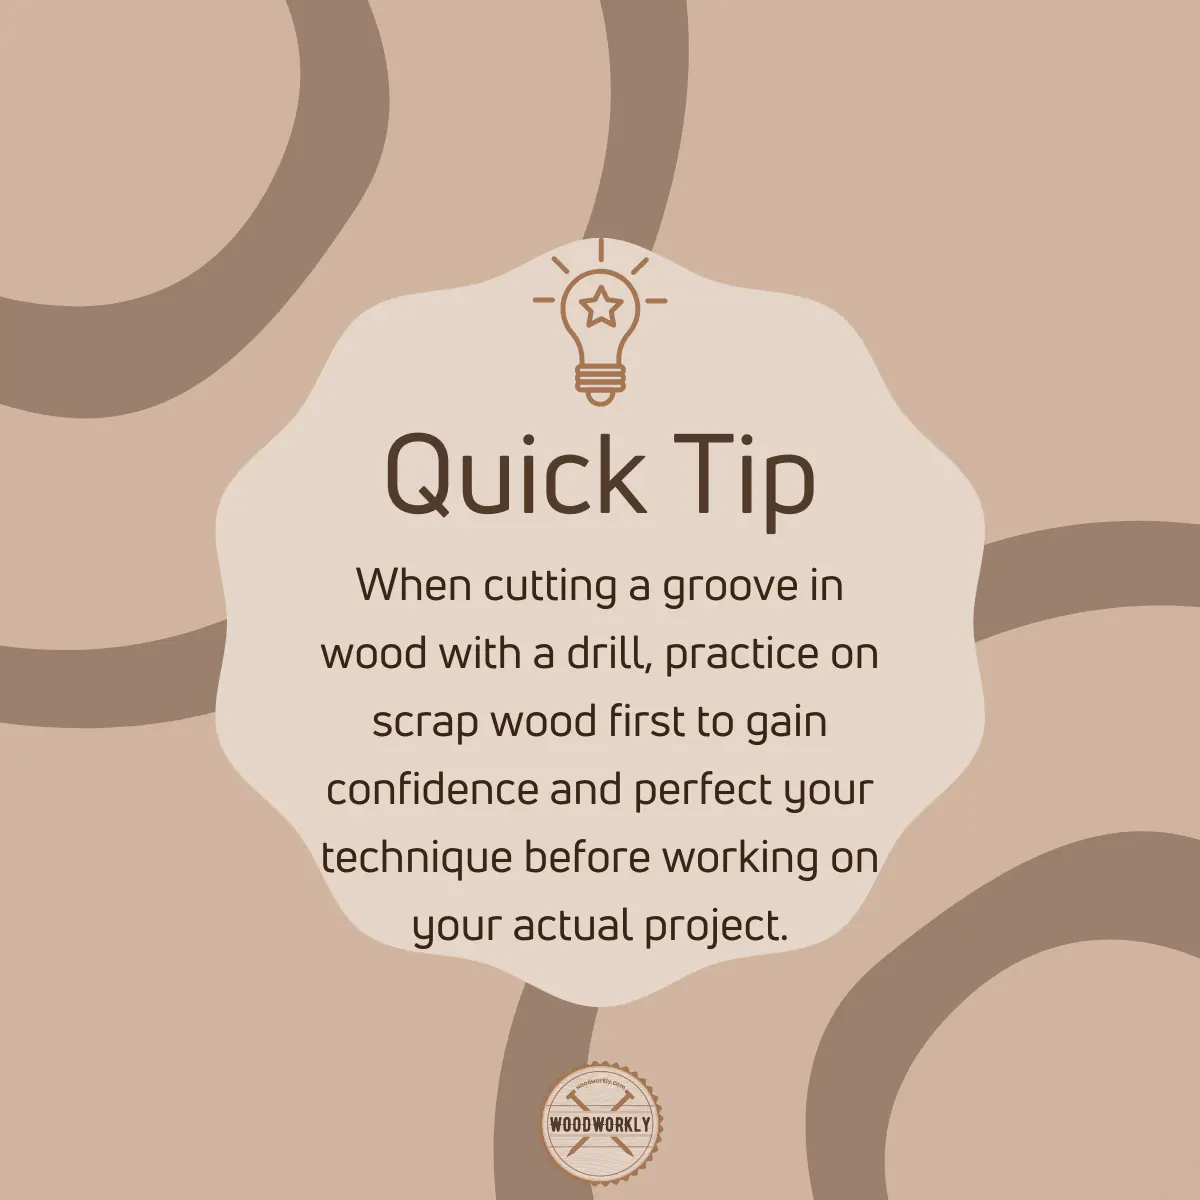
    • Practice on scrap wood before working on your project.
    • Maintain steady pressure and control while drilling.
    • Clean the groove frequently to remove debris.
    • Be patient and work slowly for the best results.

    Let’s discuss them in detail.

    Practice on Scrap Wood Before Working on Your Project

    Before you begin working on your actual project, practice cutting grooves on scrap wood pieces.

    This will help you get familiar with the drilling process. You will learn how much pressure you need to apply on drill while cutting groove in wood and the required motion for a smooth cut.

    Practicing on scrap wood will also allow you to test different drill bits and techniques to find the best approach for your specific project.

    Maintain Steady Pressure and Control While Drilling

    One of the essential aspects of cutting grooves in wood with a drill is maintaining steady pressure and control throughout the process.

    Apply even pressure and keep the drill aligned with the marked line as you cut the groove. Avoid pushing too hard, as this can cause the bit to dig too deeply into the wood, creating an uneven groove.

    Clean the Groove Frequently to Remove Debris

    As you cut the groove, wood debris will accumulate in the channel. Regularly stop and clean out the groove using a small brush or a vacuum to remove any debris.

    This will not only help you see the progress you’re making but also prevent the buildup of debris from affecting the accuracy and quality of the cut.

    Be Patient and Work Slowly for the Best Results

    Cutting a groove in wood with a drill requires patience and a slow, steady hand. Rushing the process can lead to mistakes or an uneven cut.

    Take your time, and if necessary, make multiple passes along the marked line to achieve the desired depth and width of the groove.

    Likewise, by following the above procedure and the given tips, you’ll be able to achieve desired results when cutting grooves in the wood.

    Keep practicing slowly and steadily until you master the technique and create grooves for your woodworking project without even touching the router, only with the drill.

    Groove cut in wood
    Groove cut in wood

     Now flip the book! What if your drill is broken and you have only mastered the groove-cutting process only with the drill?

    Don’t worry! there’re some other more precise ways to cut a groove in the wood. I have described each of them in detail for your ease.

    Let’s have a look at those alternative methods.

    Alternative Methods To Cut a Groove In Wood

    Even though cutting a groove with a drill is a versatile method, there’re some alternative methods you can get more precise and efficient results.

    Here’re some alternative methods of cutting a groove in wood,

    • Using a router
    • Table saw with Dado blade set
    • Chisel and mallet

    Let’s look at them closely,

    Using a Router

    Router is the most suitable tool for making groove cut in wood more accurately and precisely.

    With straight router bit and spiral router bit, you can make smooth grooves with different sizes of widths and depths.

    Routers can be handheld or mounted on a router table to achieve even more precision and accuracy.

    Here’re some advantages of cutting grooves with a router,

    • High precision
    • Clean and smooth grooves
    • Adjustable depth and width
    • Versatility in creating different groove shapes

    Applications,

    • Cabinetry
    • Joinery
    • Decorative woodworking projects

    Read my latest comprehensive guide about how to cut a groove in wood with a router to know the proper method with techniques in detail.

    Table Saw with Dado Set

    Table saw equipped with a Dado blade set is great for making grooves in any wood. The Dado blade set has two outer blades and a series of inner chipper blades that can be installed and removed to get desired groove width.

    You can adjust the height of the blade and the width of the dado set to make groove of various depths and widths in a single pass.

    Here’re some benefits you’ll gain by cutting grooves in wood with a table saw,

    • Quick and efficient groove-cutting
    • Adjustable width and depth
    • Great for cutting multiple grooves of the same size

    Applications,

    • Shelving
    • Box joints
    • Tenons
    • Joinery operations

    Read my latest step-by-step guide about how to cut a groove in wood with a table saw to know the proper method with techniques in detail.

    Chisel and Mallet

    If you like to cut a groove in wood using the traditional method and hand tools this method is for you.

    You can use a chisel and mallet to make grooves in wood efficiently. But need to mark the location of the groove.

    You can make a series of shallow cuts along the marked line to cut a groove in wood using a chisel and mallet while removing the remaining wood using a chisel and mallet.

    Here’re some advantages you’ll probably get by cutting grooves in wood with a chisel and mallet,

    • No need for power tools
    • Greater control
    • Traditional approach

    Applications,

    • Handicraft furniture
    • Artisan woodworking projects
    • Restoration work

    If you prefer to know more details, Read my latest guide about, cutting a groove in wood by hand.

    Apart from the above methods you can use circular saws as well to cut grooves precisely.

    If you want to know more details about its groove-cutting process, read my latest comprehensive guide about cutting a groove in wood with a circular saw step-by-step process.

    Tip: If you want to cut a groove in wood for decorative purposes, try the Dremel tool.

    Here’s my latest guide for cutting grooves in wood with the Dremel!

    Choosing the right method depends on your specific project, personal preferences, and the tools available to you.

    That’s it, folks! Hope you were able to know everything you wanted to know about how to cut a grove in wood with a drill properly in detail.

    Tip for When cutting a groove in wood with a drill
    Tip for When cutting a groove in wood with a drill

    Let’s answer some frequently asked questions as well.

    FAQs

    Can I Use A Regular Drill Bit To Cut A Groove In Wood?

    While it’s possible to use a regular twist drill bit, spade or paddle bits and Forstner bits are better suited for cutting grooves due to their design and ability to create clean, precise cuts.

    What Should I Consider When Choosing A Drill Bit For Cutting A Groove?

    Consider the desired width and depth of the groove, the type of wood being used, and the specific requirements of your project when selecting a drill bit.

    How Can I Ensure A Straight Groove When Using A Drill?

    Use a straight edge or guide to help maintain the drill’s alignment and ensure a straight, even groove.

    What Safety Precautions Should I Take When Cutting A Groove With A Drill?

    Always wear eye protection and gloves, secure the workpiece with clamps, and maintain a steady, controlled grip on the drill while cutting.

    Is It Better To Cut A Groove In Wood With A Drill Or A Router?

    Both methods have their advantages, but routers generally offer more precision and control for cutting grooves, while drills provide versatility and accessibility in tight spaces.

    Did I cover all you wanted to know about How To Cut A Groove In Wood With A Drill?

    In this article, I’ve deeply discussed, how to cut a groove in wood with a drill properly to get promising results. I’ve mentioned factors you should consider before drilling and the way of selecting the right drill bit for your specific needs.

    To cut a groove in wood with a drill, choose a suitable drill bit (such as a spade or Forstner bit), mark the groove’s location with a straight edge, secure the workpiece with clamps, and begin drilling at a 90-degree angle. Gradually tilt the drill until it’s horizontal, then move the drill along the marked line.

    Furthermore, I’ve answered some frequently asked questions as well.

    Hope you were able to learn all you wanted to know about how to cut a groove in wood with a drill.

    Practice the things that I’ve taught you regularly to become a pro at this project.

    Ask questions from experts and learn from your mistakes like I did to achieve wonderful results when grooving wood with a drill.

    Walter Parker is a woodworking enthusiast. He is passionate about woodworking projects & plays with woodworking tools having spent over 2 decades as a leader for Woodworking Planet. He wants to make people love woodworking! Read More About Him! Follow him on Twitter, Facebook and Linkedin.

    Leave a Comment