Ever wondered how wood artisans get that glass-like finish on their work? The secret lies in a technique called ‘burnishing’. Intrigued? Let’s explore this fascinating world of wood burnishing together, shall we?
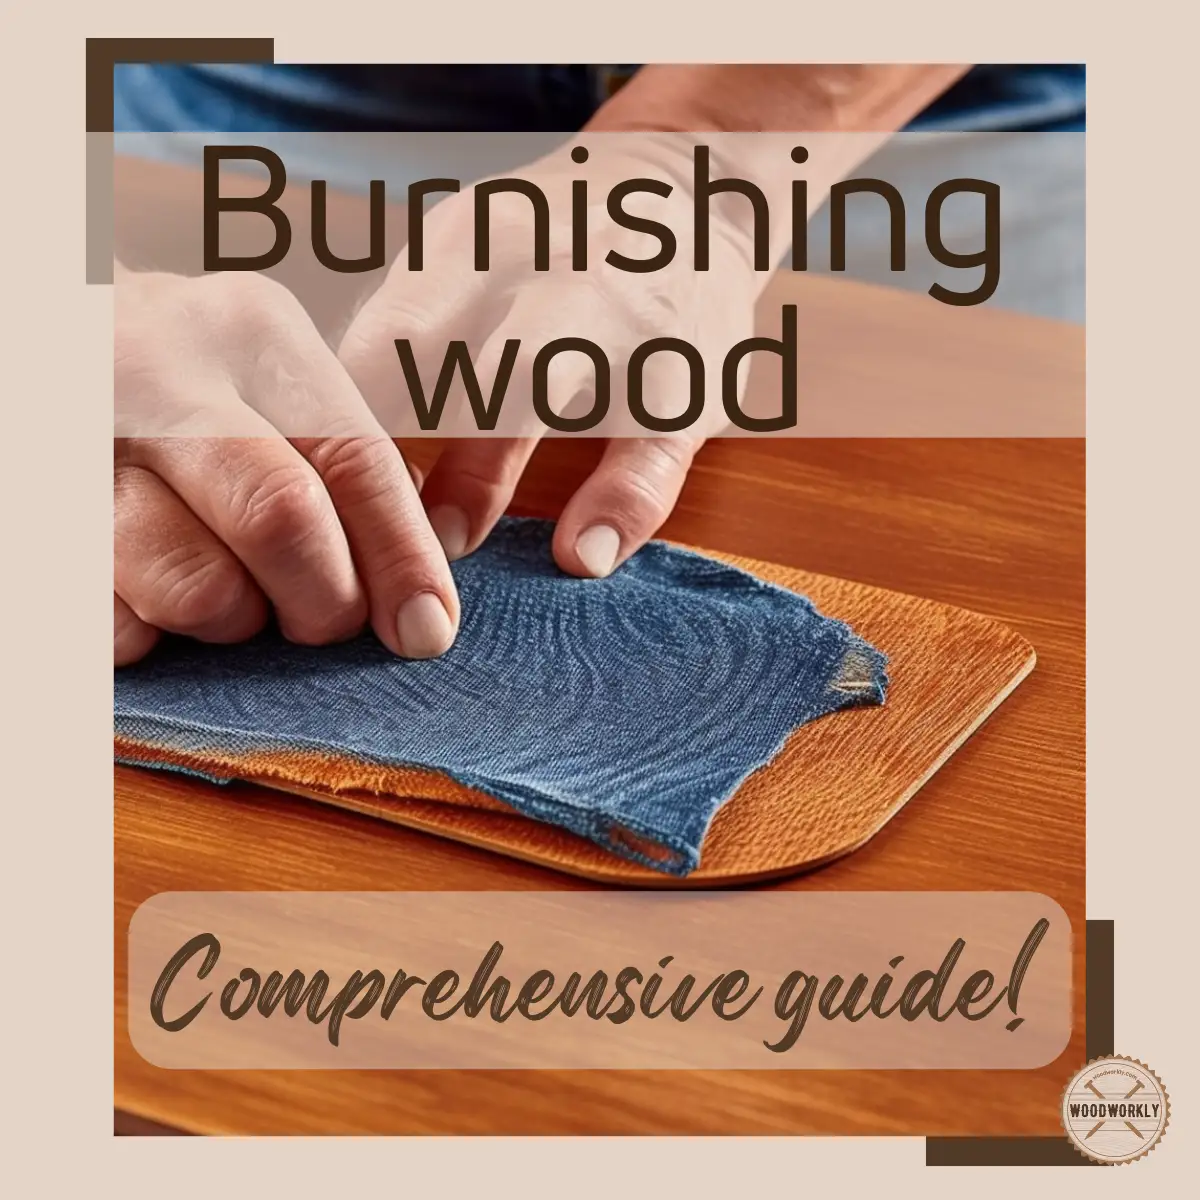
Burnishing wood comes from the 16th century which is a wood finishing technique that is used to make the wood bright and glossy.
According to the experts’ burnishing wood is a process that involves rubbing the wood surface vigorously with a smooth tool or material to create a lustrous and sleek finish.
I was curious about this wood burnishing method and why is it done. So, I did a deep research about it over the past 5 years.
Now with years of experience, here’s what I know about burnishing wood,
Burnishing wood is a woodworking technique that polishes and enhances the wood’s finish. By creating heat through friction, it compresses the wood fibers, yielding a smooth, shiny surface, and improving durability.
But that’s just a quick snapshot.

So, in this article, I’ll explore what burnishing wood, its purpose and benefits of it, and how to burnish wood by hand and also with different tools and materials.
Furthermore, I’ll answer some frequently asked questions as well.
Let’s jump in!
What is Burnishing Wood?
Burnishing wood is a wood finishing technique that is used to enhance the appearance and the smoothness of wood surfaces.
Burnishing involves rubbing and polishing the wood with a smooth and hard object to create a glossy or polished sheen on the wooden surface.
The burnishing process works on the principle of friction.
This constant rubbing generates heat, causing the surface fibers of the wood to soften and meld together, creating a glossy, polished surface that’s not only pleasing to the eye but pleasing to the touch as well.
And that, dear friends, is the quintessence of burnishing.
Most importantly, you don’t need any chemicals when finishing wood with the burnishing method.
It enhances the appearance of your furniture and other woodworking projects just as polyurethane, varnish, and lacquer finish.
What is the Purpose of Burnishing Wood?
Burnishing plays a pivotal role in the final steps of wood finishing. Imagine spending hours carefully crafting a piece of wooden furniture, only to be let down by a dull and rough finish.
That’s where burnishing steps in.
Burnishing helps create that final touch of excellence – a gleaming finish that accentuates the beauty of the wood, highlighting its natural grain patterns and colors.
Moreover, burnishing can also be a preparatory step before applying a finish like a shellac, varnish, or wax.
It helps smooth out any remaining rough spots, ensuring the finish applies evenly, adheres properly, and lasts longer.
In this way, burnishing serves as a bridge between your woodworking efforts and the ultimate finished product.
Beyond function, burnishing wood serves an artistic purpose.
The process can reveal hidden details and amplify the natural beauty of the wood, bringing out the subtle hues, the striking grains, and the warm tones that lay beneath the surface.
With every stroke of the burnisher, the wood’s aesthetics evolve, gaining depth and character.
But the advantages of burnishing go beyond mere beauty. The process also greatly enhances the wood’s durability.
When you burnish wood, you’re essentially compacting its surface fibers, creating a denser, harder finish that’s more resistant to moisture, staining, and daily wear and tear.
For example, consider a burnished wooden dining table. Not only does it shine brilliantly under your dining room lights, but it’s also better equipped to resist the occasional spills and scratches that are part and parcel of daily life.
Now, that’s a winning combination, don’t you think?
As you can see, the purpose of burnishing wood goes beyond creating a glossy finish. It’s about enhancing the natural beauty and longevity of your wooden pieces.
Whether you’re a hobbyist working on a small DIY project or a seasoned woodworker creating an artisanal masterpiece, burnishing can elevate your work from good to great.
So, shall we take a closer look at the advantages of burnishing wood in our next section? Keep reading to find out more.
What are the Benefits Of Burnishing Wood?
Here’re the benefits you’ll gain by burnishing wood,
- Enhance the natural beauty of the wood.
- Create a more durable surface.
- Improve the application of finishes.
- Ease of maintenance and care.
Let’s discuss the benefits of wood burnishing in detail which helps you to select wood burnishing over other wood finishing techniques.
Enhance the Natural Beauty Of The Wood
Imagine a diamond that has not yet been polished. It has potential but lacks distinctive glitter.
Burnishing is comparable to the artisan who meticulously polishes the diamond to reveal its inherent brilliance.
Burnishing highlights the natural grain pattern, colors, and textures of the wood by producing a glossy and smooth finish.
This smooth and polished surface reflects light differently, producing an aesthetically appealing glow.
Consider a piece of oak furniture, for instance. With burnishing, the furniture comes alive, with the wood’s natural texture becoming more pronounced, and its rich, golden hues emanating warmth and elegance.
It’s almost as if the wood is speaking, telling its story through the grains and knots revealed during the burnishing process.
Create a More Durable Surface
As we’ve touched on earlier, burnishing doesn’t just cater to aesthetics.
It’s also about creating a more resilient surface that’s ready to take on the trials and tribulations of everyday life.
When burnishing, the surface fibers of the wood are compacted and melded together, creating a denser, harder finish.
This not only means a more durable surface but also one that’s more resistant to moisture and stains.
A burnished wooden coffee table, for instance, won’t flinch at the sight of an accidental coffee spill or frown at the occasional scratches from keys or coins.
It’s sturdy and reliable, just the way good furniture should be.
Improve the Application of Finishes
Burnishing also serves a very functional purpose when you’re planning to apply other finishes to your wooden piece.
A burnished surface is incredibly smooth and even, allowing finishes like varnish, shellac, or wax to apply evenly, adhere better, and last longer.
Imagine applying a layer of varnish over a wooden chest.
If the surface is burnished, the varnish goes on smoother and seeps into the wood evenly, and when it dries, it forms a uniform, beautiful layer that enhances the visual appeal and durability of the chest.
Overall, you can apply any finish you want after burnishing the wood. It makes the surface ready to take on the stain and other wood finishes.
Ease of Maintenance and Care
Here’s a little secret: burnished wood is easier to clean and maintain! Thanks to its smooth, hard surface, dust and grime don’t have many crevices to hide in.
A simple wipe-down with a cloth is often enough to keep burnished pieces looking their best.
As you can see, burnishing wood has a wealth of benefits, transforming both the look and feel of your pieces, and extending their lifespan.
From revealing the natural beauty of the wood to creating a resilient surface, improving the application of finishes, and simplifying maintenance, burnishing is indeed a game-changer in wood finishing.
So, intrigued enough to try burnishing? Up next, I’ll explore the types of wood suitable for burnishing and how you can choose the best for your project. Stick around!

What Types of Wood are Suitable for Burnishing?
Before starting to burnish your furniture or woodwork, it is important to know what types of woodwork are well with this method.
Some woods provide a beautiful attractive look after burnishing while some of them ruin our hopes.
According to my personal experience, let’s see how hardwoods, softwoods, and some exotic woods perform under burnishing.
Burnishing Hardwoods
When it comes to burnishing, hardwoods are the best material of choice for the majority of skilled workers.
These woods, which include oak, maple, and walnut, have a complex grain structure that reacts itself well to burnishing.
The denser the wood, the greater its ability to compress and refine under burnishing pressure.
Consider walnut, which is known for its rich, dark colors. Burnishing a walnut piece not only enhances its color but also reveals the intricate texture patterns that are characteristic of this wood.
The outcome? A spectacular, glossy piece that inspires awe and reflects the natural beauty in its details.
Burnishing Softwoods
Due to their less compact structure, softwoods such as pine, spruce, and fir may not be ideal for burnishing.
However, with a light touch and a little perseverance, these woods can also be burnished to a beautiful sheen.
They may not attain the same degree of glossiness as hardwoods, but they will still have an attractive sheen and enhanced grain.
A burnished piece of pine furniture, for instance, can take on an entirely new personality.
The soft, warm tones of the pine become more pronounced, while the distinctive grain patterns become more apparent, lending a touch of rustic charm to the piece.
Burnishing Exotic Woods
Mahogany, teak, and rosewood are exotic hardwoods with a particular affinity for burnishing.
Burnishing dramatically enhances the distinct grain patterns and hues of these hardwoods.
Burnishing a mahogany piece, for example, enhances its reddish-brown hue while emphasizing the linear grain pattern, resulting in a magnificent piece that stands out in any room.
Can Composite Woods Be Burnished?
Composite woods, such as plywood, MDF, and particleboard, are not ideal for burnishing since they are manufactured from wood products, but their grain structure differs from that of solid wood.
The process may still produce a smoother surface, but it will not bring out the wood grain or colors because, well, they aren’t there.
Now let’s see the different types of tools and materials, you are able to use when burnishing wood.
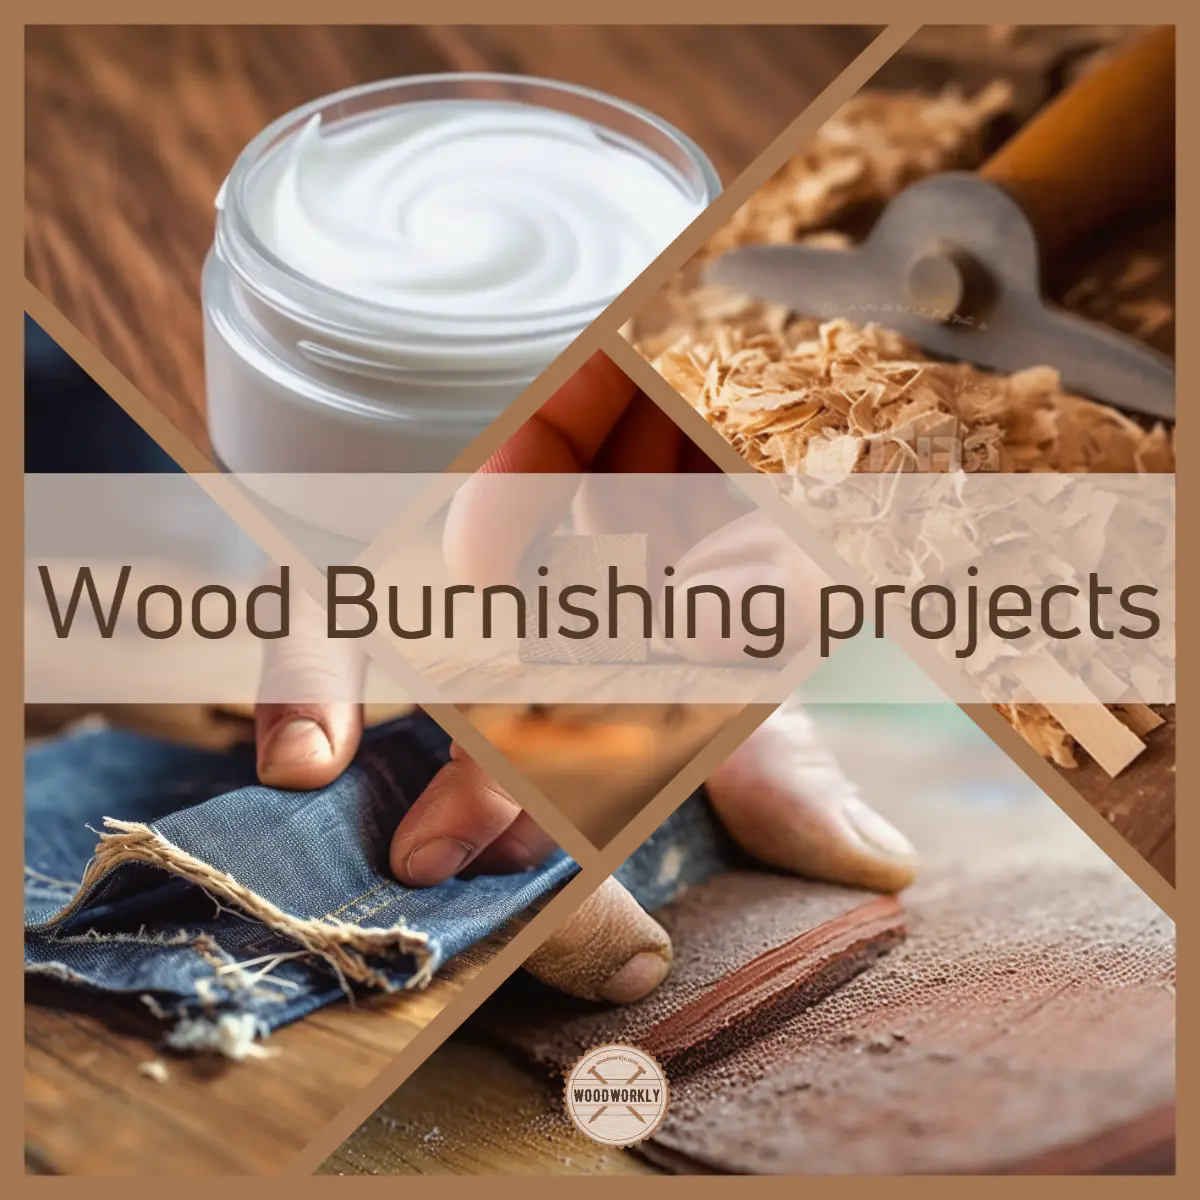
Wood Burnishing Tools and Materials
In order to achieve a smooth and enhanced look, you need to select quality materials when burnishing.
Here’re the tools and materials you can use for wood burnishing,
- Denim fabric
- Steel wool
- Hardwood
- Ultra-fine sandpaper
- Wood shavings
- Burnishing cream
- Stone
- Antler
- Lathe
- Steel wheel
- Metal burnishing tools
Let’s take a closer look at each one.
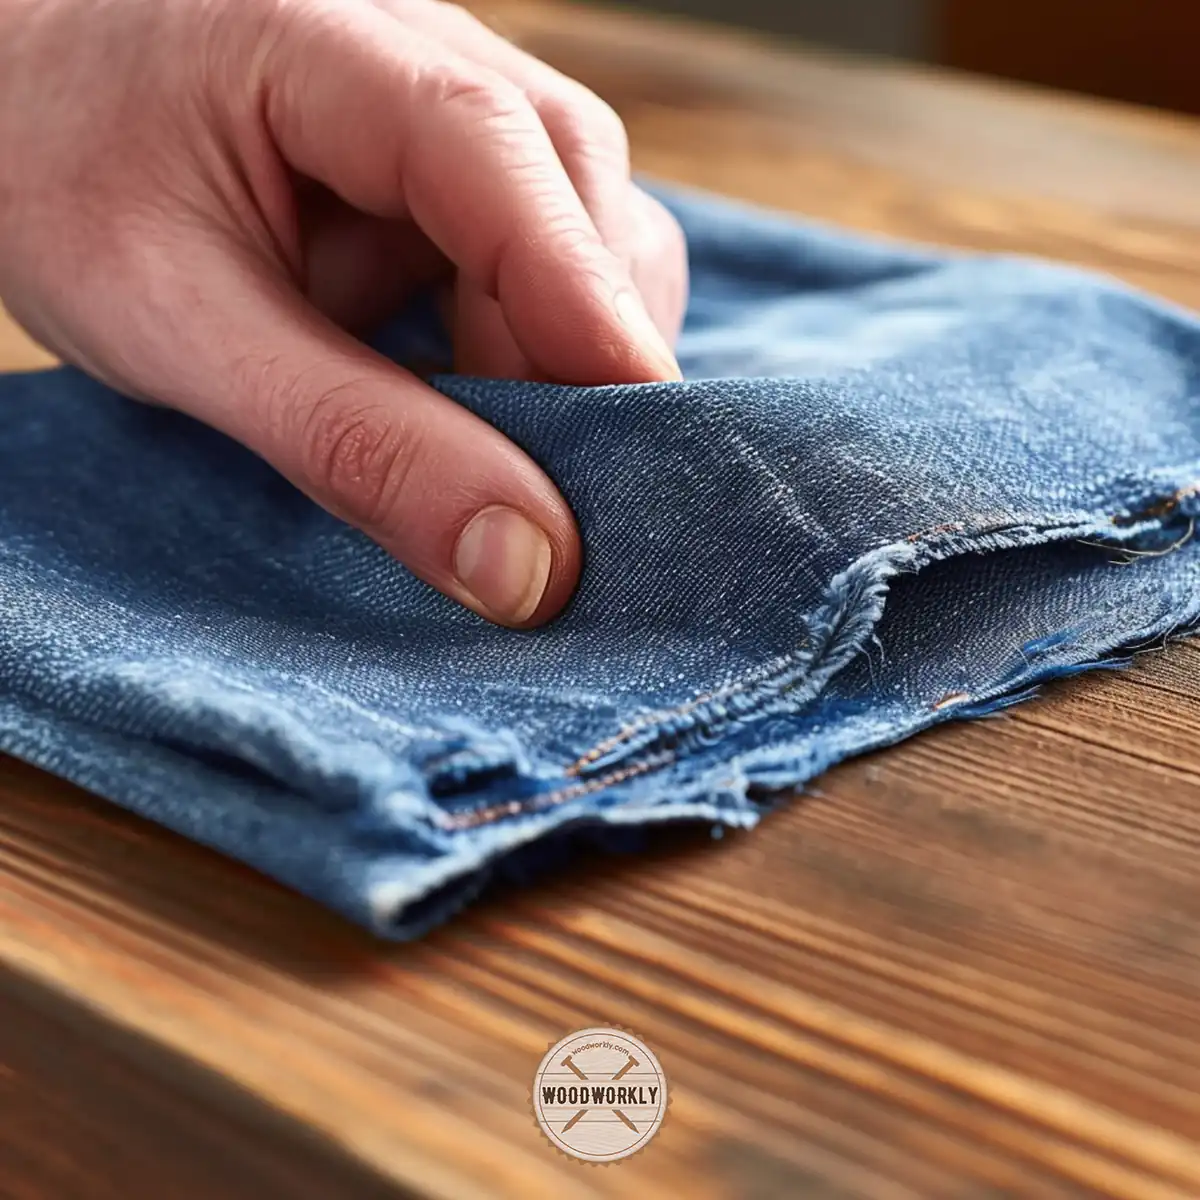
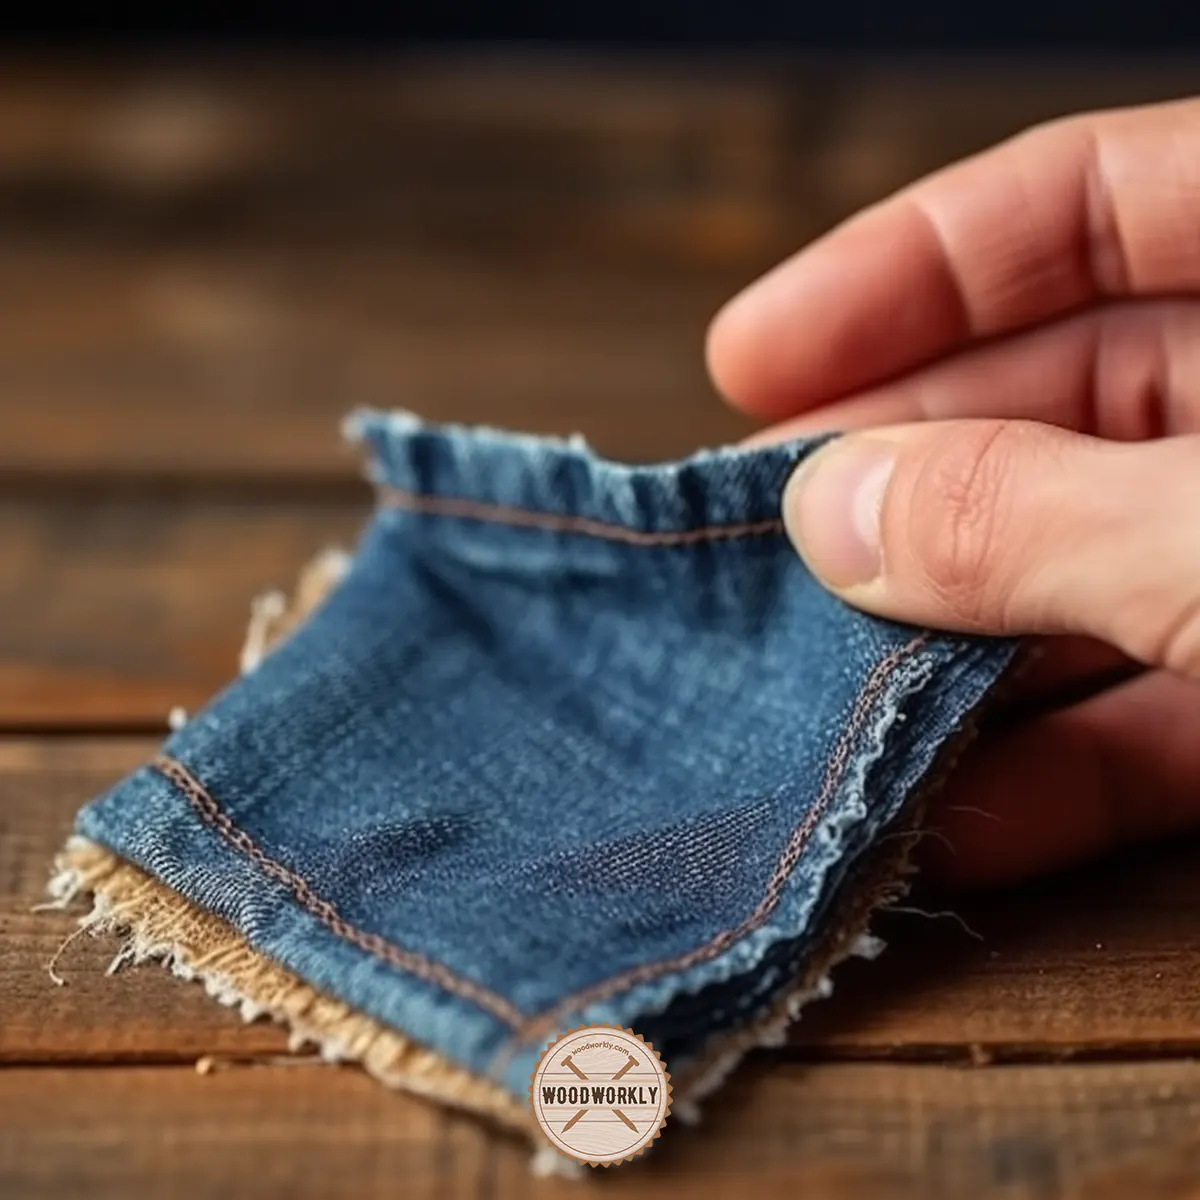
Denim Fabric
Denim fabric is an ideal material for burnishing wood since it is durable. Use 4-inch denim fabric for ideal results when burnishing wood.
The friction and heat generated by vigorously rubbing denim on a wooden surface can smoothen and polish the wood surface.
The denim fabric is folded in half to create a compact pad. Then, using the fabric, rub the wood surface in circles with a diameter of approximately 6 inches.
This process compacts the wood fibers, resulting in a burnished, shiny surface. It is also extremely useful because it conforms readily to shape the wood.
Steel Wool
Steel wool is mostly used for removing existing finishes on the wood surface and polishing it. Steel wool of the finest grade (#0000) is ideal for burnishing wood.
When steel wool is pressed on the wood surface, it compacts the wood fibers and polishes the surface to create a sheen.
Steel wool is optimal for curved or highly detailed surfaces that cannot be reached with a block or rigid tool.
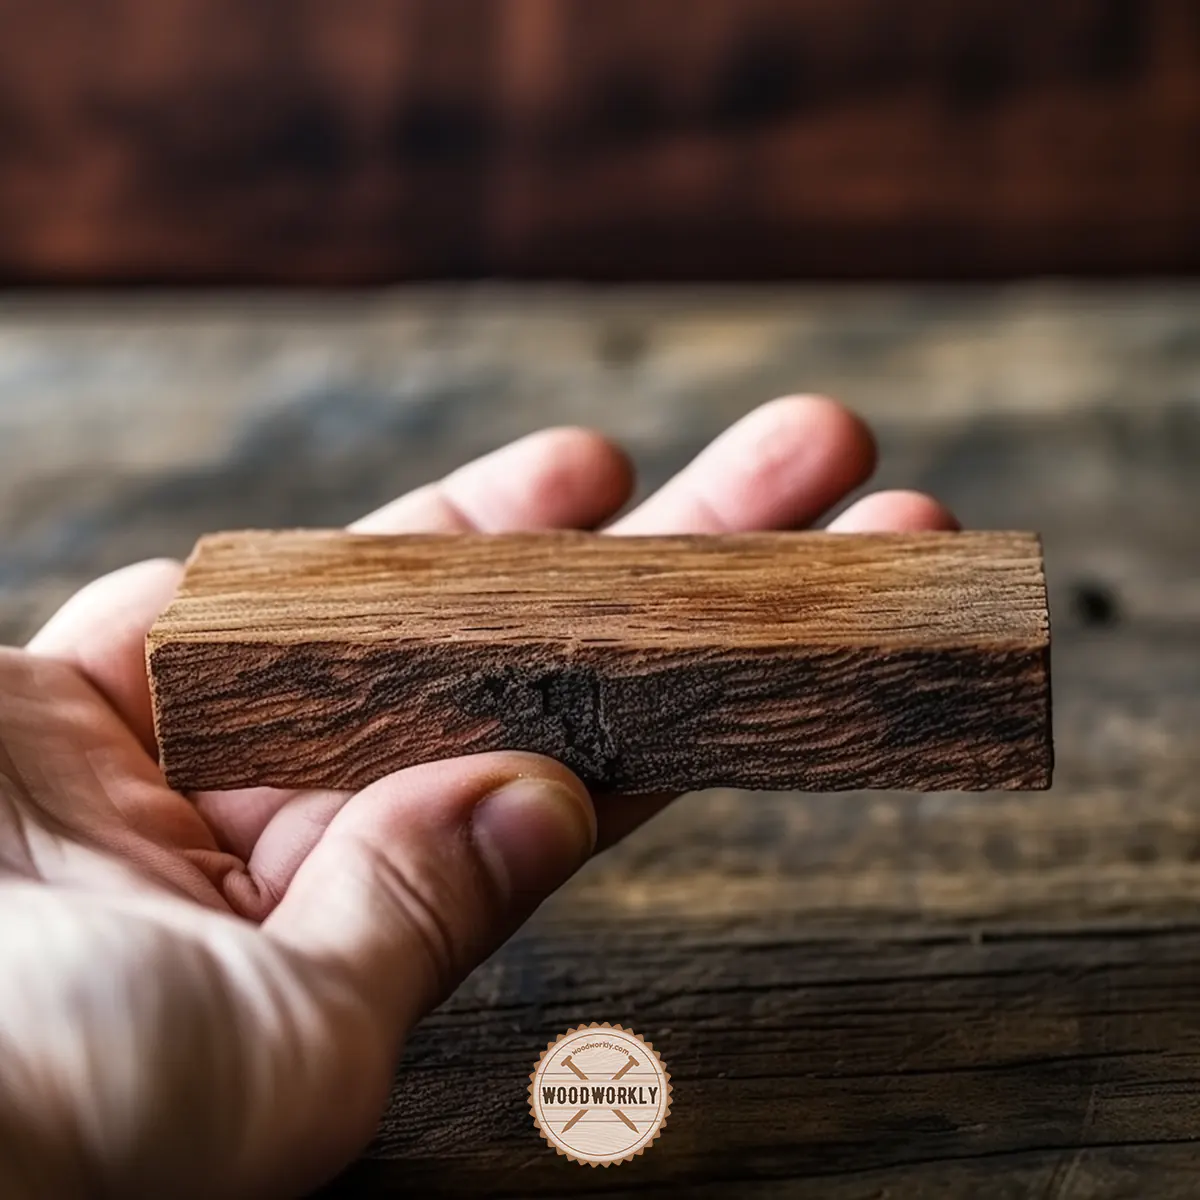
Hardwood
For large, flat surfaces, a flat piece of hardwood works well as a burnishing tool.
When burnishing wood, a hardwood block is used to push wood shavings firmly against the wood’s surface.
Press the block of hardwood against the wood surface and rub the wood in a circular motion by applying an even moderate pressure all over the surface.
This produces a polished, glossy finish. To avoid unintentional scratches, it’s imperative to make sure the hardwood block is smoother than the surface you’re burnishing.
Burnishing with hardwoods is an excellent method when burnishing a wooden spoon and knife handle since it is an affordable option.
Ultra-fine sandpaper
Prior to burnishing, the wood surface is initially smoothed with extremely fine sandpaper (above 320 grit).
Any scratches, dents, or rough areas that can obstruct the burnishing procedure ought to be removed.
The wood surface should feel completely smooth to the touch after sanding, making it ready for burnishing.
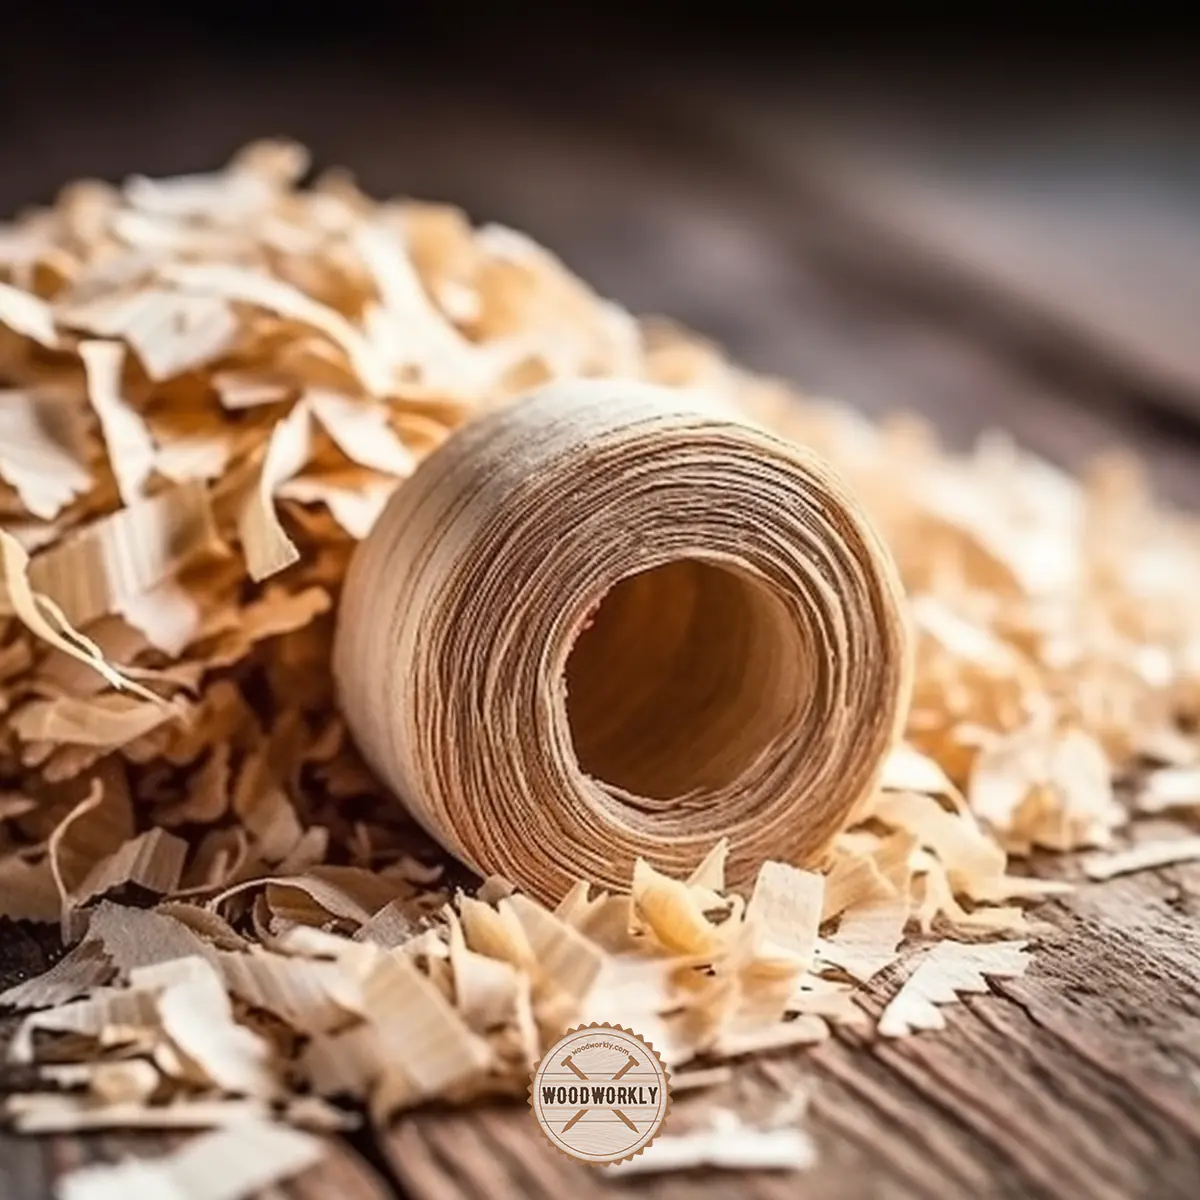
Wood Shavings
Wood shavings can be a useful burnishing tool, especially if they are made of the same wood that you are burnishing.
With the aid of a hardwood block, the shavings are compressed against the wood’s surface.
The shavings’ soft, malleable nature enables them to mold to the wood’s surface and details, producing a highly polished finish.
Burnishing Cream
A specifically prepared substance called burnishing cream aids in enhancing the shine of the wood surface.
To polish the wood, it works in tandem with a tool like steel wool or cloth.
Before burnishing the surface with the cream, you need to clean the surface thoroughly with a wax or polish remover to remove stains.
Then, soak a piece of tack cloth with burnishing cream and rub the wood gently in a circular motion with even pressure.
Make sure to shake the burnishing cream well before opening it.
When the burnishing cream is buffed all over the surface, heat and friction will produce. This leads to creating a shiny, burnished surface.

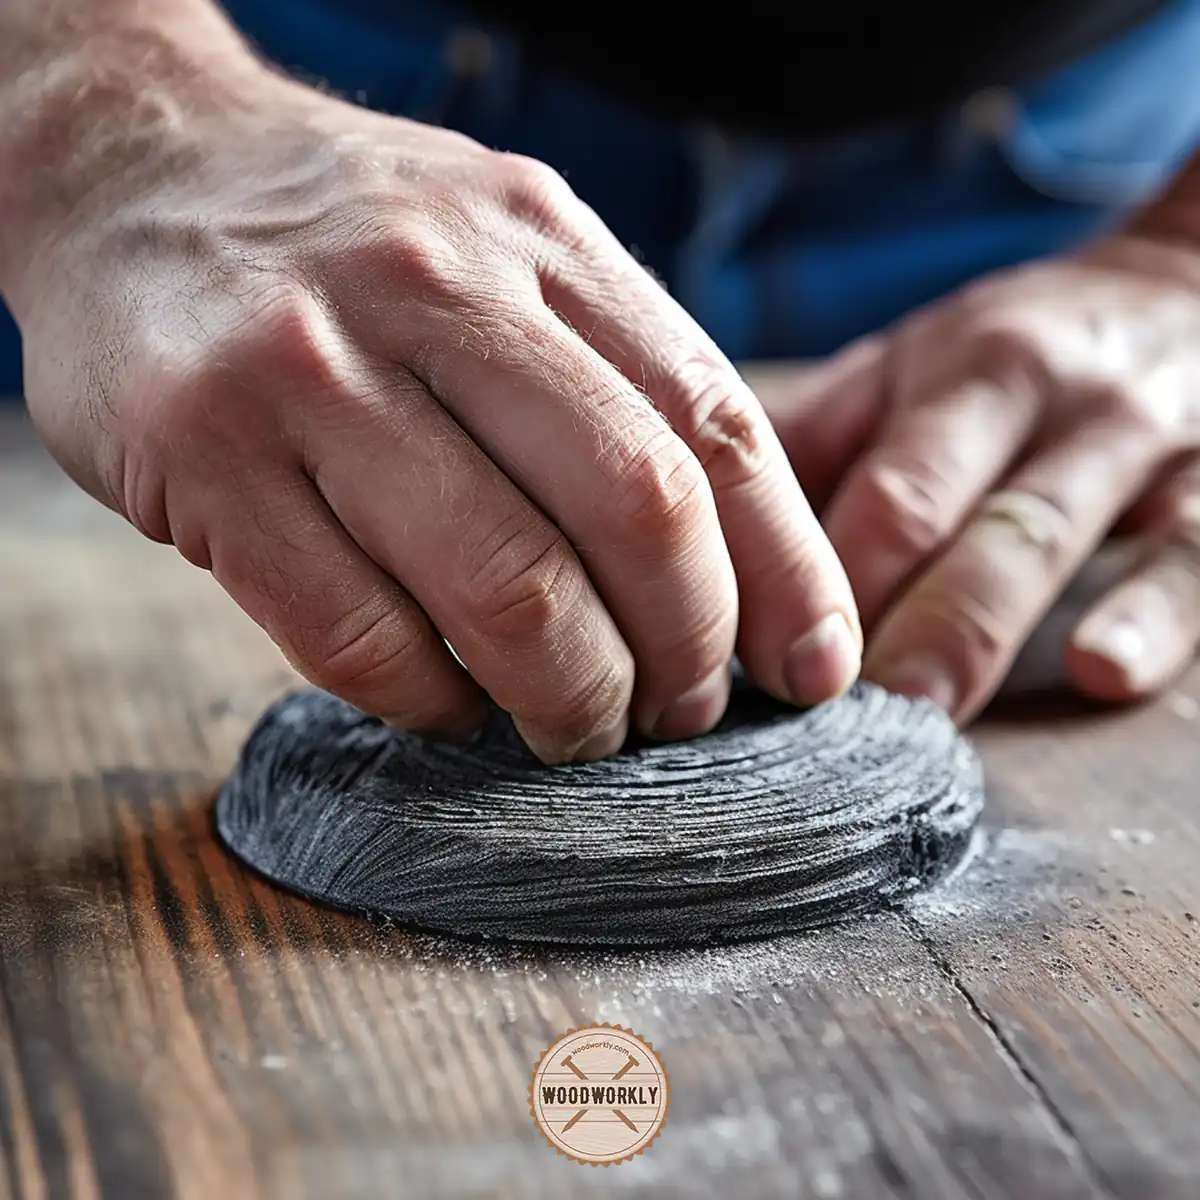
Stone
Stone is great for burnishing wood especially to elaborate or detailed work.
The wood fibers are compressed and give a polished appearance as a result of the stone’s friction with the wood’s surface.
The stone makes an ideal burnishing tool due to its hardness and smoothness.
Antler
Traditional tools for burnishing have been antlers, notably deer antlers. Antler has a smooth, hard surface, which is perfect for burnishing.
The wood surface can be thoroughly rubbed with the antler to get a high-gloss finish. Antlers are very handy for getting into small spaces and burnishing edges.
Lathe
The lathe is also a good option to burnish wood surfaces to improve their appearance with a unique look.
The lathe is great, especially for cylindrical wooden objects like table legs or batons.
A burnishing tool is used to rub against the wood as it is rapidly spun on the lathe.
Burnishing with a lathe happens quickly and uniformly as a result of the high-speed rotation and steady pressure.
Steel Wheel
When attached to a drill or lathe, a steel wheel can be a potent burnishing tool.
It is applied to the wood surface as the wheel rotates, producing a consistent, glossy finish. Large, flat surfaces are perfect for burnishing using steel wheels.
Note that this is a traditional method of burnishing wood, which I personally practiced a decade ago when I’m not familiar with the modern expensive tools.
The results were pretty good.
Tools for Metal Burnishing
There are several sizes and shapes available for metal burnishing tools.
They often have a curved, smooth surface for rubbing or buffing wood. Burnishing complicated or finely detailed woodwork is a breeze with these tools.
Tools for metal burnishing are great for detailed or intricate woodwork.
You need to select the tool that suits you the most based on the shape and detail of the wood piece being burnished.
Now you have good knowledge about each and every tool you can use to burnish wood. experiment with different tools to discover which one meets your expectations.

How to Burnish Wood?
Burnishing wood is easy when you follow the correct procedure. There’re several techniques you can try to burnish wood.
Practice each one with scrap wood and select the one that suits you the most for the actual project.
Here’re the methods you can use to burnish wood,
- Burnish wood by hand
- Burnish wood on the lathe
- Burnish wood with antler
- Stone wood burnishing
- Burnish wood with steel wheel
- Burnish wood with wood shavings
Let’s have a look at each of the above techniques when burnishing wood in detail and identify the one that works for you the most.
1. Burnish Wood by Hand
Even though it may seem difficult, burnishing wood by hand is surprisingly simple and satisfying.
When burnishing wood by hand, you need a denim fabric. Grab a pair of your old jeans that you’ve been wanting to throw away, and let’s get started!
Denim’s tough fibers rubbing up against wood produce friction, which leaves a glossy, polished appearance.
Burnishing wood with a denim fabric is an easy and affordable technique that’s ideal for individuals just getting started with wood burnishing.
Let’s check that we have all the required supplies before we begin.
Supplies You Will Need
- A piece of wood (ensure it’s sanded and ready for burnishing)
- A piece of denim fabric (old jeans work great)
- Ultra-fine sandpaper
- Burnishing cream (optional)
Get ready for the supplies and start working on burnishing wood by hand.
How to Burnish Wood by Hand?
Here’re the steps you need to follow when burnishing wood by hand,
- Sand the wood surface.
- Prepare the denim fabric.
- Start burnishing the wood.
- Apply burnishing cream (optional).
- Final burnishing
Let’s discuss each of the above steps in detail to have a good understanding of burnishing wood by hand.
1. Sand the Wood Surface
It’s crucial to make sure your wood object has been sanded to a smooth finish before we begin burnishing.
Sand the surface with ultra-fine sandpaper to make it as smooth as you can.
Keep in mind that the best approach to avoid damaging your wood is to always sand against the grain.
2. Prepare the Denim Fabric
Take your denim fabric piece and fold it into a pad next.
The burnishing procedure will be simpler and more productive with the help of this foldable pad.
3. Start Burnishing the Wood
Here comes the exciting part! With gentle pressure, begin rubbing the denim material on the wood.
Once more, it’s crucial to always move the denim along the direction of the wood grain of the wood.
As you work, you’ll start to see the wood’s surface getting smoother and more shiny.
4. Apply Burnishing Cream (Optional)
Now is the moment to apply burnishing cream if you decided to do so.
Apply the cream to the wood using a different piece of denim or a piece of steel wool, then buff until the surface is glossy.
You can skip this step if you prefer not to use burnishing cream.
5. Final Burnishing
The last step is to burnish your piece once more using a clean piece of denim.
Any residual flaws will be buffed out during this last pass, which will also give your wood a high-gloss finish.
There you have it, then! You used a denim fabric to burnish your wood successfully. The end effect is a gorgeously polished, shining, smooth, and eye-catching wood surface.
Burnishing wood by hand is the most popular method of burnishing wood since you only need a piece of denim for enhancing the wood’s appearance.
Now, let’s discuss another technique of burnishing wood with the Lathe tool.
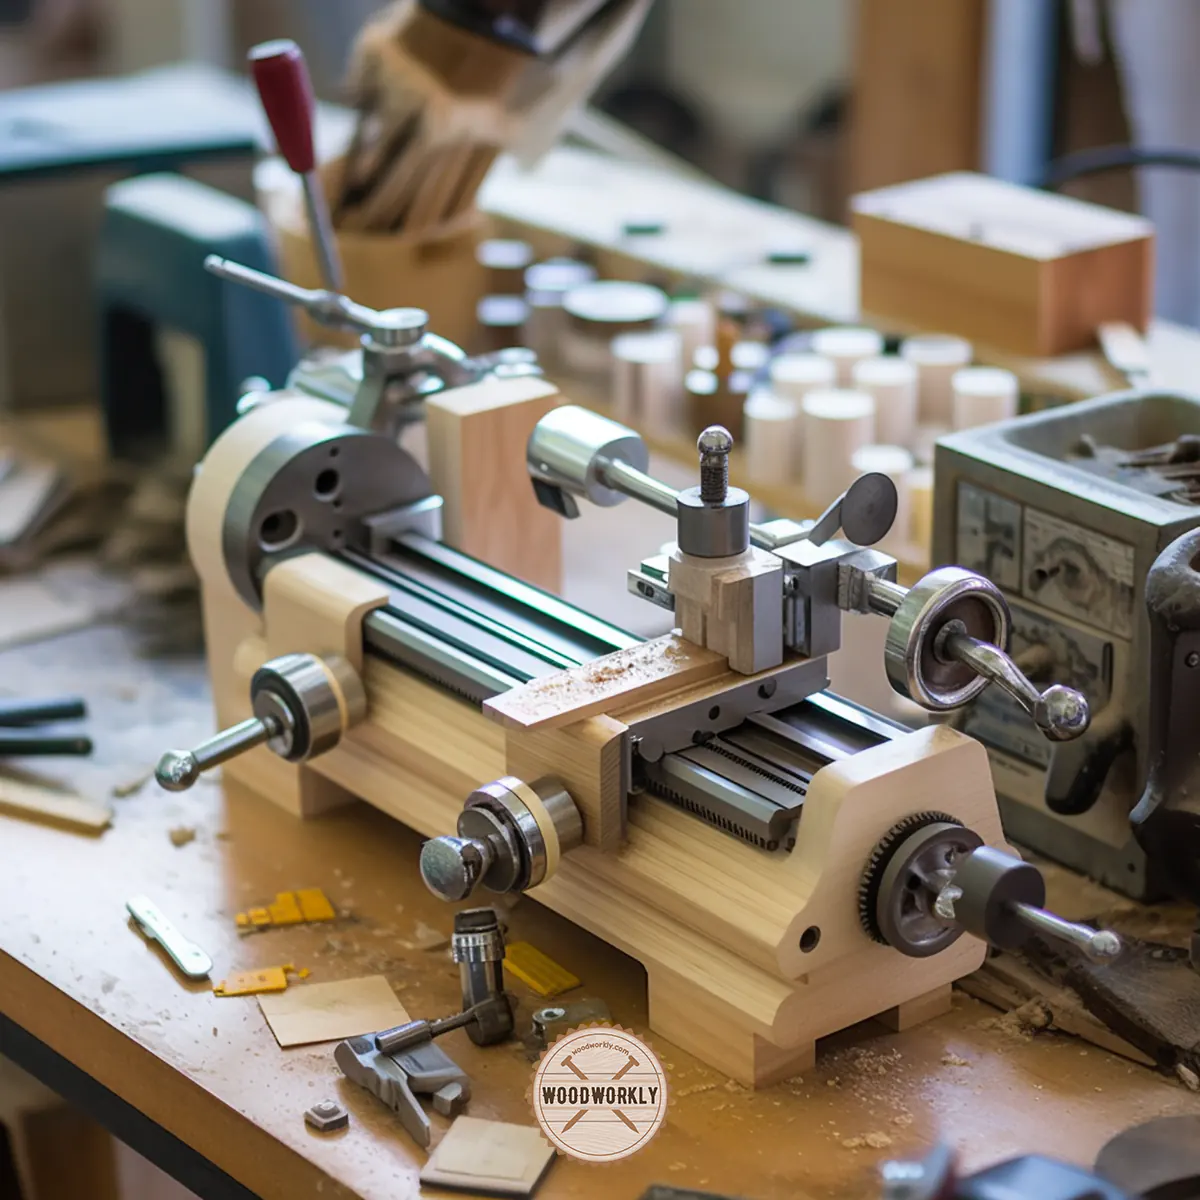
2. Burnish Wood on a Lathe
Lathe is a versatile tool that woodworkers use to perform various operations such as cutting, sanding, knurling, drilling, or deformation by rotating the workpiece on its axis.
When it comes to burnishing, the lathe adds a spin (pun intended) to the process by allowing us to leverage the machine’s speed and consistency, resulting in a shiny, well-burnished finish.
Let’s see what supplies you need to achieve success when burnishing with the lathe.
Supplies You Will Need
- A lathe
- A piece of wood mounted on the lathe
- Ultra-fine sandpaper
- Burnishing cream (optional)
- A soft cloth or burnishing tool (hardwood, antler, steel burnisher)
How to Burnish Wood on a Lathe?
Here’re the steps you need to follow when burnishing wood on a lathe,
- Sand the wood surface.
- Prepare the lathe.
- Start burnishing the wood.
- Apply burnishing cream (optional).
- Final burnishing.
Now. Let’s discuss each of the above steps in detail to burnish wood properly on a lathe.
1. Sand the Wood Surface
Just like any burnishing process, the initial step involves sanding the wood piece.
Mount the piece on the lathe and gradually increase the grit of the sandpaper until the wood is smooth.
Remember to always move with the grain of the wood.
2. Prepare the Lathe
Once your piece is sanded, ensure that your lathe is in good working condition and ready for the burnishing process.
Set the speed to a moderate setting – too slow, and you won’t generate enough heat; too fast, and you risk damaging the piece.
3. Start Burnishing the Wood
With your piece of wood smoothly spinning on the lathe, it’s time to start the burnishing process.
Using a soft cloth or your chosen burnishing tool, apply gentle but steady pressure to the wood. As you continue, you’ll start to notice the piece gaining a lustrous shine.
4. Apply Burnishing Cream (Optional)
If you’re using burnishing cream, apply it using a separate cloth or burnishing tool, then continue the burnishing process.
This step can amplify the glossy effect.
5. Final Burnishing
For the final touch, increase the lathe’s speed slightly and continue burnishing until you’re satisfied with the glossy finish.
Congratulations, you’ve just burnished a piece of wood on a lathe!
Now, let’s have a look at another effective method of burnishing wood which is with an antler.
3. Burnish Wood with Antler
Using antlers to finish your woodworking projects is an odd thing right? Yes, but let me tell you, it is not unconventional as you think.
You can definitely use an antler to burnish wood to improve the wood’s appearance and to make the surface smooth.
The hardness of the antlers is the main reason why I like to use them for burnishing wood.
Antlers are incredibly effective at compacting wood fibers, thereby reducing the wood’s ability to absorb moisture and enhancing its durability.
Plus, the curvatures and points on antlers allow you to access even the hard-to-reach areas, giving your wood a thorough, all-around burnishing.
Let’s see what tools are you required to burnish wood with an antler.
Supplies You Will Need
- A piece of antler (could be the whole or part of it, depending on the size of your wood piece)
- A well-sanded piece of wood
- Burnishing cream (optional)
Gather the above tools and get ready to burnish your woodwork.
How to Burnish Wood with an Antler?
Here’re the steps you need to follow when burnishing wood with an antler,
- Prepare the wood surface.
- Start burnishing the wood.
- Dealing with nooks and crannies.
- Apply burnishing cream.
- Final burnishing
Now let’s discuss each of the above methods in detail to burnish wood with an antler effectively.
1. Prepare the Wood Surface
Just like with other methods, start with a smoothly sanded piece of wood. If the piece has been pre-sanded, make sure it’s clean and free of any dust or particles.
2. Start Burnishing the Wood
Hold the antler firmly and start rubbing it on the wood surface with steady, even pressure. Make sure to rub along the grain to avoid damaging the wood fibers.
Don’t rush; allow the hardness of the antler and your applied pressure to do the work.
3. Dealing with Nooks and Crannies
One of the advantages of using an antler for burnishing is its ability to reach into crevices or round off edges smoothly. Use the pointed parts of the antler for this purpose.
4. Applying Burnishing Cream
If you’re using a burnishing cream, this is the time to apply it. Using a clean cloth, apply the cream to the wood and continue the burnishing process.
5. Final Burnishing
Keep burnishing until you notice the wood develop a high shine. If needed, increase your pressure slightly during the final passes.
Now you know how to burnish wood using an antler. Let’s talk about the method of burnishing wood with stones.
4. Stone Wood Burnishing
Who would have thought that the unassuming stones we frequently ignore could play such an important part in woodworking?
You’re going to learn how a stone can give your wood items a lovely, beautiful finish.
Let’s see what the things you need to have when burnishing wood with stone.
Stone burnishing is an ancient technique that has stood the test of time.
Its continued popularity lies in the fact that it is effective, inexpensive, and the stones are easy to handle.
The result is a lustrous, durable finish that can withstand harsh weather conditions.
You need a hard, smooth stone for stone burnishing. River stones are a great option, but make sure they don’t have any edges that are too sharp because they could damage the wood.
How to Burnish Wood with Stone?
Here’re the steps you need to follow when burnishing wood with stones,
- Prepare the wood surface.
- Start burnishing the wood.
- Working on the details.
- Finishing touches.
Now, let’s discuss each of the above steps in detail to burnish wood using stones perfectly.
1. Prepare the Wood Surface
Start with a wood object that has been carefully cleaned and sanded, as with other burnishing techniques.
Make sure the burnishing procedure won’t be hampered by dust or other obstructions.
2. Start Burnishing the Wood
Grab the stone of your choice, then begin rubbing it against the wood. Apply constant pressure and maintain your motions.
To prevent damage, keep in mind to move the stone in the direction of the grain.
The wood fibers are compressed during this process, providing the item with a beautiful gloss and greater moisture resistance.
3. Working on the Details
Use a smaller stone or one with a suitable form to reach the corners or small spaces on your item. Although it can require a little more work, the results are certainly worth it.
4. Finishing Touches
After completely burnishing the wood, wipe it clean to get rid of any leftover dust. If you want, you can now apply a burnishing cream or a protective finish.
That’s how you should burnish wood using stones.

Let’s see how to burnish wood with a steel wheel in detail.
5. Burnish Wood with a Steel Wheel
When it comes to burnishing wood, a steel wheel is a one-of-a-kind tool that generates a distinct and aesthetically pleasing finish.
The friction generated by the wheel compresses the wood fibers, resulting in a polished, velvety surface.
Choosing the Correct Steel Wheel
Choosing a steel wheel for burnishing is relatively simple. You need one with a rounded, smooth edge that will not damage the wood.
There are a variety of sizes and shapes available, allowing you to adapt to the requirements of your project.
How to Burnish Wood with a Steel Wheel?
Here’re the steps you need to follow when burnishing wood with a steel wheel,
- Wear safety equipment
- Prepare the wood surface.
- Start burnishing the wood using the wheel.
- Finishing up.
- Final touches.
Let’s discuss each of the above steps in detail to burnish wood properly with a steel wheel.
1. Wear Safety Equipment
Always use protective equipment, such as safety glasses and gloves, when working with power instruments. Remember that your safety comes first.
2. Prepare the Wood
Always begin with a clear and well-sanded piece of wood. This not only guarantees an even burnish, but also prevents unwanted marks or scratches from appearing on the final product.
3. Start Burnishing the Wood Using the Wheel
Attach the steel wheel to a power drill. Follow the grain direction along the surface of the timber to avoid damaging the fibers.
Maintain a constant, constant speed and pressure to accomplish an even finish.
4. Finishing Up
After burnishing, wipe away any residuals and examine the work. If you discover any unlevel areas, you can run the steel wheel over them again.
5. Final Touches
You can apply a layer of burnishing cream or a protective finish for added brilliance.
This process not only improves the wood’s sheen but also increases its resistance to wear and strain.
That’s how you should burnish wood using a steel wheel.
Now let’s see the final technique of burnishing wood, which is with wood shavings.
6. Burnish Wood with Wood Shavings
When you think of burnishing wood, you likely imagine using some form of tool or cloth.
However, did you realize that wood shavings can be used to achieve a beautiful burnished finish?
Yes, you can.
Wood shavings, a byproduct of planning or carving wood, are frequently collected and reused for a variety of purposes, including burnishing.
Utilizing the natural abrasiveness and consistency of wood shavings, this technique creates an eco-friendly and cost-effective burnishing tool.
Selecting the Ideal Wood Shavings
The quality of the wood shavings is the key to producing a wonderful burnish with them.
Ideally, you should utilize fine, thin shavings from the same type of timber being worked.
Avoid wood shavings that are excessively coarse or dense, as they may leave scratches instead of a smooth finish.
How to Burnish Wood with Wood Shavings?
Here’re the steps you need to follow when burnishing wood with wood shavings,
- Wear safety equipment.
- Prepare the wood surface.
- Start burnishing the wood.
- Monitor the process.
- Apply a finish.
Let’s discuss each of the above steps in detail to burnish wood properly using wood shavings.
1. Wear Safety Equipment
Always remember to prioritize safety.
Although burnishing with wood shavings is comparatively risk-free, it is still prudent to wear safety glasses and a dust mask to prevent exposure to fine particles.
2. Prepare the Wood Surface
Start with a spotless, well-sanded piece of wood. Properly preparing the wood permits a smoother, more uniform finish when burnishing.
3. Start Burnishing the Wood
With a handful of shavings, rub the surface of the wood in the direction of the grain.
The wood fibers are compressed by the friction caused by the shavings, resulting in a glossy and smooth finish.
4. Monitor the Process
After polishing, examine your work. If you discover any areas that are not as polished as you would like, merely go over them again with additional shavings.
5. Apply a Finish
You can apply a varnish or wax to protect and further enhance the luster of your burnished wood.
This step is optional, but it can lend a layer of sheen and durability to your finished product.
That’s it, folks! Now you know how to burnish wood properly using 6 different techniques.
Practice each method that I taught you with scarp wood first and select the one that suits you the most when it comes to the actual project.
Now, let’s see how to burnish some common wood applications as examples.
You can follow the methods I provide directly without any fear since I’m already practicing them for years with no issues.
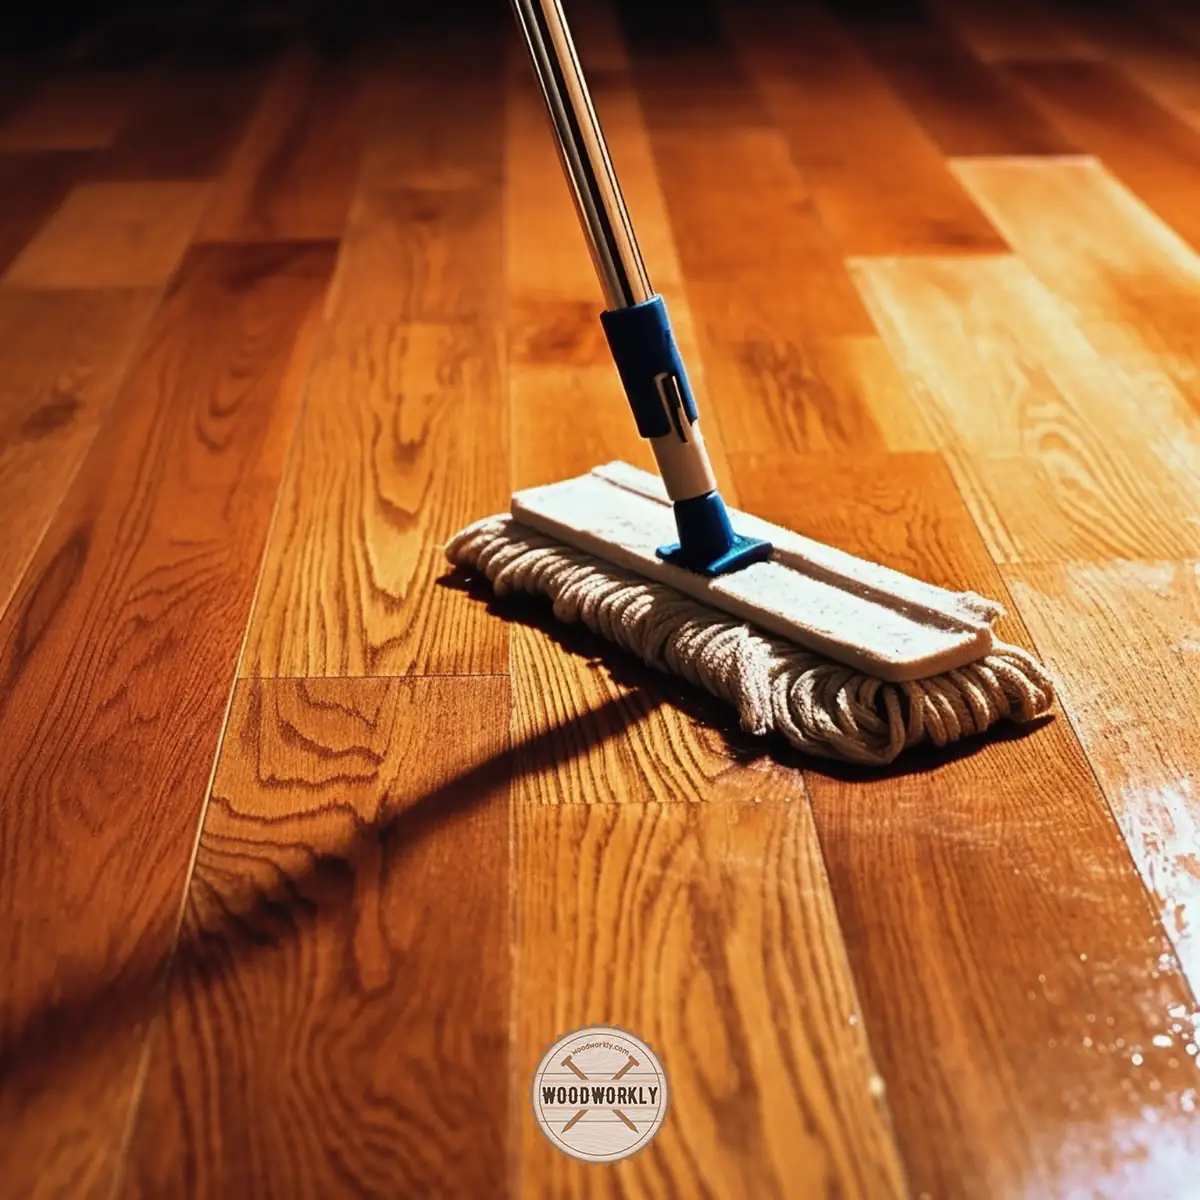
How to Burnish Wood Floors?
Burnishing wood floors is an easy thing if you follow the correct procedure. Make sure to use quality tools and proper safety guidelines for promising results.
Here’re the steps you need to follow when burnishing wood floors,
- Clean the floor.
- Sand the surface.
- Choose the right burnishing tool.
- Apply burnishing cream.
- Buffing the floor.
- Repeat the process.
Let’s have a look at each of the above steps in detail to burnish wood floors properly using the appropriate method.
1. Clean the Floor
The first step is to thoroughly clean your wood floors. Remove any furniture and rugs from the room, and sweep or vacuum the floors to ensure they are free of dust and debris.
2. Sand the Surface
Depending on the condition of your floor, you may need to lightly sand the surface to prepare it for burnishing.
Remember to use fine-grit sandpaper for this step and always sand along the grain to avoid scratches.
3. Choose the Right Burnishing Tool
When burnishing wood floors, it’s best to use a buffer with a soft pad attachment.
This tool is designed to apply the right amount of pressure and friction to achieve a smooth, glossy finish.
4. Apply the Burnishing Cream
Begin by applying a thin layer of burnishing cream or wax to a small section of the floor. The cream should be spread evenly across the surface with a soft cloth or sponge.
5. Buff the Floor
Next, slowly move the buffer over the cream-covered area, working in small circular motions.
The buffer’s heat and friction will blend the cream into the wood, filling any microscopic scratches and smoothing the surface.
6. Repeat the Process
Continue applying the burnishing cream and buffing each section of the floor until the entire area is complete.
Remember to periodically check the buffer’s pad for buildup and clean it as necessary to maintain its effectiveness.
After burnishing, your wood floors will have a beautiful, glass-like sheen. However, to maintain this luster, proper care is required.
Regular sweeping or vacuuming will help keep your floors looking their best. Avoid using harsh cleaning products that could dull the finish over time.
Depending on the level of traffic your floor sees, you may need to re-burnish every few years to maintain its shine.
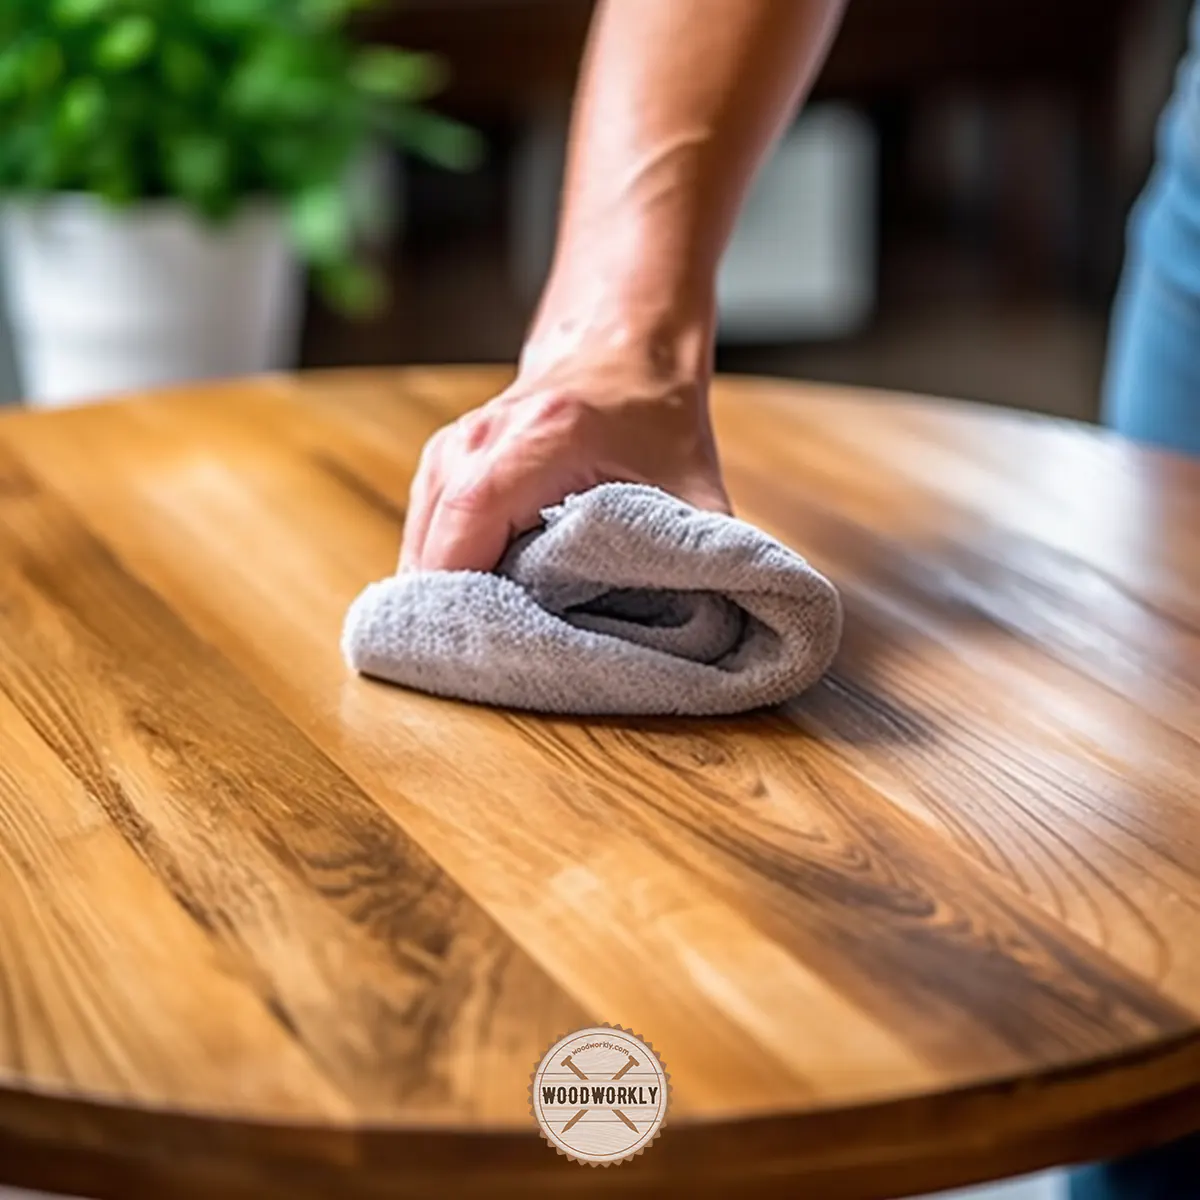
How to Burnish Wood Furniture?
Wood burnishing is mostly used for the restoration process of wood furniture.
Here’re the steps you need to follow when burnishing wood furniture and wood tables,
- Clean the furniture.
- Sand the surface.
- Choose the right burnishing tool.
- Apply burnishing cream.
- Burnish the furniture.
- Wipe down the furniture.
- Apply a sealant.
Let’s discuss each of the above steps in detail to burnish wood furniture properly without making any mistakes.
1. Clean the Furniture
Remove any dust, dirt, or grime from the surface using a damp cloth. Be sure the furniture is completely dry before moving to the next step.
2. Sand the Surface
Using fine-grit sandpaper, lightly sand along the grain of the wood.
This step not only prepares the surface but also reveals the beautiful natural grain that will be highlighted through the burnishing process.
3. Choose the Right Burnishing Tool and Material
You have several options when it comes to burnishing tools. The choice often depends on personal preference and the desired finish.
Steel Wool
Steel wool is a popular tool for burnishing. Its abrasive nature can smooth out the wood while also burnishing it.
Cloth or Denim
A simple cloth or piece of denim can be an effective burnishing tool. When combined with some elbow grease, these can bring out a nice sheen in your wood furniture.
Burnishing Cream
Burnishing cream can add an extra layer of protection and shine to your furniture, especially when used in combination with a cloth or steel wool.
4. Apply Burnishing Cream
If you are using a burnishing cream, apply it to your piece of furniture. Use a soft cloth to spread it evenly across the surface.
5. Burnish the Furniture
Gently rub your chosen tool (steel wool, cloth, or denim) across the surface of the wood.
Always follow the grain of the wood. The pressure and friction will create heat, which in turn polishes the wood and brings out its natural color and sheen.
Burnishing a wood table follows the same process. However, because tables often see more use, it’s particularly important to protect the newly burnished surface.
6. Wipe Down the Furniture
After burnishing the whole piece, wipe it down with a clean, dry cloth. This step removes any residue and presents the final polished look.
7. Apply a Sealant
For tables, consider applying a sealant like a clear varnish or polyurethane after burnishing.
This will protect the wood from scratches, spills, and stains, keeping the burnished surface looking fresh and vibrant for longer.
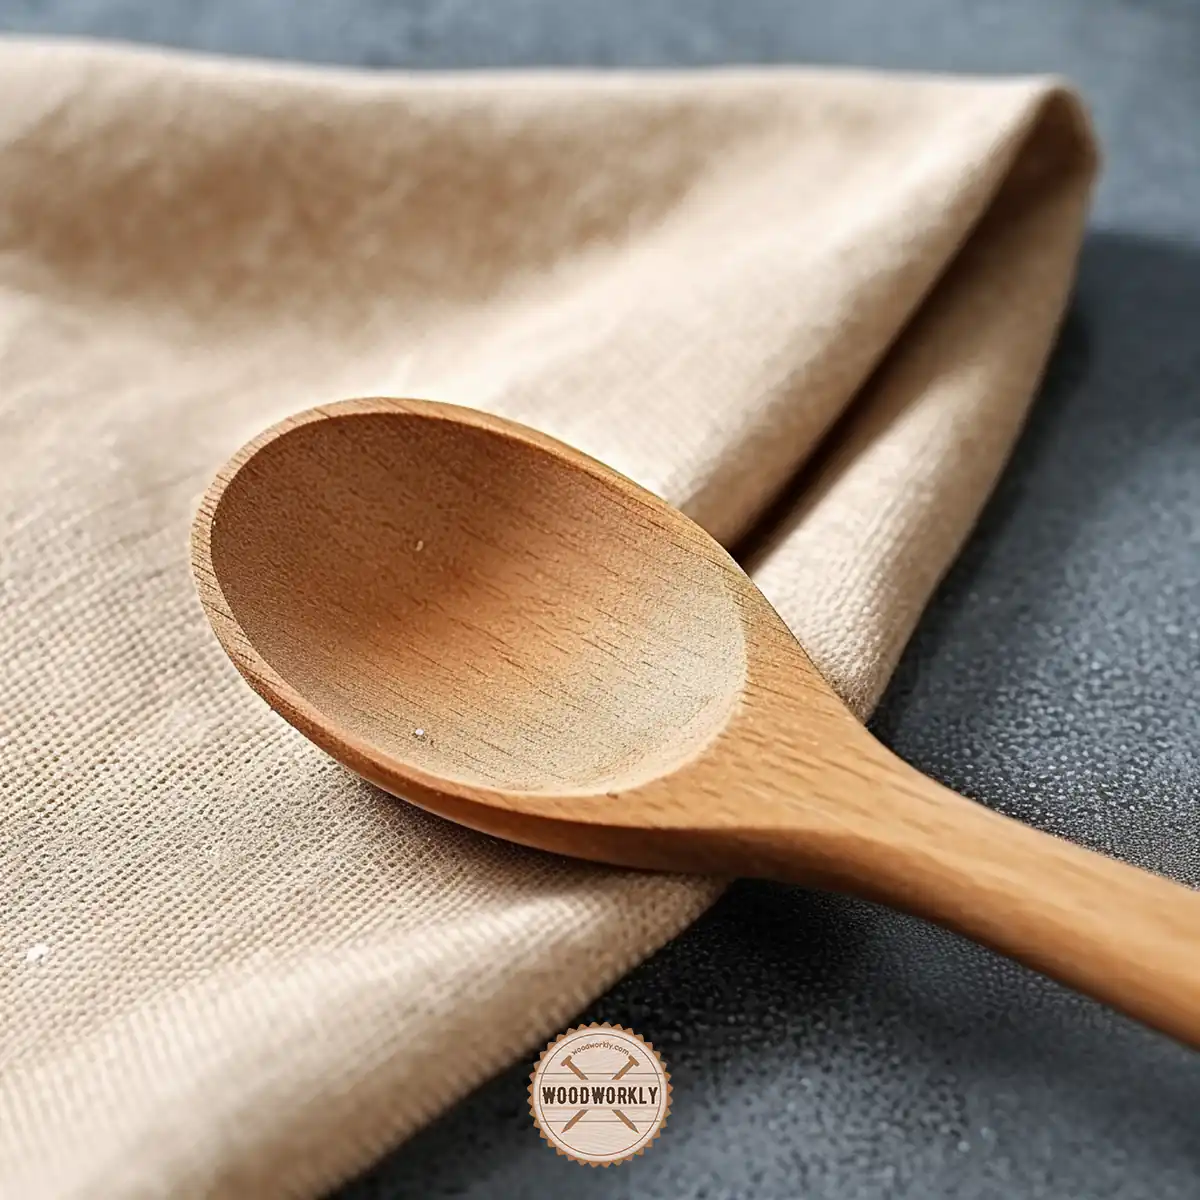
How to Burnish Wooden Spoon?
Burnishing is important to finish and enhance the appearance of your wood carving projects as well.
Even if you’re a beginner in wood carving or a professional carver, finishing is important to keep your wood carving projects for so long without any damage.
Here’re the steps you need to follow when burnishing wood spoon,
- Gather tools and materials.
- Sand the wooden spoon.
- Burnish the wooden spoon.
- Apply burnishing cream or oil.
- Finish the surface.
Let’s look at the above steps closely to burnish your wooden spoon properly.
1. Gather Tools and Materials
First, you need to gather the below supplies to burnish the wooden spoon well,
- The wooden spoon
- Fine grit sandpaper
- Burnishing tool (smooth river stone or antler for curved surfaces)
- Burnishing cream or oil
Make sure to keep your equipment clean and free from damage to achieve a nice and smooth finish.
2. Sand the Wooden Spoon
Start with lightly sanding the wooden spoon. This step removes any rough edges and prepares the spoon for burnishing.
Always sand in the direction of the wood grain to prevent scratches and damage.
3. Burnish the Wooden Spoon
Now it’s time to burnish. Take your chosen burnishing tool and gently rub it over the spoon, always following the direction of the wood grain.
Apply a moderate amount of pressure as you go. The friction will heat the wood slightly, sealing the pores and giving it a polished look.
4. Apply Burnishing Cream or Oil
This is optional but can enhance the overall appearance of the spoon. If you are using a cream or oil, apply it evenly over the spoon, then continue the burnishing process.
5. Finish the Surface
After you’ve achieved the desired sheen, wipe off any excess cream or oil with a clean cloth. Your spoon is now burnished!
Burnishing a wooden spoon not only elevates its aesthetic appeal but also improves its functionality.
The smooth surface ensures your spoon is gentle on your cooking surfaces and easy to clean.
Now you know all the methods of burnishing wood and how to burnish floors, wooden tables, furniture, and wooden spoon perfectly without any fear.
Now I’m going to share with you some useful tips that I’ve learned over the past few years by burnishing different types of woodworking projects.
These tips will make your burnishing job a lot easier.
Tips for Burnishing Wood
- Select a burnishing tool that’s comfortable to use and suited to your specific project.
- Understand that different burnishing tools yield different results on various wood types.
- Plan to burnish as the last step in your woodworking process, and post any staining or finishing.
- For turned pieces on a lathe, burnish immediately after your final pass with your turning tool.
- Be mindful of the amount of pressure you apply when burnishing.
- Start with lighter pressure and gradually increase it during the burnishing process.
- Ensure that you have a firm grip on both the piece and your burnisher, especially when working with a lathe.
- Always wear safety gear such as protective glasses and gloves while burnishing.
- Practice consistently, as mastering burnishing requires time and patience.
Now I’m going to answer an optional question that was raised in my mind upon writing this post.
What are the Differences Between Sanding and Burnishing?
| Sanding | Burnishing |
| Sanding is typically the first step in finishing a piece of wood. | Burnishing is a process done to polish the wood. |
| Sanding uses sandpaper of varying grit sizes to smooth out the rough spots on the wood’s surface. | Burnishing uses materials like cloth, wood shavings, or a special tool to rub the wood surface vigorously. |
| The goal of sanding is to remove small ridges, splinters, and inconsistencies, creating a smooth, uniform surface. | The goal of burnishing is to compress the wood fibers on the surface to create a shiny, smooth finish. |
| Sanding is a subtractive process, removing wood fibers. | Burnishing is a transformative process, altering the surface fibers. |
| The purpose of sanding is to make the wood surface smoother and to open up the wood’s pores for better absorption of stains, paints, and finishes. | The primary purpose of burnishing is to enhance the aesthetic appeal of the wood by creating an attractive shine and a smooth touch. Burnishing can also slightly harden the surface, providing some extra resistance to wear and tear. |
That’s it, folks! Hope you were able to learn everything you wanted to know about wood burnishing in detail.
Let’s answer some frequently asked questions as well.
FAQs
How does burnishing benefit wood?
Burnishing enhances wood’s natural beauty by improving its shine and smoothness. The process also compresses the wood’s fibers, making it more durable and resistant to wear and tear.
Can all types of wood be burnished?
While most types of wood can be burnished, denser hardwoods like oak, maple, and walnut tend to yield better results due to their tight grain structure.
What tools are required for burnishing wood?
A variety of tools can be used to burnish wood – common ones include steel wool, denim fabric, a hardwood burnisher, and even smooth stones or antlers. Some woodworkers also use specialized burnishing tools or a lathe.
Is burnishing the same as sanding?
No, burnishing and sanding are different processes. Sanding removes wood fibers to smooth out rough surfaces, while burnishing compresses and polishes the wood fibers to create a shiny finish.
What tips can you share for burnishing wood?
When burnishing wood, always move your burnishing tool in the direction of the wood grain. Also, consider applying a burnishing cream or oil for an extra smooth and shiny finish.
Did I cover all you wanted to know about: Burnishing Wood?
In this article I’ve deeply discussed what is burnishing wood, why is it done and what are the importance of burnishing wood.
Plus, I’ve mentioned 6 different wood burnishing techniques with practical applications of each and useful tips to make your burnishing project a lot easier.
Burnishing wood involves friction-based polishing to enhance the finish and durability. The process involves running a smooth, hard object across the wood grain repeatedly, generating heat that compresses the wood fibers. Common tools include steel wool, sandpaper, or even a natural antler or stone.
Furthermore, I’ve answered some frequently asked questions as well.
Hope you learned all you wanted to know about wood burnishing. Practice the methods that I mentioned regularly to become a pro and burnishing wood and enhance the appearance of your loving projects.