Can particle board be stained? Curious about the process? Discover the secrets to transforming this affordable material into an eye-catching and stylish surface!

Staining particle board might seem like a daunting task, but with the right guidance and a touch of creativity, you can transform this humble material into a stunning piece of functional art.
Particle board, an affordable and versatile wood product, is found in many of our homes, gracing our furniture, cabinetry, and flooring. Yet, its appearance often lacks the warmth and charm of natural wood, leaving us craving a more refined finish.
Once I was curious about staining my particle board cabinet and floor and did deep research about it to be more familiar with it.
Here’s what I’ve learned. So, let’s find out, Can you stain particle board?
Yes, you can stain particle board so well since it is a very porous material with lots of tiny holes to absorb stain. Apply a thin coat of stain over the particle board and remove excess for a uniform finish. To stain particle board, apply primer first if necessary to get an even stain finish.
Enter the world of staining!

Not only will this technique enhance the aesthetics of your particle board pieces, but it will also provide a layer of protection to extend their lifespan.
So, if you’re ready to embark on a journey that melds practicality with style, keep reading this comprehensive guide on staining particle board.
With a sprinkle of perseverance and a dash of patience, you’ll unlock the secrets to mastering this skill, infusing your space with a touch of elegance that only a seasoned woodworker could achieve.
Let’s dive in!

What Is A Particle Board?
Before diving into the staining process, it’s essential to understand the material we’re working with.
Particle board, sometimes referred to as chipboard, is an engineered wood product composed of wood chips, sawdust, and adhesive materials.
These components are compressed under high pressure and heat to create a durable and uniform panel.

Composition and Manufacturing Process Of Particle Board
The composition of particle board is primarily wood waste, such as wood chips, sawdust, and shavings.
These materials are mixed with a synthetic resin or other bonding agents and then subjected to heat and pressure.
The result is a dense, flat panel with a relatively smooth surface, making it an ideal candidate for staining and refinishing.

Uses of Particle Board
Particle board’s affordability and workability have made it a popular choice for various applications in both residential and commercial spaces.
Some common uses of particle board include:
- Furniture: Due to its low cost and ease of machining, particle board is often used in the manufacturing of affordable furniture, such as bookshelves, desks, and cabinets.
- Cabinetry: Particle board is a prevalent material for constructing kitchen and bathroom cabinets, as it can be easily cut and assembled to fit various designs.
- Flooring: Many types of engineered flooring, including laminate and luxury vinyl planks, use particle board as a core material, providing a stable and cost-effective base.
Read to know, Painting Engineered Wood (6-Step EASY Guide!)

Advantages and Disadvantages of Particle Board
Understanding the pros and cons of particle board will help you make informed decisions about your staining project and set realistic expectations for the final result.
Advantages Of Particle Board
- Affordability: Particle board is significantly cheaper than solid wood or plywood, making it an attractive option for budget-conscious projects.
- Workability: Particle board is easy to cut, drill, and assemble, allowing for faster project completion times.
- Availability: Particle board is widely available in various thicknesses and sizes, making it accessible for all kinds of woodworking projects.
Disadvantages Of Particle Board
- Moisture Sensitivity: Particle board can be susceptible to moisture and humidity, causing it to swell or deteriorate if not adequately sealed and protected.
- Lack of Strength: Particle board is not as strong as solid wood or plywood, which may limit its suitability for heavy-duty applications or structural components.
- Lower-Quality Appearance: The surface of the untreated particle board lacks the natural grain patterns and warmth of solid wood, giving it a less appealing aesthetic.
Now that we have a solid understanding of particle board and its characteristics, we can delve into the art of staining this versatile material.

Read on to discover how to choose the right stain and prepare your particle board for a stunning transformation.
Reasons for Staining Particle Board
As you embark on your staining journey, it’s essential to know why staining particle board is an excellent choice for enhancing both its aesthetics and functionality.
Here’re some reasons for staining particle board,
- Aesthetic appeal
- Provide protection.
- To match existing woodwork
Let’s explore those top reasons for staining particle board and how they can add value to your projects.
1. Aesthetic Appeal
The natural charm of wood, with its unique grain patterns and warm hues, is often a sought-after look for furniture, cabinetry, and flooring.
While particle board doesn’t inherently possess these qualities, staining it can bring that touch of elegance to an otherwise plain surface.
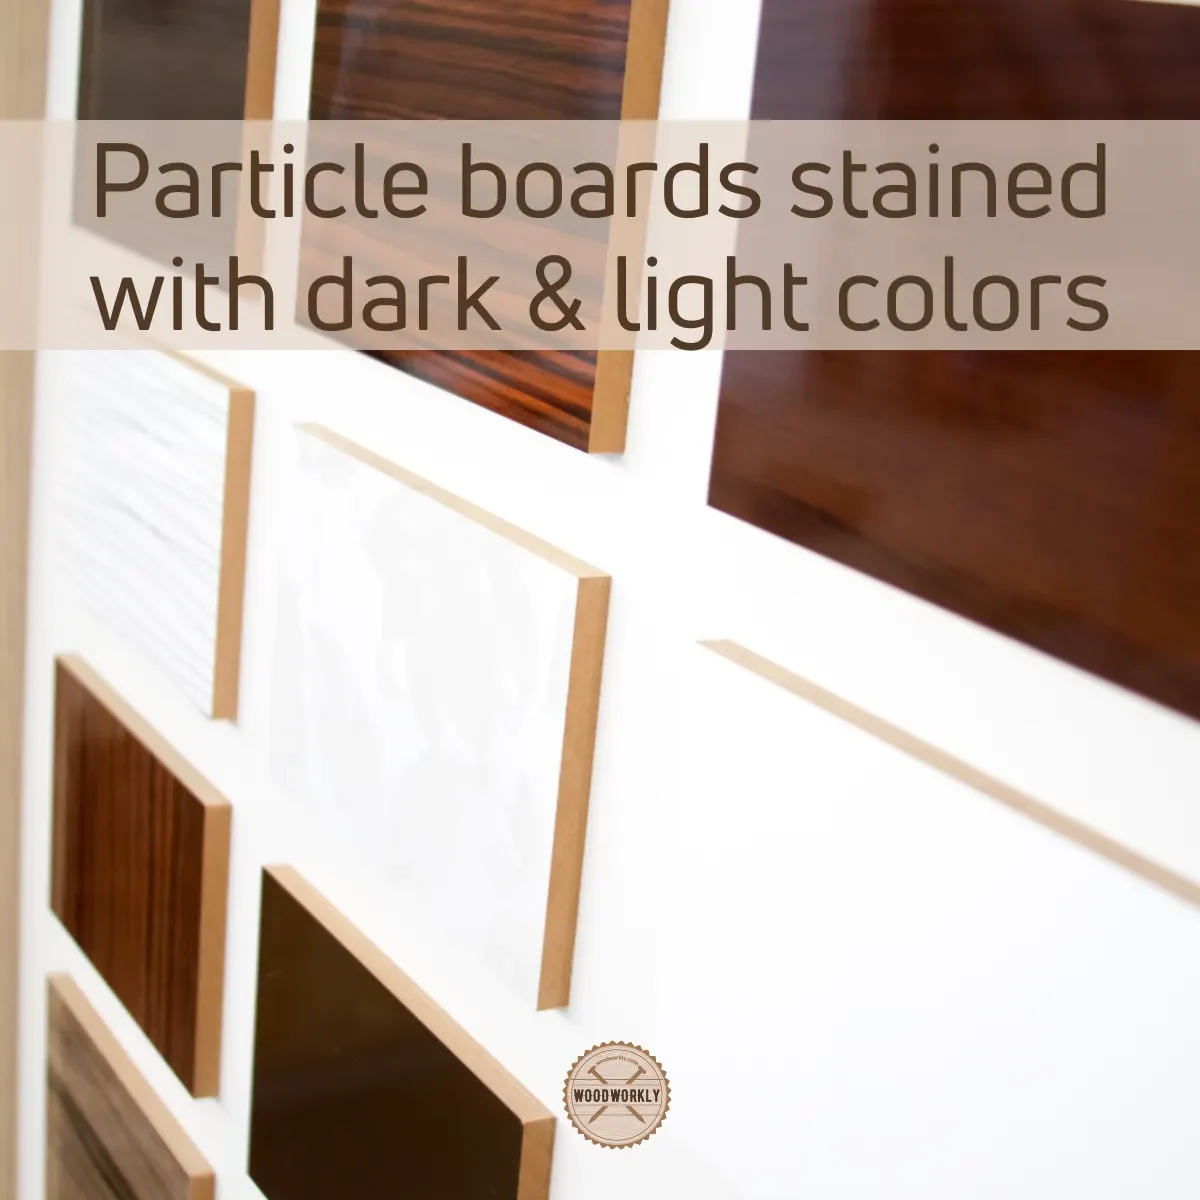
By selecting the right stain color and finish, you can mimic the appearance of various wood species or create a custom look that complements your interior design.
For example, imagine transforming a simple, particle board bookshelf into a centerpiece that emulates the rich, deep tones of walnut or the warm, golden hues of oak, instantly elevating your space.

2. Provide Protection
Particle board can be vulnerable to moisture and wear, especially in high-traffic or humid areas. Staining not only enhances the appearance but also provides a protective barrier.
When combined with a suitable topcoat, staining can shield the particle board from moisture, spills, and everyday wear and tear, extending the life of your furniture and surfaces.
Example: In a kitchen setting, stained and sealed particle board cabinets can better withstand the humidity and splashes from daily cooking activities, ensuring they remain in top-notch condition for years to come.

3. Matching Existing Woodwork
Sometimes, the goal is not to create a new look but to harmonize your particle board piece with existing woodwork or furniture in your space.
Staining allows you to match the particle board to the surrounding wood elements, creating a cohesive and visually pleasing environment.
For instance, If you’re adding a particle board storage unit to your living room, which already features cherry wood furniture, staining the particle board with a similar hue will seamlessly blend it into the existing décor.
Staining particle board offers numerous benefits, from elevating its visual appeal to protecting against potential damage.
By selecting the right stain and executing the process with care and precision, you can create a stunning transformation that adds both beauty and value to your home.

Ready to begin? Keep reading for expert tips on choosing the perfect stain and preparing your particle board for success!
Let’s have a look, at how to select the right wood stain for your particle board easily without any confusion.
Choosing the Right Stain for Particle Board
Selecting the perfect stain for your particle board project is a crucial step to ensure a successful outcome.
In this section, we will delve into the different types of stains, explore the vast array of colors and finishes, and discuss the factors to consider when choosing the best stain for your needs.
Armed with this knowledge, you’ll be well-equipped to make an informed decision and create the desired look for your particle board masterpiece.

Types of Stains
There are several types of stains on the market, each with its own set of characteristics and advantages.
Let’s take a closer look at the most common options for staining particle board,
- Oil-based stain
- Water-based stain
- Gel stain
So, let’s discuss each of the above stain types in detail and see how they work with particle board to get our desired results.
Oil-Based Stains
These stains provide excellent penetration and durability, resulting in a rich and long-lasting color.
They tend to dry slowly, allowing for a more extended open time to work with the stain and achieve an even finish.
However, they often emit strong fumes, so proper ventilation is a must.

Water-Based Stains
Water-based stains are eco-friendly and emit fewer fumes than their oil-based counterparts. They dry faster and offer easy cleanup with soap and water.
While they may not penetrate as deeply as oil-based stains, they still provide vibrant color and excellent durability.
Gel Stains
These thick, creamy stains are designed for easy application and minimal dripping.
They’re particularly suitable for vertical surfaces or intricate details.
Gel stains tend to sit on the surface rather than penetrate deeply, which can be advantageous when working with particle board, as it helps to avoid over-absorption.
Particle boards have a highly porous structure and gel stain is great for avoid wood from swelling and to avoid from getting blotchy spots when staining.

Therefore, overall, gel stain is the best stain for particle boards to improve the wood’s appearance with good protection from the elements.
Stain Colors and Finishes
The variety of stain colors and finishes available allows you to tailor your project to your unique style and preferences.
Wide Range of Colors
Stains come in a vast array of colors, from traditional wood tones like oak, walnut, and mahogany, to more unconventional shades like blue, gray, and green.
You can even mix colors to create a custom hue that perfectly matches your vision.
Read this article to get to know more about, mixing wood stains.
Finishes: Matte, Satin, Semi-Gloss, Gloss
The finish you choose determines the sheen of your stained particle board.
Matte finishes provide a subtle, low-sheen look, while satin and semi-gloss finishes offer a moderate shine.
Gloss finishes create a high shine, reflecting more light and accentuating the wood grain.

Factors to Consider When Choosing The Right Stain For Particle Board
To select the ideal stain for your project, consider the following factors,
- Durability of the stain
- Drying time of the stain
- Ease of application
Let’s discuss each of the above factors more to get a good idea about selecting the right type of wood stain for your particle board furniture or woodwork.
1. Durability of the Stain
Choose a stain that provides excellent protection against moisture, wear, and UV light damage, especially if your project will be exposed to harsh conditions or heavy use.

2. Drying Time of the Stain
Consider the drying time of the stain. Faster-drying stains, such as water-based options, can be beneficial for quick projects, while slower-drying stains, like oil-based ones, offer more time to work with and adjust the finish.
3. Ease of Application
Some stains are easier to apply than others. Gel stains, for example, are particularly user-friendly due to their thick consistency and reduced dripping.
Example: For a kitchen cabinet project, you might opt for a water-based stain in a satin finish, providing both durability and a moderate sheen that complements the room’s style.
By carefully considering the type, color, and finish of your stain, as well as factors like durability, drying time, and ease of application, you can confidently choose the right stain for your particle board project.

Next, we’ll guide you through the essential tools and materials needed to achieve a flawless finish.
Tools and Materials To Stain Particle Board
Having the right tools and materials on hand is key to achieving a professional-looking finish when staining particle board.
In this section, we’ll guide you through the essential supplies needed to complete your project successfully, from sandpaper to stain applicators, protective gear, and surface protection.
With a well-stocked toolkit, you’ll be ready to tackle the staining process with confidence and ease.
Here’re the tools and materials you’ll need to stain particle board,
- Sandpaper (coarse grit, medium grit, and fine grit)
- Tack cloths
- Suitable applicator (brush, roller, rags, foam brushes)
- Gloves
- Face mask
- Rags
Check out the Best Brushes For Staining Wood!

Let’s have. a look at each of the above tools and their function during the staining process.
Sandpaper
Sanding is a crucial step in preparing your particle board for staining. Using the right sandpaper grit will ensure a smooth, even surface that readily accepts the stain.
- Coarse grit (60-80): Use coarse grit sandpaper for initial sanding to remove any rough spots or imperfections from the particle board surface.
- Medium grit (100-150): Transition to medium grit sandpaper for smoothing and refining the surface, creating an even texture that’s ready for staining.
- Fine grit (180-220): Employ fine grit sandpaper for final sanding, as well as between topcoat layers to achieve a smooth, polished finish.
Dust Removal
After sanding, it’s essential to remove any dust and debris from the particle board surface, as this can interfere with the stain’s adhesion and appearance.
- Tack cloth: A tack cloth is a sticky fabric that picks up and retains dust, making it an excellent tool for wiping down the surface after sanding.
- Vacuum with brush attachment: A vacuum cleaner with a brush attachment can effectively remove dust from crevices and edges, ensuring a clean surface for staining.

Stain Applicators
Applying the stain evenly and consistently is crucial for achieving a professional finish. Consider these applicators for your project:
- Brushes: High-quality brushes, such as those with natural bristles, can provide excellent control and even coverage when applying the stain.
- Rags: Clean, lint-free rags are suitable for applying and wiping off excess stain, allowing you to control the color intensity by adjusting the pressure.
- Foam brushes: These affordable, disposable brushes can be a convenient option for applying stain, especially on flat surfaces or in tight spaces.
Protective Gear
Staining can be a messy process, and it’s essential to protect yourself from spills, fumes, and potential skin irritation.
- Gloves: Wear chemical-resistant gloves to shield your hands from stain and solvents, avoiding potential skin reactions.
- Mask: Use a mask, ideally with a particle filter, to protect yourself from inhaling dust and fumes during sanding and staining.
- Eye protection: Safety goggles or glasses can prevent accidental splashes or debris from entering your eyes while working.
Surface Protection
Protect your workspace from spills and drips by using proper surface protection.
- Drop cloths: Lay down drop cloths or old sheets to cover the floor and any nearby surfaces, catching any accidental spills or splatters.
- Plastic sheeting: Use plastic sheeting to protect walls, appliances, or other items in close proximity to your staining project, ensuring a mess-free workspace.
By gathering the right tools and materials, you’ll be well-prepared for every step of the particle board staining process.

Next, we’ll delve into surface preparation under the staining process, where we’ll discuss techniques for creating the ideal foundation for a stunning stained finish.
How To Stain Particle Board?
Staining particle board is easy if you follow the right procedure. Now you have a good idea about what type of stain you should select and hope you’re equipped with all the tools and materials needed for the staining project.
Here’re the steps you need to follow when staining particle board,
- Surface preparation (inspect particle board, sanding, cleaning)
- Apply primer or sealer
- Apply stain on particle board
- Apply protective topcoat
So, let’s discuss each of the above staining steps of particle board one by one to get a deep view about the application process without getting things messed up.
1. Surface Preparation
Proper surface preparation is the foundation for a flawless, long-lasting stain finish on particle board.
In this section, we’ll discuss the importance of inspecting your particle board for damage, sanding the surface to achieve a smooth texture, and cleaning to ensure a pristine surface for stain application.

By following these essential steps, you’ll set the stage for a successful staining project that showcases your craftsmanship and attention to detail.
1. Inspecting Particle Board
Before you begin the staining process, it’s crucial to thoroughly inspect the particle board for any damage or imperfections that could affect the final appearance.
- Checking for damage or imperfections: Examine the surface for scratches, dents, or holes that may need repair before staining. Also, look for any loose or protruding particles that could create an uneven surface.
Having damage to the particle board may result in a blotchy surface with lots of uneven spots.
Therefore, you should repair and fix the damages on your particle board to get an even looking finish with no issues.
- Repairing dents or holes with wood filler: If you discover any damage, use a high-quality wood filler to patch the area, following the manufacturer’s instructions. Allow the filler to dry and sand it smoothly to create a seamless repair.
For example, You might find a small dent in the corner of your particle board table; filling and sanding it ensures a smooth, even finish after staining.

2. Sanding
Sanding is a vital step in preparing your particle board for staining, as it creates a smooth, even surface that readily accepts the stain and ensures consistent coloration.
- Using appropriate grit sandpaper: Start with coarse grit sandpaper (60-80) for initial sanding, followed by medium grit (100-150) for smoothing, and finally fine grit (180-220) for the final sanding and between topcoat layers.
- Sanding in the direction of the wood grain: Always sand in the direction of the wood grain, as this helps to avoid scratches and ensures an even finish.
- Progressing from coarse to fine grits: Sand the surface progressively, starting with coarse grit and working your way to finer grits. This gradual process will remove any imperfections and create an ultra-smooth surface for staining.

3. Cleaning
Once you’ve completed the sanding process, it’s essential to clean the particle board thoroughly, removing any dust or debris that could interfere with the stain’s adhesion and appearance.
- Removing dust with tack cloth or vacuum: Wipe down the surface with a tack cloth to eliminate fine dust particles. Alternatively, use a vacuum cleaner with a brush attachment to remove dust from crevices and edges.
You can use a proper dust collection pipe system to collect sawdust that releases during the sanding process.
Make sure the surface is completely dust-free before proceeding to the staining process.
By meticulously inspecting, sanding, and cleaning your particle board, you’ll create the perfect foundation for a stunning stained finish that lasts.
Now that your surface is expertly prepared, let’s move on to the actual staining process, where we’ll share tips and techniques for achieving professional results.

2. Apply Primer Or Sealer
Applying primer or sealer before staining the particle board is an optional step. You can avoid using this step if you want.
But, it’s often beneficial to use a primer or sealer to ensure consistent color absorption and a uniform finish.
We’ll discuss the various types of primers and sealers, their benefits, and tips for proper application and drying time.
By taking this extra step, you’ll achieve a professional, even finish that showcases your particle board project to its full potential.
Types of Primers and Sealers
Primers and sealers come in various formulations designed to work with different types of stains and surfaces.
Here are the main types of primers you might consider applying before staining your particle board project,
- Oil-based primer
- Water-based primer
- Shellac-based sealer
So, let’s discuss each of the above primers and sealers separately to get a good knowledge about them before applying them on particle board when staining.
- Oil-based primers: These primers are compatible with oil-based stains and provide excellent adhesion, penetrating the wood fibers to create a solid foundation for the stain.
- Water-based primers: Suitable for use with water-based stains, these primers dry quickly and offer low odor and easy clean-up with soap and water.
- Shellac-based sealers: Known for their fast-drying properties and ability to seal porous surfaces, shellac-based sealers provide a barrier that prevents blotching and uneven color absorption.

Benefits of Using Primer or Sealer Before Staining Particle Board
Applying a primer or sealer to your particle board offers several advantages that can enhance the final appearance of your stained project.
- Enhanced stain absorption: Primers and sealers create a uniform surface that promotes even stain absorption, resulting in consistent coloration across the entire project.
- Reduced blotching and uneven color: By sealing the porous surface of particle board, primers, and sealers help prevent blotching and uneven color distribution, ensuring a smooth and even finish.
For example, Applying a primer to your particle board bookshelf can help prevent dark spots and blotchy areas, achieving a more polished and professional appearance.
Application Techniques and Drying Time Of Primers And Sealers
Proper application and drying time are crucial for obtaining the best results with primers and sealers.
- Brush or foam applicator: Use a high-quality brush or foam applicator to apply the primer or sealer, ensuring a smooth, even coat without brush marks or streaks.
- Thin, even coats: Apply thin, consistent coats of primer or sealer, allowing each layer to dry before adding additional coats if necessary. This prevents drips and ensures a smooth surface for staining.
- Allowing proper drying time according to manufacturer’s instructions: Follow the manufacturer’s recommended drying time for your chosen primer or sealer.
Drying time of primers and sealers can vary depending on factors such as temperature, humidity, and the specific product used.
Allowing adequate drying time ensures a solid foundation for the stain application.
By selecting the appropriate primer or sealer, and applying it with care and attention to detail, you’ll enhance the overall appearance and longevity of your stained particle board project.

With your surface primed and ready, it’s time to dive into the staining process, where we’ll share tips and techniques for achieving a beautiful, even finish.
3. Apply Stain On Particle Board
This is the most important step of staining particle board. Follow the procedure below to stain particle board properly without messing things up.
Here’re the steps you need to follow when staining particle board,
- Stirring the stain
- Apply stain on particle board.
- Wiping off excess stain.
- Let the stain coat dry completely.
- Apply additional stain coats.
I’ll delve into the step-by-step process in detail of staining particle board, from stirring the stain to applying multiple coats for the desired color depth.

By following these expert tips and techniques, you’ll transform your particle board project into a stunning, professional-looking masterpiece.
1. Stirring the Stain
Before you begin applying the stain, it’s essential to ensure that it’s thoroughly mixed for consistent color.
Gently stir the stain with a stirring stick, taking care not to introduce air bubbles until getting an even color. Make sure to reach the bottom and sides of the container to achieve a uniform mixture.
For example, Stirring the stain properly helps prevent color variations, leading to a more professional-looking finish on your particle board coffee table.

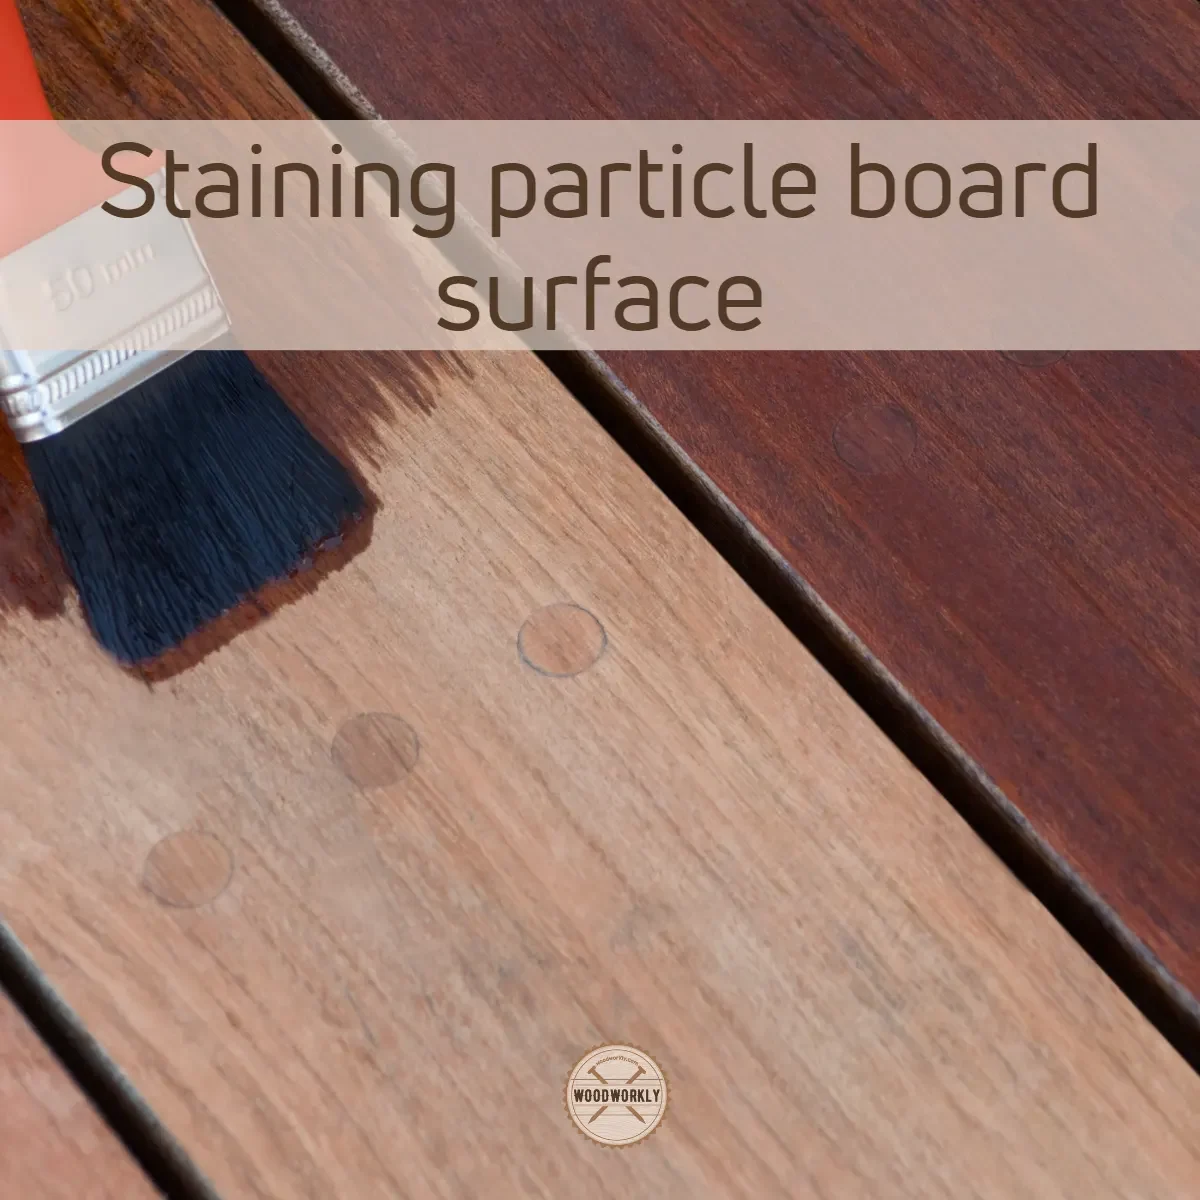
2. Apply Stain On Particle Board
The application technique can significantly impact the final appearance of your stained particle board project.
Choose a high-quality brush, rag, or foam applicator suitable for your chosen stain type.
Each applicator has its advantages, depending on the specific stain and desired finish.
Applying along the direction of the wood grain with even pressure. Always apply the stain in the direction of the wood grain to avoid streaks and enhance the natural beauty of the material without making any wood stain mistakes.
Ensuring full coverage without pooling.
Apply the stain evenly across the surface, taking care to avoid pooling or drips. Too much stain can lead to an uneven finish and extended drying times.

3. Wiping Off Excess Stain
Once you’ve applied the stain, it’s essential to remove any excess to ensure uniform color and smooth finish.
Using a clean, lint-free cloth to wipe off and clean the excess stain to get an even finish with a thin coat.
Choose a clean, lint-free cloth to wipe away excess stain gently. This helps prevent debris from contaminating the surface.
Always wipe in the direction of the wood grain to maintain a consistent, natural-looking finish.
4. Let The Stain Coat Dry Completely
Proper drying time is vital for the success of your staining project.
Allowing stain to dry according to manufacturer’s instructions. Follow the drying time guidelines provided by the stain manufacturer.
Factors such as temperature, humidity, and stain type can impact drying times. Drying time can be slow when the environmental humidity is high.
For instance, A dining room table stained with an oil-based stain may require 24-48 hours of drying time before it’s ready for a topcoat or additional stain layers.

5. Apply Additional Stain Coats
The number of stain coats you apply will determine the depth and richness of your final color.
Apply 2 to 3 coats of stain on particle board to get promising results with nice wood color and to get a protective finish.
Applying additional coats as needed for desired color depth. Depending on your desired color intensity, you may need to apply multiple coats of stain.
Allow each coat to dry thoroughly before applying the next, and assess the color between coats to achieve the perfect shade.
By following these expert tips and techniques for the staining process, you’ll create a beautiful, professional finish that showcases the unique qualities of your particle board project.
With your staining complete, it’s time to move on to applying a topcoat to protect and enhance your handiwork.

4. Apply Protective Topcoat on Stained Particle Board
Adding the finishing touches to your stained particle board project can make all the difference in its final appearance and durability.
With these expert tips, you’ll ensure your particle board masterpiece stands the test of time and continues to impress for years to come.
A topcoat not only enhances the look of your stained particle board but also protects it from wear, moisture, and other environmental factors.
- Choosing the right topcoat: Consider factors like durability, sheen, and compatibility with your chosen stain when selecting a topcoat. Options include polyurethane, polycrylic, varnish, or lacquer.
- Application techniques: Use a high-quality brush, foam applicator, or spray gun to apply thin, even coats of the topcoat, following the wood grain direction. Avoid drips and brush marks for a professional finish.
- Number of coats: Apply two or three coats of topcoat, allowing each to dry thoroughly and lightly sanding with fine-grit sandpaper between layers for a smooth, long-lasting finish.
Example: A particle board bookcase finished with three coats of satin polyurethane will have a durable, attractive finish that resists wear and moist

That’s it, folks! Now you know exactly how to stain particle board using the correct techniques.
Cleaning And Maintenance Of Stained Particle Board
With regular cleaning and proper maintenance, you will be able to keep your stained particle board for a long time without damaging the stain coat and the wood underneath.
Taking care of your stained particle board to ensure its longevity and maintain its pristine appearance.
We can discuss the cleaning and maintenance of stained particle board under following categories,
- Regular cleaning.
- Preventing damage.
- Repairing minor damage.
So, let’s discuss each one of them in detail to keep your stained particle board clean with good maintenance.
1. Regular Cleaning
Consistent and proper cleaning is vital for maintaining the beauty of your stained particle board.
Here’s what you need to know:
- Dusting: Regularly remove dust and debris using a soft, dry cloth or a duster. Avoid using harsh materials that could scratch the surface.
- Wiping with a damp cloth: For more thorough cleaning, use a slightly damp cloth to wipe the surface gently. Always avoid using excessive water or soaking the particle board, as it can cause damage.
- Using gentle cleaners: If needed, use a mild detergent diluted in water for cleaning stubborn stains or spills. Rinse with a damp cloth and dry the surface immediately afterward. Steer clear of abrasive cleaners and harsh chemicals that could damage the finish.

2. Preventing Damage
To keep your stained particle board in top-notch condition, it’s crucial to take preventive measures:
- Using coasters, placemats, or pads: Protect your particle board surfaces from heat, moisture, and scratches by using coasters for drinks, placemats for dining, and pads for writing or other activities.
- Avoiding exposure to excessive heat and moisture: Keep your particle board furniture away from direct heat sources, such as radiators, and avoid placing hot items directly on the surface. Additionally, protect your particle board from moisture by promptly wiping spills and keeping it away from damp areas.
- Rearranging furniture or decorations: Periodically rearrange your furniture or decorative items to prevent uneven fading caused by sunlight exposure. This will help maintain consistent color throughout the surface.

3. Repairing Minor Damage
Even with the utmost care, accidents can happen. Here’s how to address minor damage to your stained particle board:
- Touch-up pens or stain: If you notice small scratches or blemishes, touch-up pens or a little bit of matching stain can help conceal the imperfections. Apply carefully and follow the manufacturer’s instructions.
- Reapplying topcoat as needed: Over time, the protective topcoat may wear down, especially in high-traffic areas. In such cases, consider lightly sanding the surface with fine-grit sandpaper and reapplying a topcoat to restore the finish and protect the particle board.
Caring for your stained particle board is essential for preserving its beauty and extending its lifespan.
By following these cleaning and maintenance tips, you’ll be able to enjoy your particle board furniture and surfaces for years to come.

Troubleshooting and Common Mistakes During Staining Particle Board
Staining particle board can be a rewarding process, but it can also be fraught with challenges.
To help you navigate the process with ease, I’ll share some common mistakes and troubleshooting tips.
Here’re some common mistakes that could occur when staining particle board,
- Inadequate surface preparation
- Applying stain incorrectly
- Drying time issues
- Topcoat problems
So, let’s discuss each of the above common mistakes in detail and find out the troubleshooting solutions for each one of them.
1. Inadequate Surface Preparation
One of the most significant issues when staining particle board is neglecting proper surface preparation.
Here are some crucial aspects to consider:
- Not sanding sufficiently: Insufficient sanding can lead to an uneven or blotchy finish. Ensure that you sand the surface thoroughly, progressing from coarse to fine grits, to create a smooth and even base for the stain.
- Failing to remove dust and debris: Dust and debris can interfere with stain absorption and mar the finish. Always clean the surface using a tack cloth or vacuum with a brush attachment before applying any stain.

2. Applying Stain Incorrectly
Another common issue is the improper application of stain.
To avoid this, pay attention to the following tips:
- Not stirring the stain properly: Inadequate mixing can lead to inconsistent color. Stir the stain thoroughly to ensure even pigment distribution throughout the can.
- Using a poor-quality applicator: A low-quality brush, rag, or foam applicator can leave streaks, bristles, or lint on the surface. Invest in a high-quality applicator for a smooth and even finish.
- Applying too much or too little stain: Over-applying stain can cause pooling or an overly dark finish, while using too little may result in uneven coverage. Apply a thin, even layer of stain and follow the manufacturer’s instructions for the best results.
3. Drying Time Issues
Drying time plays a critical role in the staining process.
To avoid complications, keep the following points in mind:
- Not allowing enough time for the stain to dry: Rushing the drying process can lead to a tacky surface and poor adhesion of the topcoat. Allow the stain to dry according to the manufacturer’s instructions before moving on to the next step.
- Applying a topcoat or additional stain coats too soon: Applying additional layers before the previous coat has dried can cause an uneven finish and poor adhesion. Patience is key; always wait for each coat to dry completely.

4. Topcoat Problems
The topcoat protects the stain and adds durability to the particle board surface.
Avoid these common topcoat mistakes:
- Choosing the wrong topcoat: Select a topcoat that is compatible with your stain type (oil-based, water-based, or gel). Consult the stain manufacturer’s recommendations if you’re unsure.
- Applying topcoat unevenly or with visible brush marks: Apply thin, even coats of topcoat, using long and smooth brush strokes in the direction of the wood grain. This technique helps minimize visible brush marks and ensures an even finish.
- Not applying enough coats for adequate protection: Depending on the use and location of the particle board, multiple coats of topcoat may be required for optimal protection. Follow the manufacturer’s recommendations for the number of coats needed.

Tips to Avoid Common Mistakes During Staining Particle Board
- Following manufacturer’s instructions: Adhering to the instructions provided by the stain and topcoat manufacturers is essential for achieving a successful finish.
- Testing stain on a scrap piece of particle board: Before applying the stain to your project, test it on a scrap piece of the same material. This will give you an idea of the color and finish you can expect, allowing you to make adjustments if necessary.
- Taking your time and being patient throughout the process: Staining particle board requires patience and attention
By following the above tips and troubleshooting steps you can achieve promising results with your stained particle board.
Let’s answer some frequently asked questions under, can you stain particle board.
How To Stain Particle Board To Look Like Wood?
- Surface preparation: Sand the particle board, starting with coarse grit sandpaper (60-80), progressing to medium grit (100-150), and finishing with a fine grit (180-220). Sand in the direction of the wood grain.
- Clean the surface: Remove dust and debris using a tack cloth or vacuum with a brush attachment.
- Apply primer or sealer: Using a brush or foam applicator, apply a thin, even coat of a wood primer or sealer to enhance stain absorption and reduce blotching. Allow it to dry according to the manufacturer’s instructions.
- Stir the stain: Mix the wood stain thoroughly to ensure even color distribution.
- Apply the stain: Use a brush, rag, or foam applicator to apply the stain in the direction of the wood grain, ensuring full coverage without pooling.
- Wipe off excess stain: Use a clean, lint-free cloth to wipe off excess stain in the direction of the grain.
- Allow to dry: Let the stain dry according to the manufacturer’s instructions. Apply additional coats if needed for the desired color depth.
- Apply a topcoat: Choose a compatible topcoat (matte, satin, semi-gloss, or gloss) and apply thin, even coats in the direction of the wood grain. Allow each coat to dry according to the manufacturer’s instructions.
Follow the above steps carefully to stain your particle board just like wood.

How Many Coats Of Stain Should Apply On Particle Board?
The number of coats of stain you should apply on particle board depends on the desired color depth and the type of stain you’re using.
Typically, one or two coats of stain on the particle board should be enough to achieve the desired effect.
However, you may need additional coats if you want a darker or richer color.
Always allow each coat to dry according to the manufacturer’s instructions before applying the next one.
It’s essential to test the stain on a scrap piece of particle board or an inconspicuous area to ensure you achieve the desired color before staining the entire project.
Can I Use A Brush Or A Roller To Apply The Stain?
Yes, You can use a brush, foam brush, or a rag to apply the stain on particle board.
Brushes and foam brushes provide better control and help you apply the stain evenly. Rags work well for wiping on and off the stain, especially for larger surfaces.
Using a roller is generally not recommended for staining particle board, as it may result in uneven application and excessive stain pooling on the surface.
Stick to brushes, foam brushes, or rags for the best results when staining particle board.
How Long Does It Take For The Stain To Dry On Particle Board?
The drying time for the stain on particle board can vary depending on the type of stain, environmental factors (such as temperature and humidity), and the thickness of the application.
Generally, you’ll have to wait 4 to 24 hours to dry the stain on particle board. But it’s essential to check the manufacturer’s instructions for the specific drying time of the product you’re using.
Always allow the stain to dry fully before applying additional coats or a topcoat to ensure a smooth and even finish.

Can I Apply A Polyurethane Finish Over The Stained Particle Board?
Yes, you can apply a polyurethane finish over the stained particle board.
Polyurethane is a popular choice as a protective topcoat because it adds durability and enhances the appearance of the stain.
Before applying the polyurethane, ensure the stain is completely dry according to the manufacturer’s instructions.
Apply the polyurethane in thin, even coats using a brush or foam applicator, following the direction of the wood grain.
Allow each coat to dry as recommended by the manufacturer, and lightly sand between coats using fine-grit sandpaper for a smooth finish.
Can you stain MDF particle board?
Yes, you can stain MDF (Medium Density Fiberboard) particle board, but the process is slightly different than staining regular particle board.
MDF is more porous and less textured, so it may not absorb the stain as evenly.
Here’re the steps you need to follow when staining MDF particle board,
- Surface preparation: Lightly sand the MDF surface with fine-grit sandpaper (180-220 grit) to create a slightly rough texture for better stain adhesion.
- Apply a pre-stain wood conditioner: This helps create a more even surface for the stain to adhere to and reduces blotchiness.
- Apply the stain: Use a brush, foam brush, or rag to apply the stain in thin, even layers, working in the direction of the wood grain.
- Wipe off excess stain: Use a clean, lint-free cloth to remove any excess stain.
- Allow to dry: Follow the manufacturer’s instructions for drying time.
- Apply a topcoat: Choose a compatible topcoat, such as polyurethane, to protect the stained MDF and enhance its appearance.
Keep in mind that MDF may not provide the same wood-like appearance as regular particle board when stained, but you can still achieve an attractive finish by following these steps.
How To Stain Particle Board Floors and Cabinets?
Staining particle board floors and cabinets follow a similar process.
Here’re the steps you need to follow when staining particle board floors and cabinets:
- Surface preparation: Remove any dirt, dust, and debris from the floors or cabinets. Sand the particle board surfaces with appropriate grit sandpaper, progressing from coarse to fine grits. Vacuum or use a tack cloth to remove any sanding dust.
- Apply primer or sealer (optional): Applying a primer or sealer can help the stain absorb more evenly and reduce blotchiness. Choose a compatible primer or sealer and apply it with a brush or foam applicator. Allow it to dry according to the manufacturer’s instructions.
- Apply the stain: Use a brush, foam brush, or rag to apply the stain evenly on the floors or cabinets, working in the direction of the wood grain. Make sure to reach all corners and edges.
- Wipe off excess stain: Use a clean, lint-free cloth to remove excess stain, wiping in the direction of the grain.
- Allow to dry: Let the stain dry according to the manufacturer’s instructions.
- Apply additional coats (if needed): For a deeper color, apply additional coats of stain, allowing each coat to dry before applying the next.
- Apply a topcoat: To protect and enhance the stained particle board floors or cabinets, apply a compatible topcoat such as polyurethane, following the manufacturer’s instructions for drying time and application methods.
Remember to protect surrounding surfaces with drop cloths or plastic sheeting and ensure proper ventilation during the staining process.

Did I cover all you wanted to know about: Can You Stain Particle Board?
In this article, I’ve deeply discussed, can you stain particle board and how to stain particle board like a pro with all the essential steps tips, and techniques that are useful to follow.
You can stain particle board to achieve a wood-like finish. Prepare the surface by sanding and cleaning, then choose a suitable stain. Optionally, apply a primer or sealer for even absorption. Apply the stain, wipe off excess, and let it dry. Finish with a protective topcoat for lasting beauty.
Furthermore, I’ve answered some frequently asked questions as well.
Follow our guide for a stunning result on particle board floors, cabinets, and furniture. Try and practice by yourself to get amazing results. Happy staining!