Ever tried painting wood only to watch your hard work bubble and peel? Could moisture be the culprit? Let’s dive in and find out!
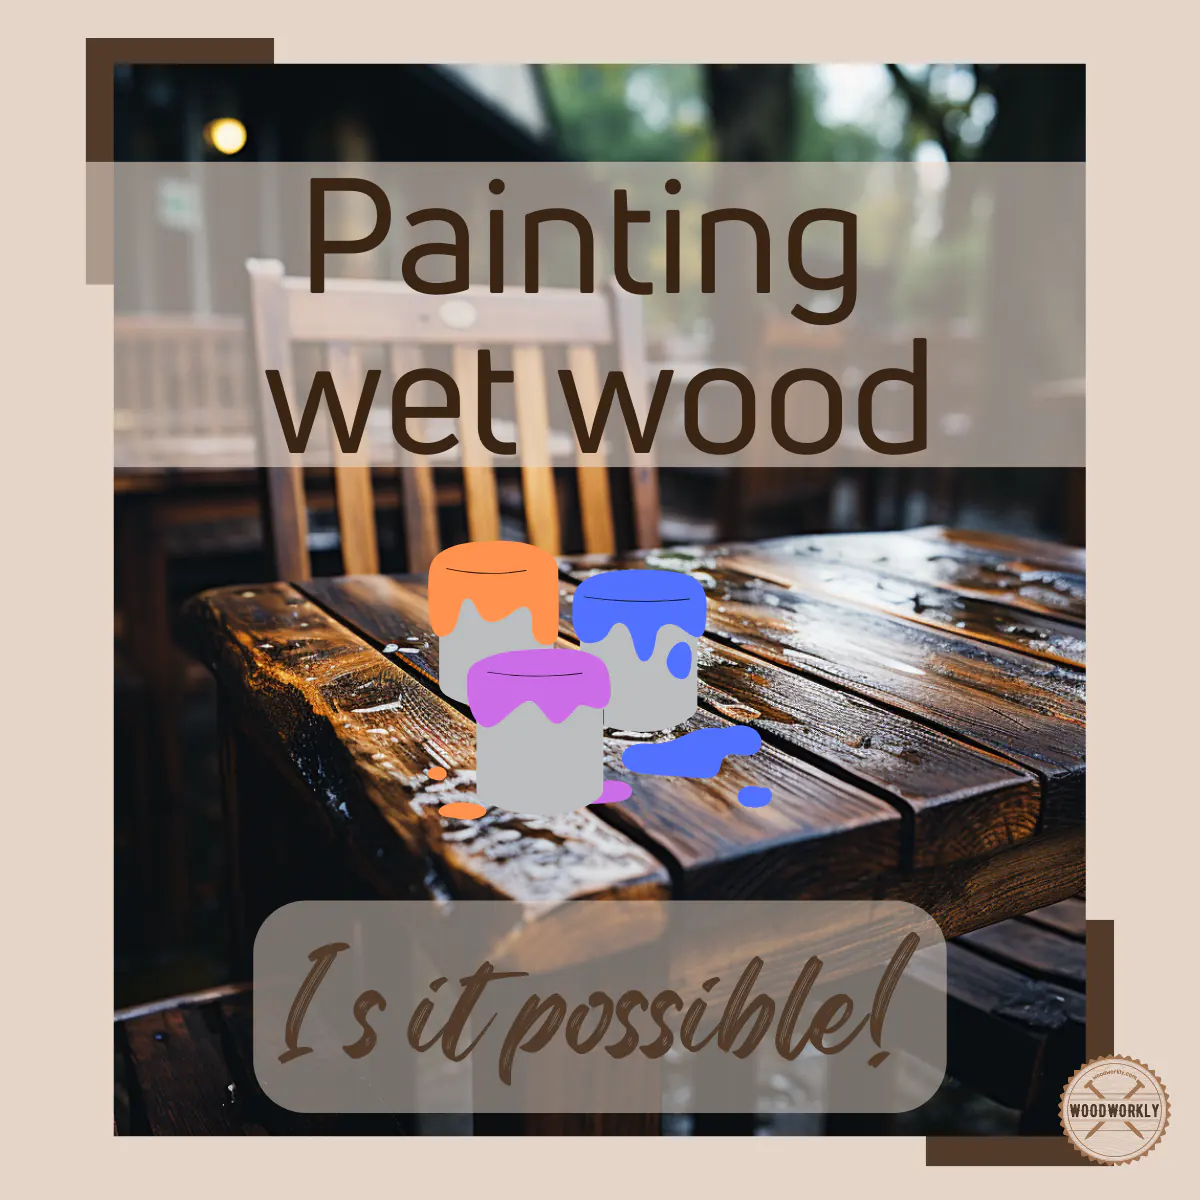
Painting wet wood may not be as simple as you think. Although it is technically possible to apply paint to wet wood, it is generally not recommended for several important reasons.
Are you aware of the challenges of painting wet wood that affect the quality and durability of your paint job?
However, in my history of woodworking, a question I often get asked is whether it is okay to paint wet wood and how to do so properly without ruining the paint surface.
In search of the perfect answer, I consulted experts who have worked with painted wood since 1995.
Now, with years of experience, I am ready to share my two cents on the capabilities and techniques for painting wet wood

Let’s find out, Can you paint wet wood?
No, you cannot paint wet wood effectively as moisture prevents paint from adhering properly. To paint wet wood, it must first be dried until the moisture content is below 15%. Use a moisture meter to check, and once dry, apply a suitable primer before painting.
I know right now you are running into some issues.
Okay, don’t worry!
I will tell you clearly about all these matters.
If you have come today to learn about wet wood painting I believe this article will be of great help to you.
In this article, I will walk you through the step-by-step process of applying paint to wet wood to ensure proper adhesion and a smooth finish.
Additionally, this article will look at why painting wet wood can be problematic and provide insight into the essential factors to consider when working with wet wood.
So, let’s explore the intricacies of painting on wood, including how paint interacts with wood, the impact of moisture levels, and key considerations before, during, and after painting on wood.
Let the journey begin!

Can You Paint Wet Wood?
Yes, you can paint wet wood but it is generally not recommended due to several important reasons.
You will face several challenges when painting wet wood. Keep in mind that these challenges can affect the quality and durability of your paint job.
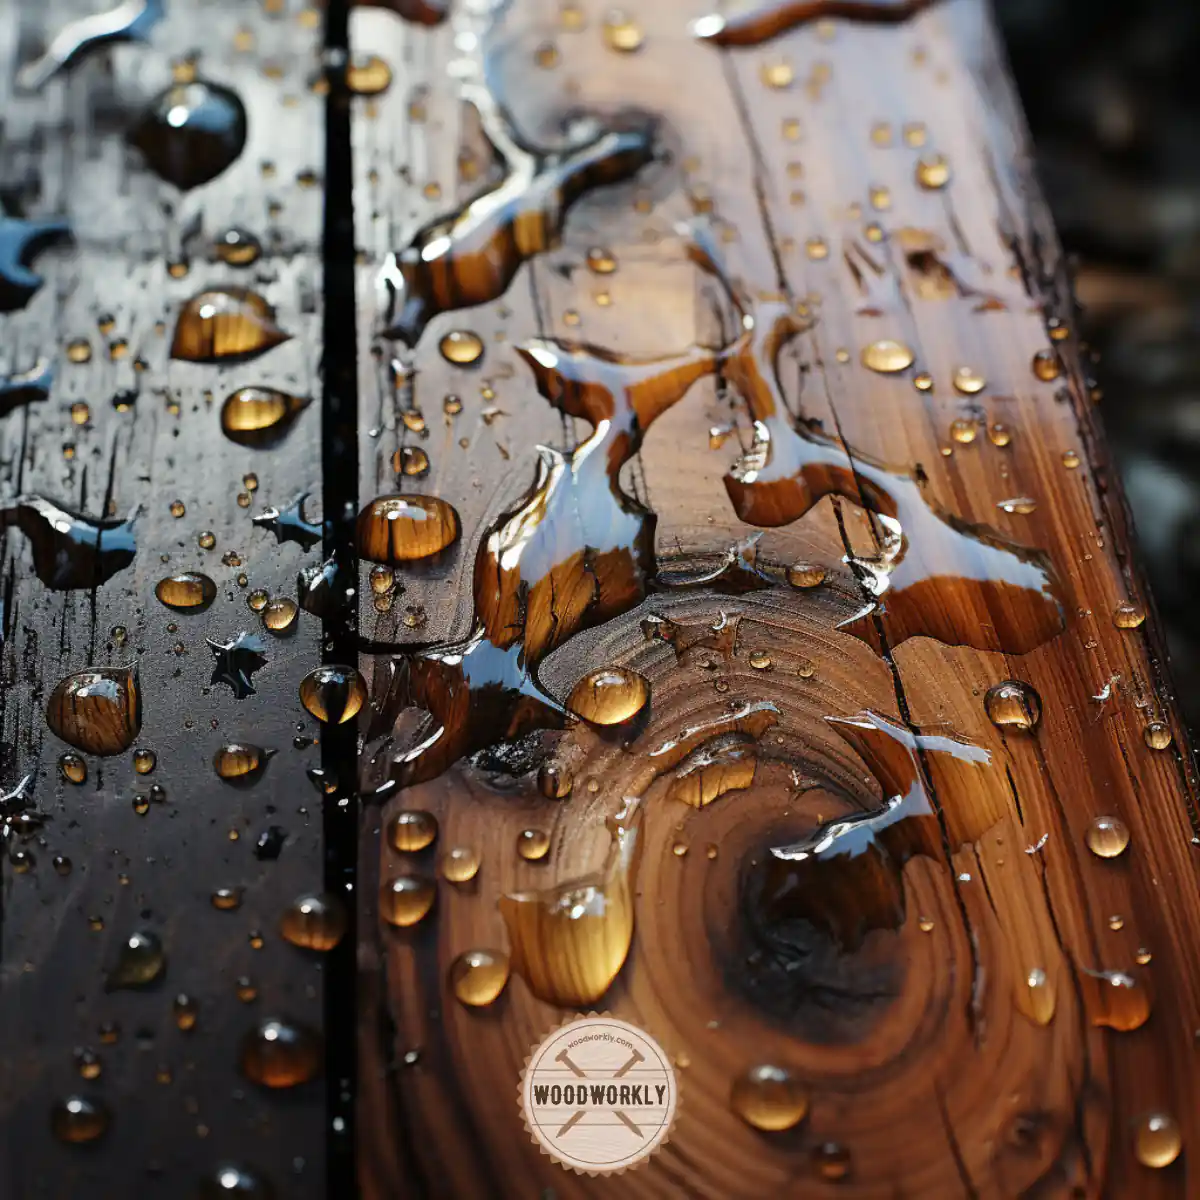
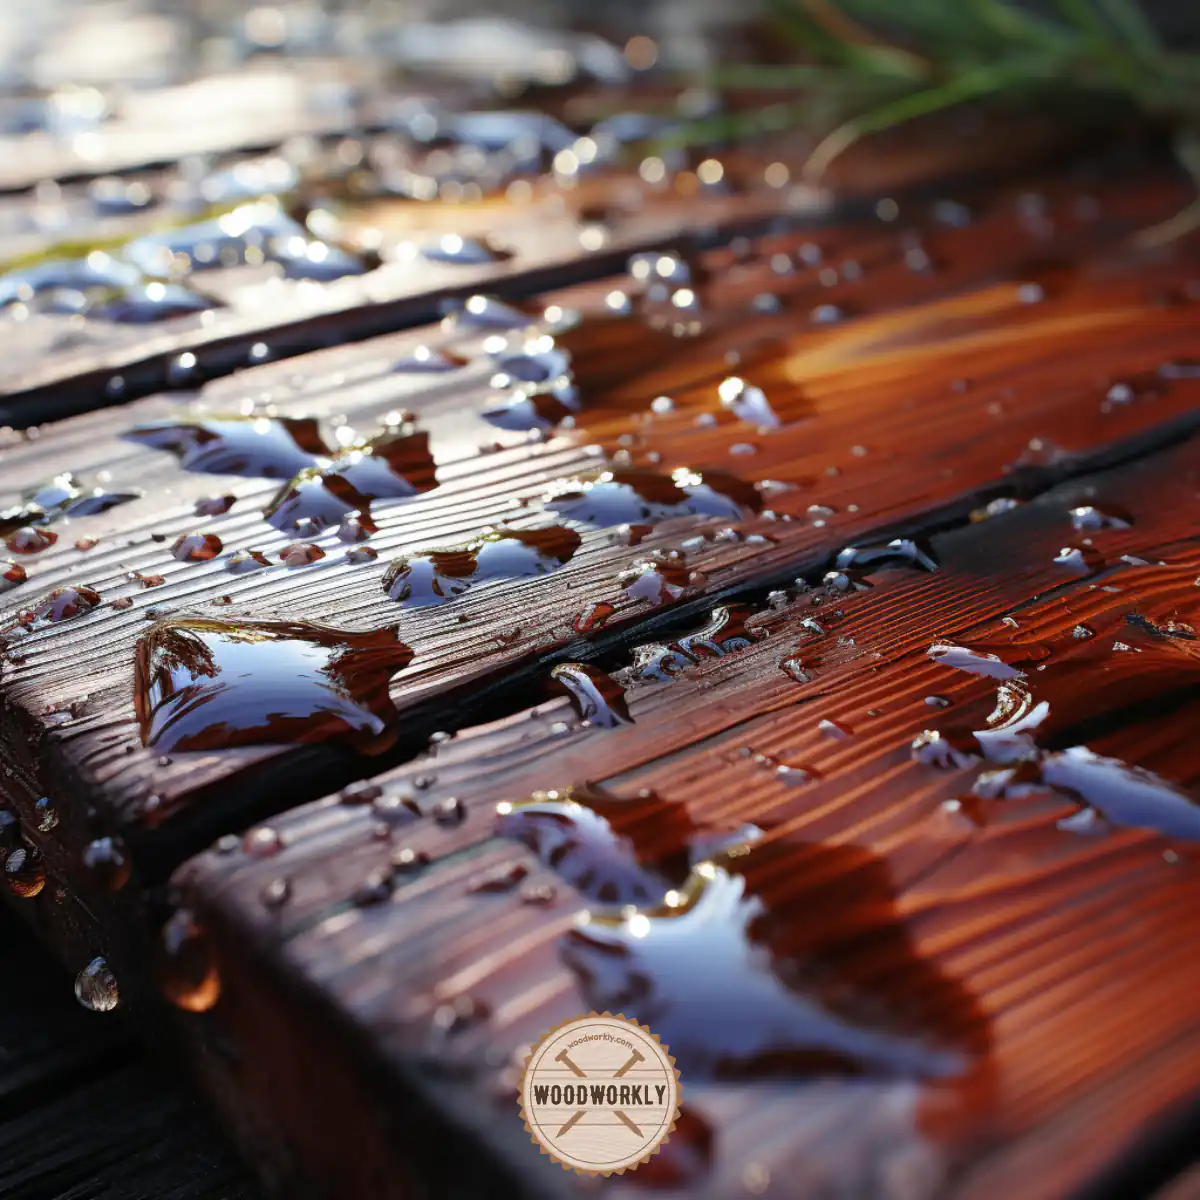
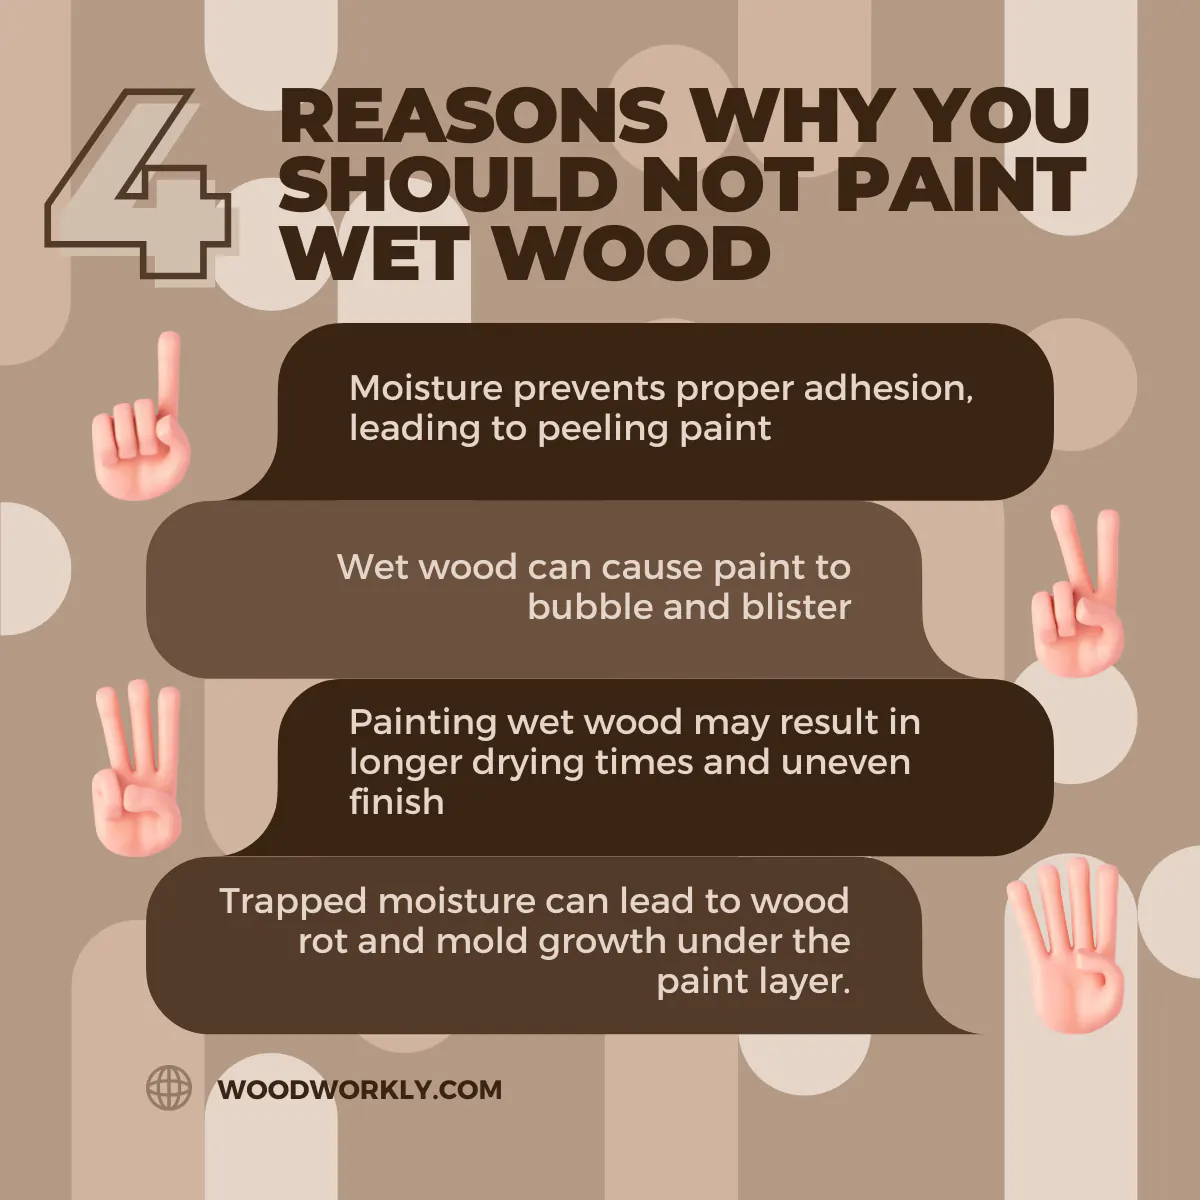
Generally, when wood is wet it contains more moisture, which can interfere with paint adhesion.

When you paint wet wood, the moisture can prevent the paint from properly bonding with the surface, resulting in problems like cracking, peeling or blistering over time.
Always remember that good adhesion is essential for long-lasting paint.
Another problem with painting wet wood is that it can lead to uneven coverage.
The excess moisture in the wood can cause the paint to apply unevenly, leading to areas with varying thicknesses of paint. This can result in a less-than-professional finish with visible inconsistencies.
What’s more, painting wet wood can create an environment for mold and mildew to grow.
When paint traps moisture beneath its surface, it provides ideal conditions for these unwanted microbes to thrive.
This not only damages the paint but can damage the integrity of the wood. You should be aware that mold and mildew can pose health risks and further degrade the quality of wood.
The long-term durability of the paint coating is also compromised when working with wet wood. Even if the paint looks acceptable at first, it can deteriorate quickly.
It is worth remembering that the combination of poor adhesion, uneven coverage, and moisture-related problems can significantly reduce the life of the paint, leading to the need for frequent repainting.
I can remind you that although it is technically possible to paint wet wood, it is generally advisable to wait for the wood to dry thoroughly.

How Does Paint Work on Wood?
Painting wood involves a complex process that goes beyond simply adding color to the surface.
Understanding how paint works on wood will help you achieve the best results and ensure the longevity of your project.
I’ll now share with you some key points about how paint interacts with wood.
Adhesion
By now you are well aware that the first step in painting wood is to ensure that the paint adheres properly to the surface.
Paints are formulated with adhesive properties to bond with wood.
When you apply paint, this glue helps it stick to the wood surface, creating a lasting bond. The smoother and cleaner the wood surface, the better the paint will fit.
Protection
The paint acts as a protective barrier for the wood. It protects the wood from environmental factors such as moisture, UV rays, and temperature fluctuations.
This protective layer helps prevent the wood from rotting, warping, or rotting, thereby extending the life of the wood.
Coverage
The opacity of the paint allows it to effectively cover the underlying surface. The wood may have imperfections, knots, or color variations.
The paint gives a uniform and consistent appearance and hides these irregularities and gives a polished finish.
Color and Aesthetics
Paint is a versatile tool for achieving desired color and aesthetics on wood. It allows you to personalize the look of the wood to suit your decor, style, or project needs.
Whether you want a natural wood look, a vibrant color, or a distressed finish, I’m sure paint will help you achieve the desired effect.
Sealing and Waterproofing
The paint serves as a sealant for wood, protecting it from moisture penetration. When wood absorbs moisture, it can swell, warp, and even rot.
Paint creates a waterproof barrier that prevents water from penetrating and damaging the wood.
Finishing Touches
Paint can be used as a finishing touch to improve the appearance and durability of the wood.
This includes applying a varnish, clear coat, or protective finish that gives the paint extra gloss, protection, and longevity.
Surface Preparation
Now you know that it is very important to properly prepare the wooden surface before painting.
Sanding, filling cracks or holes, and applying a primer can improve the paint’s adhesion and ensure a smooth, long-lasting finish.
Read to know, Lacquer Primer For Wood!
Paint Types
Various types of paint are suitable for wood, including oil-based and water-based (latex) paints.
Don’t forget that choosing the type of paint depends on the type of wood, intended use, and personal preference.
Paint on wood is more than a decorative touch, it offers protection, durability, and an opportunity for personalization.
Always keep in mind that understanding the principles of adhesion, protection, and surface preparation will allow you to achieve the best results when working with paint on wood.
Is it OK to Paint Wet Wood?
No, it’s not OK to paint wet wood because painting wet wood can lead to problems such as poor adhesion, uneven coverage, and long-term durability issues.
Do not forget that it is essential to wait until the wood is completely dry before applying the paint for a successful and long-lasting paint job.
Why Painting Wet Wood is Problematic?
You already know that painting wet wood should not be done.
So, now let’s see what are the reasons for not doing wet wood painting.
1. Impact on Wood Moisture Levels
A primary reason to avoid painting wet wood is that excessive moisture can have adverse effects on the wood itself.
Moisture in wood can cause it to warp, which can lead to structural problems and aesthetic problems.
Even if you choose a water-based latex paint that is compatible with wet wood, the wood must be thoroughly dried to an acceptable moisture level to avoid these problems.
2. Uncertainty about Moisture Levels
You may find it challenging to determine the correct moisture level for the wood before painting.
The ideal moisture content can vary depending on the type of wood and the type of paint used.
Using wood with too much moisture can cause a weak bond between the wood and the paint, making the paint job less durable.
3. Decreased Bonding with Paint
Normally, some fibers absorb water when the wood is wet. This means that less wood fibers are available to absorb and bind the paint.
Decreasing this bond can lead to premature peeling of the paint, which not only results in dirt but also reduces the durability of the paint.
4. Risk of a Sloppy Finish
Working with wet wood often results in sloppy paint jobs, regardless of the painter’s skill level. Excess moisture prevents the paint from bonding properly with the wood surface.
As a result, the paint sits on the surface and can result in a less-than-professional finish. This can lead to chipping and less durable paint after the wood dries.
5. Thinning of Latex Paint
Even if you choose latex paint, always remember that it is essential to dry the wood thoroughly before painting.
The moisture in the wood can mix with the paint and thin it, leading to a runny, dripping paint application.
This not only causes poor coverage but also results in a washed-out and unappealing appearance once the paint dries.
6. Unsightly Bubbles
The paint’s interaction and mixing with the wood’s moisture can also produce inconsistent bubbles in the paint.
These bubbles can affect the final appearance of the paint coating, making it less desirable.
7. Increased Risk of Rot and Wood Deterioration
One of the most significant risks of painting wet wood is the possibility of wood rot.
When paint is applied to wet wood, it creates a waterproof seal around the wood. This seal can trap moisture in the wood and prevent it from drying out naturally.
Don’t forget that over time, with changes in temperature and humidity levels, trapped moisture can cause wood to rot and deteriorate.
Furthermore, the constant expansion and contraction of moisture inside the wood can cause cracks and warping.
This, in turn, causes the paint to chip and distort the wood, while further reducing the overall quality of the paint job.
Painting wet wood is not ideal due to a variety of issues ranging from poor bonds and uneven finish to possible wood rot and structural damage.
My recommendation is that in order to get a durable and professional paint job, it is very important to ensure that the wood is dry and well-prepared.

Can You Paint Wood After Rain?
No, painting wood after exposure to rain is generally not recommended.
The reason for this is that rain can increase the moisture content of the wood, which can cause several problems during painting.
First, the excess moisture can hinder the adhesion of paint to the wood surface. This can result in poor bonding, which may lead to issues like peeling, flaking, or blistering over time.
Second, painting wood after rain can result in uneven coverage. The moisture in the wood can cause the paint to apply inconsistently, leading to areas with varying thicknesses of paint.
Additionally, the trapped moisture under the paint can create an environment conducive to mold and mildew growth, which not only damages the paint but can also compromise the wood’s integrity.
Lastly, the paint can trap the moisture inside the wood, preventing it from drying properly. This trapped moisture can lead to wood rot and deterioration over time.
I am sure it is best to wait for the wood to dry thoroughly before painting to achieve a successful and long-lasting paint job.
Check out to know, How Long Does Wet Wood Take To Dry? (4 Fast Drying Tips!)
Ensures wood is in proper condition for proper adhesion and smooth finish.
Can You Paint Damp Wood?
Yes, you can paint damp wood, but it’s not the ideal choice.
Painting on wet wood can cause problems such as poor adhesion, uneven coverage and long-term durability issues.
For best results and a long lasting finish it is advisable to wait until the wood is completely dry before applying the paint.
Can You Paint Over Water-Damaged Wood?
Yes, you can paint over water-damaged wood, but it’s important to take specific steps to ensure a successful and long-lasting paint job.
Painting over water-damaged wood is a viable option when the wood has been adequately repaired and dried.
I’ll now share with you some facts that you should consider before and after painting over water-damaged wood,
- Before painting, carefully inspect the wood for water damage. Make sure any structural damage, such as rot or decay, is addressed and repaired. Remember that it is very important to replace or repair heavily damaged wood to ensure a strong base for paint.
- Make sure the wood is completely dry before you start painting. You can use a moisture meter for that. A level of 12% or less is generally acceptable for painting. Depending on the extent of water damage, the wood should be allowed to air dry for a sufficient period of time.
- Prepare the wood surface properly. Sand any rough or uneven areas, fill cracks or holes, and ensure the surface is clean and free of debris. If mold or mildew is present, address it with appropriate cleaning solutions before painting.
- Apply a suitable primer to water-damaged wood. Primers help seal surfaces and improve paint adhesion. Choose a primer designed for use on damaged or porous surfaces.
- Choose high-quality paint suitable for your specific needs. Consider using exterior-grade paint if the wood will be exposed to the elements. High-quality paint ensures better coverage and durability.
- Apply the paint following the manufacturer’s recommendations for temperature, humidity and drying times. Use the appropriate tools for your project, such as brushes, rollers or sprayers, to achieve an even and smooth finish.
- After painting, it is essential to monitor the painted surface for further damage or problems. Regular maintenance helps extend the life of paintwork and woodwork.
Check out the Best Spray Paint For Wood!
Ultimately, you can paint over water-damaged wood, but it’s important to repair and dry the wood thoroughly, prepare the surface properly, use the correct primers and paints, and follow proper painting techniques.
I can confidently say that by ensuring that this paint adheres well, you can achieve a visually appealing finish and protection for previously water damaged wood.
Can You Paint or Stain Freshly Cut Green Wood?
No, painting or staining freshly cut green wood is generally not recommended.
Greenwood has a high moisture content, and excess moisture can cause problems with adhesion and drying. Its high moisture content can lead to some challenges when painting or staining it.
I recommend allowing the wood to dry and cure for several months before painting or staining for a more successful and durable finish.
What I am going to tell you now are some key considerations to consider if you are looking to paint or stain freshly cut green wood,
- The high moisture content of green wood can prevent paint or stain from adhering effectively to the surface. Therefore, you will have to think again about the durability of your finish.
- Because green wood tends to dry out and shrink with age, it can cause cracks, warping, and changes in the wood’s appearance. This can result in an uneven and less attractive finish over time.
- The moisture content of green wood creates a favorable environment for mold and mildew growth, especially in humid conditions. This can cause problems under paint or stains that can be dirty and harmful.
- If you paint or stain green wood, the finish may look good at first, but it may deteriorate rapidly as the wood dries and changes. So you may have frequent maintenance and repainting needs.
For best results, I recommend you allow freshly cut wood to season or dry for an appropriate amount of time before applying paint or stain.
Once the wood is sufficiently dry, it can be primed, primed, painted, or stained to achieve a more durable and visually appealing finish.
Remember that proper surface preparation, choosing the appropriate paint or stain, and following the manufacturer’s recommendations for application are essential steps to a successful project.
Factors You Need To Consider Before Painting Wet Wood
Before deciding to paint wet wood, there are several critical factors to consider.
Painting wet wood is not ideal, but if you have no choice, you should keep these key points in mind.
Here I have just listed some factors that you need to consider before painting wet wood,
- Moisture Content
- Proper Drying Time
- Surface Preparation
- Primer Selection
- High-Quality Paint
- Proper Application
- Maintenance
Let us now look at each of these factors in detail.
1. Moisture Content
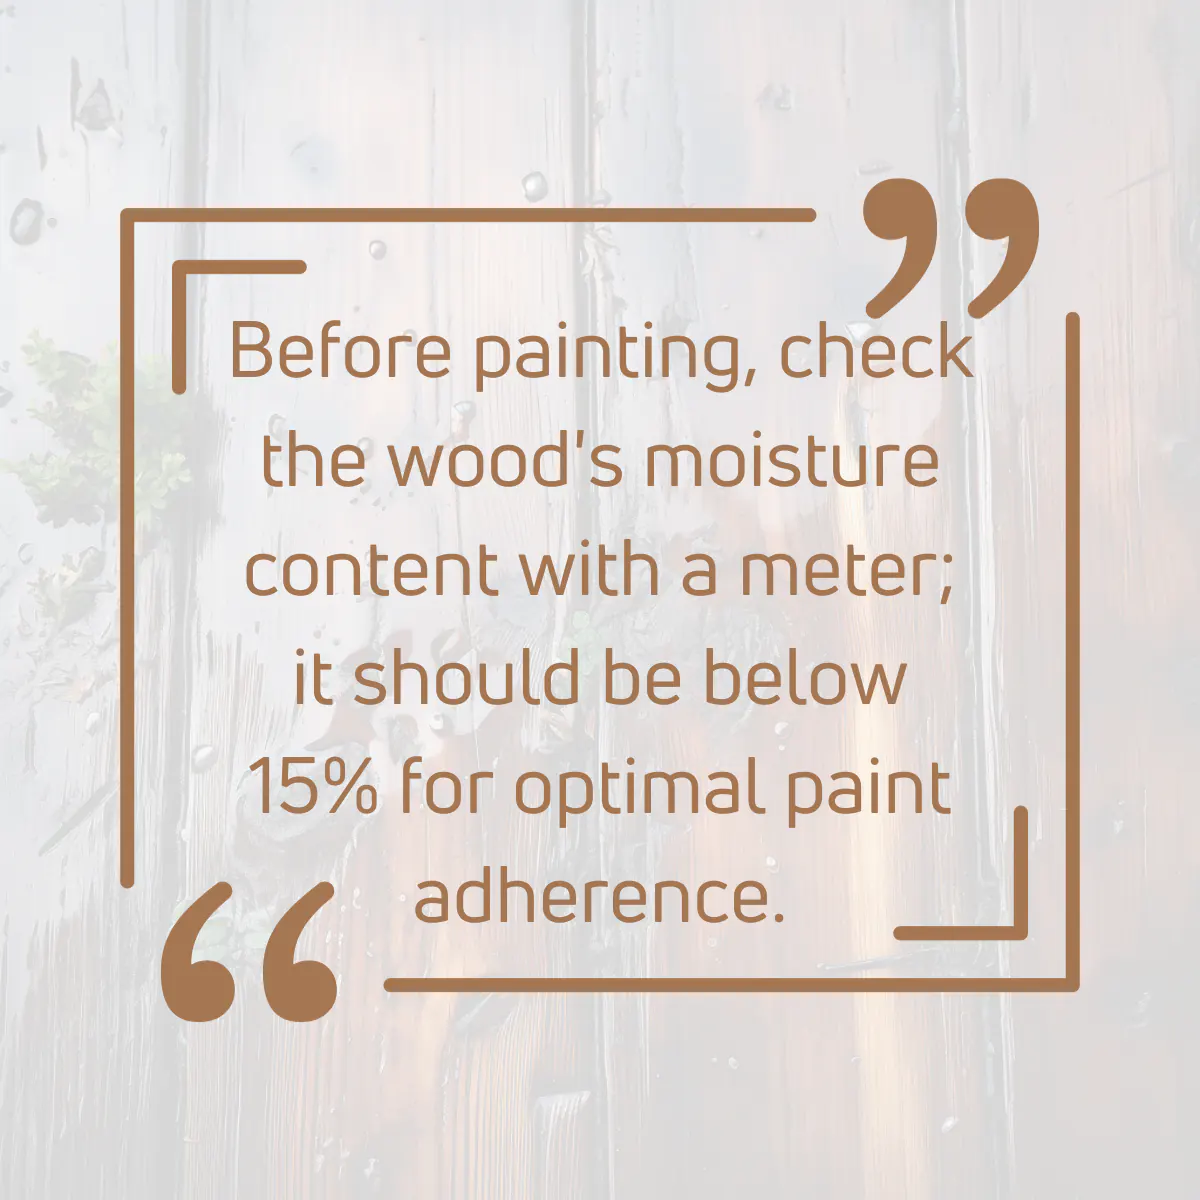
Make sure the wood’s moisture content is within an acceptable range (usually below 12%) before painting.
You can accurately determine the moisture level of wood by using a moisture meter.
2. Proper Drying Time
Allow the wood to dry thoroughly. Drying time may vary depending on wood type, thickness and environmental conditions.
Remember that rushing the process can cause problems with the paint job.
3. Surface Preparation
Prepare the wood surface by sanding to create a smooth and clean canvas for paint.
Be sure to remove any existing paint, dirt or debris and any imperfections such as cracks or holes.
4. Primer Selection
Choose an appropriate primer designed for use on wet or porous surfaces.
Remember that a good primer can improve paint adhesion and provide an even surface for the top coat.

5. High-Quality Paint
Choose high-quality paint suitable for your specific project.
Different types of wood and projects may require different types of paint, and choosing the right one for your needs is a must.
6. Proper Application
Follow the manufacturer’s instructions regarding temperature and humidity conditions for painting.
I advise you to apply the paint evenly using suitable tools such as brushes, rollers or sprayers, and allow sufficient drying time between coats.
7. Maintenance
Inspect painted surfaces regularly for paint failure or moisture-related problems.
You should be aware that proper maintenance can extend the life of paintwork and woodwork.
Now you know that painting wet wood is not ideal but if you must go ahead, ensure the wood is within an acceptable moisture range, allow it to dry thoroughly, prepare the surface properly, use the right primer and paint, and follow appropriate application techniques.
I believe these considerations will help you achieve a more successful and durable paint job on wood that still has residual moisture.

How Do You Know The Wood Is Dried Enough To Paint?
Knowing when the wood is sufficiently dry and ready for painting is critical to ensuring a successful and long-lasting paint job.
I’ll now share with you some simple facts that will help you determine if the wood is dry enough.
Moisture Meter
Always use a moisture meter, a handy tool that provides accurate measurements of wood moisture.
Wood is generally considered suitable for painting when its moisture content is below 12%. You already know that you can get an accurate reading by using a moisture meter.
Visual inspection
Check the appearance of the wood before applying the paint. Keep in mind that dry wood usually has a light color and feels dry to the touch.
Wet wood looks dark and feels cool and damp. These visual and tactile cues can indicate the wood’s moisture level.
Weight
You know that dry wood is generally lighter than wet wood.
If you have a piece of dry wood from the same source or batch, you can compare the potential painting surface weight to the dry wood to gauge its relative moisture level.
Squeezing Test
You can squeeze a small area out of the wood with your hand. If you see water droplets or moisture oozing there, the wood is still too wet to paint.
Remember that dry wood does not release moisture in this way.
Drying Time
By considering the drying time you can also ensure that the wood is dry enough to paint.
Adequate drying time for wood depends on factors such as wood type, thickness, and environmental conditions. In general, it can take days or weeks for the wood to dry completely.
Expert Advice
If you can’t come to the right decision using all of the above calculations, or if you’re unsure about the wood’s readiness for painting, I recommend that you seek advice from a woodworking or painting professional or knowledgeable source.
That way you can give them valuable insight based on your specific circumstances.
It is essential to ensure that the wood is sufficiently dry before painting to achieve good paint adhesion and a durable finish.
It’s worth taking the time to assess the wood’s moisture and appearance to avoid potential problems with your paint job.
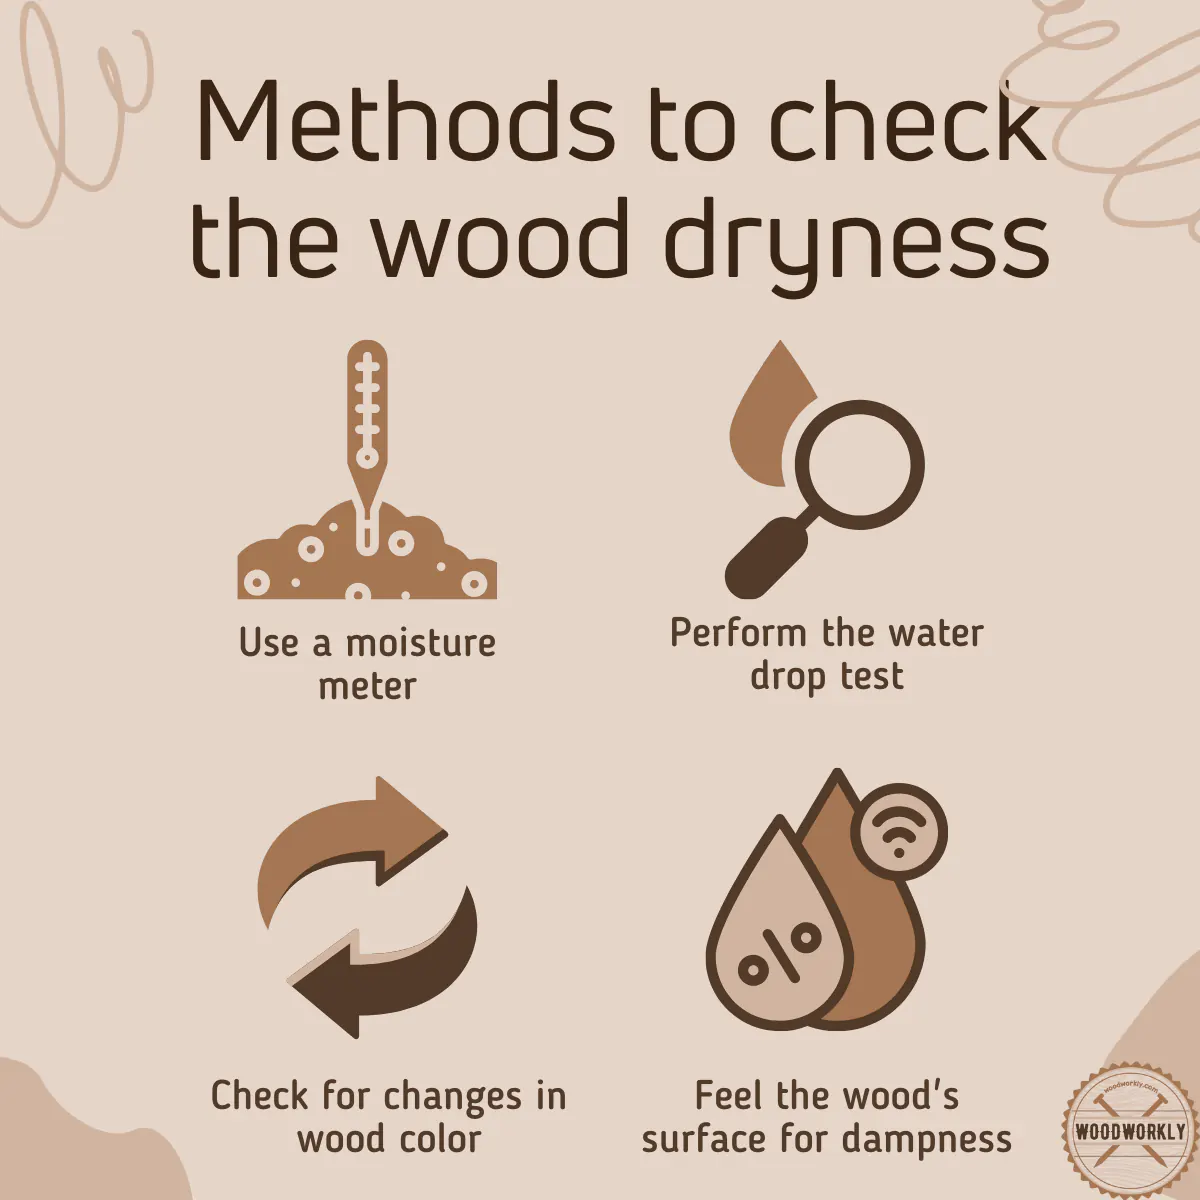
Additionally, if you want to avoid the risks associated with painting wet wood, did you know that there are two ways you can check the dryness of the wood?
Splash Test
Here you can conclude that the test was done using a few simple steps. The first test is simple and costs nothing to perform.
First, keep in mind that the wood is dry enough to be painted if it can absorb water.
To start, spray some water on the wood you want to paint. Then observe whether the water is absorbed or not.
If the wood is ready for painting, you can observe that the water has completely dried out from the wood.
However, it should be remembered that surface water beads indicate high moisture content and the need for further drying before painting.
I’ll remind you that you can use this test on any type of wood, including pressure-treated wood and MDF.
Using a Moisture Meter
You can get a general idea of whether a piece is saturated with moisture or not with a splash test.
However, if you want something more specific or scientific, I would recommend using a moisture meter.
Using a moisture meter makes your tools affordable and easy to use. They will easily show you the exact amount of moisture in your wood in percentage content.
Press the prongs into the wood to start the process, then press a button to display moisture content readings.
Remember that most paints require a maximum of 16-percent moisture to work.
This means that any reading above that image is likely to be more saturated than most inks.

How to Paint Wet Wood Furniture?
You already know that painting wet wood furniture can be challenging. But it is not impossible if you follow appropriate steps and take necessary precautions.
This process should only be considered when there are no other options, painting on dry wood is generally recommended for best results.
Here are the steps you need to follow when painting wet wood furniture,
- Assess the Moisture Level
- Ensure Proper Drying Conditions
- Sand the Surface
- Apply Primer
- Choose High-Quality Paint
- Apply the Paint
- Allow Proper Drying Time
- Perform Regular Maintenance
Now let’s see how these steps are performed in detail.
1. Assess the Moisture Level
Before you begin, you must first assess the moisture level of the wet wooden furniture. Now you know why it is so important to determine whether the wood is too wet or too wet.
I remind you again that if the furniture is extremely wet, it is best to let it dry completely to avoid possible problems.
2. Ensure Proper Drying Conditions
If the wood is slightly damp, do not forget to place the furniture in a well-ventilated area.
Ensure adequate air flow to speed up the drying process. Here you can use fans or dehumidifiers to reduce the humidity if you want.
3. Sand the Surface
The next step you should not forget is sanding the surface of the furniture. After the wood reaches an acceptable moisture level, usually less than 12%, the surface of the furniture can be sanded.
Remember that sanding helps create a smooth canvas for paint and improves adhesion.
Check out, Can You Sand Wet Wood? (EASY Sanding Steps!)
4. Apply Primer
Apply a suitable primer designed for use on wet or porous surfaces. Primer will help you greatly in sealing the wood and improving the adhesion of the paint.
Don’t forget to choose a primer that is compatible with the type of paint you’ve chosen.
5. Choose High-Quality Paint
Choosing the right high-quality paint for your specific project is very important.
There are different types of paint, such as oil-based or water-based (latex) paint. Make sure the paint is suitable for wet wood applications.
6. Apply the Paint
Follow the manufacturer’s instructions regarding temperature and humidity conditions for painting.
Use appropriate tools such as brushes, rollers or sprayers to ensure even and complete coverage.
7. Allow Proper Drying Time
After applying the paint, allow the furniture to dry for the recommended time indicated on the paint can.
Make sure the furniture is in a well-ventilated area during the drying process.
8. Perform Regular Maintenance
Regular inspection of painted surfaces for paint failure or moisture-related problems is an essential process.
Don’t forget that proper maintenance can help extend the life of paintwork and wooden furniture.
While painting wet wood furniture should be a last resort, it is important to note that allowing the wood to dry completely before painting is the best method.
Painting on properly dried wood ensures better adhesion, coverage and long-term durability.
That’s it folks! Now you know whether can you paint wet wood and how to do that properly without making any mistakes.

Now let me share with you several tips that I’ve learned by working and painting wet wood for more than a decade which will be useful for you to get promising results.
Some of the below tips were collected from the experts in woodworking industry.
So, just keep reading!
Tips for Painting Wet Wood Properly
With the right approach, you can get good results by properly painting wet wood.
Here are some important tips for properly painting wet wood.
- Always make sure the moisture content of the wood is within an acceptable range before painting.
- Always allow the wood to dry sufficiently so you can avoid paint sticking problems by rushing it.
- Prepare the wood surface by sanding to create a smooth and clean canvas for paint.
- Choose a primer specifically designed for use on wet or porous surfaces.
- Choose high-quality paint suitable for your specific project.
- Always follow the manufacturer’s instructions regarding temperature and humidity conditions for painting.
- Inspect painted surfaces regularly for paint runoff or moisture-related problems.
- If you are unsure about painting wet wood, consider consulting a professional painter or woodworker who can provide valuable advice and guidance based on your specific circumstances.
Remember that painting on dry wood is generally recommended for best results.
Read to know, Can You Stain Wet Wood? Here’s the Truth!
Best Paint to Use on Wet Wood?
The best paint to use on wet wood is a waterborne latex paint specially formulated for wet or damp surfaces.
These paints are designed to adhere well to wood with high moisture content and give better results than oil-based paints in such conditions.
Here’s why waterborne latex paint is a good choice for wet wood.
- Waterborne latex paints have excellent adhesion properties. They can effectively adhere to wet surfaces without completely drying out the wood. This is very important when working with wet wood to ensure good paint bonding.
- Latex paints are known for their flexibility, which allows the wood to expand and contract as it dries. This flexibility minimizes the risk of the wood cracking or peeling due to changes in moisture content.
- Water-based latex paints generally have a faster drying time compared to oil-based paints. This is advantageous when working with wet wood, as it allows you to complete your project more efficiently.
- Most water-based latex paints are low in volatile organic compounds (VOCs), making them a more environmentally friendly and safe choice for indoor and outdoor applications.
- Waterborne latex paints come in a wide range of colors and finishes, providing versatility for a variety of projects, from outdoor furniture to interior walls.
When using water-based latex paint on wet wood, it is essential to follow the manufacturer’s instructions regarding temperature and humidity conditions for application.
Proper surface preparation, including sanding and priming, is also critical to ensure a smooth and durable finish.
While water-based latex paint can be used on wet wood, it is important to note that painting on dry wood is generally recommended for best results and longevity.
If possible, waiting for the wood to dry before painting is a better approach.
So, let’s answer some frequently asked questions.
FAQs
How long should wood dry before painting?
Wood typically needs to dry for at least one day before painting, but if heavily saturated, it may require up to a week or until the moisture content is below 15%.
How can you tell if wood is dry enough to paint?
A moisture meter can accurately measure if the wood’s moisture content is below 15%, making it dry enough for painting; alternatively, the water sprinkle test can give a quick indication.
What happens if you paint wood that is not fully dry?
Painting wood that isn’t fully dry can lead to paint not adhering properly, resulting in a finish that is prone to bubbling, peeling, and uneven coloration.
Can you use a primer on damp wood?
Yes, using a moisture-resistant or waterproof primer can help mitigate the issues of painting over damp wood by providing a dry surface for the paint to adhere to.
What are some methods to speed up the drying time of wet wood?
Using a hairdryer, electric fan, paper towels, or exposing the wood to sunlight are effective methods to reduce the drying time of wet wood.
Which types of paint are best for slightly damp wood?
Water-based paints are more suitable for slightly damp wood as they are compatible with water, but only if moisture levels are sufficiently low (below 12-15%).
Can you seal wet wood before painting it?
Sealing wet wood is not advisable because it can trap moisture and potentially lead to rot, but if necessary, waterproof sealants designed to handle moisture can be used.
Did I cover all you wanted to know about: Can You Paint Wet Wood
In this article, I deeply discussed whether can you paint wet wood and how to paint wet wood using the right techniques for better outcomes.
Painting wet wood is possible but not recommended. Wet wood may result in poor paint adhesion, uneven coverage, and a shorter-lasting finish. It’s best to wait for the wood to dry for a successful, long-lasting paint job.
Furthermore, I’ve answered some frequently asked questions.
Hope you learned all you wanted to know about painting wet wood including experts’ tips and insights.
Now its time for you to take action and practice the procedure you learned with scrap wood. With enough practice you’re good to head into the main project like a pro!