Ever struggled to achieve a flawless finish when staining wood? Discover the secret behind oak’s stainability and unlock the key to perfecting your next oak staining project!

Do you find yourself admiring the rich, warm hues of oak furniture, wondering if you can achieve the same gorgeous finish on your own woodworking project?
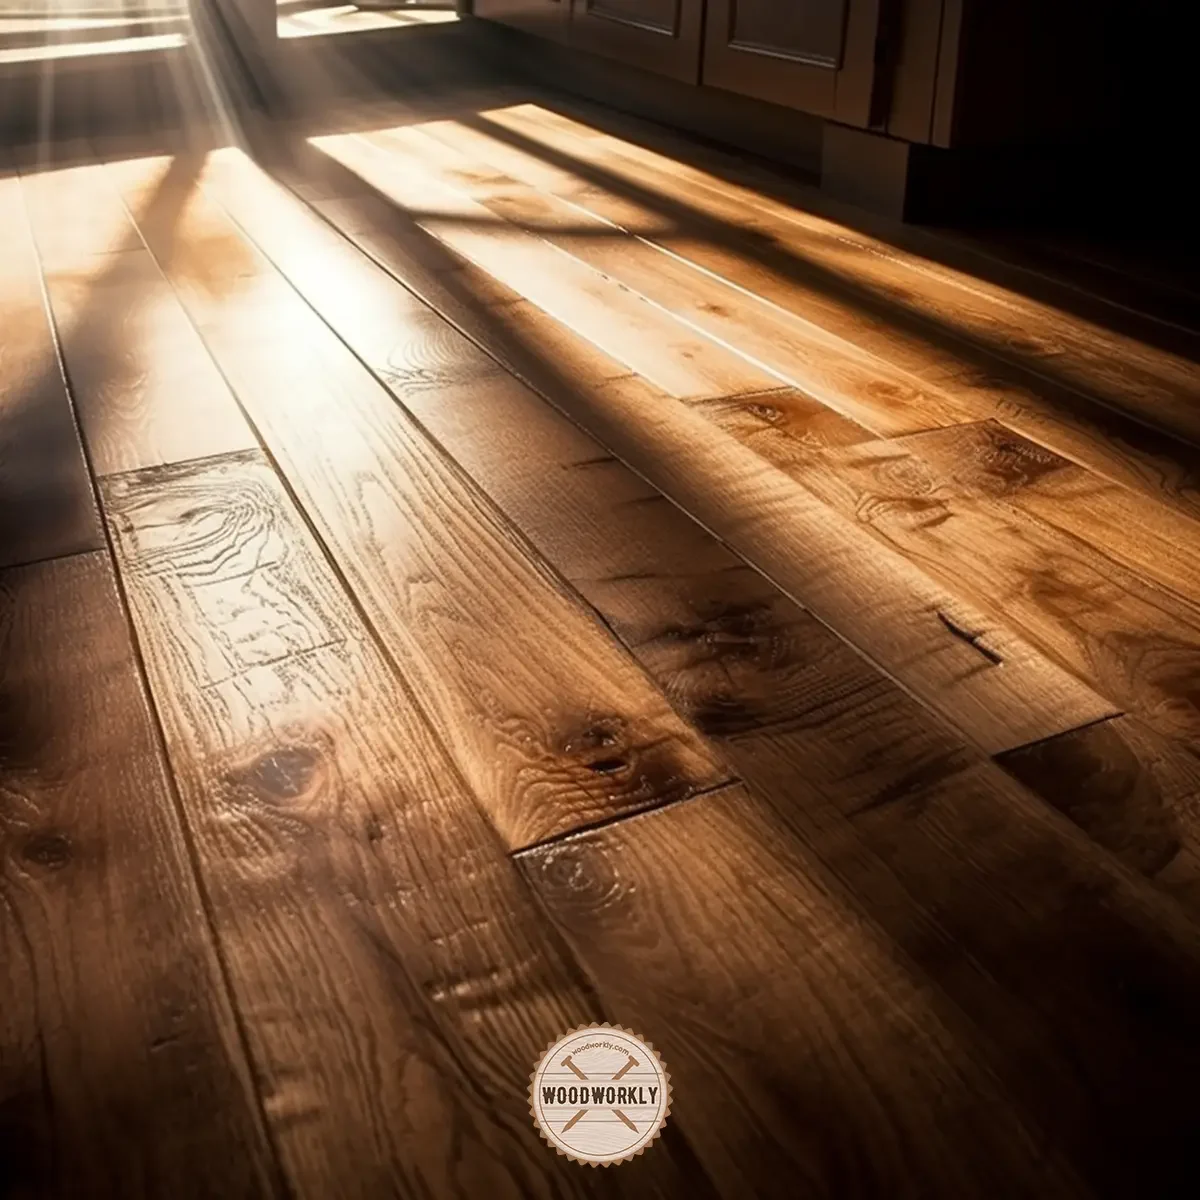
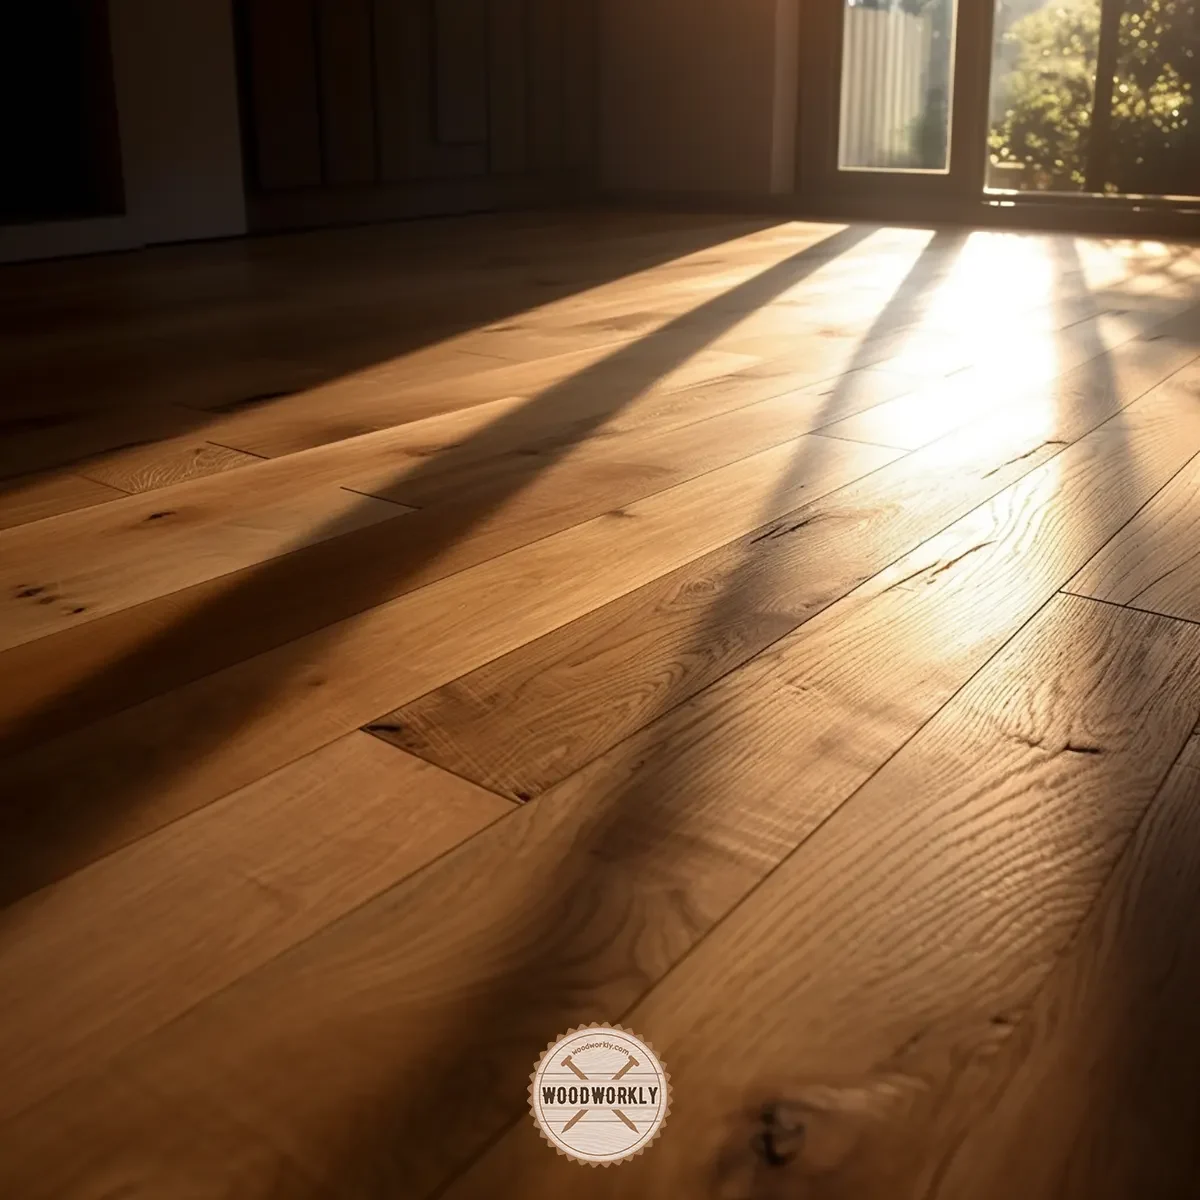
Oakwood is a popular wood in making cabinetry and flooring because of its great strength, durability, and beautiful appearance.
As a seasoned woodworker, I’ve tackled many oak projects and discovered the secrets to staining this beautiful, versatile wood.
So, let’s find out, Does Oak Stain Well?
Yes, oak stains well due to its open pores and grainy surface. To stain oak, sand the surface, apply the chosen stain with a lint-free cloth or paintbrush, and allow it to dry. Add additional coats if desired, ensuring proper drying time. Finish by applying a protective sealant to preserve the color.
Ultimately oak wood is capable of taking any stain perfectly because of its structure and any stain can easily penetrate through its deep pores.

Staining oak wood is fun and can gain the dramatic grain you wish with any color of the stain.
So, in this article, I’ll deeply discuss does oak stain well and how to stain oak in the most accurate method possible with the best stain for both read and white oak woods.
Furthermore, I’ll answer some frequently asked questions as well.
Just keep reading!

Is Oak Hard to Stain?
Oak is known as one of the easiest wood to stain. The stain will easily penetrate through oak wood’s large pores structure and takes stain well without making any staining mistakes.
Woods with tight grain are hard to stain.
If we cut and observe their grain structure the vessels are small, and they absorb a very little amount of stain and staining is also hard.
The best example is maple wood, which is considered one of the hardest woods to stain.
But oak wood has a smooth grain with large rows of vessels that are visible to the naked eye. Those vessels in oak wood absorb a lot of stains and display very dramatic grain lines when it is stained completely.
Oak is a versatile hardwood is relatively easy to work with, especially when compared to some of its counterparts.
So, is oak hard to stain? The answer is no, not if you understand the factors that contribute to its stainability and follow some tried-and-true techniques.
Let’s dive in and get to the nitty-gritty of staining oak.
Comparing Oak’s Ease of Staining to Other Wood Species
Contrary to popular belief, oak is a more forgiving wood species when it comes to staining.
Oak is generally easier to stain compared to some other hardwoods like maple, birch, or cherry.
These woods have a tight, closed-grain structure that can make stain absorption more challenging, leading to uneven and blotchy results.
In contrast, oak’s open pores and large cells allow for better stain absorption, resulting in a more consistent and attractive finish.
Factors That Influence Oak’s Stainability
To stain oak like a pro, consider the following key aspects:
- Grain structure: The secret sauce to oak’s stainability is its open, porous grain. This not only allows the stain to sink in more deeply and evenly but also lends a hand in camouflaging minor imperfections. The result? A visually appealing finish that adds character to your masterpiece.
- Wood quality: As with any project, the quality of your materials matters. Choose oak that’s free from defects, knots, and other blemishes that could throw a wrench in your staining process.
- Preparation: The saying “preparation is key” rings true here. Sand the wood to a silky smooth finish and rid the surface of dust and debris before you even think about applying the stain.
Before heading into the comprehensive guide about the staining of oak wood, let’s have a brief look at it.

Techniques to Ensure a Smooth Staining Process
Follow these steps to achieve a flawless oak finish:
- Sanding: Channel your inner artist and finesse the oak’s surface by sanding it with progressively finer grits of sandpaper, starting with a coarse 80 or 100 and ending with a finer 220. This creates a velvety canvas for the stain to adhere to and reduces the chance of blotchiness.
- Conditioning: Want to up your staining game even more? Apply a pre-stain wood conditioner to help seal the pores and promote even stain distribution.
- Stain application: Now for the fun part! Using a lint-free cloth or high-quality paintbrush, apply the stain in sections, going with the grain. Ensure even coverage and remove any excess with a clean cloth to avoid unsightly buildup.
- Multiple coats: Depending on your color preferences, you may need to apply more than one coat of stain. Just remember to let each coat dry per the manufacturer’s guidelines before layering on the next one.
- Sealing: Protect your handiwork by applying a sealant after the last coat of stain has dried. Sealing will not only enhance the wood’s durability but also shield it from UV damage, moisture, and daily wear and tear.
Don’t worry I’ll take a deep look at each of the above steps in a later section of this article. So, just keep going!
Staining oak doesn’t have to be an uphill battle.
By understanding its unique features and using the right techniques, you can achieve a stunning, long-lasting finish that showcases the natural allure of oak wood.
Characteristics of Oak That Make It Ideal for Staining
When it comes to staining, not all woods are created equal.
Oak, however, is a standout choice thanks to its unique characteristics that make it especially suited for staining projects.
Here’re the main characteristic features of oak that make it great for staining,
- Open Pores structure for better stain absorption
- Large cells for better stain absorption
- The grainy surface of oak prevents patchiness
- The resilience and durability of oak
- The versatility of oak Staining options
Let’s take a closer look at each of these attributes and learn why oak is an excellent wood for staining.
1. Open Pores and Large Cells for Better Stain Absorption
One of the key features that makes oak so stain-friendly is its open pores and large cells.
This cellular structure allows the stain to penetrate deeper into the wood, resulting in a richer, more even color.
Here’s a fun fact: oak is a ring-porous wood, which means that its pores are arranged in concentric rings.
This leads to a distinctive, pronounced grain pattern that is not only visually striking but also enhances the wood’s stainability.
2. Grainy Surface That Prevents Patchiness
The secret weapon of oak’s staining prowess is its grainy surface.
This natural texture helps to prevent patchiness by evenly distributing the stain across the wood. Consequently, you’ll achieve a more consistent and attractive finish.
Additionally, the bold grain pattern found in oak also adds a touch of rustic charm to your finished project, making it an excellent choice for those who appreciate the beauty of natural wood.
3. The Resilience and Durability of Oak
Oak is well-known for its strength and durability.
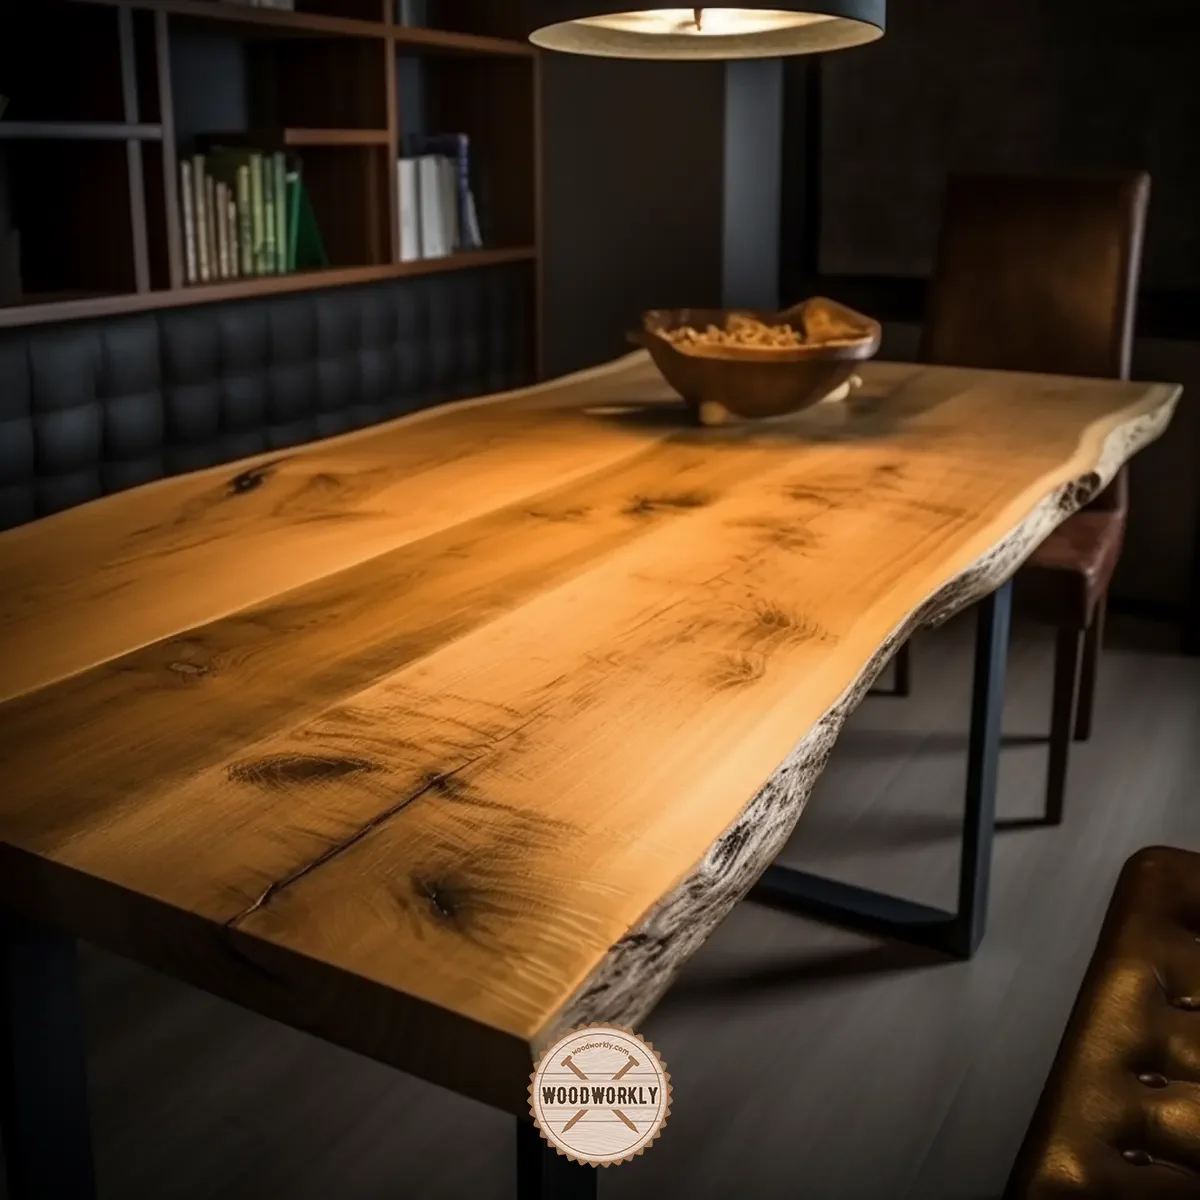
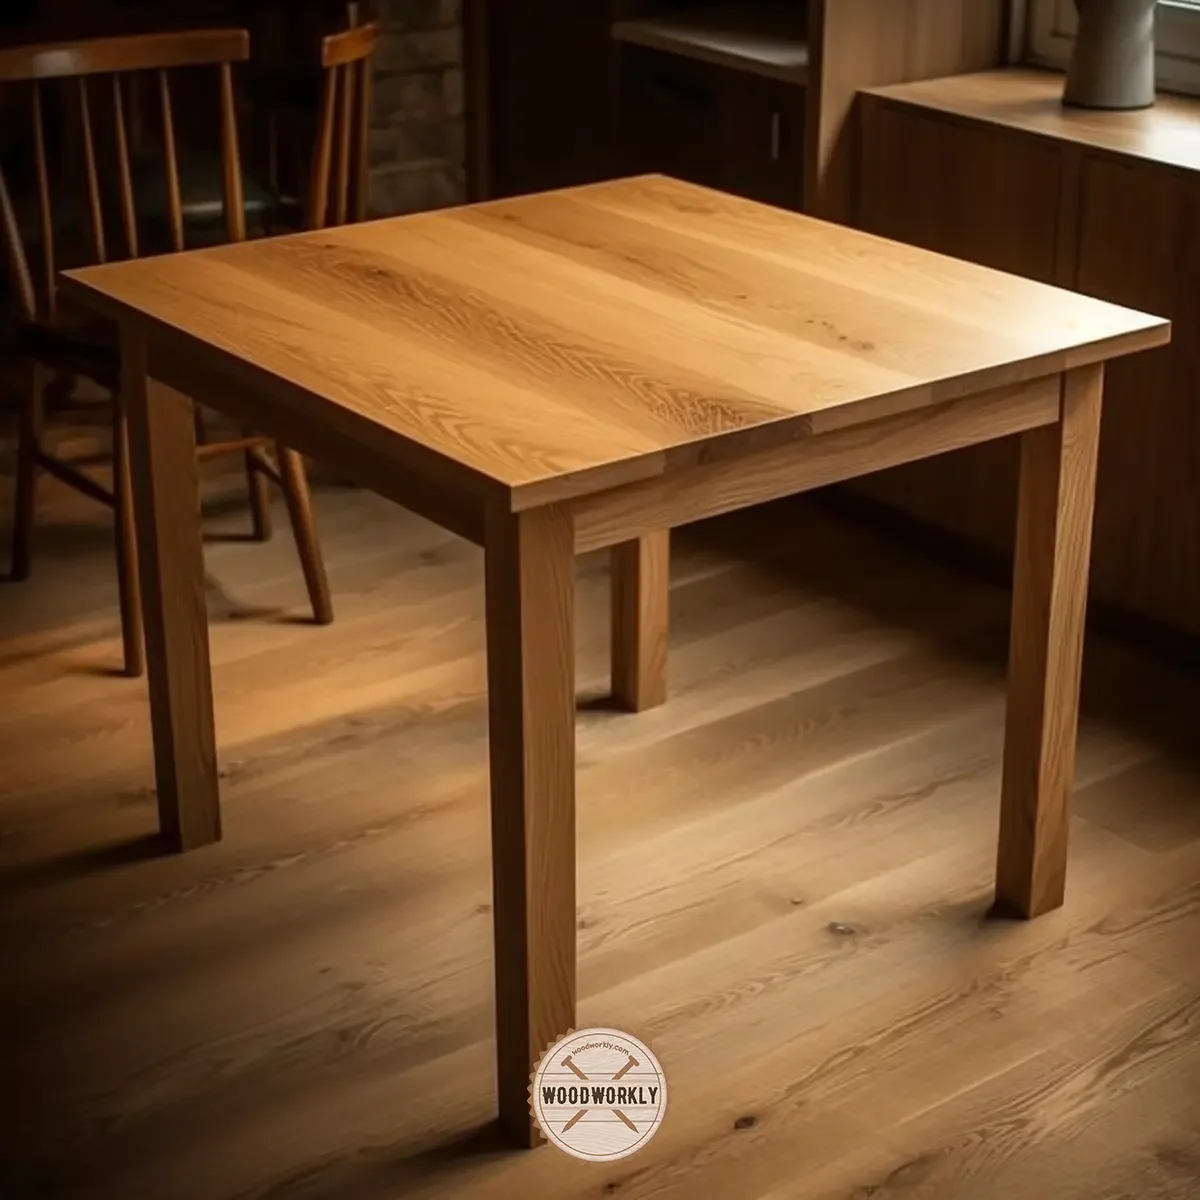
This hard-wearing wood species is a popular choice for furniture, flooring, and cabinetry because it can withstand daily use and the test of time.
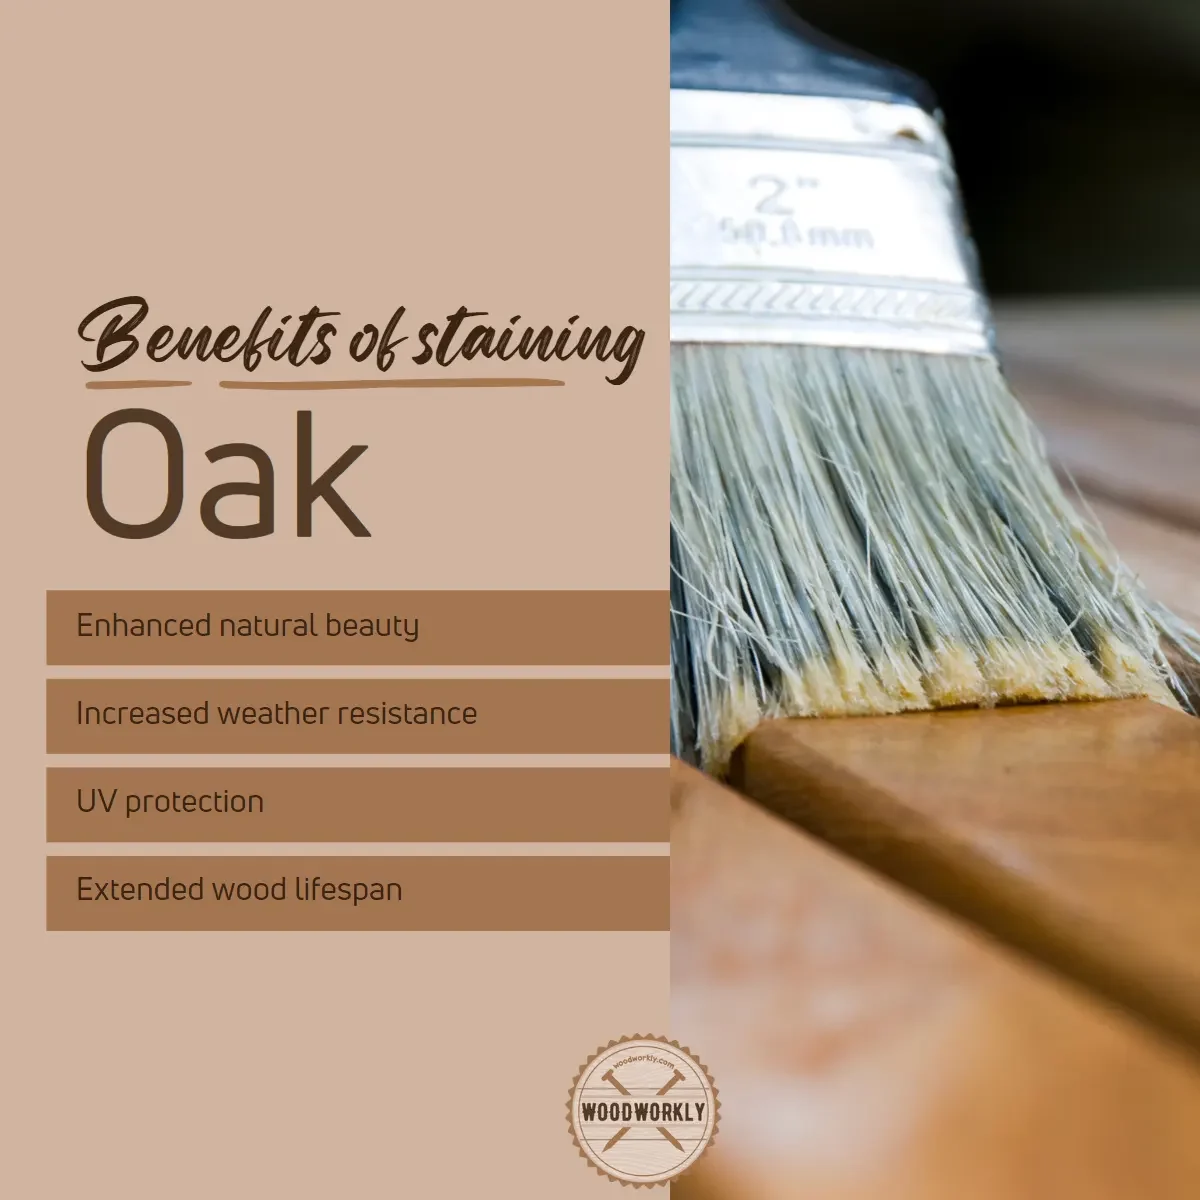
By staining oak, you not only enhance its natural beauty but also preserve and protect it from everyday wear and tear.
As a result, your oak woodwork or furniture will last for long time with no issues at all.

4. The Versatility of Oak Staining Options
Another fabulous characteristic of oak is its adaptability. Thanks to its receptive nature, you can stain oak in a wide range of colors and finishes.
From light and natural to dark and dramatic, oak is a fantastic canvas for you to experiment with and create the perfect look for your project.
This versatility ensures that you can find the ideal stain to complement your personal style and taste.
As you can see, oak is a stellar choice for staining projects due to its open pores, large cells, grainy surface, resilience, and versatility.
Comparing Oak to Other Wood Species
When it comes to staining wood, the choice of species can significantly impact the final result.
Oak is an exceptional choice for staining, but how does it stack up against other popular wood species?
Let’s delve into the world of wood staining and compare oak to maple, birch, cherry, and pine.
We’ll see why oak reigns supreme in the staining arena.
Maple, Birch, Cherry, and Pine: Not the Best Choices for Staining
Before we dive into oak’s superiority, let’s quickly explore the challenges that other wood species pose when it comes to staining:
- Maple – Known for its density and close grain, maple isn’t the most stain-friendly wood. Its resistance to even stain absorption often leads to blotchiness and uneven finishes.
- Birch – Similar to maple, birch struggles with even staining due to its close-grained nature. It often requires extra prep, like wood conditioning, to achieve somewhat consistent results.
- Cherry – Cherry wood is a true beauty, with a natural color that ages gracefully. However, staining cherry can be problematic due to its subtle grain and blotch-prone nature.
- Pine – Pine, a softwood, features a noticeable grain pattern. Though it absorbs stains quickly, its varying density can result in uneven finishes.
The Staining Advantages of Oak Over Other Species
Now, let’s turn our attention to oak and discuss why oak stains better than other wood types.
- Open pores and large cells – Oak’s unique structure, complete with open pores and large cells, allows it to absorb stains more effectively. This ensures a richer, more even color.
- Bold grain pattern – Oak’s eye-catching grain pattern does more than just add visual interest. It also helps distribute stains uniformly, which prevents a patchy appearance.
- Versatility – With oak’s receptiveness to various stain colors and finishes, you’ll have more flexibility to achieve your desired look.
- Strength and durability – Oak is a sturdy wood that can endure the test of time. Its resilience makes it perfect for projects that demand long-lasting finishes.
So, there you have it! Oak’s blend of open pores, large cells, a striking grain pattern, versatility, and durability set it apart from other wood species like maple, birch, cherry, and pine.
By opting for oak in your staining endeavors, you’ll be well on your way to creating a stunning, even finish that highlights the wood’s natural allure.

Types of Oak and Their Stainability
Diving into the world of oak, you’ll soon discover that there are different types of oak with unique characteristics that impact their ability to take on stain.
There’re main two types of oak wood species that we mostly use. They are,
- Red oak
- White oak
Let’s explore the differences between red oak and white oak, two of the most common oak species, and discuss how their unique properties impact their ability to accept wood stain.
Red Oak: The Coarser, Straight-Grained Option
Often a go-to option for woodworkers, red oak boasts an unmistakable appearance, and its abundance makes it a popular choice.
Red oak takes stain so well and you can easily stain red oak without messing up.
Let’s take a look at some of its defining characteristics:
- Straight grain – The linear grain pattern of red oak not only adds a striking visual element but also plays a role in how well it absorbs stain.
- Coarser texture – Possessing a coarser texture, red oak allows stains to seep in more thoroughly and consistently.
- Color nuances – Bearing its name with pride, red oak exhibits a reddish tint that may influence the final stain color. Bear this in mind when choosing your stain.
White Oak: A Smoother, More Neutral Alternative
White oak, another oak species that garners attention, is cherished for its neutral color palette and velvety texture.
White oak is easy to stain and you can change the color of the white oak with good protection basically using any type of stain you want.
Here’s what sets white oak apart from its red counterpart:
- Smoother texture – Contrasting with red oak, white oak has a silky surface that paves the way for a more uniform stain application.
- Neutral hues – White oak’s subtle, creamy tones offer a neutral base that’s less likely to alter the color of the applied stain, unlike red oak.
- Water defiance – Surpassing red oak in water resistance, white oak is a prime candidate for moisture-prone projects.
Staining Properties of Red and White Oak
Having explored the disparities between red and white oak,let’s examine how these properties impact their stainability:
- Red oak – The coarser texture and straight grain of red oak allow it to absorb stains effectively. However, its reddish undertones may tinge on the final color. To avoid surprises, test stains on sample pieces.
- White oak – The smoother texture and neutral color of white oak make it a versatile option for staining. Like with red oak, always test your stain on scrap wood to ensure the desired effect.
As you can see, both red and white oak are able to stain easily because of their distinct features.
Gaining insight into these oak species’ differences enables you to make an informed decision when selecting wood for your staining endeavors, guiding you towards the perfect result.

Considerations for Selecting the Perfect Stain for Oak
When you start to stain oak wood furniture or woodwork, there are several factors to consider when choosing the ideal stain.
I’ve dealt with this decision-making process countless times, and through trial and error, I’ve discovered that paying attention to the nuances of oak can make all the difference.
Here’re the factors you should consider when selecting a wood stain for oak wood,
- Grain of the wood
- Capacity of absorbance
- Undertones of the wood
- Sampling stains
So, let’s explore those critical aspects in detail that will help you select the perfect stain for oak and achieve stunning results.
The Grain of the Wood: Respecting Nature’s Artistry
One of my favorite parts of working with oak is the striking grain patterns that make each piece unique.
While choosing a stain, it’s essential to consider how it will interact with the wood’s natural grain.
In my experience, a semi-transparent stain allows the oak’s inherent beauty to shine through, while a solid stain can obscure its rich texture. Remember, you want to enhance the wood’s character, not conceal it.

The Capacity of Absorbance: Unlocking Oak’s Potential
Oak is a porous wood, which means it absorbs stains more readily than some other species.
When I first started staining oak, I had to learn that lighter stains might not achieve the desired intensity due to oak’s absorbent nature.
Thus, choosing a stain with a slightly darker shade than your intended result can help you attain the perfect hue.
Undertones of the Wood: Harmonizing with Oak’s Symphony
During my woodworking adventures, I’ve come to appreciate the subtle undertones of different oak species.
Red oak, for example, possesses a warm, reddish hue, while white oak showcases a more neutral tone.
When selecting a stain, consider how it will complement these natural undertones.
A stain that clashes with the wood’s intrinsic color might produce undesirable results.

Sampling Stains: The Key to Success
In the world of wood staining, I’ve found that there’s no substitute for testing.
Sampling stains on scrap pieces of oak can save you from potential heartache and ensure that you’re satisfied with the final outcome.
Make sure to apply the stain to the same species of oak you’ll be using for your project, as different oaks can react uniquely to the same stain.
As you can notice, choosing the perfect stain for oak involves considering the wood’s grain, absorbency, undertones, and sampling stains to find the ideal match.
When I tried various stains and paid attention to these factors, I was able to achieve spectacular results that showcased the inherent beauty of oak.
So, keep these considerations in mind, and you’ll be well on your way to creating a masterpiece that highlights oak’s true character.

What Kind of Stain to Use on Oak?
When it comes to staining oak, I’ve learned that selecting the proper form of stain is essential to achieving the desired appearance and texture.
Each form of stain has distinct characteristics and can produce distinct outcomes.
In this section, we’ll discuss the advantages and disadvantages of the most common types of stains for oak projects.
In addition, I’ll share some insights I’ve gained from personal experience to assist you in selecting the best stain for your oak masterpiece.
Factors to Consider When Choosing a Stain
There’re some factors you should consider before applying wood stain on your oak furniture or woodwork.
They are,
- Desired color and appearance: Determine the look you want to achieve with your oak project. Some stains will enhance the natural beauty of the wood, while others can create a more dramatic effect.
- The durability of the stain: Consider the intended use of your project and how much wear and tear it will be subjected to.
- Application process: Some stains are easier to apply than others, so choose one that aligns with your skill level and the tools you have on hand.
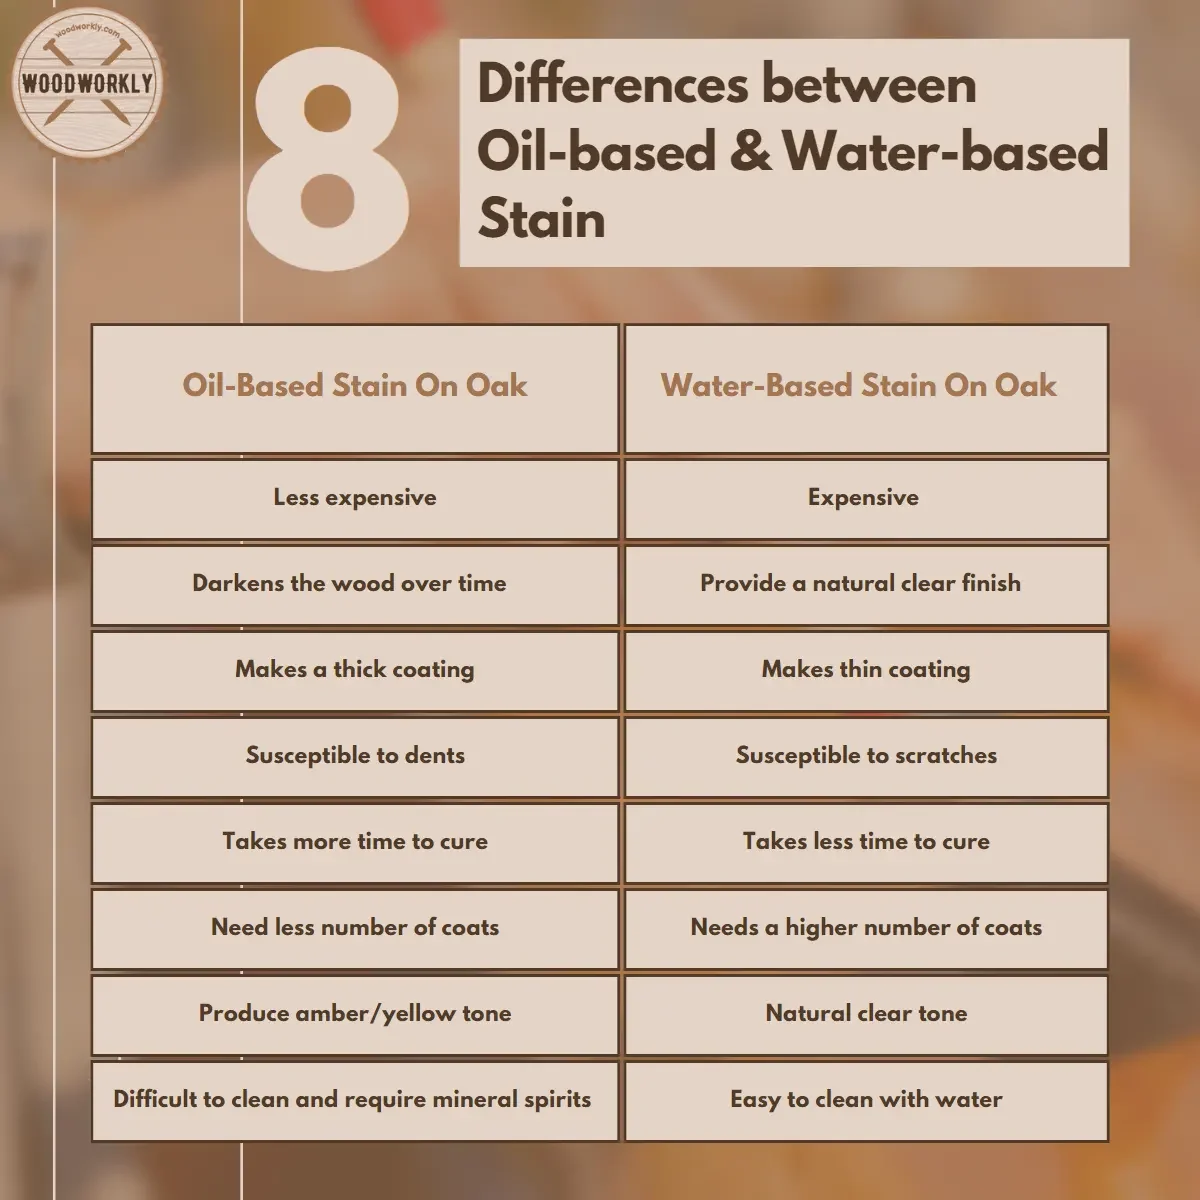
Oil-Based Stains On Oak
In my experience, oil-based stains are a popular choice among woodworkers for their ability to penetrate deep into the wood and improve its natural beauty.
Here are some pros and cons of using oil-based paints on oak:
| Advantages | Disadvantages |
| Rich, vibrant colors | Slow drying time |
| Durable finish | Strong characteristic odors |
Oil-based stains tend to bring out the depth and character of the oak wood grain.
Plus, oil-based stains provide long-lasting protection for your oak projects.
But on the other hand, Oil-based stains can take longer to dry, which means you’ll need to be patient between coats.
The fumes from oil-based stains can be potent, so ensure proper ventilation when working with them.

Let’s see how water-based stains work on the oak wood surface.
Water-Based Stains On Oak
Water-based stains have become increasingly popular due to their eco-friendliness and ease of use.
Here’s what I’ve found to be their pros and cons for painting oak:
| Advantages | Disadvantages |
| Quick drying time | Less color intensity |
| Easy cleanup | Can raise the wood grain |
Water-based stains dry faster than oil-based stains, allowing for a quicker project turnaround. This is important when applying multiple coats of stain to finish the desired outcome quickly without messing things up.
Plus, Soap and water are all you need to clean up after using water-based stains.
Please note that Water-based stains may not provide the same depth of color as oil-based stains on oak. That means color-wise oil-based stains are better to use than water-based stains.
Water-based stains can sometimes cause the wood grain to raise, so it’s crucial to sand the surface properly before application.

Let’s see how the gel stains finish the oak wood surface.
Gel Stains On Oak
Gel stains are thicker, which makes them great for vertical surfaces or patterns with a lot of detail.
Gel stain sits on the oak wood surface without penetrating inside. Therefore, you can apply gel stain even for the oak wood that is already treated. There’ll be no incompatibility issues.
Here are the pros and cons of using gel paints on the oak that I’ve seen:
| Advantages | Disadvantages |
| Easy to apply | Limited color range |
| Even color distribution | Slow drying time |
Gel dyes are easy to use because they have a thick consistency that prevents drips and runs.
Plus, Gel stains can provide a more consistent color across the oak surface without occurring surface blotchiness and tacky surface.
On the other hand, Gel stains may not offer the same variety of color options as other stain types.
Gel stains dry slower than water-based stains. Like oil-based stains, gel stains can take longer to dry between coats.
The right stain for your oak project will depend on the factors we’ve discussed and your personal preferences.
By considering the pros and cons of oil-based, water-based, and gel stains, you can find the ideal match for your oak project and achieve a stunning result.
Don’t hesitate to experiment and learn from your experiences to hone your skills and master the art of staining oak.
Best Stain for Oak Wood
When you are picking stain for oak wood, you need to have a clear idea about the undertones.
Otherwise, after the staining is done the wood will look old and not nice in appearance.
For example, white oak has a neutral undertone and red oak has a reddish rich undertone. So, you need to match what stain looks better on your oak wood.
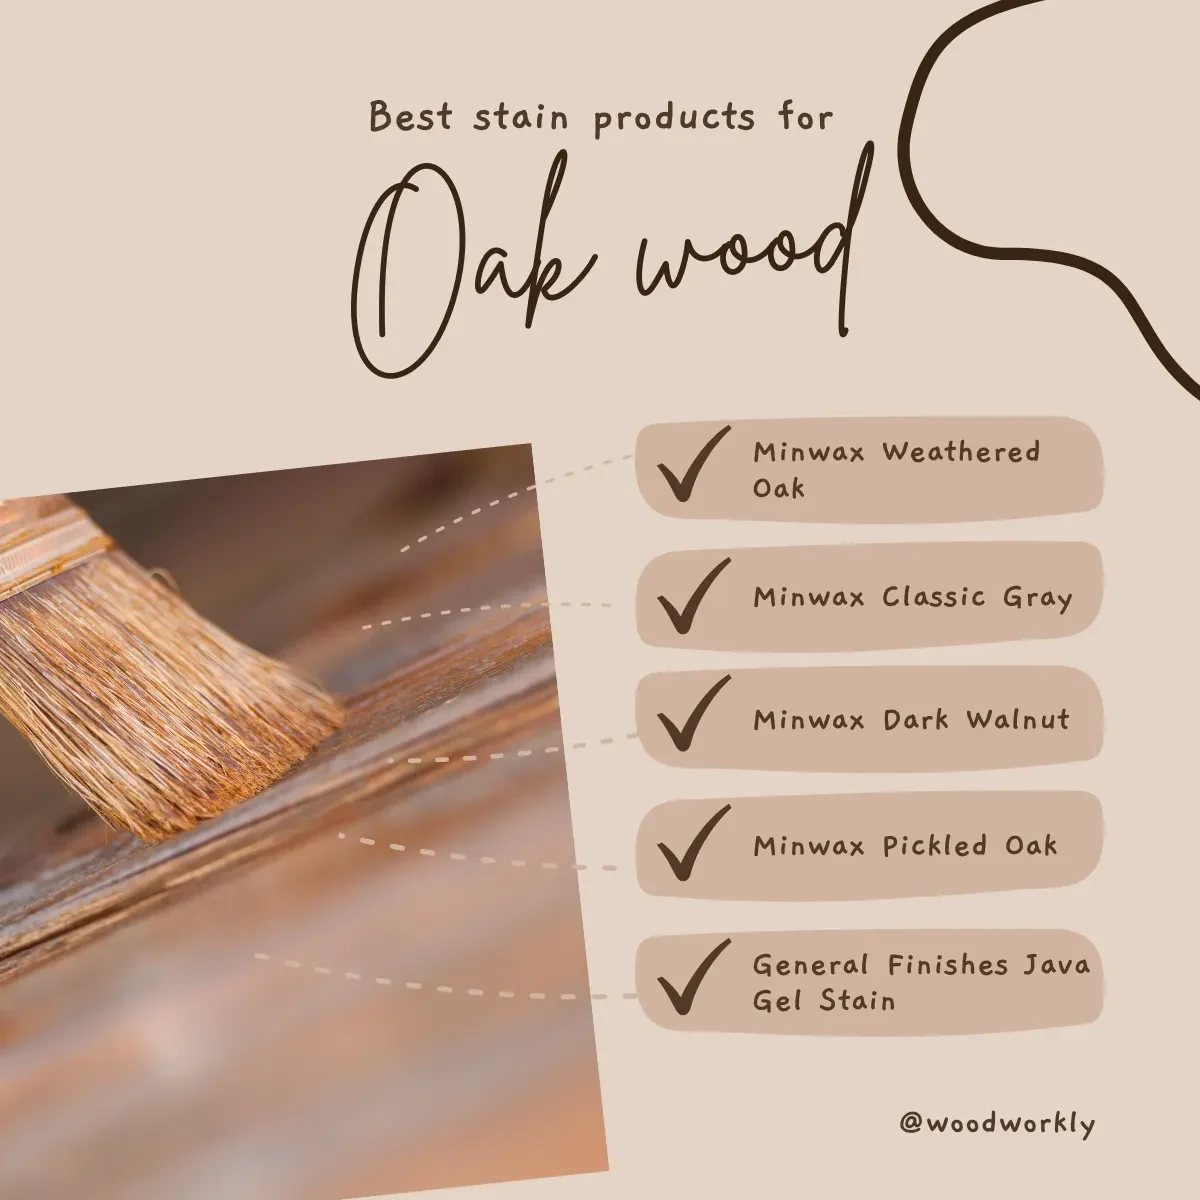
Here are some of the best strains that go perfectly with oak wood.
- Minwax Pickled Oak
- Minwax Golden Pecan
- Minwax Simply White
- Minwax Golden Oak
- Minwax Dark Walnut
- Minwax Jacobean
So, let’s discuss each of the stains one by one and see how they look on red and white oak separately.
Minwax Pickled Oak on Oak Wood
Minwax pickled oil stain gives a very small amount of shade to the oak wood. The color is almost neutral.
If you’re looking to stain oak wood while almost keeping its natural grain and color, Minwax pickled oak is a good choice.
Minwax Pickled Oak is an excellent option if you’re searching for a neutral stain that enhances oak’s inherent beauty without competing with it.
With its light, slightly bleached texture, this stain complements minimalist or Scandinavian-style interiors perfectly.
Hereby I have listed specifications of Minwax pickled oak stain on oak wood.
| Color | Beige Cream |
| Drying Time | 2 Hours |
| Type | Oil-based stain |
| Applications | Cabinets, doors, wood furniture |

Minwax Golden Pecan on Oak Wood
Minwax golden pecan stain is a great choice if you’re wishing to get a mid tint with a red undertone color. With Minwax golden pecan both white and red oak will get a bright and fresh look.
This stain can give rich beautiful classic color to oak wood while keeping natural beauty.
| Color | Semi-Transparent |
| Drying Time | 2 Hours |
| Type | Oil-based stain |
| Applications | Cabinets, doors, wood furniture |
Minwax Simply White on Oak Wood
Minwax simply white stain is best for those who love soft colors. It has the ability to soften both red and white oak without masking their beautiful grain.
Oakwood undertones are visible even after application of Minwax simply white stain, but they’re not highlighted as before staining.
Red and white oak get cerused elegant white color look after taking Minwax simply white stain.
Here’s how Minwax simply white stain goes with the oak wood surface.
| Color | Soften white |
| Drying Time | 2 Hours |
| Type | Oil-based stain |
| Applications | Cabinets, doors, wood furniture |
Minwax Golden Oak on Oak Wood
Minwax Golden Oak gives mid-range stain color to both red and white oak wood.
Most importantly the undertone color of Minwax golden oak is so neutral and oak wood grains are clearly visible even after the application of stain. Grain gets dark brown color instead of redness.
After applying Minwax golden oak on white oak and red oak you can’t really see a difference between them, because both get almost similar in color.
| Color | Rich color |
| Drying Time | 2 Hours |
| Type | Oil-based stain |
| Applications | Great for any project |

Minwax Dark Walnut on Oak Wood
If you want to make the oak wood stain darker, Minwax Dark Walnut stain is the best stain for you.
With this stain product, you can make oak wood looks like walnut wood in color while keeping the grain as it is.
In my opinion, Minwax Dark Walnut is an excellent choice for individuals who favor an oak finish that is deeper and more dramatic.
This deep brown stain gives the wood depth and sophistication, making it ideal for high-end furniture items or highlighting architectural details.
Minwax dark walnut stain does not mask out the grain and penetrates easily through the pores structure of red and white oak wood.
| Color | Dark rich brown color with golden highlights |
| Drying Time | 2 Hours |
| Type | Oil-based stain |
| Applications | Great for any project |
Minwax Jacobean on Oak Wood
Like Minwax dark walnut stain, you can get the dark rich color you want with Minwax Jacobean wood stain as well.
With a single coat of Minwax Jacobean stain, you can get the rich color you want with ease.
It penetrates deeply through oak wood and provides a beautiful color and enhances the natural wood grain with only a single coat.
| Color | Light Brown |
| Drying Time | 2 Hours |
| Type | Oil-based stain |
| Applications | Woodworks, doors, furniture, cabinets |
So, that’s all about the best stain products that work perfectly on oak wood.
It doesn’t even matter if you’re working with white or red oak because those products give an even uniform tone all over the surface without destroying the beautiful red color wood grain.
So, let’s talk about the need for wood conditioner before applying stain on oak.
Does Oak Need Wood Conditioner Before Staining?
Conditioning oak wood before staining is not a must, but applying a wood conditioner will help to apply the stain uniformly throughout the oak wood surface.
Wood conditioners can make a world of difference in achieving a consistent, professional finish on oak projects.
By applying a pre-stain wood conditioner before staining, it will support the wood to take stain evenly without getting blotches and streaks while applying stain.
As an experienced woodworker, my advice is when you’re working with red or white oak wood, never skip conditioning before staining the wood.
The Purpose of Using Wood Conditioners
Wood conditioners, sometimes called pre-stain conditioners, are designed to help achieve a more even and uniform stain on woods like oak.
Oak has a porous, open-grained structure, which can lead to uneven stain absorption and a blotchy appearance if not treated properly.
In my experience, using a wood conditioner on oak before staining can significantly improve the final result, ensuring that the stain is absorbed consistently and the wood’s natural beauty shines through.
Even though oak wood does not get blotches and streaks easily, there are some occasions wood stains unable to penetrate evenly throughout the surface.
So, it’s always better to apply conditioner before staining.

How Wood Conditioners Improve Stain Absorption and Consistency
When I first tried using a wood conditioner, I was amazed at the difference it made. Wood conditioners work by partially sealing the wood’s pores, which helps regulate the absorption of stain.
Wood conditioner leads to a more uniform finish on oak wood, as the stain is less likely to pool in some areas and be too thin in others.
As a result, the final appearance is more consistent, with fewer unsightly blotches or dark spots.
How To Apply Wood Conditioner On Oak Before Staining?
It’s quite easy to apply a wood conditioner to oak, but the finest results require that you take the right precautions.
Here’re the steps you need to follow when applying wood conditioner on oak before stain the wood,
- Sand the oak surface
- Clean the surface
- Apply the conditioner
- Allow the conditioner to dry
- Lightly sand if necessary
- Apply the stain
Let’s discuss each of the above steps in detail for better view of applying pre-stain wood conditioner on oak.
1. Sand the oak surface
Be sure to sand the oak surface smoothly, getting rid of any rough patches or flaws, before adding a wood conditioner. This will aid in the conditioner’s even application to the wood.
2. Clean the surface
After sanding, the surface must be thoroughly cleaned to get rid of any dust or other debris.
To make sure the surface is clean and ready for the conditioner, I usually wipe it down with a tack cloth or a rag that has been gently dampened.
3. Apply the conditioner
Follow the manufacturer’s directions when applying the wood conditioner with a brush or a clean cloth.
Check out the Best Brushes For Staining Wood!
Apply wood conditioner along the direction of the oak wood grain to get a nice and even finish with even pressure.
Applying a uniform coat is crucial, as is avoiding significant buildup in any one spot.
4. Allow the conditioner to dry
The wood conditioner should be allowed to dry for the amount of time specified on the product label.
It’s important to adhere to the manufacturer’s instructions because this may change depending on the particular product.
If required, lightly sand the surface to get rid of any elevated grain once the conditioner has dried.
If sanding is necessary, make careful to clean the surface once more before staining.
After installing the wood conditioner, you can finish staining the oak by following the manufacturer’s directions.
From my experience, applying a wood conditioner before staining oak can substantially enhance the end effect, producing a more uniform and polished gloss.

No matter if you’re an experienced carpenter or a novice just embarking on your first job, I wholeheartedly recommend this step to everyone dealing with oak.
Normally conditioner will complete the penetration through oak wood within 15 minutes and make sure to wipe excess conditioners.
I highly recommend using pre-stain wood conditioner and stain products from the same manufacturer to avoid any incompatibilities.
In my experience, the Minwax Pre-stain wood conditioner is a great product to apply before staining the oak wood.
Tools And Materials To Stain Oak
- Oak furniture or woodwork
- 80-100 grit sandpaper
- 120-150 grit sandpaper
- 180-220 grit sandpaper
- Wood stain product
- Gloves
- Clean rags
- Lint-free tack cloths
- Suitable applicator (paintbrush, roller, sprayer, or cloth)
- Facemask

How To Stain Oak?
Before staining oak, I highly recommend applying conditioner to avoid blotches and applying the stain evenly throughout the oak wood surface.
Staining oak wood is so much easy compared to other wood types because of its pores structure.
Both red oak and white oak does stain well. Here are the required tools you need to have to stain oak wood.
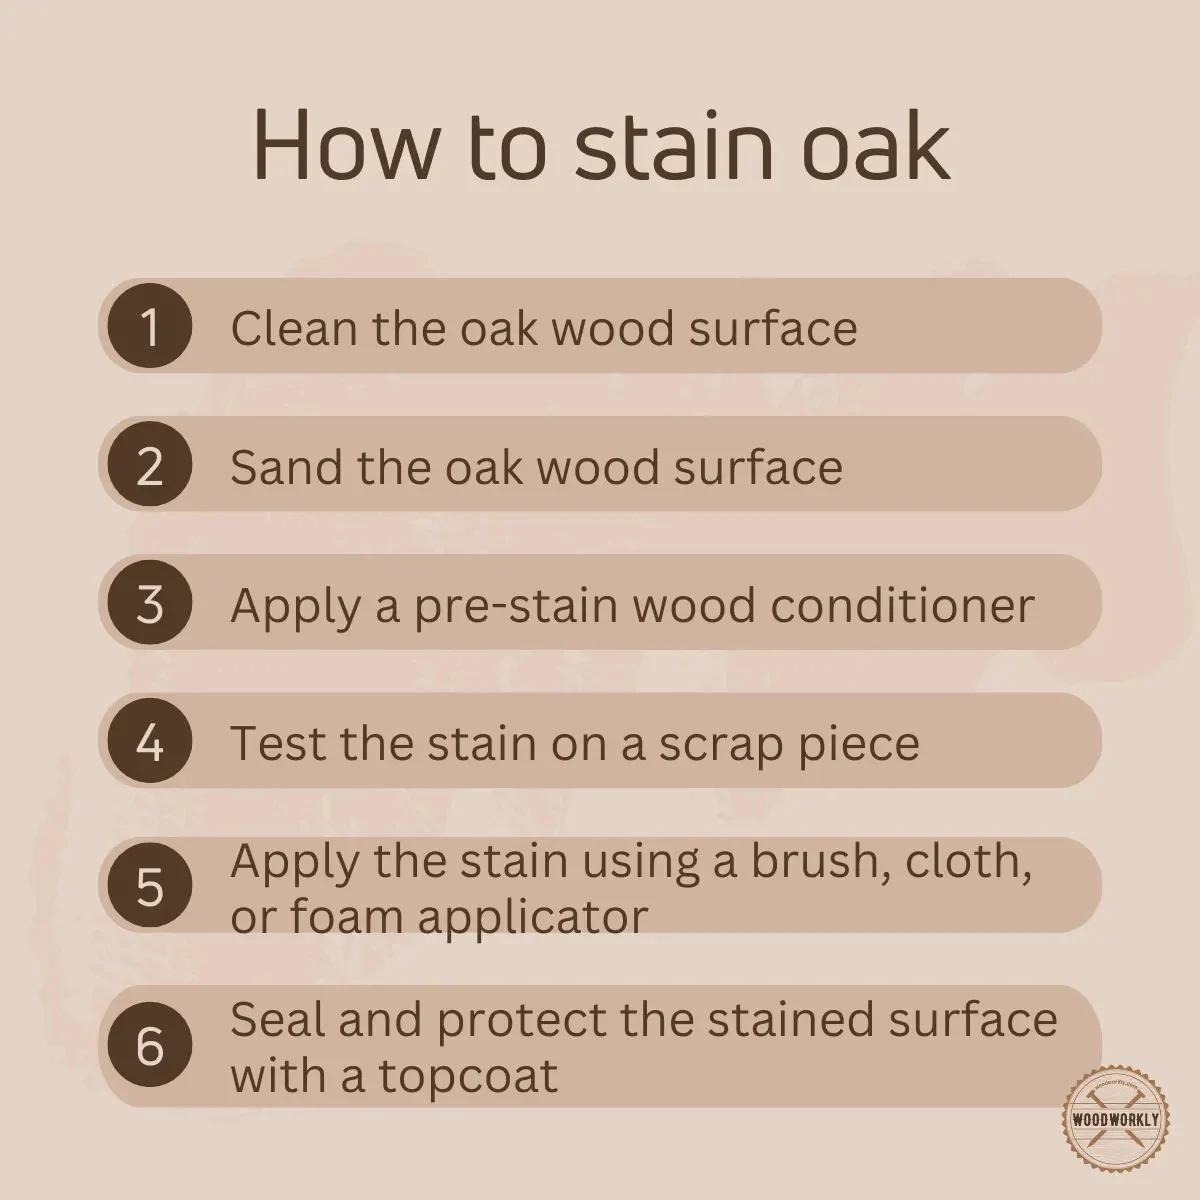
Here are the steps you need to follow when staining oak wood,
- Clean and sand the wood.
- Apply the stain.
- Let the wood dry completely.
- Applying the Second Coat of Stain (if needed)
- Applying a Protective Sealant
So, let’s discuss each of the above steps to get an idea about how to stain oak. This is how you should stain both white oak and red oak.
1. Clean and Sand the Oak Wood
Cleaning and sanding oak wood is important to remove sawdust. Cleaning and sanding the oak wood will help the wood to absorb the stain evenly.
sanding is a crucial step to ensure an even stain on your oak project.
Proper sanding helps to smooth out any rough spots, remove surface imperfections, and open the pores of the wood, allowing the stain to penetrate evenly.
Here’re the steps you need to follow when sanding oak before applying stain,
- Selecting the right sandpaper: Start with a coarser grit (e.g., 100 or 120 grit) and gradually work your way up to a finer grit (e.g., 220 grit). This progression helps to remove rough areas and then smooth out the surface.
- Sand in the direction of the grain: It’s essential to sand with the grain of the wood, as going against it can cause scratches and damage to the surface.
- Clean the surface: After sanding, use a tack cloth or a slightly damp rag to remove any dust or debris from the surface.
Make sure not to go with too high grades of sandpapers, because they’ll destroy the wood grain and that not only ruins the appearance of the oak wood but also make the wood resistant to take stain evenly.
Once you finish the sanding all over the wood, wipe the sawdust and clean the oak wood surface using a damp cloth.
After finishing sanding and cleaning the oak wood, I highly recommend keeping the wood for 24 hours until it is completely dried before moving on to the staining step.

2. Apply the Stain
After selecting a good stain that goes perfectly with your oak wood, take the paintbrush and dip it in the stain can.
Then apply the first coat of stain all over the oak wood surface along its wood grain to take the stain evenly.
I prefer using a lint-free cloth or a high-quality paintbrush to apply the stain.
Both methods have their advantages: a cloth allows for more control and even pressure, while a paintbrush can get into tight spaces and cover more area quickly.
After applying the stain, use a clean cloth to wipe off any excess. Wiping off excess stain helps to ensure an even coat and prevent any unwanted blotches or dark spots.
Follow the manufacturer’s instructions for the drying time of the stain. In my experience, it’s essential to allow the stain to dry thoroughly before proceeding to the next step.
While you’re applying stain, make sure to focus on how much pressure you should apply on the paintbrush.
Because the pressure is high the resulting color is deeper. So, always make sure to keep the pressure steady to get them evenly uniformed color all over the wood.
3. Let the Wood Dry Completely
After you are done applying stain completely all over the wood, let the coat dry completely.
The average drying time of oak wood is nearly 24 hours.
Never go for applying a second coat until the wood is completely dry. A wet surface will ruin the wood and eventually destroy the wood.
So, drying is extremely important when staining oak wood.
4. Applying the Second Coat of Stain (if needed)
Once you feel the wood is dry enough, clean the surface and remove the excess stain with a rag and apply the second coat on top of that.
Sometimes, one coat of stain isn’t enough to achieve the desired color or intensity.
Here’s how to determine whether a second coat of stain is necessary and how to apply it on oak wood.
Once the first coat is dry, examine the finish.
If you’re happy with the color and intensity, you can move on to the next step. If not, a second coat might be needed.
Just like the first coat, apply the second coat using a lint-free cloth or paintbrush, making sure to cover the entire surface evenly.
Allow the second coat to dry according to the manufacturer’s instructions before moving on to the final step.
While applying the second coat you need to focus on pressure to get the uniform color all over the oak wood and make sure to apply along the wood grain.
The stain will penetrate inside the wood within 15 minutes. Once you’re done with staining, leave the wood for another 24 hours to dry completely.
After applying 2-3 coats, check the wood color. If you’re stratified with the result wipe off the excess stain and finish the task.
But if you’re looking to get a more deep color tone with a rich look, probably you should go with more coats of stain.
Applying coats until it hits the right color is not a problem, because oak wood stains well than many other wood types.
5. Applying a Protective Sealant
Applying a protective sealant is the final step in staining oak, and it’s one I never skip.
A quality sealant will protect your Oak wood project from UV damage, moisture, and everyday wear and tear.
The importance of a UV protective sealant: UV exposure can cause the stain to fade or change color over time.
A sealant with UV protection will help maintain the stain’s color and integrity.
Top sealant recommendations for oak projects: In my experience, some excellent sealants for oak projects include water-based polyurethane, oil-based polyurethane, and spar urethane.
Choose the one that best suits your needs and follow the manufacturer’s instructions for application.
By following these steps, you’ll be well on your way to creating a beautiful, long-lasting finish on your oak project.
Remember that patience, practice, and attention to detail are essential in achieving the best results.
As you gain experience and confidence, you’ll find that staining oak can be an enjoyable and rewarding process.
That’s it, folks! now you know does oak stain well? Yes of course and how to stain oak wood in the most accurate way possible. Give it a try!

How To Make Oak Stain Darker?
To get the oak stain darker you can select a dark color stain, or you should apply the stain following the same procedure as I discussed, but with extra pressure.
If you apply a higher amount of pressure to the paintbrush while staining, you’ll end up with dark deep stain color. But always make sure to keep the pressure steady thought out the surface.
Apart from the above two methods, you can make the oak stain darker by applying extra coats until it hits the correct dark color you want.
But I highly recommend going with a dark color stain product if you’re looking to make the oak stain darker, because it won’t destroy the beautiful wood grain and is easy to apply evenly all over the wood.
How To Stain Oak Light?
You can stain oak light by applying light color stain products. Here is the formula you should go with to get light color on oak wood.
50% Jacobean, 25% weathered oak, and 25% of grey. this mixture will end up with nice light brown color with a slight grey tone.
If staining oak wood light is a difficult task, you can simply go with white oak and apply a neutral color stain along its grain.
This will easily give the best light oak tone you wished.

Tips for Staining Oak Wood
Although staining oak wood can be satisfying, there are certain difficulties involved.
As a woodworker, I’ve run into a number of problems and have picked up some helpful advice for getting the best finish on oak.
Here are some of my best suggestions for perfecting the staining technique for oak wood:
1. Testing Stain Colors on Scrap Pieces of Oak
Before diving into your project, it’s essential to test your chosen stain on scrap pieces of oak. This will help you:
- Understand how the stain will look on the actual wood
- Determine if the color is right for your project
- Identify any potential issues with the stain
When I first started staining oak, I often skipped this step and ended up with a finish that didn’t quite meet my expectations.
Trust me, it’s worth the extra time and effort to avoid any surprises.
2. Proper Ventilation and Safety Precautions during the Staining Process
Working with stains can be messy and potentially hazardous, so it’s crucial to ensure proper ventilation and take necessary safety precautions:
- Work in a well-ventilated area, ideally outdoors or with open windows
- Wear protective gloves, eye protection, and a mask to prevent inhalation of fumes
- Keep stain and materials away from open flames or sources of ignition
Wood stains may release harsh chemicals and fumes upon application process that can cause skin and eye irritations.
Therefore, make sure to have good air circulation in the area you staining the oak wood.
Plus, working in a well-ventilated area help the wood stain to dry quickly without forming a tacky surface.
I’ve found that taking these precautions not only keeps me safe but also helps me stay focused on the task at hand.
3. Addressing Common Challenges: Blotchiness and Uneven Application
Staining oak can sometimes lead to blotchiness or uneven application.
Here are some tips for avoiding blotchy and uneven stain on oak wood:
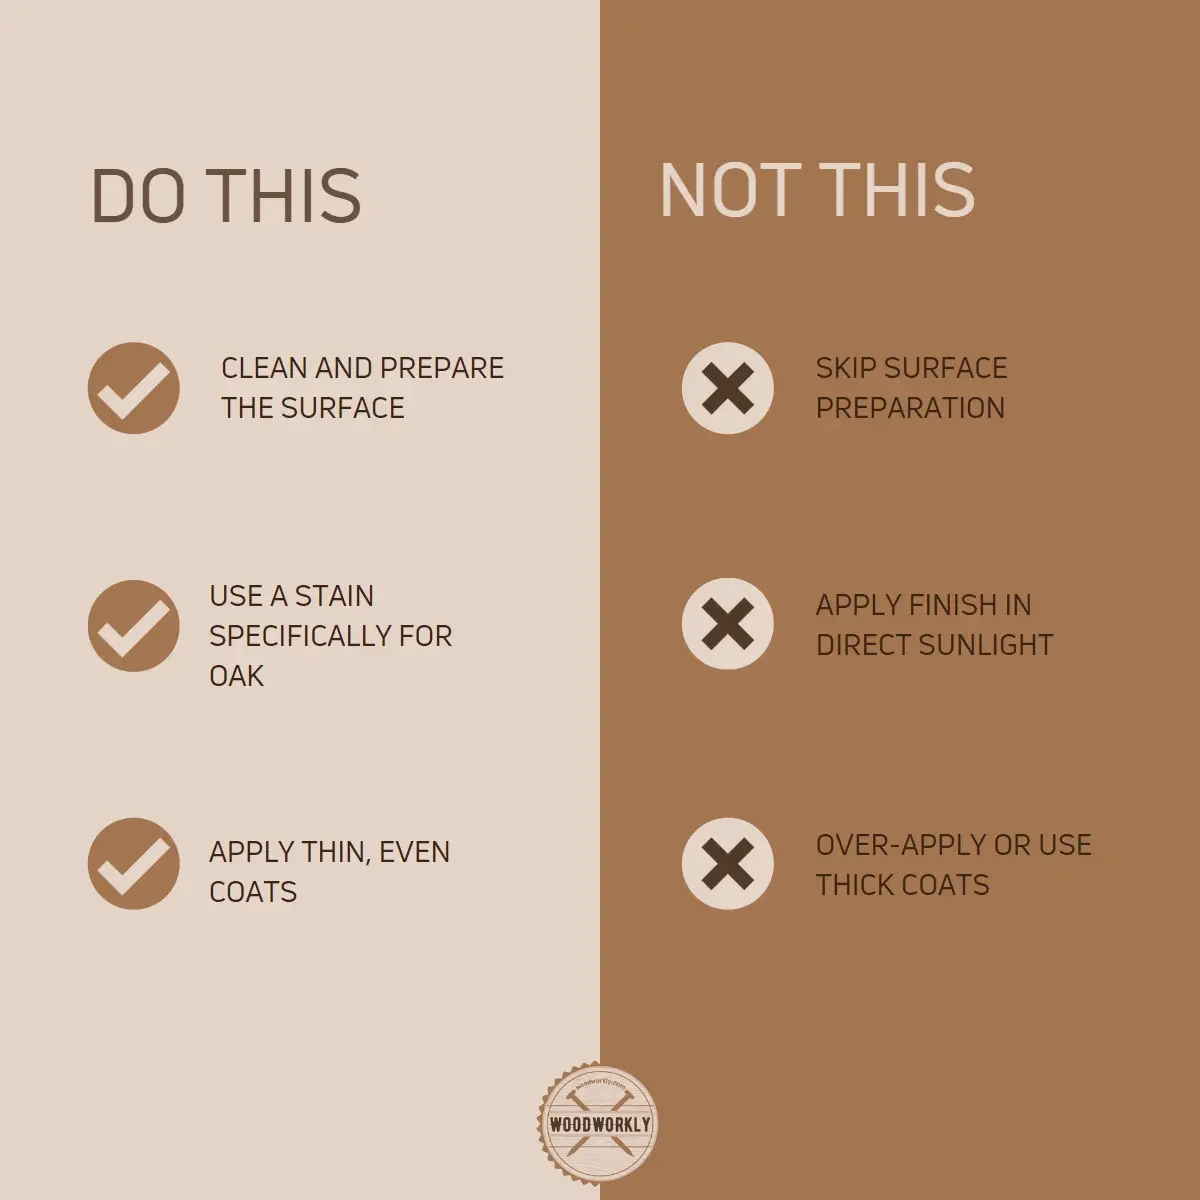
- Use a wood conditioner before staining to help with even absorption
- Apply the stain in thin, even layers and wipe off excess stain to prevent pooling
- Sand lightly between coats to maintain a smooth surface
In my experience, these simple steps have made a significant difference in the quality of my finished projects.
Solutions for Fixing Wood Staining Mistakes
Wood mistakes can happen, but don’t worry – there are ways to fix them:
- Lightly sand the area to remove excess stain and reapply a thin, even coat
- If the stain is too dark, use a lighter stain to help balance the color
- If the stain is too light, apply additional coats until you reach the desired shade
Enough drying time can solve most of the oak wood staining mistakes.
Remember, practice makes perfect.
As you gain experience staining oak, you’ll become better at recognizing and correcting any mistakes.
Don’t be too hard on yourself; every woodworker has faced challenges along the way.
So, let’s head into some frequently asked questions about does oak stain well.
Does oak stain well compared to other wood species?
Absolutely! Oak stains better compared to many other kinds of wood. Oak is known for its excellent stainability due to its open pores and large cells, which allow the stain to penetrate deeply and evenly.
While woods like maple, birch, cherry, and pine may be more challenging to stain, oak is a more forgiving and versatile option for staining projects.
What’s the difference between red oak and white oak when it comes to staining?
Red oak has a straight grain and coarser texture, while white oak features a smoother texture and more neutral tones.
Both red and white oak can be stained effectively, but their different characteristics may influence the final appearance of the stain.
Consider sampling stains on both types to determine the best option for your project.
How do I choose the right stain for my oak project?
Selecting the perfect stain for your oak project involves considering factors such as the grain of the wood, its capacity for absorbance, and any undertones present in the wood.
Sampling stains on scrap pieces of oak will help you find the ideal color and finish that suits your project’s aesthetic.
Should I use oil-based, water-based, or gel stains for my oak project?
Each type of stain has its pros and cons when it comes to staining oak.
Oil-based stains offer rich colors and excellent penetration but may take longer to dry.
Water-based stains dry quickly on oak and are easy to clean up but may raise the wood grain.
Gel stains provide better control during application but may not penetrate as deeply as other types.
Experiment with different stain types on scrap pieces of oak to determine which one works best for your project.
Do I need to use a wood conditioner before staining oak?
Using a wood conditioner can help improve stain absorption and consistency on oak, especially if you’re working with a more porous or uneven surface.
Applying a wood conditioner before staining will help you achieve a more uniform and professional-looking finish.
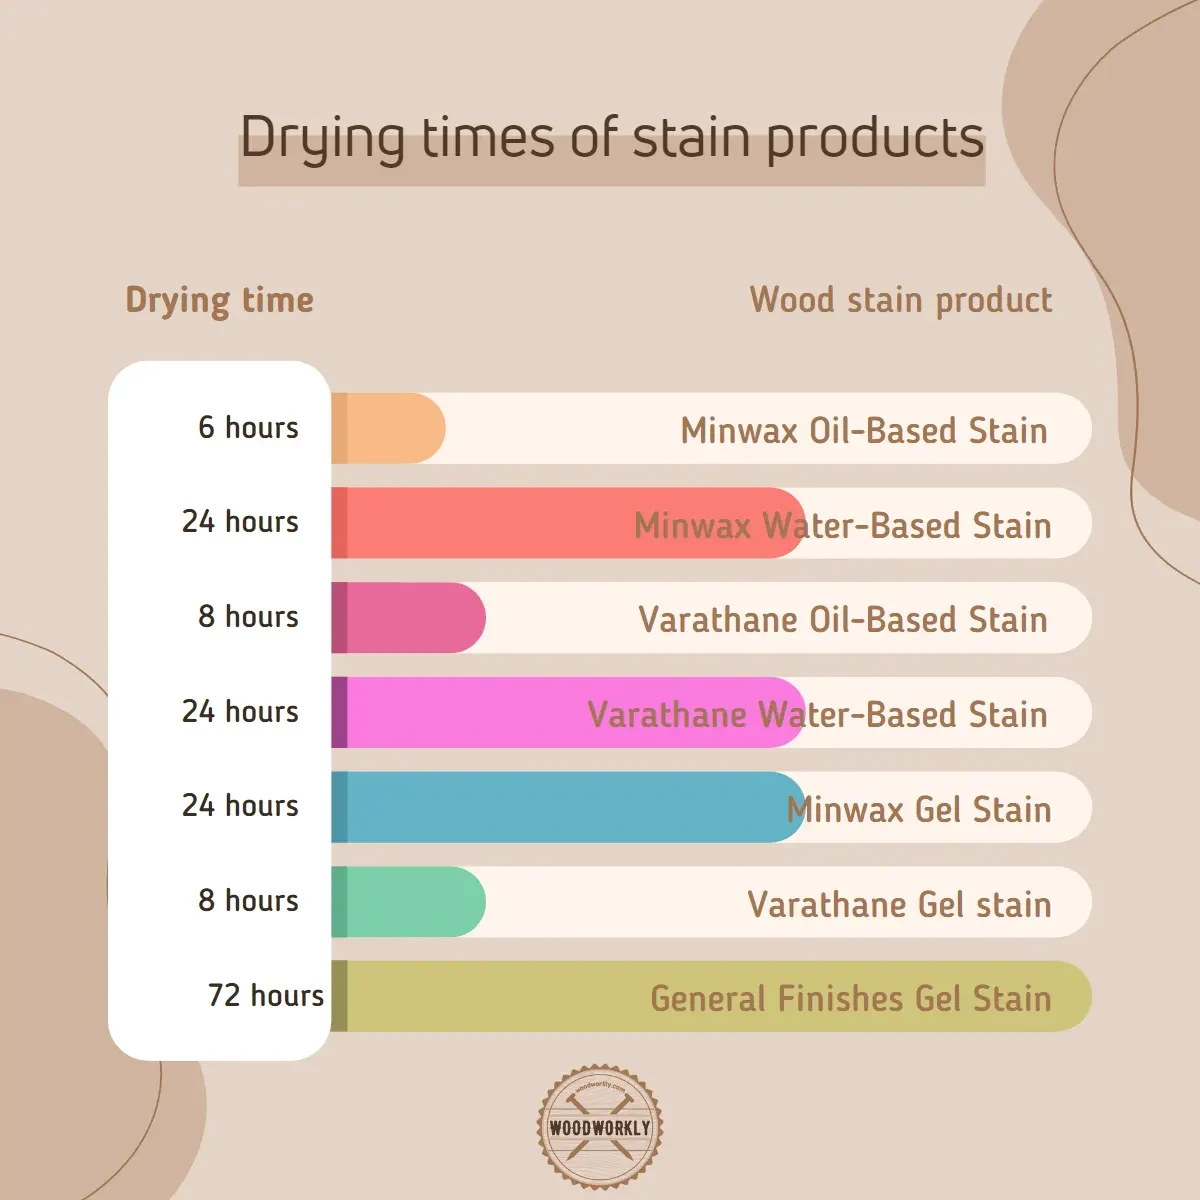
How long should I wait between stain coats and for the stain to dry on my oak project?
The drying time for stains can vary based on the type of stain used, the temperature, and humidity levels.
Generally, it’s a good idea to wait at least 4-6 hours between stain coats on oak and 24 hours for the final coat to dry completely.
Always refer to the manufacturer’s instructions on the stain container for specific drying times and recommendations.
How many coats of stain should I apply to my oak project for the best results?
The number of coats needed depends on the desired color intensity and the type of stain you’re using.
For some projects, a single coat may be sufficient, while others may require two or more coats to achieve the desired depth of color.
To determine the right number of coats, apply a single coat of stain to your oak project, allow it to dry, and assess the color.
If you’re satisfied with the result, one coat is enough.
If you want a deeper color, apply additional coats, waiting for the recommended drying time between each coat, until you achieve the desired shade.
Does Oak Plywood Stain Well?
Oak plywood stain well. But gaining stain completely even throughout the plywood is somewhat more difficult than solid oak wood.
You might end up with a blotchy surface when applying a stain to the oak plywood because of a tiny mistake.
You can prevent the uneven application of stain in oak plywood by following the below steps.
- Sand the oak plywood with 60-grit sandpaper.
- Clean the surface to remove sawdust.
- Dip rag cloth into a filled basin with water.
- Pass the soaked cloth all over the oak plywood until the wood looks damp. (Not wet). Here damping will help to open the wood grain by little and it helps to penetrate the stain evenly throughout the surface.
- Apply stain evenly throughout the wood.
- Let the wood dry completely.
- Apply the final coat and finish the task after the wood is dried completely.
This is the best method to apply stain oak plywood without ending up with a blotchy surface.
Does Oak Stain Better Than Pine?
Oak does stain better than pine. Oak has a large pores structure that can absorb stain perfectly and evenly all over the surface. But when it comes to pine wood, the wood grains are smaller than oak wood.
Therefore, the stain does not penetrate as easily as oak wood in pinewood, and staining is difficult with pine wood and oak stain better than pine on any day.

Did I cover all you wanted to know about: Does Oak Stain Well?
So, in this article, we have widely discussed how does oak stain well and how to stain oak perfectly.
Oak stains well due to its open pores and grainy surface, which allow for better stain absorption and even coverage. To stain oak, first sand the surface, then apply your chosen stain with a lint-free cloth or paintbrush. If needed, apply a second coat, and finally, seal with a protective sealant.
Both white oak and red oak stain well and evenly and make sure to apply the stain along its grain for the best results.
Finally, we have answered some frequently asked questions about oak wood staining as well.
Hope you have gained good knowledge about does oak stain well and how to stain your beautiful oak furniture, cabinet, or woodwork with ease.
So, grab a piece of oak wood, grab the tools, and test the oak wood staining. Have fun!