Wondering if pine takes stain well? Ready to learn the tricks? Unravel the ins and outs of staining pine and achieve a flawless finish for your wood projects!

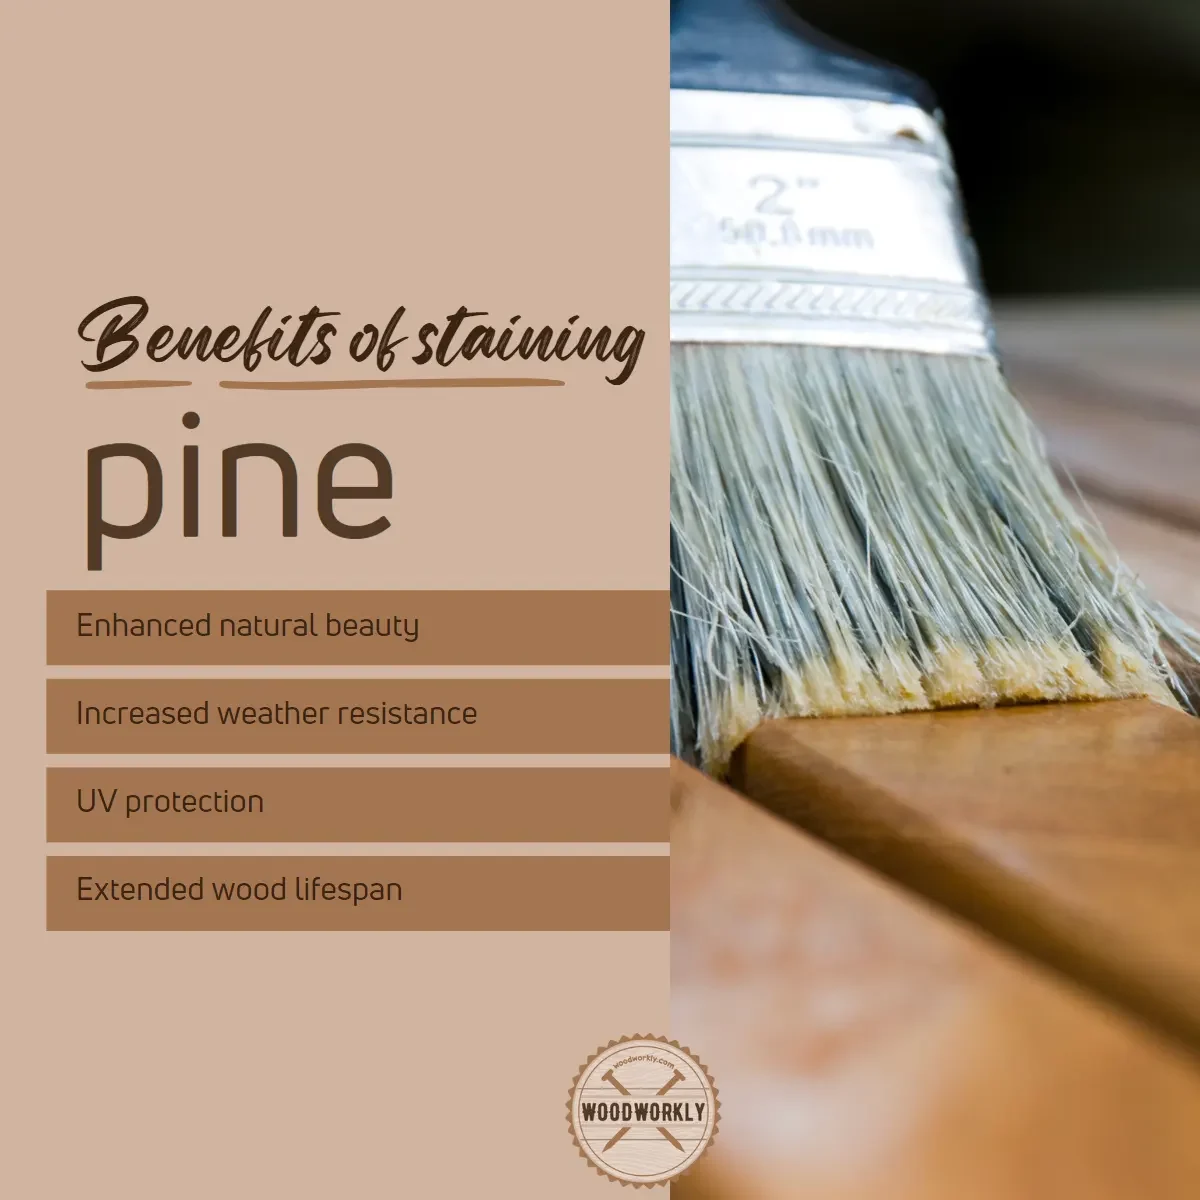
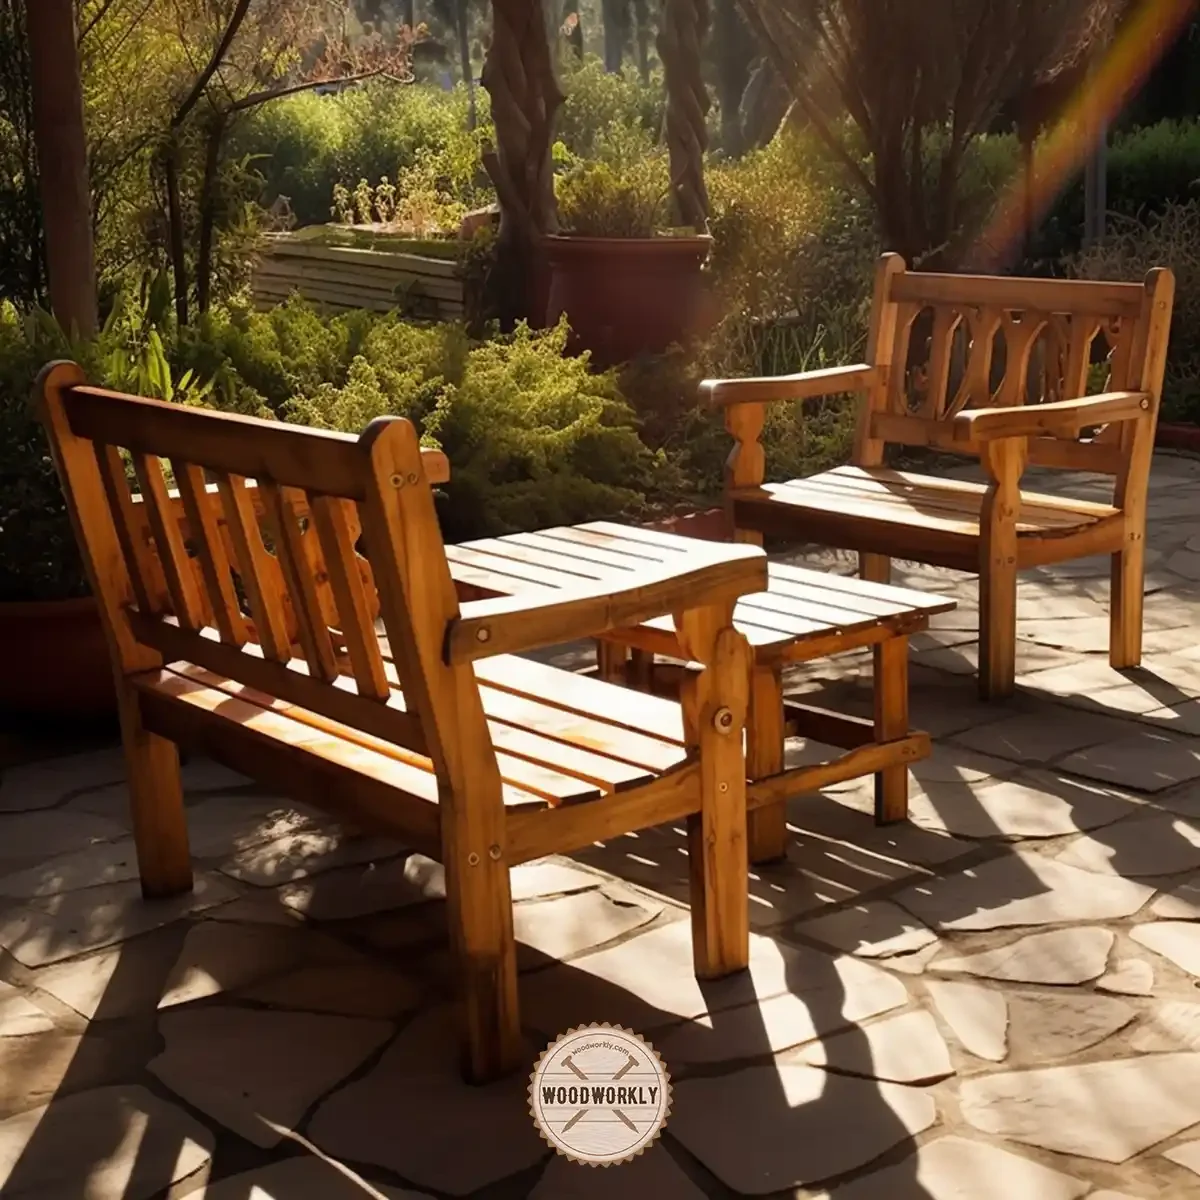
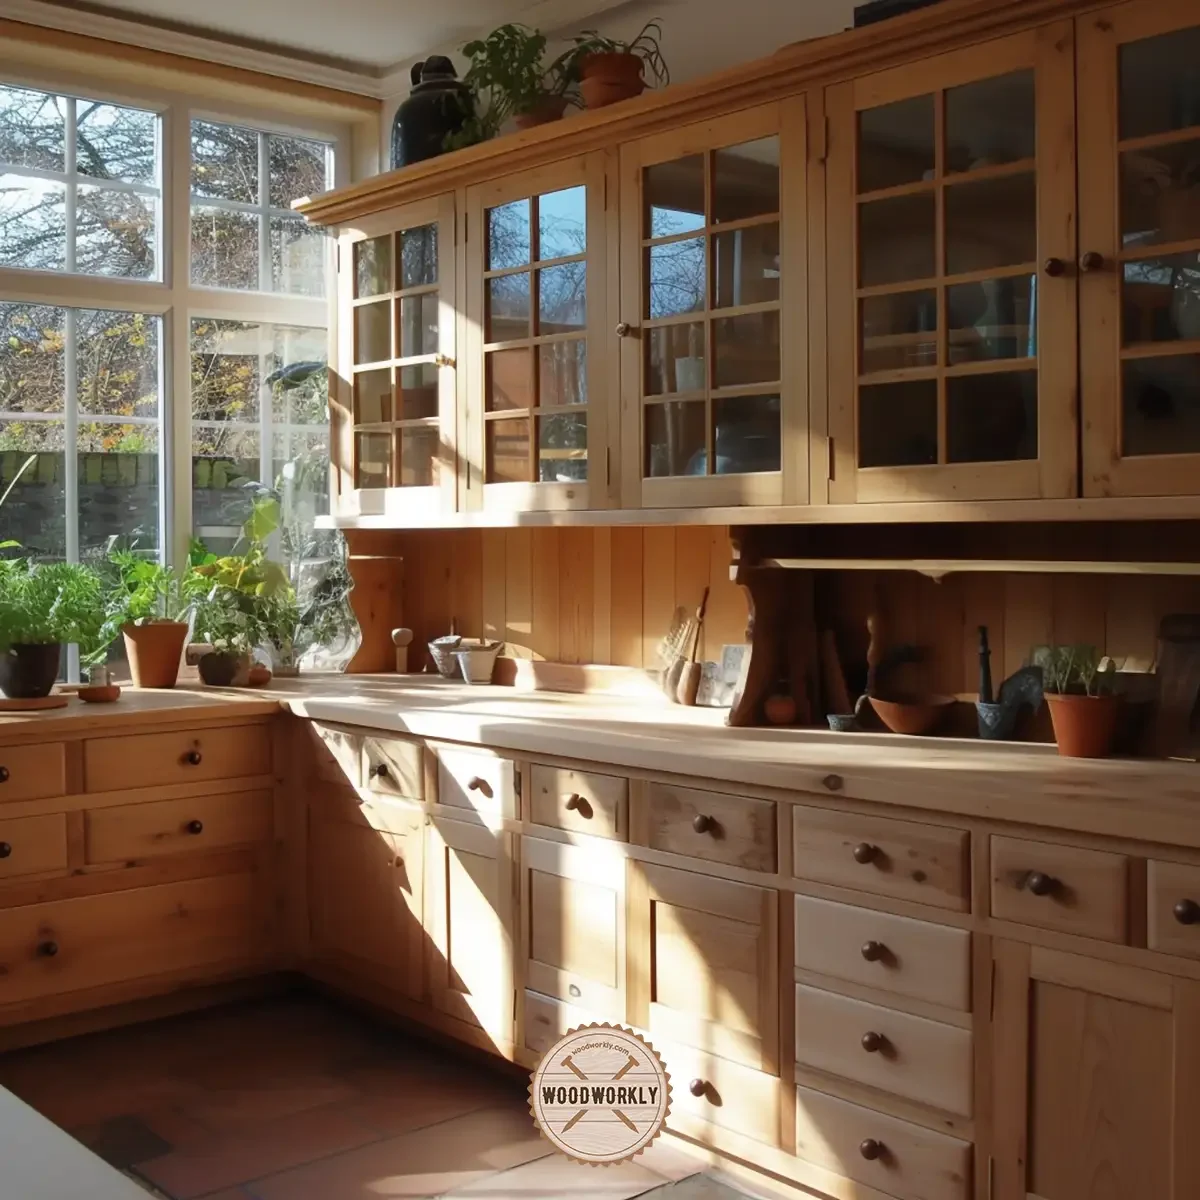
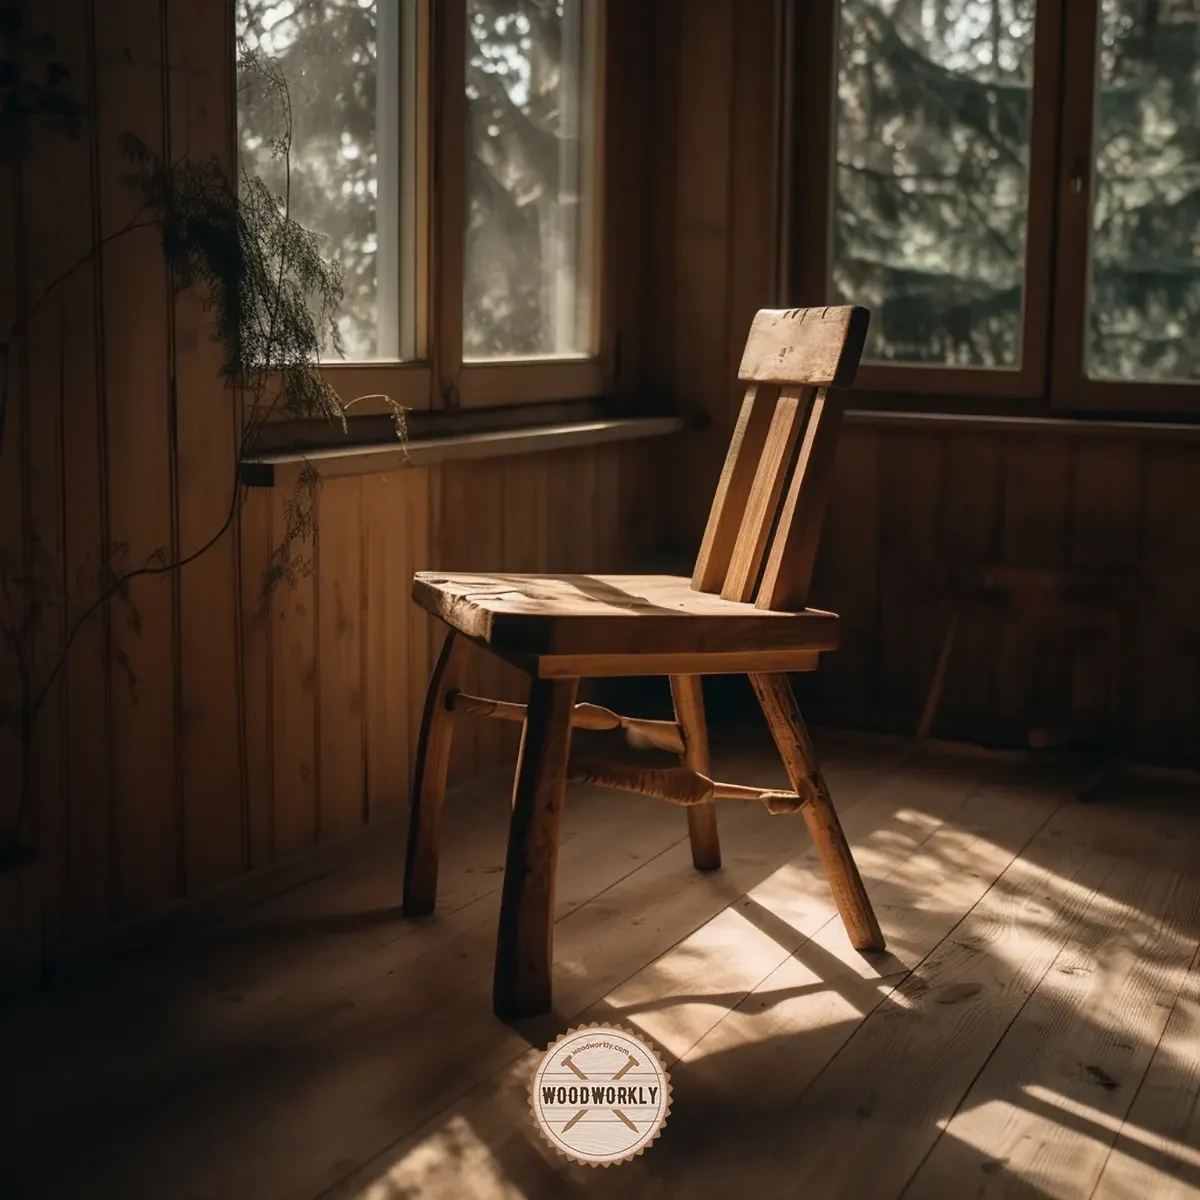
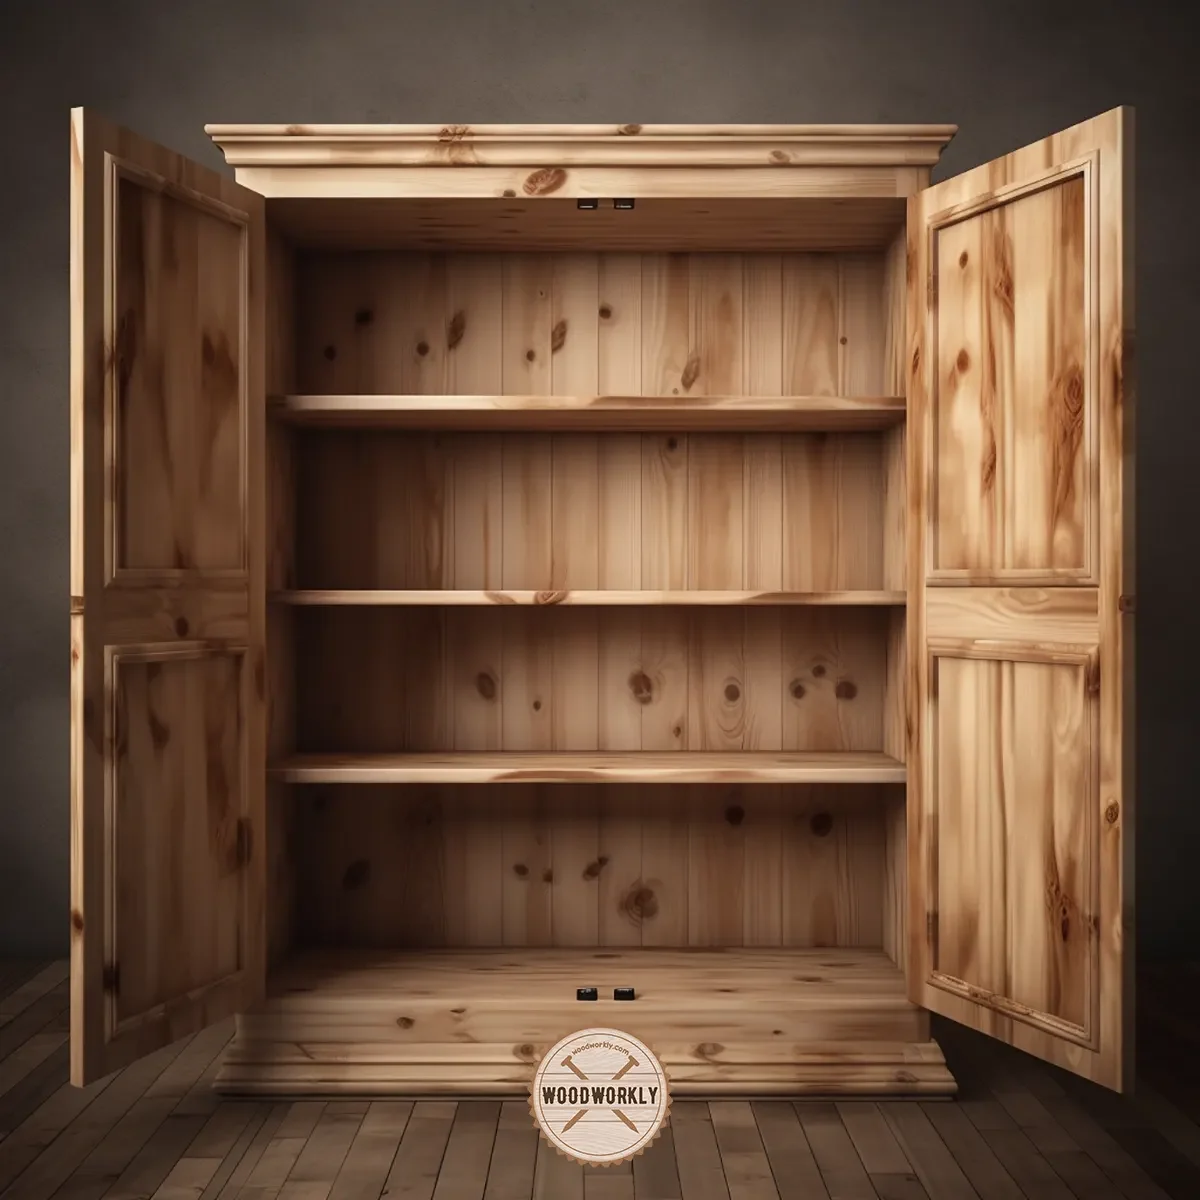
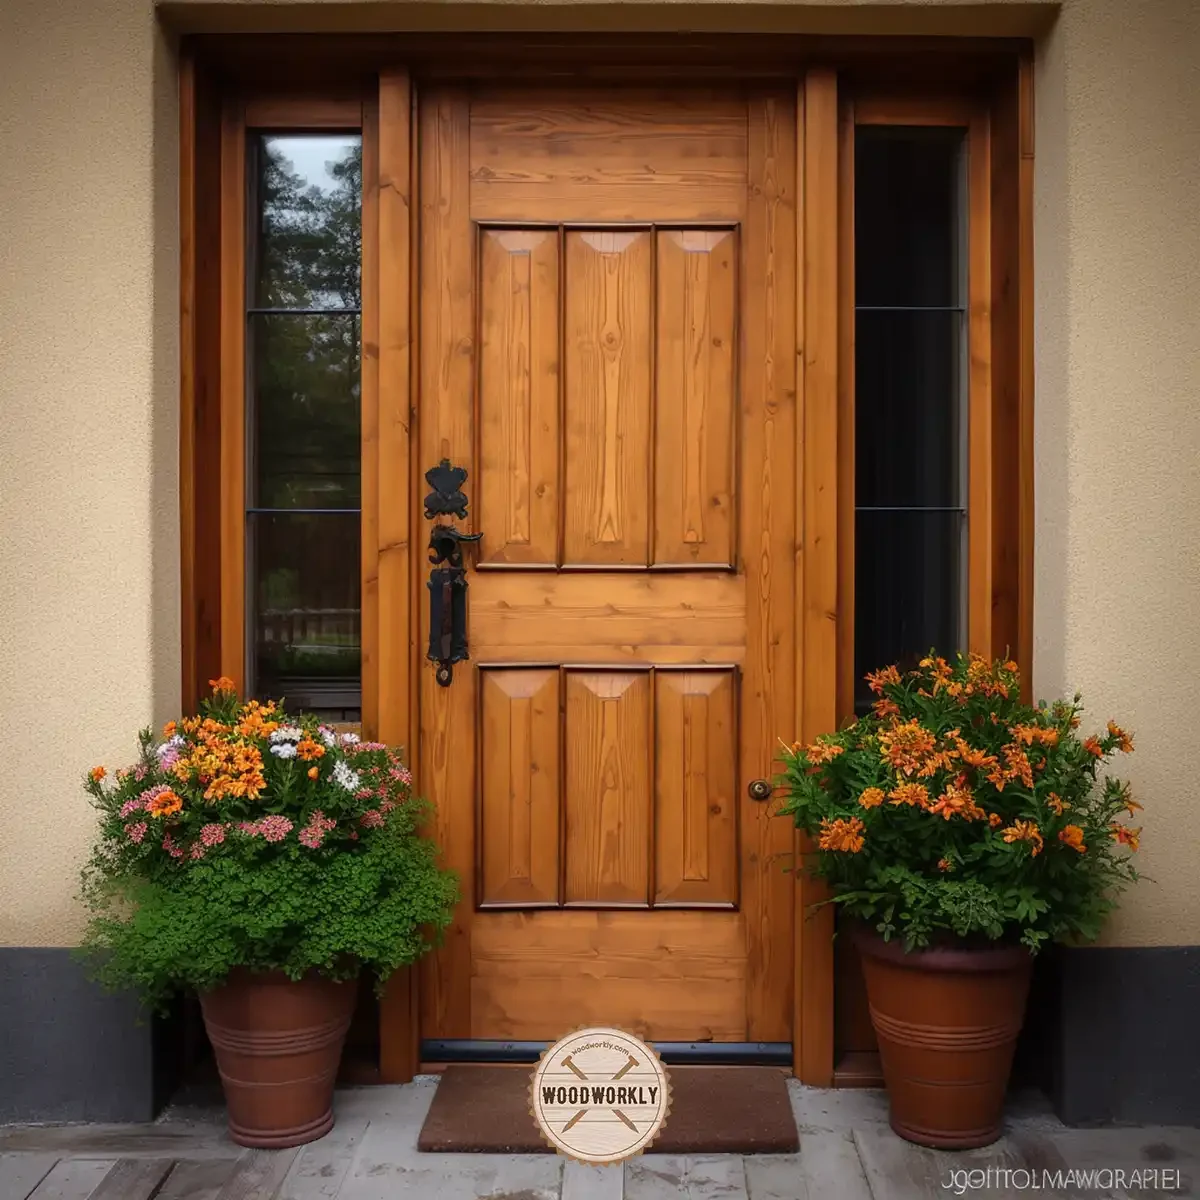
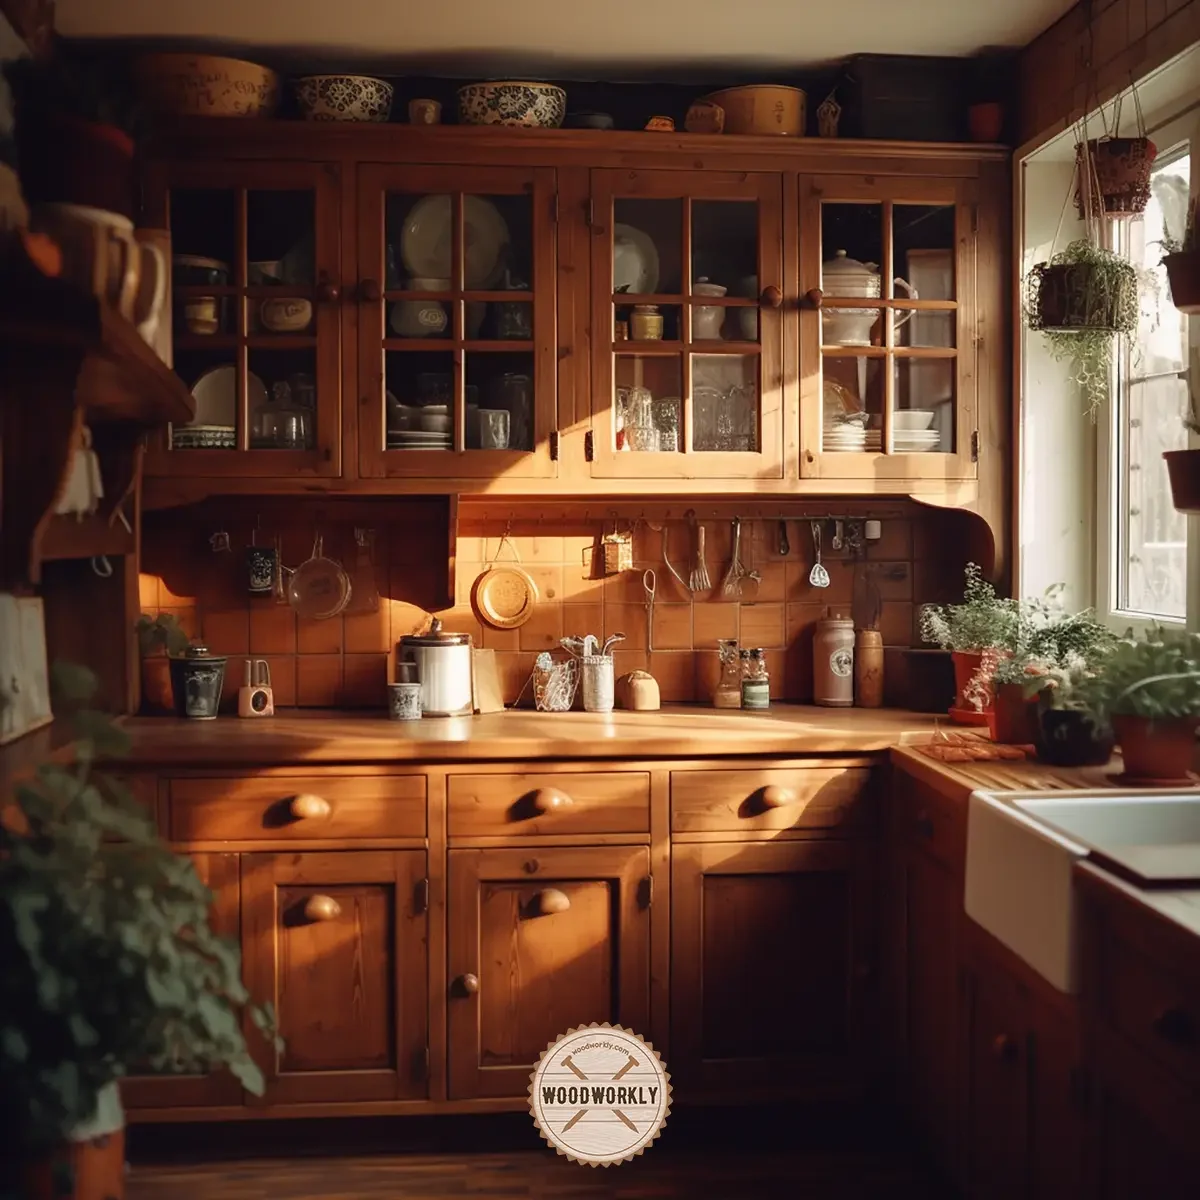
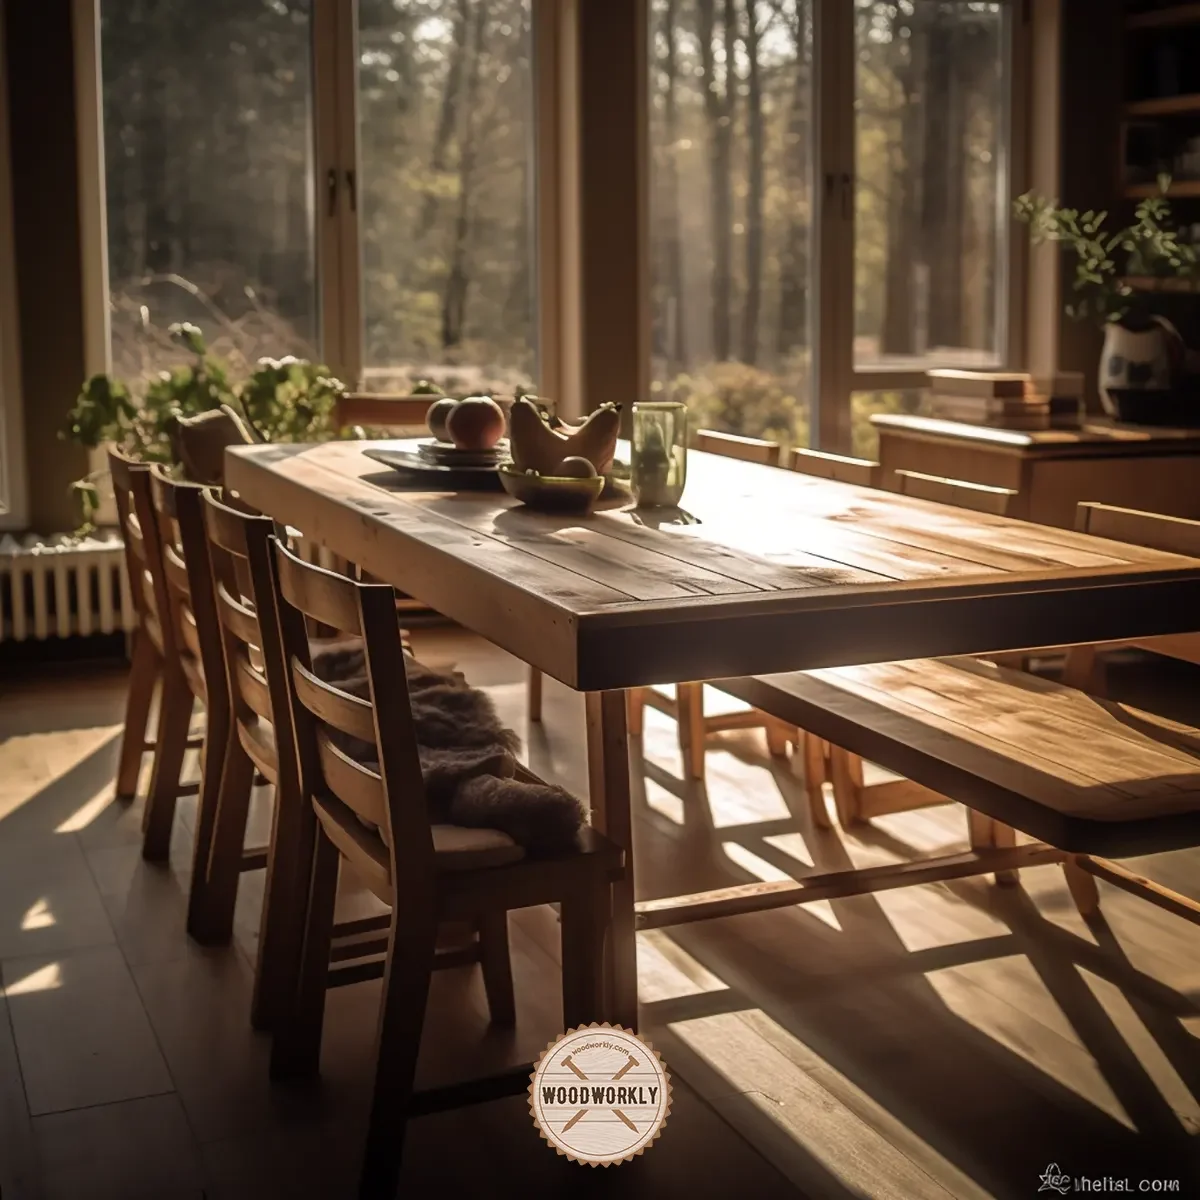
Pine is a strong and durable wood for many different woodworking projects like desks, cupboards, tables, cabinetry, and many more. It is a lightweight softwood with good workability.
Therefore, Pine is popular among woodworkers. But when it comes to the finishing part, most woodworkers are curious about staining pine due to its grain.
I did some research about this and got a good experience about staining pine.
So, let’s dive right into the question: Does Pine stain well?
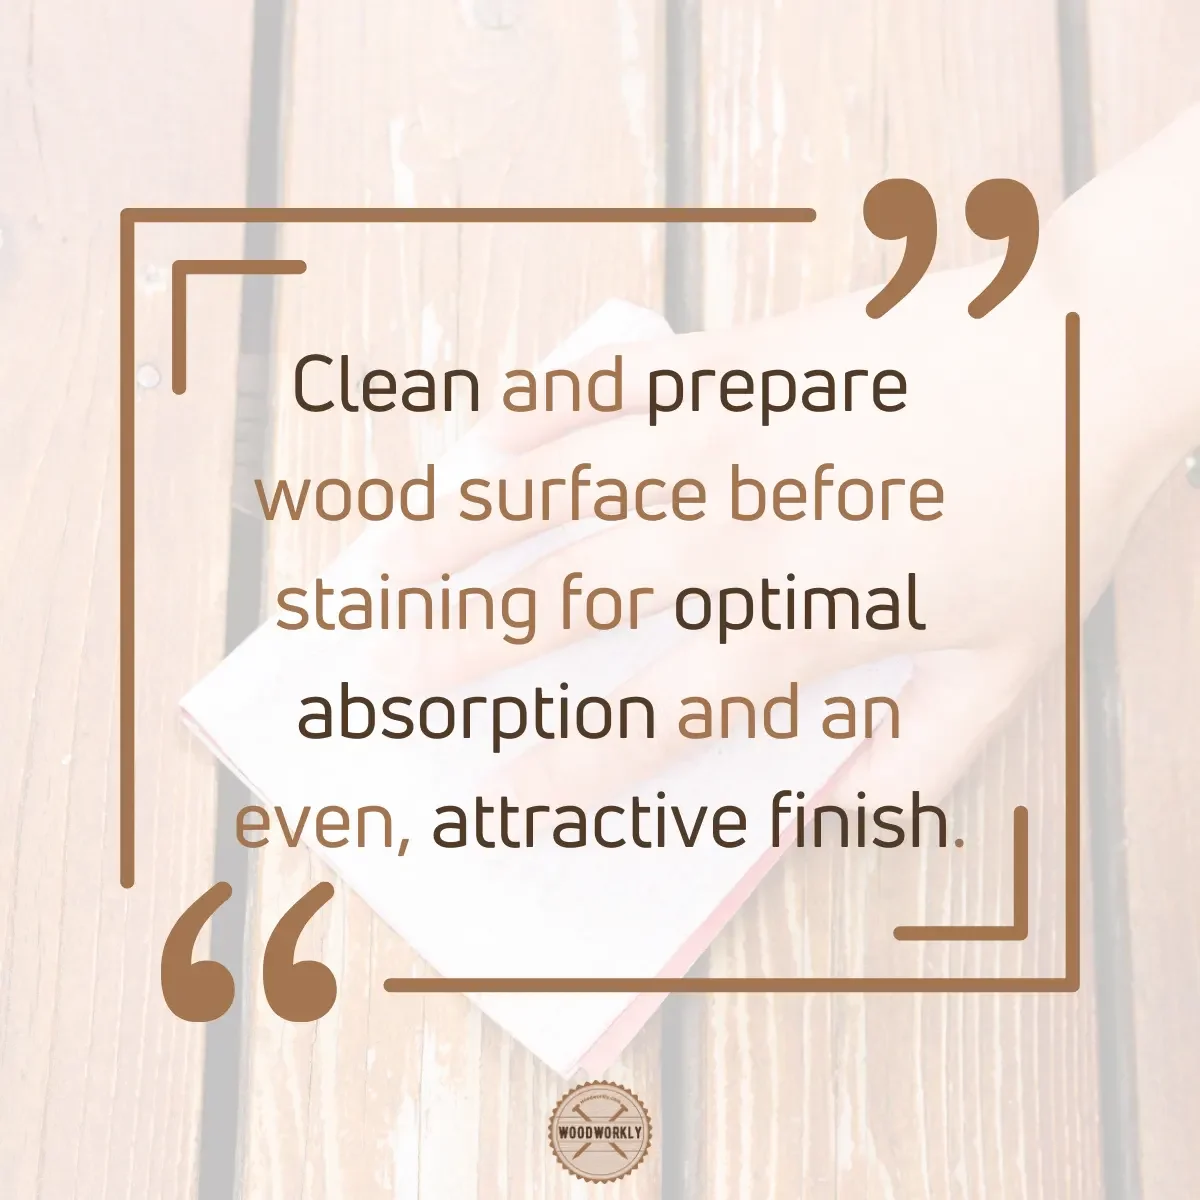
Yes, Pine can be stained well, although it is not an easy task. However, due to its unevenly dense grain pattern and super absorbent pockets, staining Pine requires skill and effort to avoid a blotchy finish. Proper preparation, sanding, and testing on a sample piece are recommended before applying stain to Pine.
But there’s more to know about staining Pinewood than just that.

Staining pine wood answer isn’t quite straightforward, as several factors come into play when it comes to staining pine.
But don’t worry, I’ll guide you through these factors, and together, we’ll find the best way to achieve a beautiful finish on your pine project.
So, in this article, we’ll deeply discuss does Pine stain well, the best stain for Pine, and a simple method you can prevent getting blotchy surfaces and staining Pine well.
Furthermore, we’ll answer some frequently asked questions about staining Pine wood compared to other woods.
Let’s jump in!

Is Pine Easy to Stain?
Pine is not an easy wood to stain. Mostly staining Pine wood ends up with a blotch surface, occurring grain reversal and getting murky colors.
These issues make stain unnatural and don’t give the beautiful color and surface you want.
But there’s a correct procedure for staining Pine well without getting any of these issues. That is by sealing the wood using a wood conditioner before staining.
That way, you can prevent the wood from absorbing more pigments randomly in different areas and be able to apply the stain evenly throughout the surface.
Using stain on unevenly dense wood-like Pine can only color the latewood. It will never act as a protective layer because stain won’t penetrate evenly to the latewood.
This will cause grain reversal which is also known as the peculiar effect.
Factors affecting pine’s staining ease
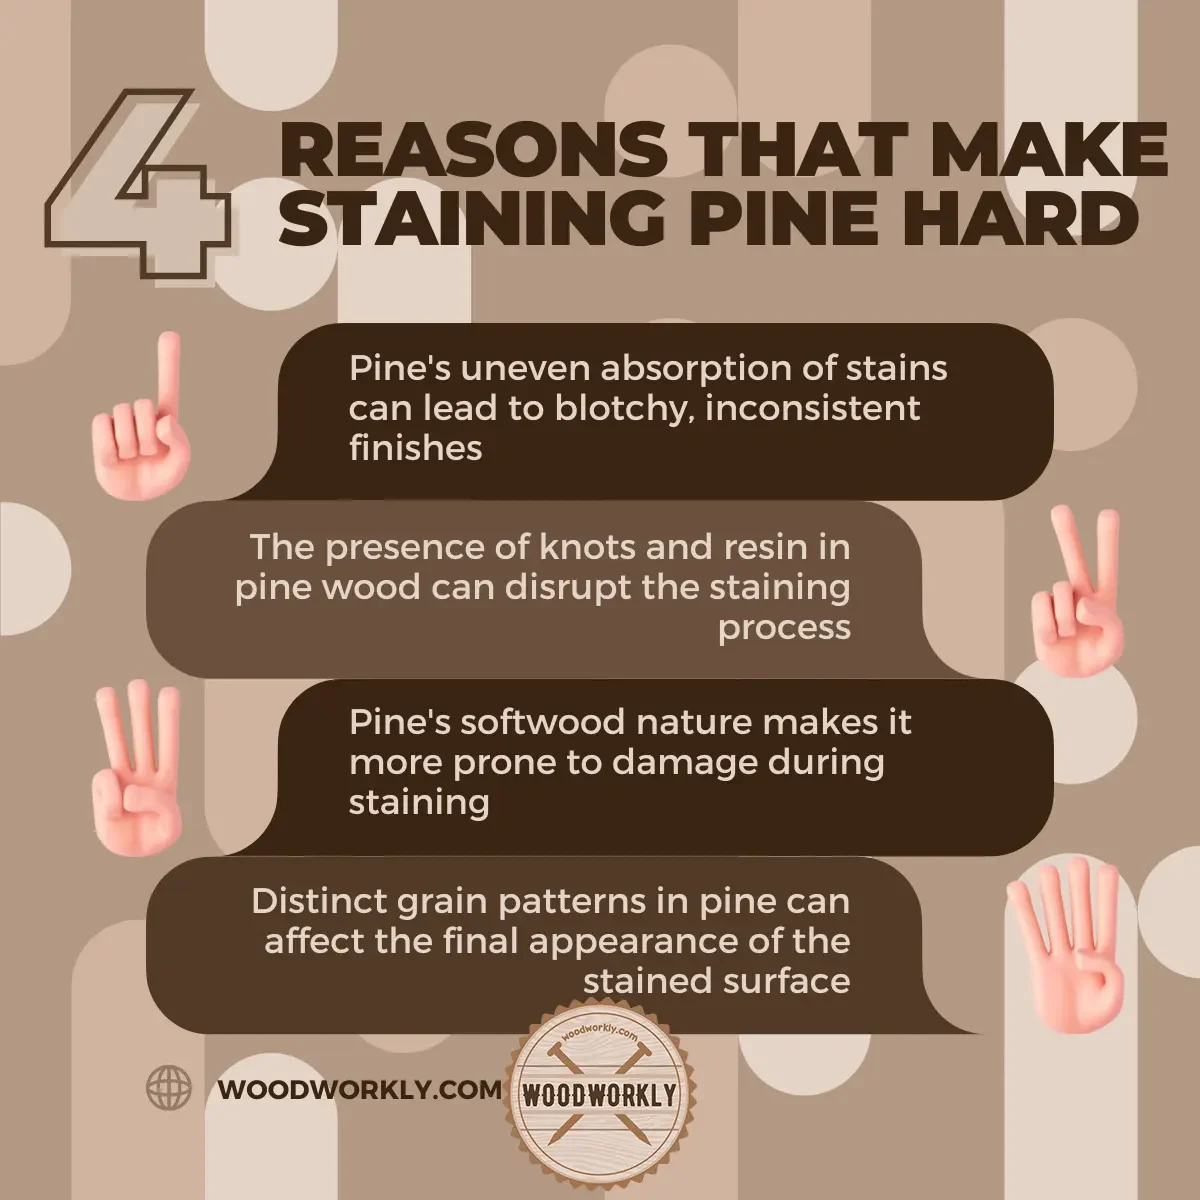
- Grain patterns: Pine has a unique grain pattern, consisting of alternating sections of dense latewood and less-dense earlywood. This characteristic can make staining a bit tricky, as the stain tends to absorb unevenly, resulting in a blotchy appearance.
- Resin content: Pine naturally contains resin, which can sometimes seep through the surface and interfere with the stain’s absorption, making it harder to achieve a consistent color.
- Wood quality: The quality of the pine you’re working with can also impact the staining process. For instance, if the wood has a lot of knots or sapwood, it might be more challenging to achieve a uniform stain.
The impact of pine’s softwood nature on staining
As a softwood, pine is generally more absorbent than hardwoods. This characteristic can be both a blessing and a curse when it comes to staining.
On one hand, the stain will penetrate the wood more quickly, requiring less time for application.
However, this absorbency can also lead to uneven stain absorption, especially in areas with contrasting grain patterns.
In some cases, using a wood conditioner before staining can help minimize this issue by creating a more uniform surface for the stain to penetrate.
Comparing pine to hardwoods in staining difficulty
When compared to hardwoods like oak or maple, pine can be a bit more challenging to stain.
Hardwoods tend to have a more consistent grain pattern and are less prone to blotchiness.
However, with proper preparation and technique, you can achieve beautiful results when staining pine.
Pine is one of the most popular woods in woodworking, and staining is a must thing in woodworking.
But because of having different densities of wood fibers across the grain pattern of Pine, screen blotchiness may occur.
When the wood gets denser and denser, the stain color ends up uneven.
But by using stain products specially manufactured for uneven dense woods like Pine, you’ll be able to stain Pine well with fewer issues.
As you can see staining pine isn’t necessarily a walk in the park, but with the right approach, you can definitely achieve stunning results.
The key is understanding the factors that affect pine’s staining ease and taking the necessary steps to overcome these challenges.
As a seasoned woodworker, I can assure you that with practice and patience, you’ll be staining pine like a pro in no time!
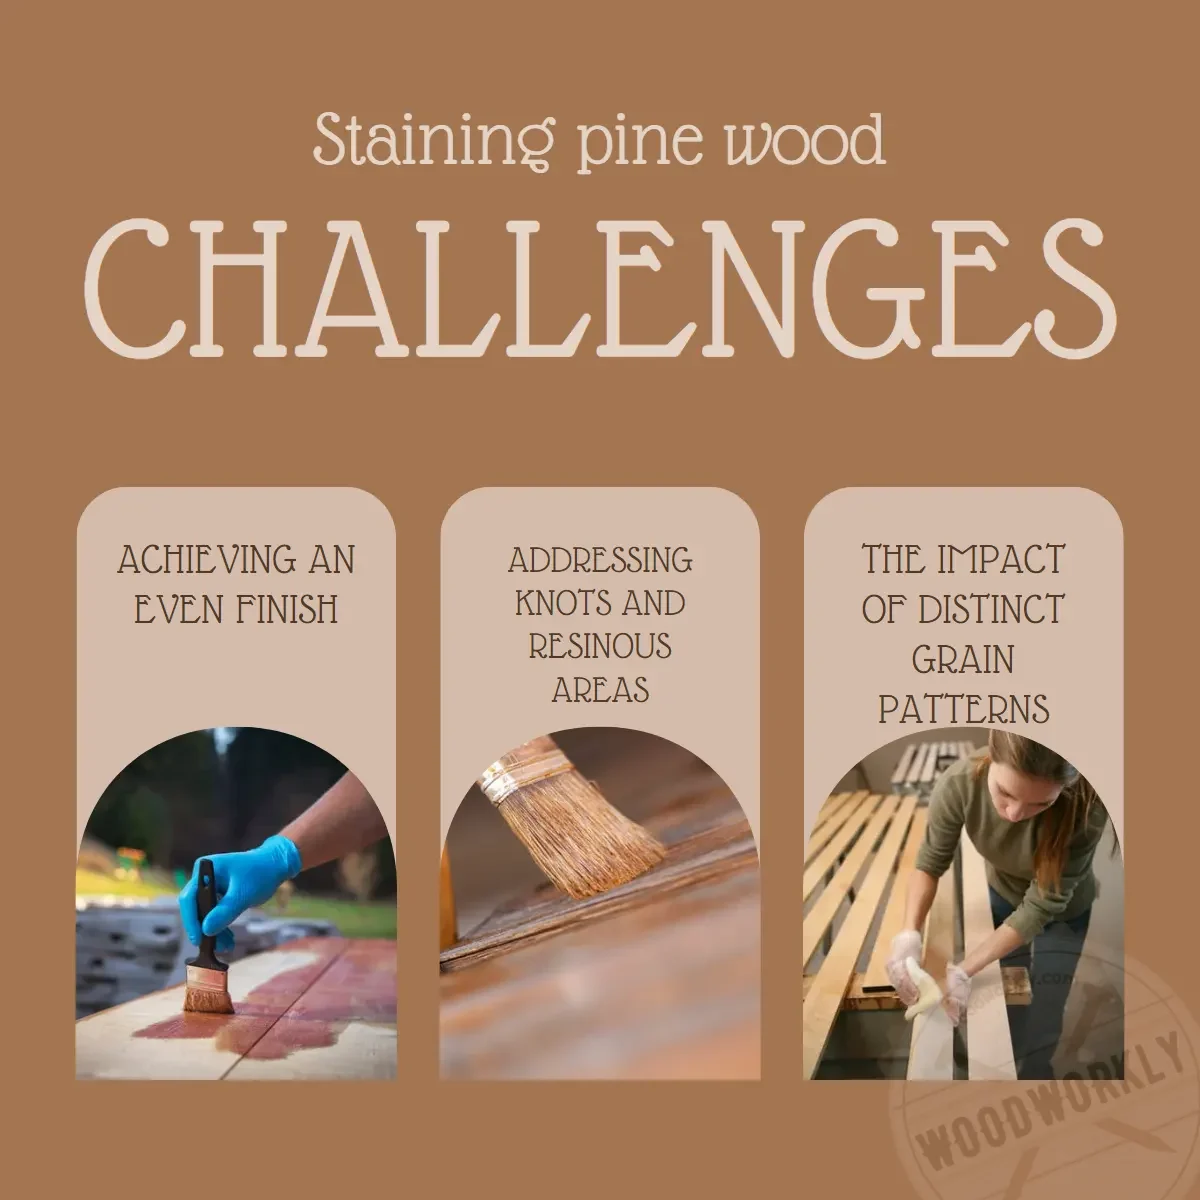
Challenges of Staining Pine Wood
As you already know pine wood is not an easy wood to stain due to its unique grain pattern, high stain absorption, and resin content of the wood.
So, before we get into staining the pine wood, let’s see what challenges ahead you’ll have to deal with.
So, buckle up, and let’s get started.
Pine’s uneven absorption of stains
First off, let’s tackle the pesky issue of pine’s uneven absorption of stains.
You see, the softwood nature of pine, coupled with its contrasting grain patterns, can lead to a blotchy, uneven appearance when stained.
But fear not! A wood conditioner is your secret weapon here.
Apply it before the stain to even out the absorption and reduce blotchiness. Just follow the manufacturer’s guidelines, and don’t forget to let it dry before moving on to the staining step.
Knots and resin in pine affecting the staining process
Next up, we have knots and resin, the dynamic duo that can throw a wrench in your staining process.
Knots, being denser than the surrounding wood, can be stubborn and end up looking lighter than the rest of your piece.
Meanwhile, resin in pine can create a barrier on the surface, preventing the stain from penetrating evenly.
Don’t fret, though! You can seal the knots with a shellac-based primer before staining, which will help keep the resin in check and ensure a consistent finish.
And if you can, opt for pine boards with fewer knots and resin pockets for your project.
The impact of grain patterns on the final finish
Finally, let’s talk about the impact of grain patterns on the final finish. Pine’s grain patterns can be both beautiful and challenging when it comes to staining.
The alternating sections of dense latewood and less-dense earlywood can make achieving a uniform stain feel like an uphill battle.
But don’t lose hope! Try applying the stain in thin layers over pine, allowing each layer to dry before adding the next.
This technique gives you more control over the final color and helps minimize any unevenness caused by the grain patterns.
You can also experiment with gel stains, as their thicker consistency is less likely to penetrate the wood deeply, leading to a more even finish.
In a nutshell, staining pine wood can be quite the adventure, but with the right knowledge and techniques, you’ll overcome the challenges like a champ. Remember, practice makes perfect!
So, if your first attempt isn’t spot-on, don’t worry. Keep experimenting and refining your methods, and soon enough, you’ll be a master of staining pine!
What Kind of Stain to Use on Pine?
Because of having several challenges when staining pine compared to other woods, you need to have a good understanding about the stain types that go well with pine.
Otherwise, there is a high possibility of going on the wrong track since pine wood itself does not like to take stain evenly.
So, let’s dig in and explore the best options for staining pine wood.
Oil-based vs. water-based stains: The eternal debate
When it comes to staining pine, you’ll come across two primary types of stains: oil-based and water-based.
The decision between the two can be tough, but I’m here to help you make an informed choice.
Oil-based stains are typically more durable and offer a longer working time, which can be a blessing for beginners.
They also provide a deeper, richer color, which many woodworkers prefer. However, they come with a longer drying time and a strong odor, so proper ventilation is essential.
On the other hand, water-based stains dry faster and have a lower odor, making them a more eco-friendly choice.
They’re also easier to clean up, but be warned – they can raise the wood grain, requiring additional sanding.
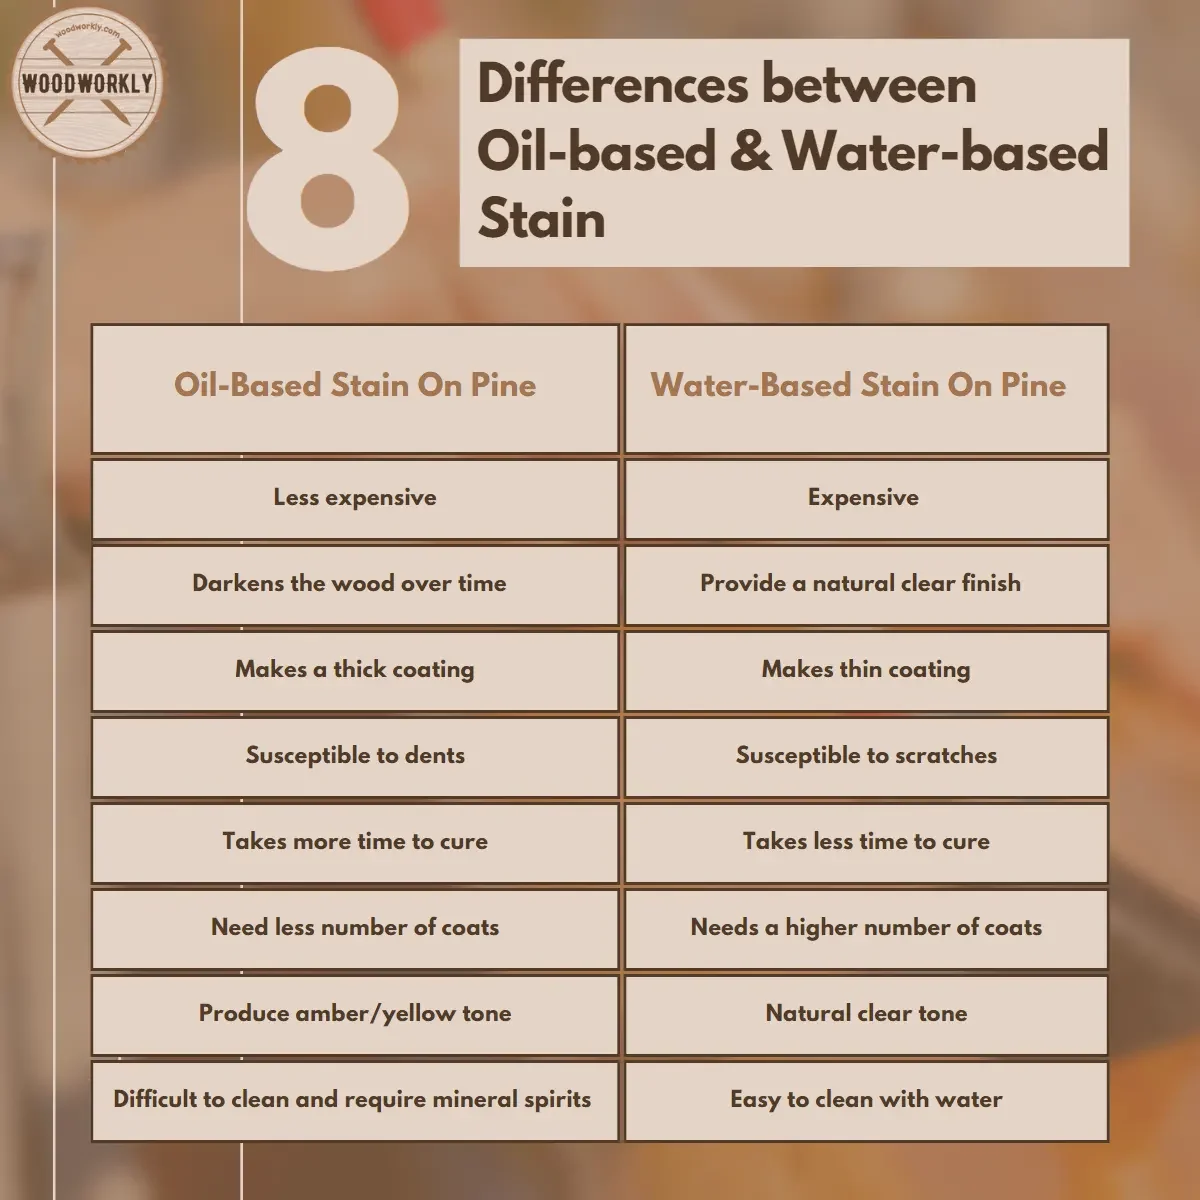
Plus, there is a high possibility of oil-based stains turning into a slight yellow color gradually due to high volatile organic content while water-based stains will remain in their natural clear finish forever.
To sum it up, both options have their pros and cons, so consider your specific needs and preferences when making a choice.
Gel stains: The secret to better control and even application
Now, let’s talk about gel stains, which are a game-changer for staining pine wood.
Their thicker consistency allows for better control and more even application, making them perfect for overcoming the challenges of staining pine.
Gel stains are also less likely to cause blotchiness, as they don’t penetrate the wood as deeply as traditional stains.
Mostly, gel stains tend to sit on the pine wood surface and change the color of the wood.
Even if the pine wood is already treated or untreated, gel stain is able to do the job so well since it doesn’t bother to penetrate the wood.
If you’re new to staining pine or looking for a more foolproof option, give gel stains a try. You might be pleasantly surprised by the results!

Toning the stain to achieve the desired color
Finally, let’s discuss toning your stain to achieve the desired color on your pine wood.
Since pine can sometimes be unpredictable when it comes to stain absorption, you might need to experiment with different stain colors and concentrations to get the look you’re after.
Remember, you can always apply multiple layers of stain, allowing each one to dry before applying the next.
This technique gives you greater control over the final color and minimizes any unevenness caused by the wood’s grain patterns.
You can mix different types of stains and get the color you want. But make sure those stains are from the same base like water-based with water-based or oil-based with oil-based.
Read the correct procedure for mixing stains to get promising results.
Alternatively, consider using a pre-stain conditioner or a wood toner to achieve a more consistent color across your project.
Wood conditioner is able to penetrate the pine wood and control and limit the absorption of wood fibers to get an even-looking finish.
Apply wood conditioner before staining is a bonus advantage to get a nice even finish after staining the wood.
These products can help balance out the pine’s natural characteristics, resulting in a more even and attractive finish.
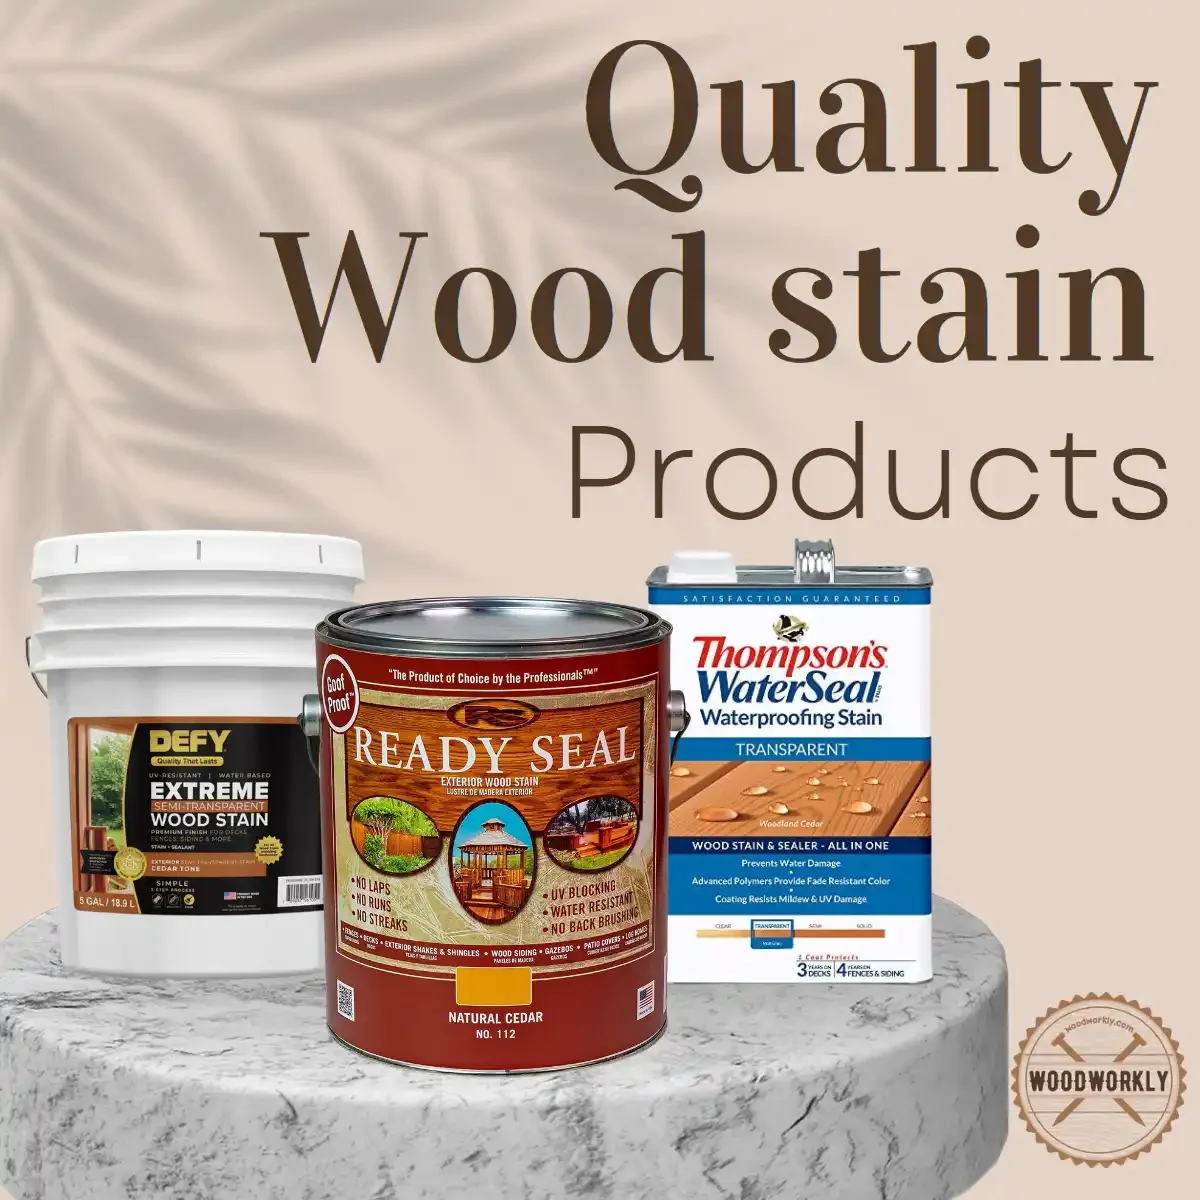
Best Stain for Pine Wood
Because of being a difficult wood to stain, you need to have a clear idea about what stain products you should select to stain Pine wood.
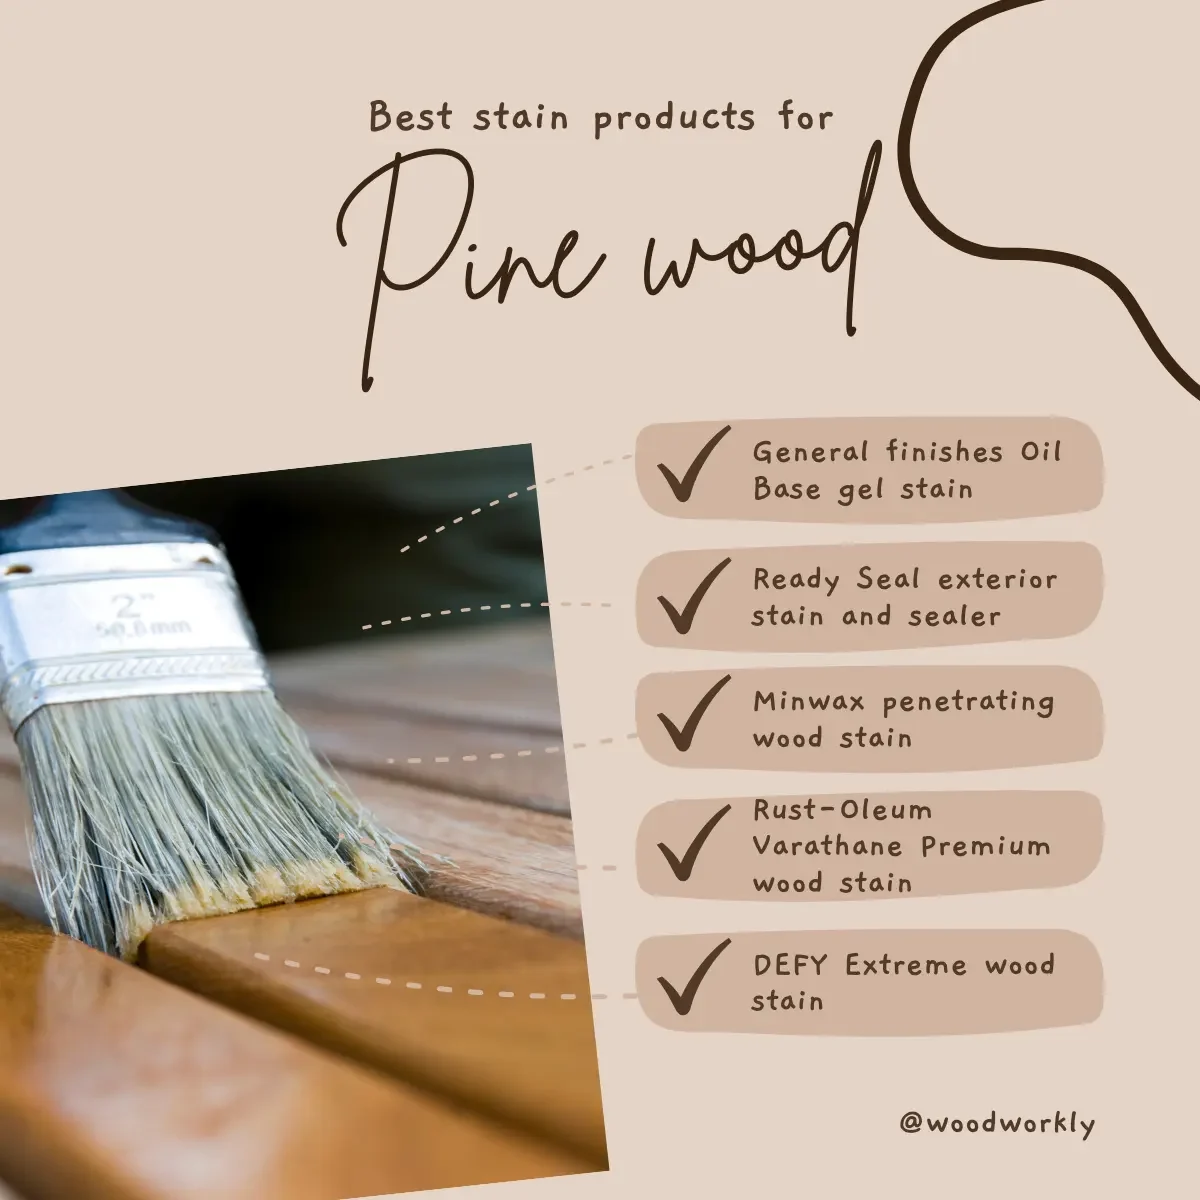
Here’re some popular stain products for Pine wood,
- General finishes Oil Base gel stain
- Ready Seal exterior stain and sealer
- Minwax penetrating wood stain
- Rust-Oleum Varathane Premium wood stain
- DEFY Extreme wood stain
- SamaN Water-Based wood stain
Among the above different types of stain products, Gel stain is the best stain for Pine wood.
In summary here’re the different applications of the above wood stains.
| Wood Stain Products | Applications |
| General finishes Oil Base gel stain | Best Overall stain for Pine |
| Ready Seal exterior stain and sealer | Pine outdoors and larger projects |
| Minwax penetrating wood stain | Best Pine penetrating stain |
| Rust-Oleum Varathane Premium wood stain | Best stain for Pine floors |
| DEFY Extreme wood stain | Best stain for Pine fences |
| SamaN Water-Based wood stain | Best stain for Pine furniture |
So, let’s discuss each of the above stains one by one and see how they look on Pine wood separately.
General Finishes Oil-Based Gel Stain On Pine
General Finishes oil-based gel stain is the best staining product for Pine wood. It is easy to apply.
Because of being an oil-based stain, General Finishes gel stain can easily wipe on.
Here’re the main qualities of General Finishes oil-based gel stain,
- It gives a lustrous finish to your Pine wood furniture
- It is Heavy bodied and does not penetrate too deep into the wood
- Able to get an even appearance
- Easy to apply even for a beginner in woodworking using a foam brush.
General Finishes oil-based gel stain can give your Pine furniture and woodworks a glossy smooth finish.
It can apply to both indoor and outdoor Pine woodworks. It gives a beautiful, enriched look to your Pine wood furniture and does not darken the color.
It only enhances the natural color of Pine wood.
If you want to get a darker or lighter color better to go with a darker color stain of General Finishes oil-based gel stain.
To enhance the natural Pine wood color, better stick with General Finishes New Pine oil-based gel stain.
While changing or enhancing the color of the wood, General Finishes oil-based gel stain is able to act as a protective layer for the Pine wood surface.

I have listed the specifications of General Finishes oil-based gel stain.
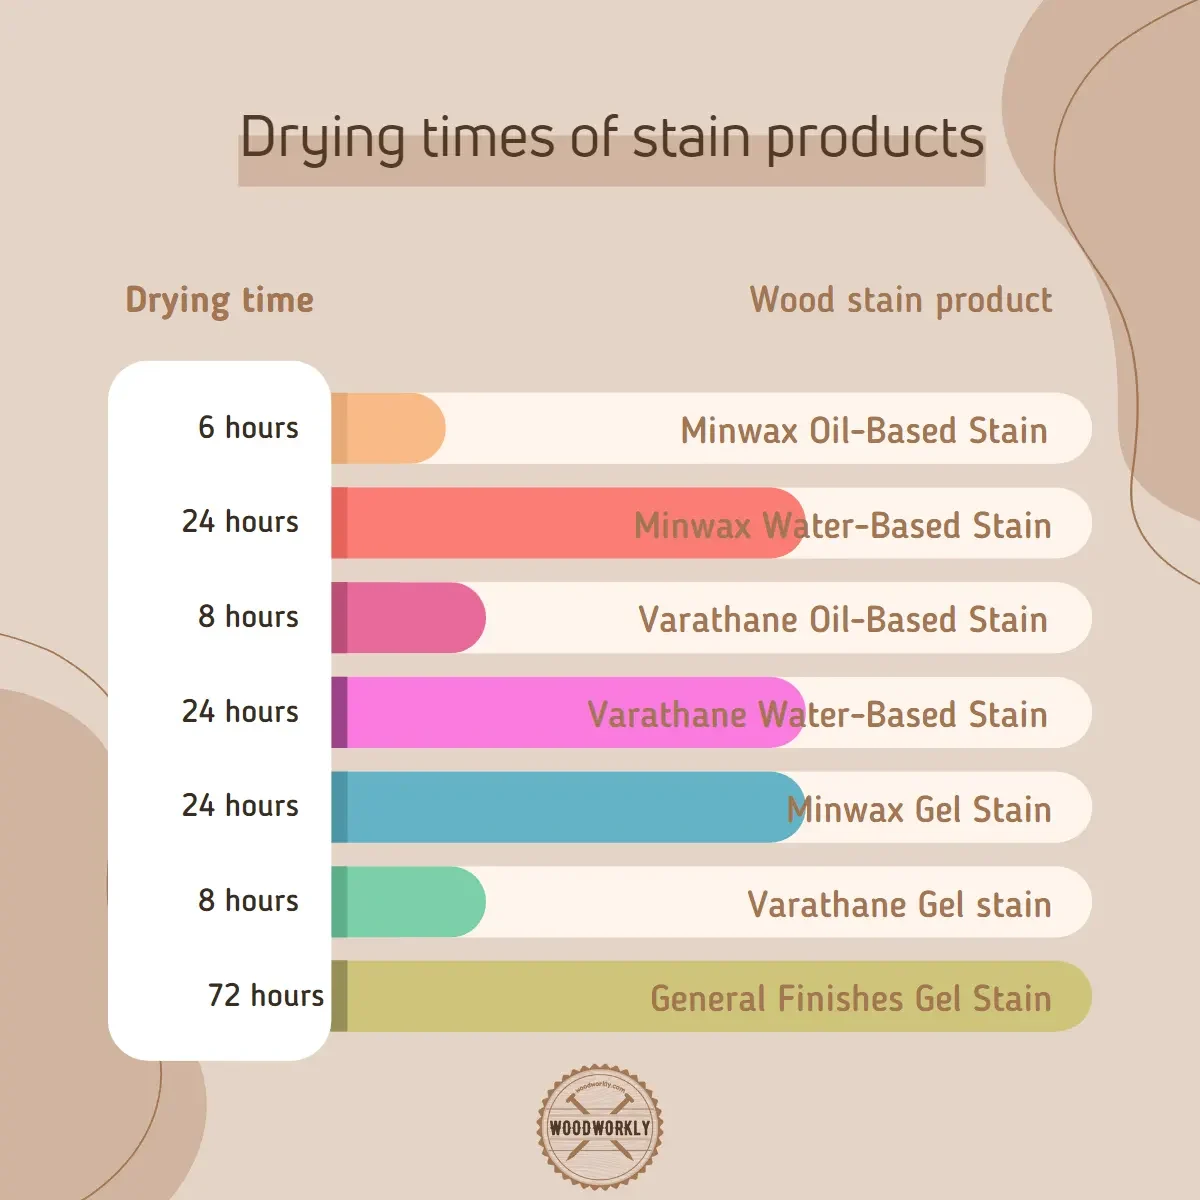
| Color | New Pine and many other |
| Drying Time | 24 hours between coats |
| Type | Satin Oil-Based |
| Applications | Cabinets, Floors, Furniture |
Ready Seal Exterior Stain and Sealer On Pine
Ready Seal Exterior stain and sealer is the best stain for Pine outdoor furniture and woodworks. It can also use for larger construction projects.
Because having especially formulated chemical ingredients, gives protection from environmental elements and improves the durability of your Pine wood furniture.
Here’re the main qualities of Ready Seal Exterior stain and sealer,
- No primer is needed
- Offer protection from UV and water resistance
- Easy to apply
- Can apply under any temperature range
- No back brushing is required
- Take up to 14 days to reach its actual color
Ensure not to apply over painted Pine wood surface because the paint layer seals the surface and blocks Ready Seal Exterior stain and sealer from penetrating the wood fibers.
Golden Pine is the best color Ready Seal Exterior stain and sealer for Pine wood.
I have listed the specifications of the Ready Seal Exterior stain and sealer.
| Color | Golden Pine and darker colors |
| Drying Time | 24 Hours |
| Type | Oil-Based stain and sealer |
| Applications | Outdoor furniture |
Minwax Penetrating Wood Stain On Pine
Minwax penetrating wood stain is a deep penetrating wood stain for Pine wood. It provides beautiful color to the Pine wood fur nature and woodworks or enhances the natural color of Pine wood.
Minwax penetrating wood stain deeply penetrates through the wood fibers providing excellent protection and improving the durability of Pine wood that will last over decades.
Here’re the main qualities of Minwax penetrating wood stain.
- Available in 28 different colors
- Penetrate too deep and highlight the grain
- Easy to apply
- Provide good protection and increase durability
Minwax is a famous brand among woodworkers. So you can trust the product for any woodworking project.
Minwax penetrating wood stain is easy to apply but always make sure to apply along the direction of the wood grain to avoid getting a blotchy surface.

With this, I have listed the specifications of Minwax penetrating wood stain.
| Color | Semi-transparent |
| Drying Time | 2 Hours |
| Type | Oil-Based stain and sealer |
| Applications | Cabinets, Furniture, Molding, Doors, Trims |
Rust-Oleum Varathane Premium Wood Stain On Pine
Rust-Oleum Varathane Premium wood stain is the best stain for Pine floors.
It enriches the wood grain because it has quality pigments that penetrate deep inside the wood fibers.
Rust-Oleum Varathane Premium wood stain is able to give protection while enhancing the color of the wood and is applicable for any kind of Pine wood surface.
Here’re the main qualities of Rust-Oleum Varathane Premium wood stain.
- Easy to apply
- Dry fast
- Give rich natural color to the wood
- By wiping, you’ll be able to get evenly stained wood without blotches.
The color-rich translucent pigments enhance the color of the wood, and they are best for interior Pinewood applications.
I have listed the specifications of Rust-Oleum Varathane Premium wood stain.
| Color | Semi-transparent or Ipswich Pine |
| Drying Time | 2 hours between coats |
| Type | Oil-Based stain |
| Applications | Pine Floors and Indoor furniture |
DEFY Extreme Wood Stain On Pine
DEFY Extreme Wood Stain is the best water-based stain for Pine wood.
It is an eco-friendly product that helps enhance the wood’s natural grain while giving excellent resistance to environmental elements.
Here’re the main qualities of DEFY Extreme Wood Stain.
- Able to provide a matte finish
- Provide UV resistance because of having zinc nanoparticles
- Water-based
- Eco friendly
- Easy to apply
Because of having zinc nanoparticles as ingredients, DEFY Extreme Wood Stain protects your Pine furniture or woodwork from harmful UV rays.
Therefore, DEFY Extreme Wood Stain is perfect for outdoor projects. It is highly durable and quality and lasts long with little maintenance.

With this, I have listed the specifications of DEFY Extreme Wood Stain.
| Color | Redwood matte finish |
| Drying Time | 24 Hours |
| Type | Water-Based stain |
| Applications | Pine furniture |
SamaN Water-Based Wood Stain On Pine
SamaN Water-Based wood stain is a perfect stain for Pine wood paneling and cabinets.
It is odorless and safe for kitchen utensils and children’s toys. SamaN Water-Based wood stain is a water-based eco-friendly product.
Here’re some main qualities of SamaN Water-Based wood stain.
- Water-based stain
- Easy to apply
- Useful for DIY products
- Easy to clean
- Available in 40 different colors
SamaN Water-Based wood stain basically can apply on any wood surface without any pro tools.
It doesn’t leave overlapping marks, and one coat is enough to cover up the whole surface evenly.
With this, I have listed the specifications of SamaN Water-Based wood stain.
| Color | Antique Walnut and more |
| Drying Time | 2 Hours |
| Type | Water-Based stain |
| Applications | Panels, Cabinets, Kitchen utensils, Furniture |
Now you have a clear idea about the best stain products for Pine wood you should go with to get the desired finish as you wish.
Factors to consider when choosing the best stain
Now, before you run off and buy the first stain you see, let’s discuss some factors you should consider when choosing the best stain for your pine project:
- Stain type: As we discussed earlier, consider whether an oil-based, water-based, or gel stain will work best for your project. Each type has its advantages and drawbacks, so think about your specific needs and preferences.
- Drying time: Depending on your project’s timeline, you may prefer a fast-drying stain or one that allows for a longer working time. Consider this when comparing stain brands and types.
- Color options: Different brands offer varying color selections, so explore your options to find the perfect hue for your project.
- Ease of application: Some stains are easier to apply than others, so if you’re new to staining pine or just prefer a fuss-free experience, look for brands known for their easy application.
So, let’s consider the need for wood conditioner for Pine woodwork and furniture.
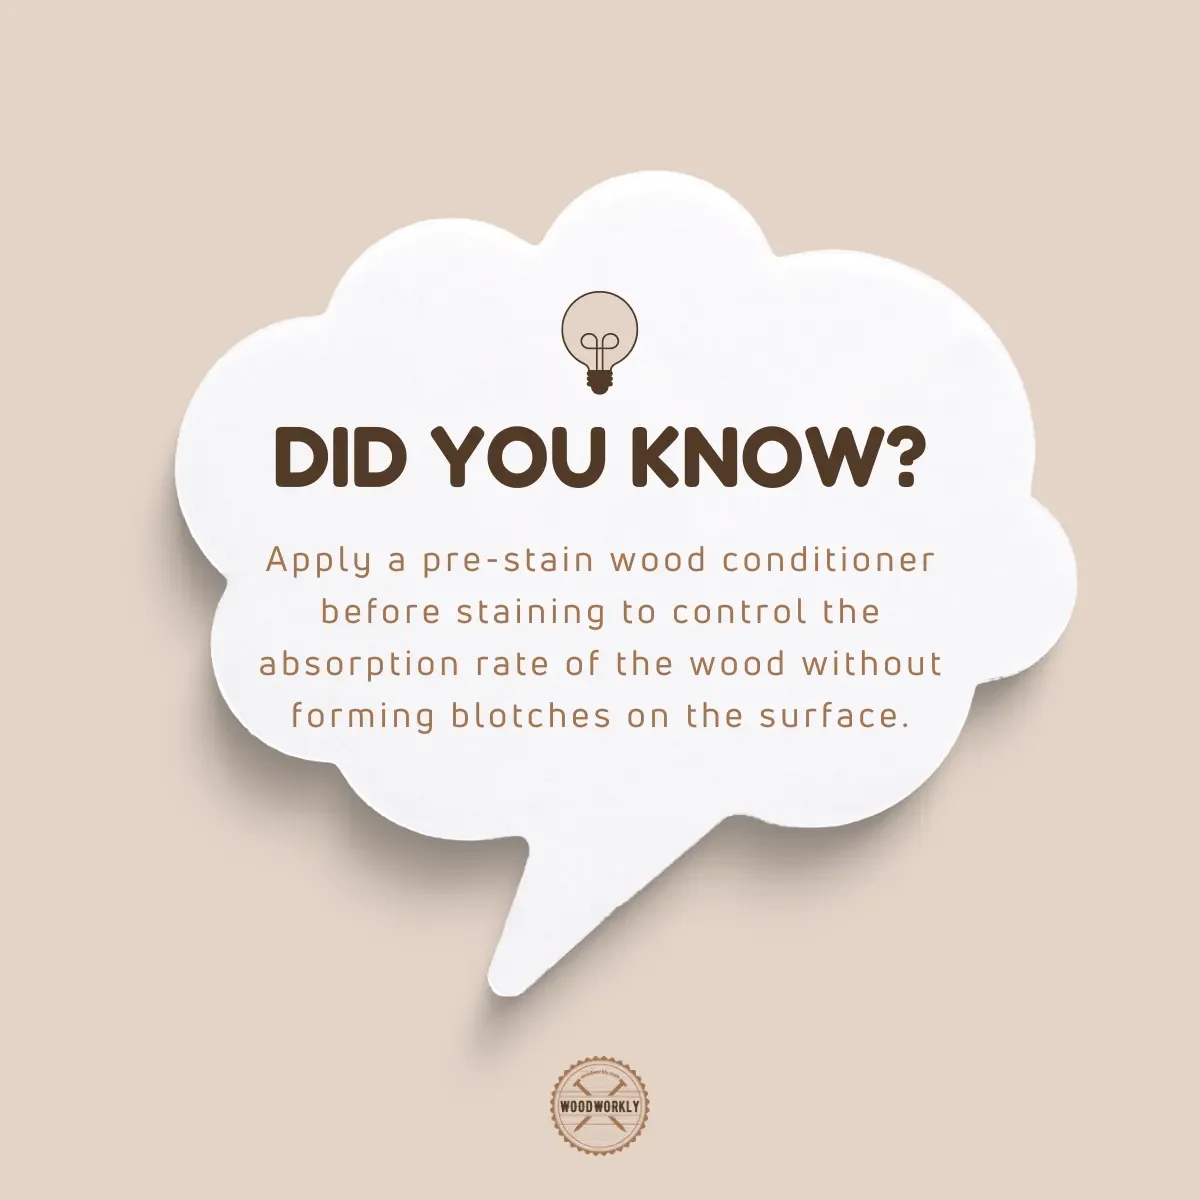
Does Pine Need Wood Conditioner Before Staining?
Yes, It is necessary to apply wood conditioner before staining Pine to get an even finish. Pine is difficult to stain because of uneven grain pattern and stains that suck up unevenly and result in a blotch surface.
To avoid that, you should apply wood conditioner to the Pine wood surface first and then go for the staining process.
Wood conditioner soaks into the wood and controls Pine wood fibers’ absorption ability by sealing the wood.
Here’re some advantages of using wood conditioner before staining the pine,
- Penetrating the wood fibers and sealing the surface.
- Reducing the absorption rate of the stain, allowing for a more even application.
- Preventing over-penetration of the stain in softer areas of the wood.
In a nutshell, using a wood conditioner before staining pine can greatly improve the overall appearance and consistency of your stain job.
Applying a pre-stain wood conditioner before staining will support Pine wood to take the stains evenly without getting blotches and streaks while applying.
After applying the wood conditioner, it will penetrate the wood within 15 minutes. Wipe the excess conditioners to apply the stain even better.
Highly recommend using pre-stain wood conditioner and stain product from the same manufacturer to avoid any incompatible issues.
In my experience, Minwax pre-stain wood conditioner is best to apply on Pine wood before the staining process.
Tips for choosing the right conditioner for your project
With various wood conditioners available on the market, it can be overwhelming to choose the right one for your project.
Here are a few tips to help you make an informed decision:
- Match the conditioner to your stain: Choose a conditioner designed for use with either oil-based or water-based stains, depending on your chosen stain type.
- Look for a product specifically formulated for softwoods: Some wood conditioners are designed for use on both hardwoods and softwoods, while others are tailored to the unique characteristics of softwoods like pine.
- Read reviews and ask for recommendations: Consult online reviews, forums, or ask fellow DIY enthusiasts for their preferred wood conditioner products.
By selecting the right wood conditioner, you’ll greatly improve your chances of achieving a stunning, even finish on your pine staining project.

Under, does Pine stain well, let’s look at how to stain Pine perfectly.
Tools And Materials To Stain Pine
- Pine furniture or woodwork
- 80-100 grit sandpaper
- 120-150 grit sandpaper
- 180-220 grit sandpaper
- Pre-stain wood conditioner
- Wood stain product
- Gloves
- Clean rags
- Lint-free tack cloths
- Suitable applicator (paintbrush, roller, sprayer, or cloth)
- Facemask
Check out the Best Brushes For Staining Wood!
How To Stain Pine?
Staining Pine is difficult because of getting a blotchy surface, occurring grain reversal, and getting murky colors.
But by the following procedure below, you’ll be able to stain Pine well without any issues.
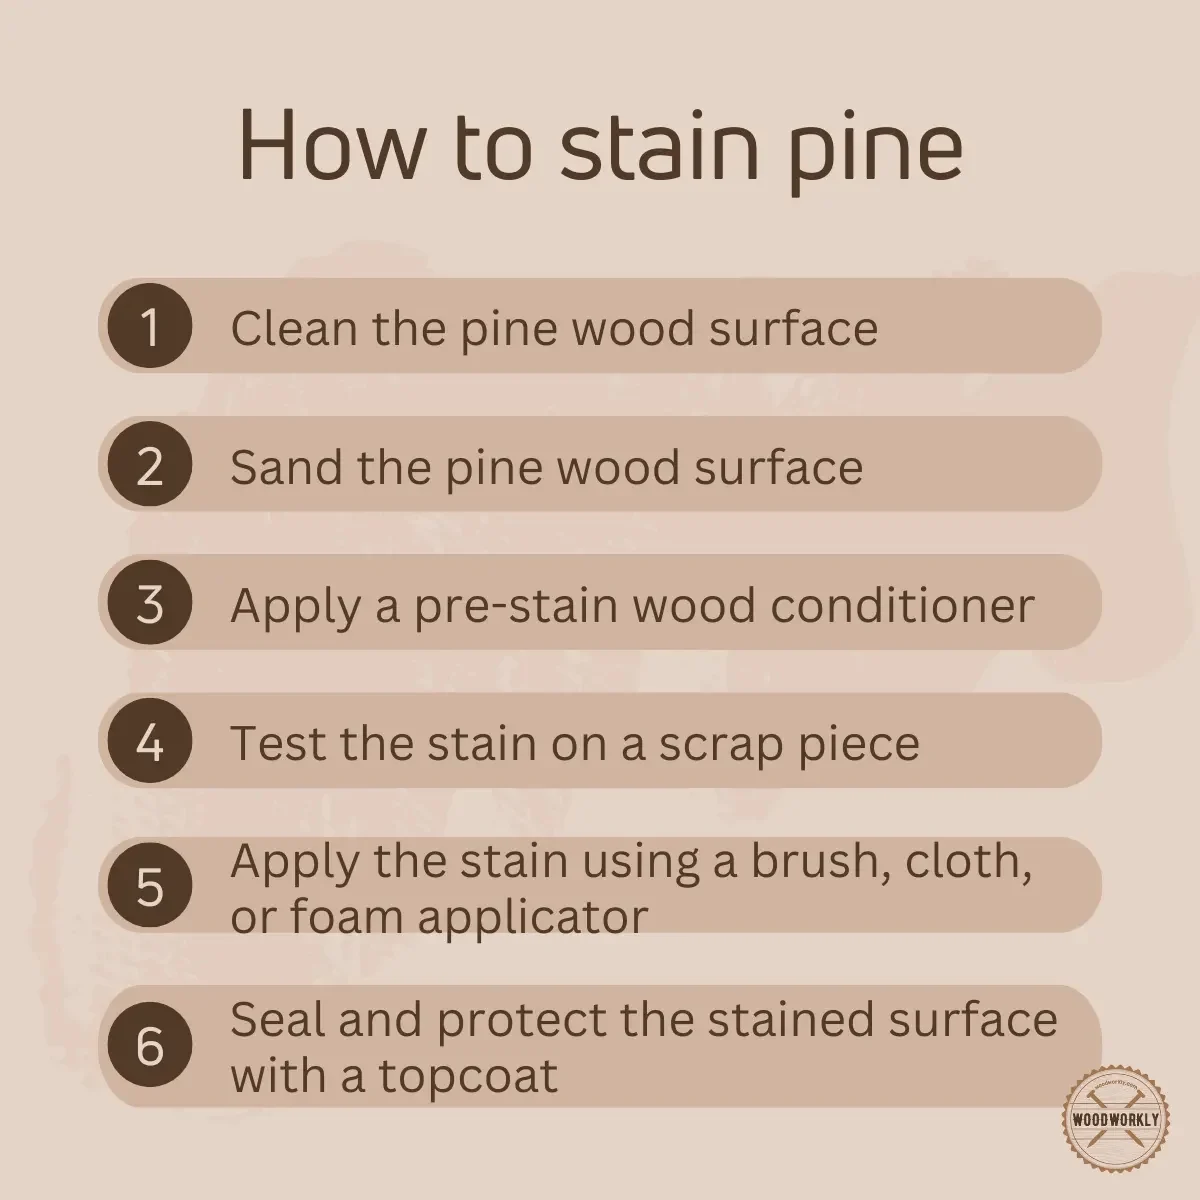
Here’re the steps you need to follow when staining Pine wood.
- Clean the wood
- Sand the wood and remove dust
- Apply wood conditioner
- Let the wood dry
- Apply the stain on pine
- Let the wood dry completely
So, let’s discuss each of the above steps to get an idea about how to stain Pine. Does Pine stain well? Yes, this is how!
Tip: before directly heading into the main project, practice first. Get a smaller piece of Pine scrap wood and test below staining procedure until you get the exact color you want.
Then do the same with your main woodworking project. Practice makes you perfect!
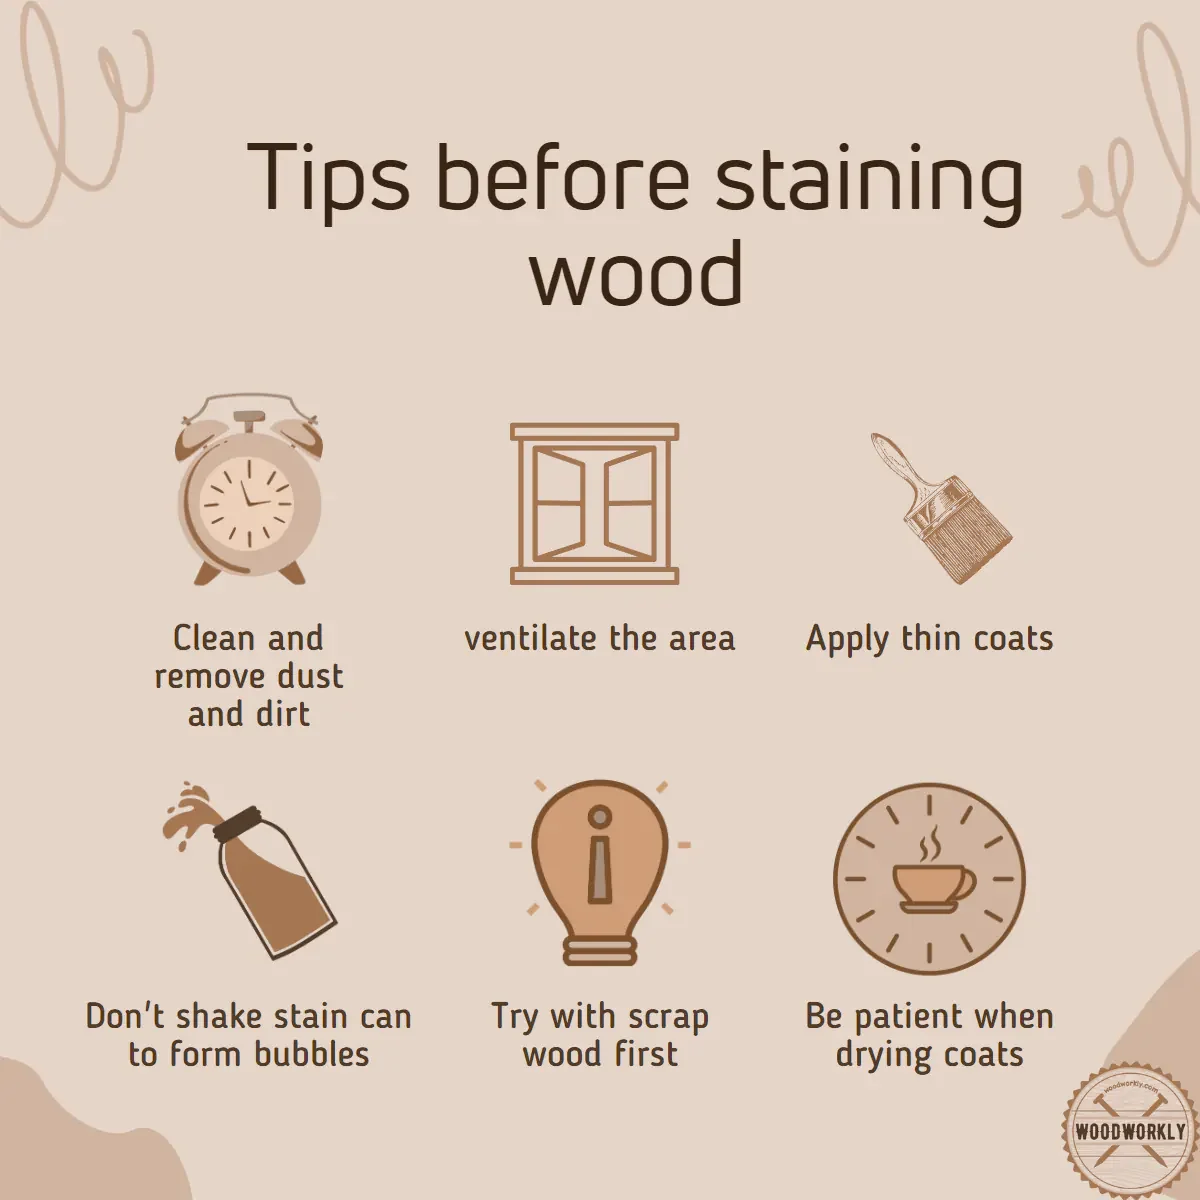
1. Clean the Wood
Cleaning the wood is the most essential step in many woodworking projects. By cleaning, you’ll be able to remove dust and debris.
Because if you start the staining process when the dust is there, you’ll probably end up with a blotchy surface because dust blocks the way of stains from getting inside the wood.
So, cleaning is a must when staining.
After cleaning the wood, let it dry completely to minimize the surface moisture level.

2. Sand and Dry the Wood
After cleaning the wood, sand the whole Pine wood surface with 80 grit, 120 grit, and 220 grit sandpapers gradually without missing any spots.
Make sure to sand the entire area with an even pressure to apply the stain evenly.
Plus, sand along the direction of the wood grain without scratching the surface because a scratched surface cause for resulting blotchy surface.
Sanding is a vital step in preparing your pine wood for staining. Why, you ask? Well, sanding helps to:
- Smooth out any rough spots or imperfections on the wood surface.
- Open up the wood grain, allowing the stain to penetrate more evenly.
- Remove any existing finish or paint that could interfere with the stain application.
Skipping sanding can result in an uneven, blotchy finish, and nobody wants that!

Choosing the right sandpaper grit for pine
When it comes to sanding pine, choosing the right sandpaper grit is essential.
Generally, you’ll want to start with a coarser grit and work your way up to a finer grit for the best results. Here’s a quick guide to help you out:
- Start with 80-100 grit sandpaper to remove any rough spots, imperfections, or existing finishes.
- Move on to 120-150 grit sandpaper to smooth the surface further and begin opening up the wood grain.
- Finish with 180-220 grit sandpaper for an ultra-smooth surface, ready for staining.
Remember, pine is a softwood, so be gentle when sanding to avoid causing damage or creating unwanted indentations.
Tips for sanding around knots and resinous areas
Now, let’s talk about those pesky knots and resinous areas in pine wood. These spots can be a bit tricky to sand, but with a few helpful tips, you’ll have no problem mastering the art of sanding pine:
- Be patient: When sanding around knots, take your time and use a light touch. Rushing can lead to uneven sanding or damage to the surrounding wood.
- Use the right tool: For tight spots or areas with lots of knots, consider using a detail sander or sanding sponge for better control and maneuverability.
- Wipe away resin: If you encounter resinous areas while sanding, use a cloth dampened with mineral spirits to wipe away the sticky residue. This will make sanding these areas much easier.
Once you’re done with sanding, wipe the entire area using clean rags to remove sawdust and make the surface clean and ready to take on the stain.
In summary, properly preparing your pine wood for staining is just as important as choosing the right stain.
By sanding with the appropriate grit and taking the time to address knots and resinous areas, you’ll be well on your way to achieving a stunning, even finish
3. Apply Wood Conditioner
When the wood is completely dried, apply pre-stain wood conditioner to the entire Pine wood surface using a paintbrush.
Make sure not to miss any spots because wood conditioner is the essential product that makes Pine wood easy to stain.
Wood conditioners seal the entire surface and limit the absorption ability of wood fibers and make the wood even.
It helps the wood stain spread evenly all over the wood without causing blotches and streaks.
Test the wood-conditioned surface by slightly wetting the Pine board.
Here’re the steps you should follow when applying wood conditioner on pine before staining the wood,
- Stir the conditioner well before use to ensure even distribution of the product.
- Apply the conditioner with a brush or clean cloth, working in the direction of the wood grain.
- Allow the conditioner to penetrate the wood for 5-15 minutes, depending on the product’s instructions.
- Wipe away any excess conditioner with a clean cloth before it dries.
- Wait for the recommended drying time (usually 15 minutes to 2 hours) before applying the stain.
If you notice any uneven areas, apply wood conditioner again to those areas before moving on to the staining process.
Because once the staining has started it is so hard to turn back.
4. Dry the Wood Completely
After conditioning the wood, let it dry for about 2 -3 hours to complete the sealing process.
Usually, wood conditioners suck up within 15 minutes after the application.
But better to wait for much longer because we never know how much time will take especially with dense Pine wood fibers.
Environmental humidity and temperature fluctuations can imapct the drying time of wood conditioner.
Tip: Remember to always work in a well-ventilated area and follow the safety instructions on your stain pine wood since harsh chemicals and fumes can cause skin and eye irritations.
5. Apply the Stain On Pine
Once the wood is dried completely, apply wood stain all over the wood using a paintbrush.
Make sure to apply thin coats of wood stain to avoid getting tacky surfaces and it helps to dry stain coatings faster.
Apply stain along the direction of the pinewood grain with even pressure to avoid getting blotches and streaks.
Apply with even pressure is a must because when the pressure is high resulting color will get deeper and darker.
Pine wood is prone to getting a blotchy surface, occurring grain reversal, and getting murky colors.
But if you follow the correct procedure of staining, I’m 100% sure you won’t face any of those issues.
Apply a maximum of 2 – 3 coats of stain until the wood gets the color you want.
Better not to go above 3 coatings because you might be ended up with a tacky surface that is hard to eliminate.
Wipe away any excess stain with a clean cloth.
Application methods: brush, cloth, or foam applicator
There are several ways to apply stain to pine wood, and the method you choose will depend on your personal preference and the specifics of your project.
Here are the three most common application methods for staining pinewood:
- Brush: Using a natural-bristle brush, apply the stain in the direction of the wood grain. Brushes offer excellent control and are particularly useful for applying stain to intricate or carved details.
- Cloth: A clean, lint-free cloth can be used to apply the stain in a circular motion, followed by a quick wipe in the direction of the wood grain. This method is great for larger, flat surfaces and can help to prevent streaks.
- Foam applicator: These disposable foam brushes can be used to apply stain evenly across the wood surface. They’re affordable, easy to use, and perfect for smaller projects or hard-to-reach areas.
Experiment with these different application methods on your test piece to find the one that works best for you and your project.

6. Let the Wood Dry Completely
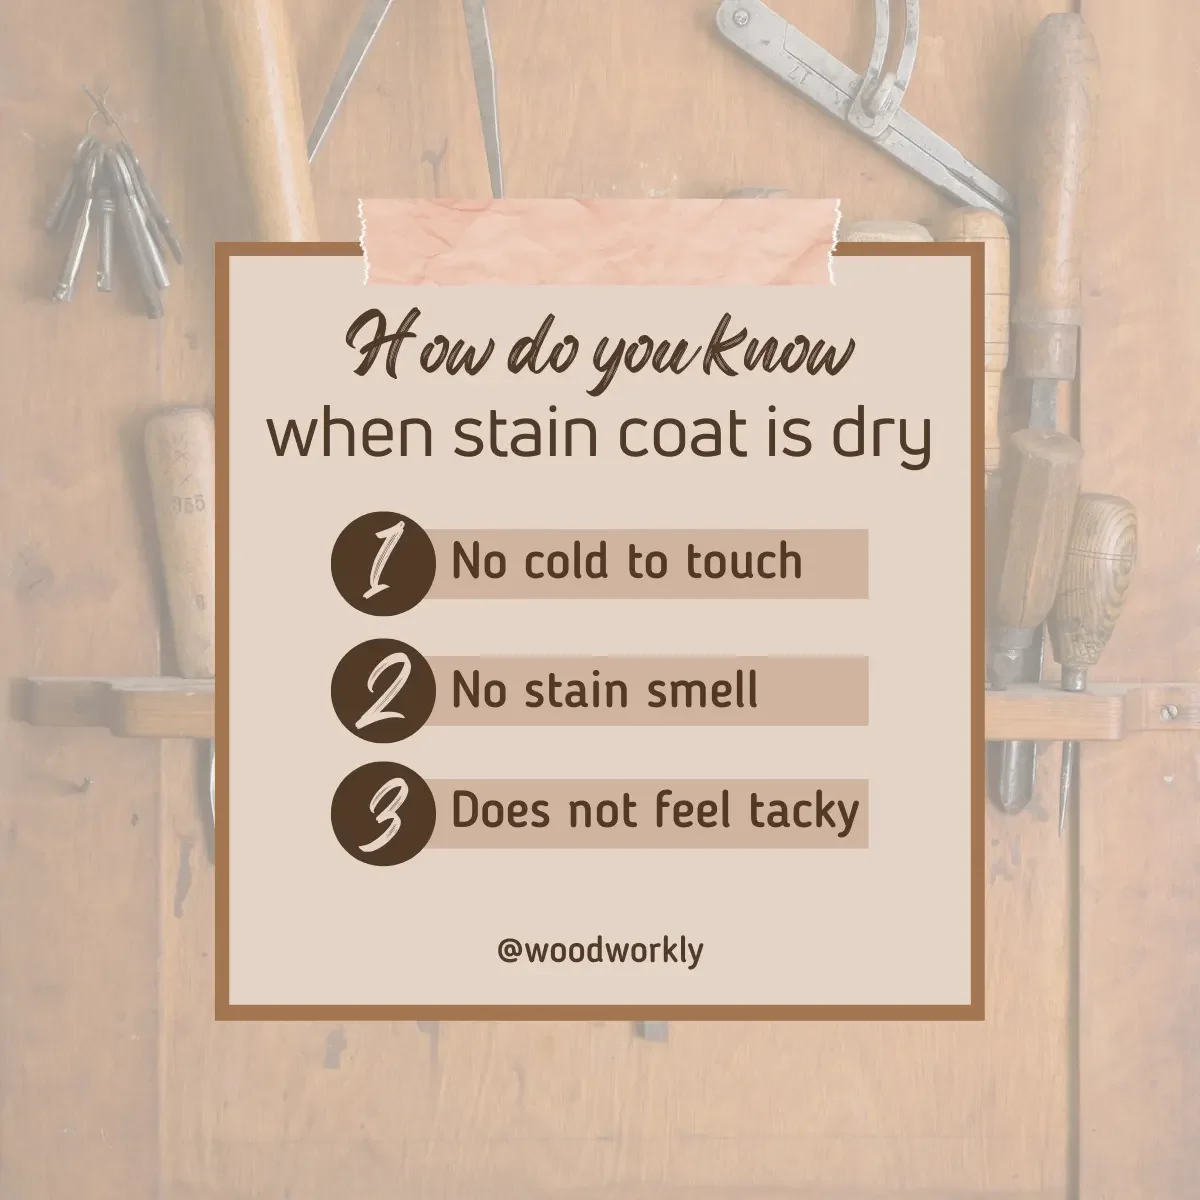
Make sure to dry the wood for a minimum of 24 hours between each coat of stain.
After the wood has dried completely it’ll start of getting true colors and you can easily decide whether it’s necessary to go for another coat of stain or not.
Drying helps to get a nice and smooth finish. Patience is the key to success when staining Pine wood. Enough drying time can solve most of the wood staining mistakes.
Congrats folks! Now you know the correct procedure of staining pine wood without getting things messed up.
This is the perfect method you should follow to the question raised does Pine stain well?
Minimizing Grain Visibility in Pine
Now that you’re well-versed in staining pine, let’s take a look at how to minimize grain visibility in your finished project.
Pine wood has a beautiful, natural grain pattern, but sometimes you might prefer a subtler appearance.
Don’t worry; we’ve got you covered!
In this section, we’ll explore techniques to tone down those yellow and orange hues, achieve an aged look with wax or glaze, and control grain prominence with additional stain coats.
Let’s dive in!
Using a vinegar stain to tone down yellow and orange hues
If you find the natural yellow and orange hues in pine wood to be a bit too bold for your taste, try using a vinegar-based stain.
To make this stain, simply mix equal parts white vinegar and steel wool. Let the mixture sit for a few days, allowing the steel wool to dissolve, then strain the solution to remove any debris.
Apply the vinegar stain to your pine wood using a brush, cloth, or foam applicator, and let it dry completely.
Vinegar stain will tone down the yellow and orange hues in the wood, creating a more muted, weathered appearance.
Read to know more details and methods of toning down orange hues on the wood.

Employing wax or glaze to achieve an aged look
Another way to minimize grain visibility in pine wood is by using a wax or glaze to create an aged look.
Both of these products add depth and dimension to the wood while softening the grain pattern.
Here’s how to do it:
- Choose a wax or glaze in a color that complements your stain. Keep in mind that darker colors will result in a more dramatic effect, while lighter colors will produce a subtler appearance.
- Apply the wax or glaze to your stained wood using a brush, cloth, or foam applicator, working it into the grain pattern.
- Wipe away any excess product with a clean cloth, leaving a thin, even coat on the wood surface.
- Allow the wax or glaze to dry completely, following the manufacturer’s instructions.
Controlling grain prominence with additional stain coats
If you prefer a more uniform look in your pine wood, you can control the prominence of the grain pattern by applying additional coats of stain.
As you layer the stain, the wood’s grain will become less visible, creating a more even appearance.
To achieve this effect, follow these steps:
- Apply a thin coat of stain to your pine wood using your preferred application method.
- Allow the stain to penetrate the wood for the recommended time on the product label.
- Wipe away any excess stain with a clean cloth.
- Allow the stain to dry completely according to the manufacturer’s instructions.
- Repeat the process with additional thin coats of stain until you achieve the desired level of grain visibility.
Experiment with these techniques to find the perfect balance of grain visibility for your project.
With a bit of practice and patience, you’ll be able to achieve a stunning finish on your pine wood that highlights its natural beauty while minimizing the grain pattern to your liking.
By minimizing the grain pattern of pine wood, you’ll be able to enhance the appearance of your pine wood furniture or woodwork.
Sealing and Protecting Stained Pine Wood
After staining the pine wood correctly, hope you were able to get the desired look you wish.
But that’s not enough! Yes, applying only the stain over pine wood won’t provide that much protection to the wood and stain coat itself.
Wood stain focused mainly on changing or enhancing the natural color of the wood.
This is where protective coats and sealers come in.
You can apply a suitable sealer or topcoat over stained pine wood to keep its stained color for so long without getting damaged by weather elements like moisture, UV light, insect attacks and many more.
Let’s see how it should be done.
In this section, we’ll compare oil-based and water-based topcoats, discuss the role of polyurethane in protecting your stained surface, and explore alternative topcoat options like General Finishes High Performance Topcoat, wax, and shellac.
Let’s get started!
Comparing oil-based and water-based topcoats
The importance of topcoats in preserving your stained pine wood’s appearance and texture cannot be understated.
Two primary topcoat types dominate the market: oil-based and water-based, each bringing its own set of pros and cons to the table.
Oil-based topcoats boast impressive durability, making them a go-to choice for areas subjected to heavy use or surfaces needing robust protection.
These topcoats take longer to dry and can impart a subtle amber hue to the wood, enriching the stain’s color.
Conversely, water-based topcoats are champions of quick drying and emit a milder odor than oil-based variants.
They typically yield a transparent finish that leaves the stain’s color unaltered.
Although water-based topcoats are eco-friendly and easier to clean, their durability may lag behind oil-based counterparts.

The role of polyurethane in protecting the stained surface
Polyurethane stands tall as a sought-after choice for sealing and safeguarding stained pine wood.
Accessible in both oil-based and water-based forms, polyurethane generates a robust, protective barrier on the wood’s exterior, shielding it from humidity, scuffs, and everyday wear and tear.
To apply polyurethane, follow these steps:
- Opt for a satin, semi-gloss, or gloss finish, as per your aesthetic preference.
- Employ a top-tier brush, foam applicator, or spray can to apply a slender coat of polyurethane to the stained wood.
- Allow the polyurethane to dry as per the manufacturer’s guidelines.
- Gently sand the surface with fine-grit sandpaper (e.g., 220-grit) to eliminate imperfections and achieve a silky finish.
- Eradicate any dust with a tack cloth and administer additional polyurethane coats, repeating the sanding process between applications, until you reach the desired level of protection.
Alternative topcoat options: General Finishes High Performance Topcoat, wax, and shellac
Polyurethane might be a crowd favorite, but other topcoat contenders deserve consideration:
- General Finishes High Performance Topcoat: This water-based topcoat wins hearts with its sturdiness and application simplicity. It’s an outstanding choice for those seeking an eco-friendly, high-caliber option.
- Wax: Wax topcoats emit a gentle, organic sheen and provide limited defense against dampness and wear. However, they lack the durability of polyurethane or General Finishes High Performance Topcoat and may necessitate occasional reapplication.
- Shellac: Shellac, a natural, non-toxic topcoat derived from the lac bug, dries swiftly and delivers a stunning, warm finish but falls short in moisture and wear resistance compared to polyurethane.
By selecting the optimal topcoat for your stained pine wood endeavor and applying it with precision, you’ll ensure that your stunning finish remains protected and intact for the long haul.
So, seize the moment, pick your topcoat, and bring your woodworking masterpiece to life!
So, let’s have a look at some tips that are important when staining pine wood which I was able to gather from experts in the woodworking world by interviewing them.
Some of the tips are gathered from my personal experience as well.
Tips For Staining Pine Wood
1. Patience and careful application: A winning combo
First things first, patience is the key ingredient when staining pine wood. Hastily rushing through the process may result in uneven finishes, streaks, or blotches on the wood’s surface.
To attain a polished, even stain, apply the product using elongated, uniform strokes following the wood grain.
Don’t skimp on drying time between coats and always abide by the manufacturer’s guidelines to a T.
2. Maintain a clean workspace and store stain correctly
An uncluttered and spotless workspace is essential for a successful staining endeavor. Ensure your work area is devoid of dust and debris, as these can jeopardize your finish.
Store your stain in a cool, dry location away from direct sunlight, and securely seal the container after each use to prevent the stain from thickening or drying prematurely.
When working with stains, it’s critical to use pristine brushes or applicators and avoid cross-contamination between varying stain colors or types.
Label each container and applicator if you’re using multiple stains for a project to avert confusion.
3. Addressing mistakes and imperfections: Stay calm and carry on
Mishaps and imperfections are par for the course in any DIY adventure, and staining pine wood is no exception.
If you detect an uneven or blotchy finish while staining, remain calm. Delicately remove excess stain using a clean cloth and let the wood dry before reapplying a slender, uniform coat.
For drips or runs in the stain, employ a clean cloth or fine-grit sandpaper to even out the affected zone.
If you inadvertently stain an unintended area, dab a small quantity of paint thinner or mineral spirits on a clean cloth to eliminate the stain.
Bear in mind, practice is the key to improvement! The more you engage with staining pine wood, the more adept you’ll become at handling any imperfections that may emerge during the process.
By integrating these tips into your staining regimen, you’ll be on the fast track to conquering the skill of staining pine wood.
With patience, precision, and persistence, you’ll soon produce stunning and enduring wood finishes that will make you beam with pride.
So, prepare to roll up your sleeves and bring your pine wood project to life!
That’s it, folks! Now you know how to stain pine properly and does pine stain well and the steps you should follow to get promising results.
Let’s answer some frequently asked questions as well.
Can pine wood be stained to resemble other wood species?
Absolutely! With the right staining techniques and color choices, you can mimic the appearance of various wood species.
Utilize different stain colors or layer multiple stains to achieve the desired look. Experiment with scrap pieces to perfect your technique before committing to your final project.
Why is my pine wood staining unevenly?
Pine is a softwood, and its porous nature causes it to absorb stain unevenly.
Knots, resin pockets, and varying grain patterns further contribute to blotchy staining.
To mitigate this, use a wood conditioner before staining and apply stain evenly, using multiple thin layers rather than one thick coat.
What can I do if my stained pine wood is too dark?
If your pine wood has turned out darker than desired, you can try to lighten it by gently sanding the surface with fine-grit sandpaper. Sand evenly and remove the dust before applying a lighter stain.
Alternatively, consider using a wood bleach or a lighter-colored glaze to tone down the dark color.
How long should I wait between stain coats on pine wood?
The waiting time between stain coats may vary depending on the type of stain used and the manufacturer’s recommendations. Generally, oil-based stains require a longer drying time than water-based stains.
Always follow the instructions on the product label and allow each coat to dry completely before applying the next one.
Can I use a water-based topcoat over an oil-based stain on pine wood?
Yes, you can apply a water-based topcoat over an oil-based stain, provided that the stain has dried completely. This usually takes at least 24 hours, but it’s best to follow the manufacturer’s guidelines.
Before applying the topcoat, ensure the stained surface is clean and free of dust.
How can I minimize the yellow or orange hues in pine wood when staining?
To tone down the yellow and orange hues in pine wood, consider using a vinegar stain or a tinted stain with cooler colors, such as gray or brown.
You can also use a wax or glaze with a cooler undertone to neutralize the warm hues and create a more subdued appearance.
Does Pine Stain Like Maple?
Both Pine and Maple are difficult to stain. Staining Maple is difficult because of its dense and tight grain structure.
Maple easily gets blotches and streaks because it tends to absorb stains unevenly.
Overall staining Maple is more difficult than Pine because Maple is a hardwood with a much more dense wood structure than the softwood Pine.
Maple sucks up the pigments in wood stain pretty quickly and staining is a challenging task.
But staining Maple is possible if you follow the correct procedure as we discussed for Pine.
Does Pine Stain Like Birch?
Even though staining both Pine and Birch are difficult, staining Birch is easier than staining Pine.
Staining Birch is possible as long as you prepare the wood correctly.
Birch is relatively soft compared to other hardwoods. Therefore wood fibers of Birch wood are quite absorbent and don’t hold up stains well.
But by following the same correct procedure we have applied for Pine wood, you can get pretty good results from staining Birch wood.
Does Pine Stain Like Spruce?
Spruce is easy to stain. Pine is difficult to stain. Spruce accepts wood stain extremely well because of having a very open cell structure. Not like Pine.
Spruce can easily absorb a massive amount of wood stain evenly through the entire surface without using any wood conditioner.
Does Pine Stain Like Alder?
Alder doesn’t accept stains well. Both Pine and Alder are difficult to stain and result in blotches and streaks. Better to apply wood conditioner before staining.
Red Alder is great for finishing. But I highly recommend applying wood conditioner because it helps the wood to take the stain evenly without losing its appearance.

Did I cover all you wanted to know about: Does Pine Stain Well?
In this article we have deeply discussed does Pine stain well, the best stain for Pine, how to stain Pine correctly without getting any wood staining issues, and why wood conditioner is important to work with Pine wood.
Pine can stain well with proper techniques. To stain pine, first sand the wood evenly and apply a pre-stain wood conditioner. Test stain colors on scrap pieces, then apply your chosen stain using a brush, cloth, or foam applicator. Use multiple thin layers for an even finish and seal with a topcoat.
Furthermore, I have answered some frequently asked questions about does Pine stain well compared to other popular wood types like Maple, Birch, Spruce, and Alder.
Hope you have gained good knowledge about staining Pine wood correctly. Make sure to practically use the things you have learned from this article with a piece of Pine wood.
You’ll succeed in woodworking. Practice makes you perfect in woodworking!